To fix an Android tablet that is frozen, slow, stuck in a boot loop, or failing to charge, perform a forced restart by holding the Power and Volume Down buttons for 10 to 15 seconds. If the issue persists, clear system cache, boot into Safe Mode to remove problematic apps, or perform a factory reset via Recovery Mode.
Step 1: Performing Initial Triage and Forced Restarts
When an Android tablet freezes, exhibits an unresponsive touchscreen, or experiences continuous app crashes, the first diagnostic line of defense is a forced restart. Unlike a standard software reboot—which requires functional display rendering and touchscreen input—a forced restart cuts power at the hardware control level, forcing the system system-on-chip (SoC) to reinitialize RAM and clear temporary execution registers.
Understanding Soft Resets vs. Forced Hardware Restarts
A normal shutdown writes operating state data to flash memory before unmounting system partitions. However, when an Android process experiences a deadlock or the SystemUI service crashes, the screen may stop responding entirely. A forced restart interrupts power delivery to the processor without corrupting the Android system partition.
Forced Restart Key Combinations by Manufacturer
Because Android device manufacturers customize power management microcode, the specific physical button combination required to force a reboot varies across brands:
- Samsung Galaxy Tab Series: Press and hold the Power (or Side key) and Volume Down buttons simultaneously for 10 to 15 seconds until the screen turns black and the Samsung logo appears.
- Lenovo Tab Series: Press and hold the Power button for 10 to 20 seconds continuously. If the tablet remains unresponsive, hold Power + Volume Up until the screen cycles off.
- Amazon Fire Tablets (Fire OS): Hold the Power button for 20 to 30 seconds until the display shuts off completely, then press Power normally for 2 to 3 seconds to turn it back on.
- Google Pixel Tablet & Stock Android: Press and hold the Power and Volume Up buttons for approximately 15 seconds until the device reboots.
If a forced restart restores functionality, inspect the device's remaining free storage space and update pending system applications to prevent recurring memory leaks.
Step 2: Fixing Power, Boot, and Charging Failures
Power supply issues often manifest as a tablet failing to turn on, turning off immediately after displaying a splash screen, or displaying a black screen despite vibrating or producing notification sounds.
| Power Troubleshooting |
|---|
| 1. Inspect physical port for lint/debris using a non-metallic pick. |
| 2. Connect to a verified 15W+ power adapter for 30–60 minutes. |
| 3. Execute hardware reset key combo while plugged into wall power. |
| 4. If charging indicator flashes rapidly, battery voltage is low. |
Resolving the "Black Screen of Death"
If the tablet shows signs of power (such as key backlight, touch sound feedback, or haptic vibration) but the screen remains dark, the issue is usually a suspended graphics driver or a loose display ribbon connector:
- Perform a Force Reboot While Plugged In: Connect the tablet to an official wall charger, wait 5 minutes, and then execute the forced restart key combination for your specific model.
- Check for Thermal Shutdown: If the tablet was running high-demand 3D applications, direct sunlight exposure, or charging under heavy load, Android software thermal throttling may have triggered an emergency shutdown. Allow the tablet to cool at room temperature for 30 minutes before attempting to power it on.
Reviving Deeply Discharged Batteries (Trickle Charging)
When a lithium-ion tablet battery drops below its minimum cut-off voltage protection threshold (often around 3.0V), the internal Battery Management System (BMS) disables normal high-speed charging to prevent thermal runaway.
To revive a deeply discharged tablet battery:
- Plug the tablet into a standard low-current USB port (such as a computer USB 2.0 port) or a non-fast-charging 5V/1A power brick.
- Leave the device connected uninterrupted for at least 60 to 90 minutes. High-wattage fast chargers often cycle off when detecting a zero-voltage battery, whereas low-wattage trickle sources slowly restore the BMS protection layer.
- Once the charging battery icon appears on screen, transfer the cable to a standard high-output charger.
Inspecting USB-C and Micro-USB Hardware Ports
Physical connection failure is a frequent root cause of charging issues. Inspect the charging port under bright light:
- Debris Accumulation: Over time, pocket lint, dust, and compressed dirt accumulate inside USB-C and Micro-USB ports, preventing the cable contacts from seating fully. Carefully clean out the port using a wooden or plastic toothpick. Avoid metal safety pins, which can short internal pins or damage the center tongue.
- Cable Strain and Bent Pins: Test the cable with another verified device. USB-C cables require functional power delivery (PD) negotiation pins; if damaged, power transfer will drop to zero.
Step 3: Resolving Freezes, App Crashes, and System Slowdowns
System instability, persistent application crashes ("App has stopped unexpectedly"), and lagging UI transitions usually stem from low internal storage, corrupted application cache files, or incompatible third-party software running background services.
Isolating Software Conflicts via Android Safe Mode
Safe Mode disables all third-party apps, booting the tablet strictly with core Android system services and pre-installed factory software. If your tablet operates quickly and without crashing in Safe Mode, a downloaded application is causing the instability.
How to Enter Safe Mode on Modern Android Tablets:
- Press and hold the physical Power button until the software power menu appears on screen.
- Touch and hold the on-screen Power Off icon for 2 to 3 seconds until the prompt "Reboot to Safe Mode" appears.
- Tap OK or Confirm. The tablet will restart, and a watermarked label reading "Safe Mode" will be visible in the bottom corner of the display.
If the tablet runs smoothly in Safe Mode, uninstall recently installed apps, launchers, or VPN utilities one by one. To exit Safe Mode, simply restart the tablet normally.
- Standard Boot (Loads 3rd-Party Apps & Services)
- If Crashes Occur: Boot to Safe Mode (Disables 3rd-Party Code)
- Smooth Performance?: Uninstall Recent Apps
- Still Crashing?: Clear Cache / System Reset
- If Crashes Occur: Boot to Safe Mode (Disables 3rd-Party Code)
Clearing Application Cache vs. System Storage Data
Android categorizes application storage into application binary code, cached temporary assets, and persistent user data:
- Clear Cache: Deletes temporary files, rendered thumbnails, and cached network requests. This action does not delete user accounts, passwords, saved games, or personal files. Navigate to Settings > Apps > See all apps > [App Name] > Storage & cache > Clear Cache.
- Clear Storage / Clear Data: Resets the application back to its fresh installation state. This action will remove local databases, offline media, and login sessions. Use this option when an application repeatedly crashes upon launch even after clearing cache.
Managing Storage Bottlenecks and Flash Memory Trim
Android OS requires a minimum of 10% to 15% free internal storage to maintain operational speed. When flash memory reaches capacity:
- Android's internal
fstrimgarbage collection routine cannot efficiently execute block management on the NAND flash memory, leading to severe write performance drops. - The system loses swap file allocation space (Android's zRAM capability), causing apps to force-close unpredictably.
To free up essential space, uninstall unused applications, move photos and videos to cloud storage or an external MicroSD card, and delete residual files using the built-in Files by Google utility or device maintenance setting.
Step 4: Troubleshooting Wi-Fi, Bluetooth, and Connectivity Drops
Network failures on Android tablets range from authentication errors ("Saved, Secured" without internet access) to Bluetooth pairing dropouts and stuck IP configuration states.
Fixing Wi-Fi "IP Configuration Failure" and Authentication Errors
If your tablet connects to a router but shows no internet connectivity, execute the following steps in sequence:
- Toggle Network Adapter: Turn Airplane Mode ON for 15 seconds, then turn it OFF. This forces the Wi-Fi hardware controller to drop active radio frequencies and re-initialize its driver interface.
- Forget and Re-add Network: Go to Settings > Network & Internet (or Connections) > Wi-Fi, tap the problematic network, and select Forget. Re-select the network, re-enter the password carefully, and verify whether WPA3/WPA2 security settings align with your network.
- Disable Private MAC Addressing (Randomized MAC): Modern Android versions randomize the Wi-Fi media access control address for privacy. Some routers drop randomized addresses or fail to allocate DHCP leases properly.
- Go to Settings > Connections > Wi-Fi > [Network Name Settings].
- Change MAC address type from Randomized MAC to Phone MAC / Device MAC.
- [Tablet Network Settings]
- Select Wi-Fi Network
- Modify Settings
- Change MAC Address Type (Switch from Randomized to Device MAC)
- Reset Network Settings (Clears all Wi-Fi, BT, and VPN profiles)
- Modify Settings
- Select Wi-Fi Network
Performing a System Network Settings Reset
If Wi-Fi or Bluetooth fails to connect to any network or device, performing a global network reset fixes corrupted system configuration files without clearing your personal documents or application data.
- Navigation Path: Settings > System (or General Management) > Reset options > Reset Wi-Fi, mobile & Bluetooth (or Reset Network Settings).
- Confirm the operation. Note that this process removes all saved Wi-Fi networks, paired Bluetooth accessories, and active VPN configurations. You will need to re-enter Wi-Fi passphrases afterward.
Step 5: Advanced Repair: Recovery Mode and Factory Reset
When an Android tablet is stuck in a boot loop (cycling continuously on the boot logo), fails to pass software updates, or suffers critical system partition corruption, accessing Android Recovery Mode is necessary.
How to Access Android Recovery Mode
Accessing Android Recovery requires pressing physical hardware buttons while the tablet is completely powered off.
Procedure for Samsung Galaxy Tablets (Android 11 and Newer):
- Power off the tablet completely.
- Connect the tablet to a computer via a USB-C cable (Samsung requires an active USB data connection to authorize Recovery access).
- Press and hold Power (Side Key) + Volume Up simultaneously.
- Release both buttons when the Samsung logo and Android Recovery text appear on screen.
Procedure for General Android / Lenovo / Fire Tablets:
Turn off the tablet completely.
Press and hold Power + Volume Up (on some models, Power + Volume Down).
Continue holding until the manufacturer logo or an Android robot icon appears, then release.
If an "No Command" screen appears, hold the Power button and press the Volume Up button once to reveal the system text menu.
Power Off Tablet Fully
Hold Physical Key Combination (e.g., Power + Volume Up)
Android Recovery Menu Appears (Use Vol Up/Down to navigate, Power to select)
- Wipe Cache Partition (Clears system temporary code)
- Wipe Data / Factory Reset (Restores device to factory)
Navigating the Android Recovery Screen
In Recovery Mode, the touchscreen is disabled. Use the Volume Up and Volume Down buttons to scroll up and down through the options, and press the Power button once to execute a selected command.
- Wipe Cache Partition (If Available): Clears the dedicated system cache partition containing compiled code from previous OS updates. This step does not delete user data and often resolves boot loops caused by software updates. Select Wipe Cache Partition, confirm Yes, and then select Reboot System Now.
- Wipe Data / Factory Reset: Formats the user data partition (
/data), removing all local files, user profiles, accounts, downloaded apps, and modified configuration parameters. Select Wipe Data / Factory Reset, confirm Factory Data Reset, and wait for script completion ("Data wipe complete"). Finally, select Reboot System Now.
Critical Safety Warning: Factory Reset Protection (FRP)
Android devices incorporate Factory Reset Protection (FRP), a Google security feature designed to deter theft. If you perform a hard factory reset through Recovery Mode while a Google Account is signed into the tablet:
- Upon rebooting, the Android setup wizard will mandate entering the email address and password of the Google Account previously synced to the device.
- If you do not know the credentials, the tablet will remain locked at the account setup gate. Ensure you know your Google account username and password before initiating a hard reset, or remove the Google account under Settings > Accounts prior to resetting if the screen is functional.
Diagnostic Reference: Common Android Tablet Symptoms and Solutions
The following diagnostic table matches common hardware and software operational failures with their primary root causes, direct troubleshooting actions, and practical resolution difficulty levels:
| Symptom / Problem | Primary Root Cause | Recommended Troubleshooting Action | Difficulty / Repair Level |
|---|---|---|---|
| Boot loop (Stuck on splash screen) | Corrupted system cache, interrupted software update, or faulty system app. | Perform forced hardware restart; if unfulfilled, clear Cache Partition or Wipe Data in Recovery Mode. | Intermediate |
| Tablet will not charge or power on | Deep battery discharge, blocked charging port, or damaged USB power delivery cable. | Clean port with non-metallic pick; plug into low-current 5V/1A power source for 60+ minutes. | Basic / User-serviceable |
| Touchscreen non-responsive in specific areas | Touch digitizer hardware failure, digitizer cable disconnection, or static buildup. | Perform soft reset; remove tempered glass screen protector; test input via *#0*# test code (Samsung). |
Intermediate to Advanced |
| "App has stopped unexpectedly" errors | Insufficient storage RAM allocation, corrupted local app cache, or API mismatch. | Clear specific App Cache; if unresolved, perform "Clear Data" or reinstall app from Google Play Store. | Basic |
| Wi-Fi stuck on "Obtaining IP Address" | DHCP lease negotiation failure, MAC address filtering, or network settings conflict. | Switch Wi-Fi MAC setting from Randomized to Device MAC; execute System Network Settings Reset. | Basic |
| Screen turns on but remains entirely black | Graphics compositor crash or display panel ribbon cable connection issue. | Execute forced restart key combo while plugged into external wall charger; verify hardware backlight. | Basic to Advanced |
| Rapid battery drain and overheating | Rogue background process, worn battery cell capacity, or location services polling. | Check Safe Mode to isolate third-party software; review battery usage per app in system settings. | Intermediate |
Addressing Physical Hardware Damage vs. Software Corruption
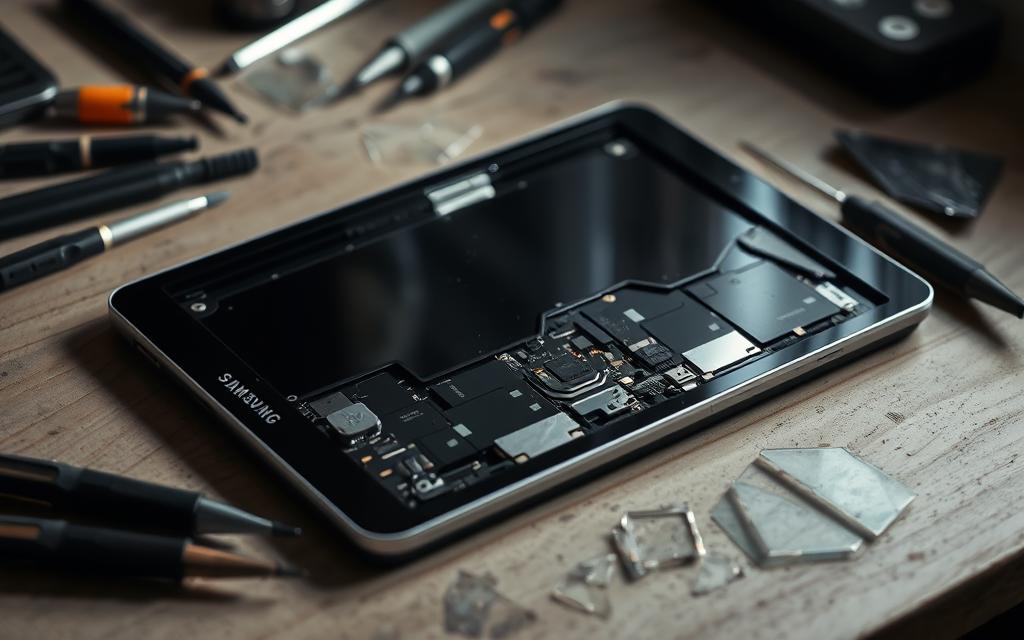
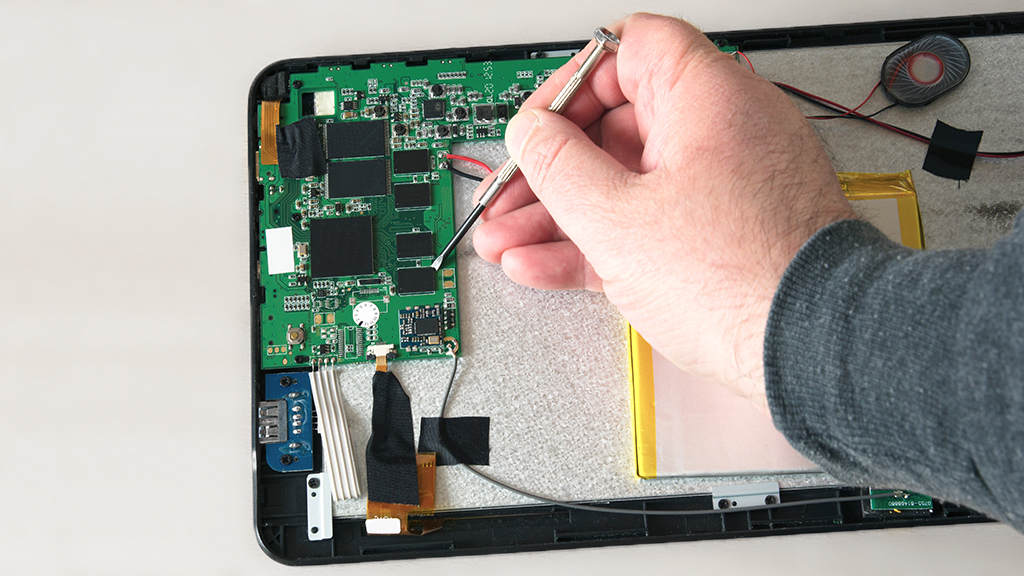
Not all Android tablet malfunctions can be fixed via software adjustments. It is important to distinguish between software corruption—which can be repaired at home—and physical hardware component failures requiring physical module replacement.
- [DEVICE MALFUNCTION]
- [SOFTWARE CORRUPTION]
- Boot loops
- Network auth timeouts
- App crashes & system lags
- Fixable via Safe Mode, Cache Wipe, or Recovery Factory Reset.
- [HARDWARE FAILURE]
- Cracked LCD matrix (ink lines)
- Swollen lithium-ion battery package
- Mechanically loose USB port pins
- Requires physical component replacement, micro-soldering, or official repair.
- [SOFTWARE CORRUPTION]
Touchscreen Digitizer Damage vs. Glass Fractures
If the outer protective glass panel of a tablet is cracked but the display clearly shows images and responds accurately to touch across the entire panel, only the top glass layer is damaged. However, if you observe:
- "Ghost Touches": On-screen elements triggering randomly without finger contact.
- Dead Touch Zones: Linear bands of the screen that refuse to process capacitive touch input.
- Internal Ink Lines or Rainbow Blotches: Cracks in the underlying AMOLED or LCD panel underneath unbroken top glass.
These symptoms indicate physical damage to the digitizer or display panel, requiring a component screen replacement.
Swollen or Severely Degraded Batteries
Lithium-ion pouch batteries used in tablets age over hundreds of charge cycles. Chemical degradation can generate gas byproduct build-up inside the sealed pouch:
- Physical Warning Signs: The display screen lifting away from the frame, a visible bulge on the rear metal/plastic casing, or abnormal heat generation while discharging.
- Safety Protocol: If a swollen battery is suspected, immediately disconnect the tablet from all power chargers, back up essential network data if possible, turn off the device, and take it to an authorized electronics recycling or repair facility. Do not puncture or apply external pressure to a swollen battery package.
Physical Charging Port Micro-Soldering vs. Sub-Board Replacement
If a tablet charges only when the cable is held at a specific mechanical angle, the solder joints securing the internal USB port pin pad to the system sub-board have cracked due to strain. While cleaning debris resolves superficial connection issues, broken board traces require professional micro-soldering or replacement of the internal daughterboard.
Frequently Asked Questions
Why is my Android tablet stuck on the loading screen logo?
A boot loop typically occurs when an operating system update is interrupted, system cache files become corrupted, or a root-level app interferes with system initialization. Force restart the tablet first. If the issue remains after several attempts, boot the device into Android Recovery Mode and perform a Wipe Cache Partition. If cache clearing does not resolve the loop, executing a Wipe Data / Factory Reset will clear the corrupted system configuration and return the tablet to working order.
What should I do if my Android tablet screen turns black but still vibrates or plays sounds?
This condition indicates that the tablet's underlying operating system is running, but the display subsystem is failing to render graphics. First, perform a forced reboot (Power + Volume Down for 15 seconds) to reset the GPU driver. If the display remains black, verify whether the display panel screen cable has disconnected or if the internal LCD backlight has failed by illuminating the screen at an angle under a bright flashlight. If faded text is visible under direct light, the screen backlight inverter has failed and requires physical repair.
Will factory resetting my Android tablet delete all my photos and files?
Yes. Performing a factory reset (or data wipe) permanently erases all content stored on the tablet's internal /data storage partition, including user photos, downloaded documents, local application databases, paired Bluetooth entries, and saved settings. Data stored on external MicroSD cards or synchronized to cloud platforms (such as Google Photos, Google Drive, or OneDrive) remains safe and unaffected.
How do I bypass the Factory Reset Protection (FRP) lock if I forgot my password?
Factory Reset Protection is a strict hardware security standard. The only official method to clear an FRP security prompt after a factory reset is to enter the credentials of the Google account previously registered to that tablet. If you forgot your password, reset the Google account password on another device via account recovery tools. Note that Google imposes a 24-hour security lockout window after a password change before the new password can be used to authenticate an FRP-locked device.
Why is my Android tablet charging extremely slowly or discharging while plugged in?
Slow charging or active discharging during use usually points to insufficient power source output, a damaged cable, or background resource consumption exceeding the input current. Ensure you are using a high-wattage power adapter (minimum 15W to 25W for modern tablets) rather than standard computer USB ports. Replace worn cables that may fail high-current Power Delivery protocols, clean lint from the tablet's charging port, and refrain from running power-intensive tasks like 3D gaming while charging.
Final Recommended Next Actions
To resolve your Android tablet's operational issues efficiently, follow this practical checklist:
- Execute a Forced Reboot: Hold Power + Volume Down for 15 seconds to clear memory deadlocks before attempting invasive repairs.
- Examine Physical Connections: Clean the USB-C/Micro-USB port with a non-metallic tool and test charging using an alternative 15W+ power adapter for 60 minutes.
- Isolate Software in Safe Mode: If the tablet experiences unexpected crashes or slowdowns, reboot into Safe Mode to identify and remove problematic third-party applications.
- Prepare for Recovery Actions: If system corruption prevents standard operation, verify your Google account credentials to navigate FRP before performing a Wipe Data / Factory Reset via Recovery Mode.