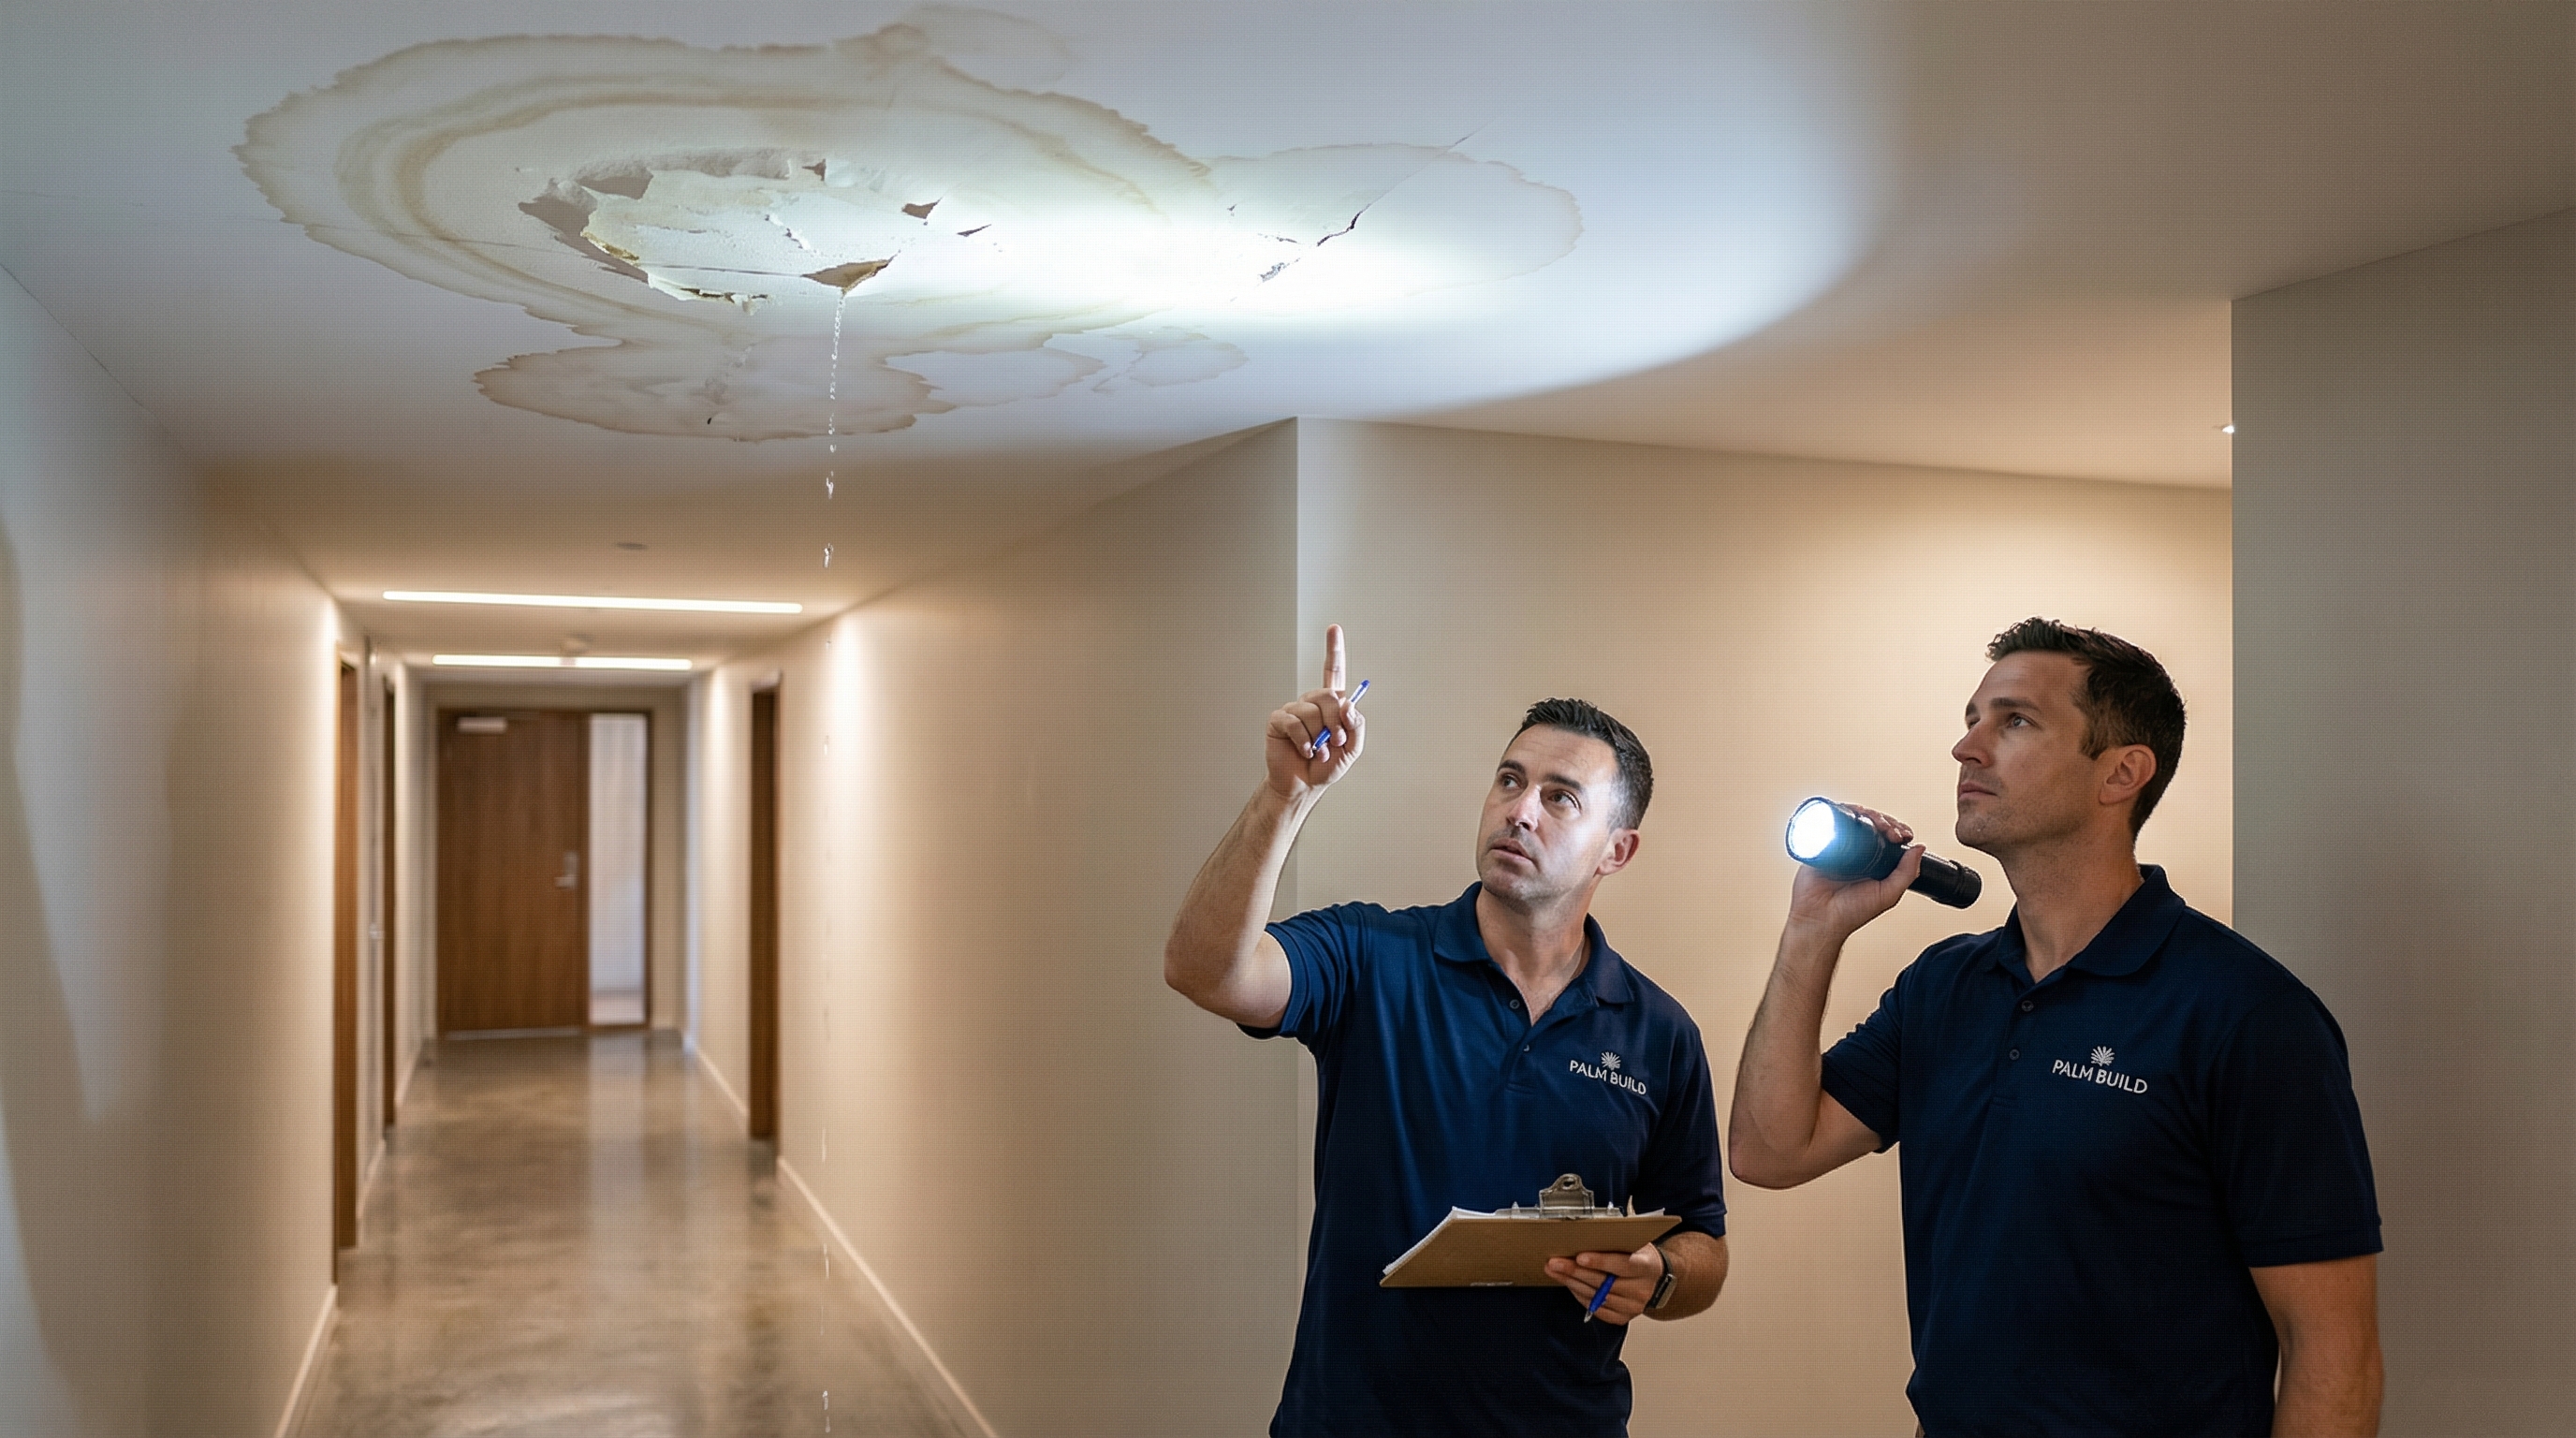
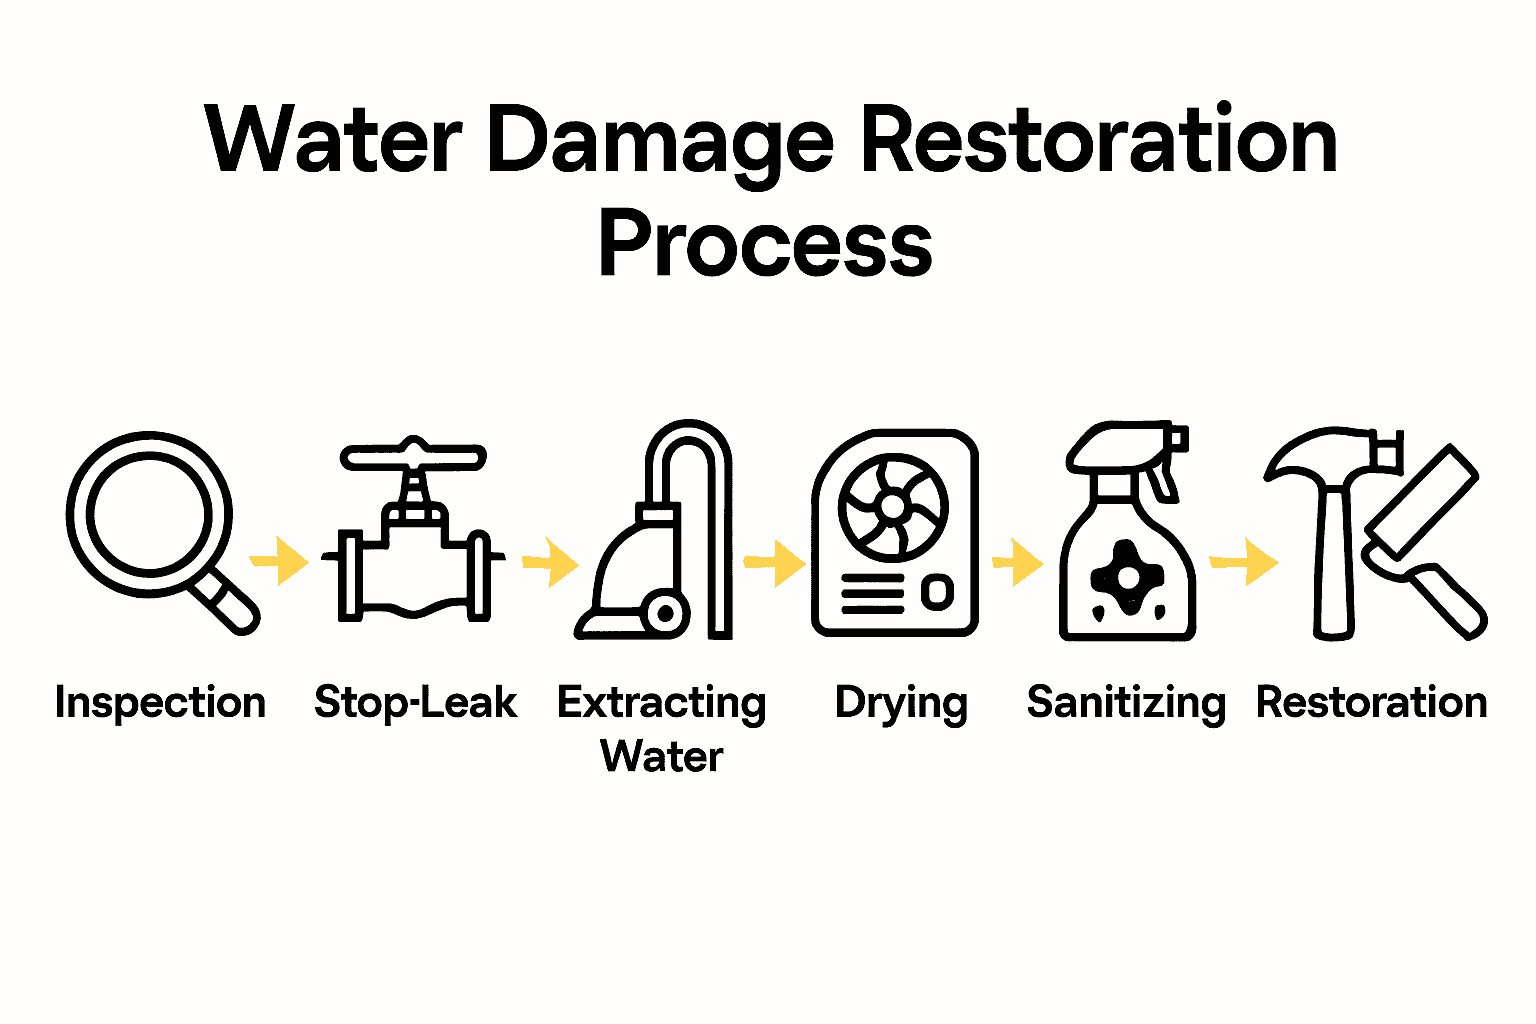
Assessing water damage effectively requires a systematic approach that combines visual inspection, specialized moisture detection tools, and an understanding of building material science. By identifying the source, categorizing the water contamination level, and mapping moisture migration paths, property owners and technicians can prevent structural decay, electrical hazards, and mold proliferation.
Water damage is one of the most pervasive and destructive threats a property can face. Whether stemming from a sudden burst pipe, a slow appliance leak, or severe weather events, moisture compromises structural integrity and indoor environmental quality. A casual glance at damp drywall or wet flooring rarely reveals the full scope of the issue. Water travels through capillary action, gravity, and vapor diffusion, hiding behind baseboards, beneath subfloors, and deep within wall cavities.
Performing a thorough and accurate assessment is the foundational step of any successful restoration process. Rushing this phase or relying purely on guesswork leads to incomplete drying, hidden rot, and costly secondary damages weeks after the initial incident. Mastering the methodology of damage evaluation ensures safety, accuracy, and efficient resource allocation.
Understanding Water Damage Categories and Classes
Before initiating any physical assessment, a professional must categorize the water and classify the extent of evaporation required. Established by restoration standards such as the IICRC S500 (Institute of Inspection Cleaning and Restoration Certification), these classifications dictate safety protocols, extraction methods, and material salvageability.
Water Categories (Contamination Levels)
Water is categorized based on its source and the potential health risks associated with exposure. Recognizing these categories dictates the required personal protective equipment (PPE) and sanitation procedures.
- Category 1 (Clean Water): Water originating from a sanitary source, such as a broken supply line, melting ice, or rainwater. While clean initially, it can degrade into Category 2 if left untreated as it contacts environmental contaminants.
- Category 2 (Grey Water): Water carrying a significant level of chemical, biological, or physical contaminants that can cause discomfort or illness if consumed or exposed to humans. Examples include discharge from dishwashers, washing machines, or hydrostatic pressure seepage.
- Category 3 (Black Water): Grossly contaminated water containing pathogenic agents, toxic substances, or sewage. This includes raw sewage backflow, rising floodwaters from rivers or the sea, and water holding standing microbial growth. Full PPE and containment are mandatory.
Water Classes (Evaporation Load)
Water classes describe the anticipated evaporation load and the rate at which water will release from building materials based on the amount and distribution of the moisture.
- Class 1 (Least Amount): Water affects only part of a room or area. Materials have low permeance (e.g., concrete, brick) and have absorbed minimal moisture.
- Class 2 (Significant Amount): Water affects an entire room, with moisture wicked up walls less than 24 inches. Low-evaporation materials (hardwood, particle board) are impacted.
- Class 3 (Greatest Amount): Water originates from overhead or has saturated the entire area, including walls, insulation, subfloors, and structural framing.
- Class 4 (Deeply Held/Bound Water): Water has saturated materials with low porosity and high retention capabilities, such as hardwood, stone, plaster, and crawlspace assemblies, requiring specialized low-grain drying strategies.
Safety First: Pre-Assessment Hazards
Entering a water-damaged environment presents immediate physical and electrical dangers. Assessment must never precede safety verification.
Electrical and Structural Risks
Electricity and water form a lethal combination. If standing water is present near outlets, breaker panels, appliances, or extension cords, do not enter the space until the main power supply has been safely shut off by a qualified electrician or utility provider. Never touch electrical panels while standing in water or on damp surfaces.
Structurally, water weakens load-bearing components. Heavy water-logged ceilings can sag and collapse without warning. When inspecting multi-story buildings or rooms below a roof leak, check overhead framing for deflection, cracking, or bulging before walking underneath. Slip hazards from slick flooring and tripping hazards from displaced area rugs or debris require sturdy footwear with non-slip soles.
Personal Protective Equipment (PPE)
Depending on the water category and environmental conditions, appropriate PPE must be donned prior to active inspection:
- Nitrile or heavy-duty rubber gloves: Protect against chemical irritants and biological pathogens in grey and black water environments.
- Respirators (N95 or P100): Essential when mold is suspected or when airborne particulate levels are high due to demolition or material degradation.
- Eye protection: Shields against splashing contaminated water, chemical cleaners, or debris during probing.
- Tyvek suits: Prevent skin contact with hazardous materials during Category 3 evaluations.
Step-by-Step Assessment Workflow
An effective assessment follows a logical, repeatable sequence. Moving haphazardly through a damaged property risks missing hidden pockets of moisture that can fuel secondary damage.
| Assessment Step | Primary Objective | Key Tools Required |
|---|---|---|
| 1. Source Identification | Locate and halt the active intrusion point. | Visual inspection, plumbing meters |
| 2. Perimeter Mapping | Establish outer boundaries of moisture migration. | Non-invasive moisture meter, thermal camera |
| 3. Deep Penetration Check | Measure moisture content within core structural layers. | Pin-type moisture meter, hygrometer |
| 4. Documentation | Record readings, conditions, and affected inventories. | Camera, clipboard, moisture log |
Step 1: Stopping the Source and Initial Survey
The first operational priority is ensuring no additional water enters the structure. Shut off main water valves, patch active roof leaks, or coordinate with municipal services if external flooding is the cause. Once the source is neutralized, conduct an initial walk-through from the dry areas of the building toward the heart of the damage. Document the general layout, types of flooring (carpet, hardwood, tile), and wall assemblies involved.
Step 2: Visual and Tactile Inspection
Human senses provide the first baseline of data. Look for discoloration on ceilings, peeling wallpaper, warped baseboards, and buckling hardwood planks. Touch surfaces to feel for dampness, but remember that human touch is subjective and cannot measure internal saturation levels. Check closets, under cabinetry, and behind furniture where air circulation is poor and humidity accumulates rapidly.
Step 3: Utilizing Advanced Detection Tools
Accurate assessment relies heavily on instrumentation. Relying on sight alone leaves hidden moisture undetected.
- Non-Invasive (Non-Destructive) Moisture Meters: These meters use radio frequencies to scan materials up to an inch deep without puncturing the surface. They are ideal for quickly surveying large expanses of drywall, vinyl flooring, and tile.
- Pin-Type Moisture Meters: These devices measure electrical resistance between two pins driven into the material. Because wet wood conducts electricity better than dry wood, the meter provides a precise percentage of moisture content (% MC). Pins must be driven to specific depths (such as 1/4-inch or down to core structural layers) for accuracy.
- Thermal Imaging Cameras (Infrared): Thermal cameras detect temperature differences on surfaces caused by evaporative cooling. Wet areas appear cooler than dry areas, allowing technicians to map hidden water tracks behind walls and under insulation rapidly. Infrared data must always be verified with a physical moisture meter, as cold spots can sometimes stem from thermal bridging rather than moisture.
- Thermo-Hygrometers: These instruments measure ambient relative humidity (RH) and temperature, calculating dew point and grains per pound (GPP). Comparing indoor readings to outdoor ambient conditions determines the baseline drying requirements for the structure.
Documenting and Mapping Moisture Migration
Comprehensive documentation is critical for insurance claims, restoration planning, and verification of drying progress. A proper moisture map records baseline data and tracks daily changes throughout the mitigation cycle.
Creating a Moisture Map
To create an effective map, draw a floor plan of the affected property. Divide rooms into manageable grids and record moisture meter readings at designated reference points. Mark the perimeter where readings transition from wet to dry. Repeat these measurements daily in the exact same locations to track progress and verify when materials have reached their dry standard—typically defined as matching the moisture content of unaffected materials within the same structure or regional equilibrium standards.
Mitigating Secondary Damage
If water sits unaddressed for even 24 to 48 hours, secondary damage sets in. Wood swells and warps, metals corrode, and mold spores begin to germinate on organic substrates like paper-faced drywall, wood framing, and carpet backing. Assessing the timeline of the water event helps determine whether materials can be salvaged or require disposal. For example, porous insulation saturated with Category 3 water cannot be sanitized and must be removed immediately, whereas structural framing exposed to clean water for a short duration can often be dried in place.
Common Mistakes in Water Damage Assessment
Avoiding common procedural errors ensures that remediation efforts are both effective and cost-efficient.
- Surface-Only Drying Assumptions: Turning off dehumidifiers because the surface of a wall or subfloor feels dry to the touch. Moisture trapped deep within thick wall cavities or subfloor assemblies will continue to cause rot and mold if interior layers are not measured.
- Ignoring HVAC Systems: Failing to inspect heating, ventilation, and air conditioning ducts. Water can enter ductwork during floods or leaks, circulating mold spores and humidity throughout the entire building long after the primary rooms appear dry.
- Failing to Establish Dry Standards: Relying on subjective judgment rather than quantitative meter readings to determine when mitigation is complete. Every assessment must reference quantifiable dry baselines for each material type (e.g., framing lumber should ideally read below 16% moisture content).
- Delaying Action: Allowing hours or days to pass before beginning the assessment. The window for preventing microbial growth and permanent structural warping closes rapidly.
Frequently Asked Questions
How long does it take for mold to grow after water damage?
Mold can begin to germinate and grow within 24 to 48 hours under favorable conditions of moisture, temperature, and organic food sources. Prompt assessment and rapid deployment of drying equipment are essential to prevent microbial outbreaks.
Can I assess water damage myself, or do I need a professional?
For minor, localized clean water spills (such as a small sink overflow), property owners can often assess and dry the area using fans and consumer dehumidifiers. However, for large losses, grey or black water contamination, multi-room infiltration, or water hidden inside wall cavities, hiring an IICRC-certified restoration professional with specialized meters and thermal cameras is strongly recommended.
What is the difference between pin and pinless moisture meters?
Pinless (non-invasive) meters use electromagnetic waves to scan large areas quickly without leaving holes, making them ideal for finished surfaces. Pin-type meters puncture the material to measure electrical resistance, providing a precise numerical percentage of moisture content that is essential for verifying structural dryness.
How do insurance companies use moisture maps?
Insurance adjusters rely on moisture maps and daily drying logs provided by restoration technicians to verify the scope of loss, confirm the necessity of structural demolition or equipment usage, and validate that mitigation was performed according to industry standards.
Why do some dry walls still feel cold after a leak?
Even after surface moisture evaporates, dampness trapped inside the wall cavity or insulation can cause localized evaporative cooling. Thermal cameras will continue to show cool anomalies until the entire depth of the wall assembly reaches equilibrium.
Conclusion and Next Actions
Assessing water damage effectively is a precise technical discipline that moves far beyond a simple visual inspection. By categorizing water contamination, utilizing advanced instruments like thermal cameras and pin-type meters, and establishing rigorous moisture maps, property owners and technicians can uncover hidden hazards and prevent long-term structural decay.
If you are currently facing water damage, prioritize immediate safety by checking electrical hazards and wearing appropriate PPE. Next, document the affected areas thoroughly, identify and halt the source, and engage certified professionals if the intrusion is extensive or contaminated. Taking swift, methodical action protects both the structural integrity of your property and the health of its occupants.