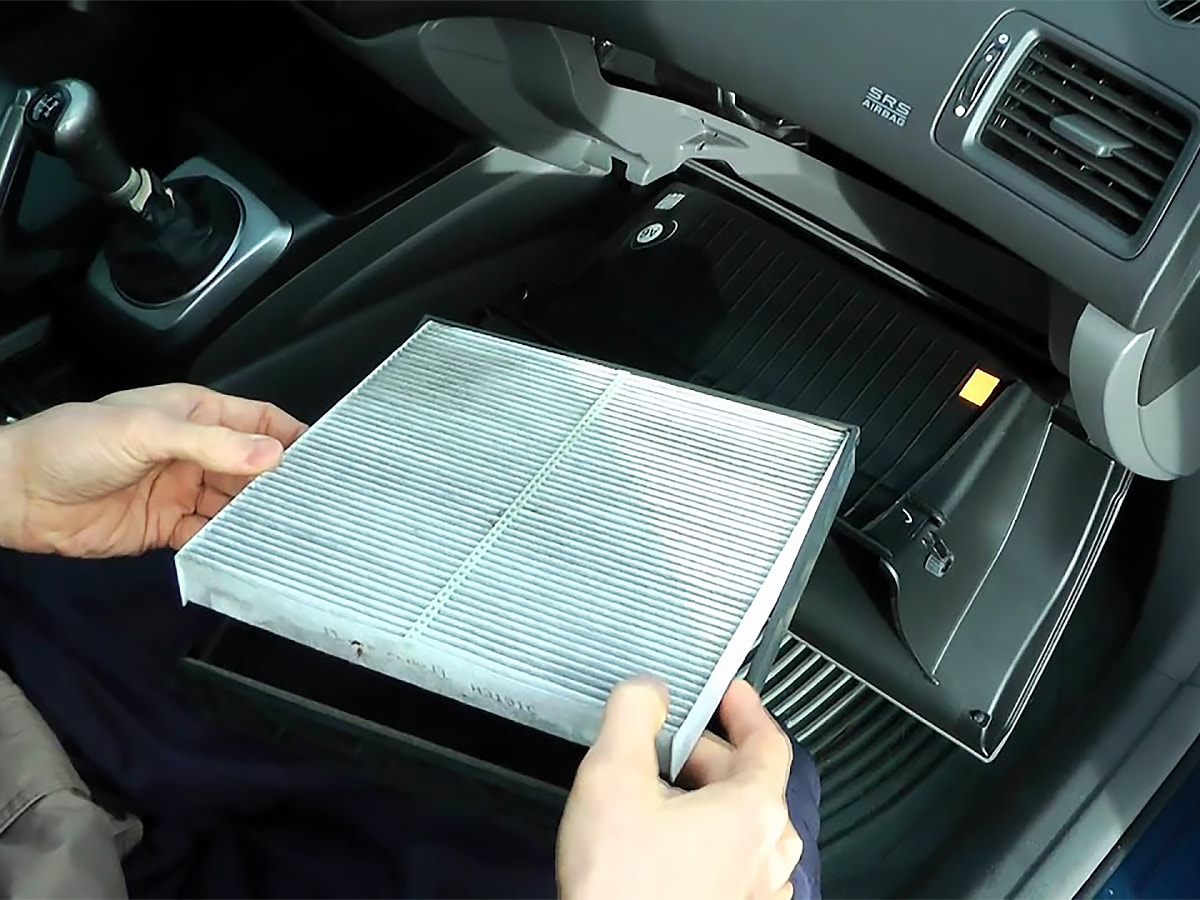
Replacing the cabin air filter on a 2019 Honda CR-V at 15,000 miles ensures clean interior airflow and protects your heating, ventilation, and air conditioning (HVAC) blower motor. Accessed directly behind the glove compartment without tools, this maintenance task takes less than ten minutes and typically costs between $12 and $25 when completed at home.
Why the 15,000-Mile Interval Matters for Your CR-V
The fifth-generation Honda CR-V (model years 2017 through 2022) utilizes an advanced cabin filtration system designed to trap microscopic airborne contaminants before they enter the passenger compartment. Honda’s onboard Maintenance Minder system tracks vehicle operating parameters—such as engine run time, ambient temperatures, and mileage—to calculate service intervals. The cabin dust and pollen filter is designated under Maintenance Minder sub-item 2, which also covers the engine intake air cleaner.
While standard driving conditions may permit replacement every 30,000 miles, Honda explicitly recommends a 15,000-mile (or one-year) replacement schedule for vehicles operating in severe conditions. In practical terms, most daily driving falls under these elevated conditions. Urban stop-and-go traffic, regions with elevated industrial smog, high-pollen spring environments, unpaved rural roads, and regions affected by seasonal wildfire smoke rapidly saturate the filter media.
Airflow Path: Fresh/Recirculated Air ---> Cabin Air Filter (Porous Media) ---> Blower Motor ---> Evaporator/Heater Core ---> Cabin Vents
When a filter reaches 15,000 miles, several functional degradation markers emerge:
- Restricted Airflow: Accumulated particulates, insect debris, and plant seeds block the micro-apertures in the nonwoven pleats, noticeably decreasing heating and air conditioning output from the dashboard registers.
- HVAC Blower Motor Strain: A blocked filter creates high negative pressure (vacuum resistance) on the intake side of the centrifugal blower wheel. The blower motor draws more electrical current to pull air through the restriction, which accelerates brush wear and can cause premature motor failure or resistor burnout.
- Evaporator Core Contamination: Once a filter clogs or begins degrading, fine organic matter can bypass the filter frame perimeter seals. These particulates land on the moist aluminum fins of the air conditioning evaporator core, creating a breeding ground for mold, mildew, and bacteria that generate persistent, sour interior odors.
- Window Fogging and Defroster Delays: Constricted cabin airflow prevents the HVAC defroster from quickly clearing moisture from the windshield and side glass in humid or freezing weather, creating an active driving hazard.
Sourcing the Right Filter: OEM Specifications vs. Aftermarket
Before beginning the installation, you must select a replacement element that matches the factory housing dimensions of the 2019 Honda CR-V. Using an incorrect physical size allows unfiltered air to bypass the filter element entirely, rendering the component ineffective.
Factory Part Numbers
The factory original equipment manufacturer (OEM) part number for the 2019 Honda CR-V cabin air filter is 80292-TF0-G01 (often superseded or cross-referenced by Honda as 80292-TBA-A11 or 80291-TF3-E01 depending on manufacturing plant origin).
Filtration Media Types
When purchasing a replacement, you will encounter three primary media options:
- Standard Particulate Filters: Constructed from single- or multi-layer nonwoven synthetic polymer fibers (such as polypropylene). These mechanical barriers capture dust, soot, road debris, and plant pollen down to roughly 3 to 5 microns. They offer minimal airflow resistance and represent the most economical choice.
- Activated Carbon (Charcoal) Filters: These combine mechanical particulate filtration with an embedded layer of granular or treated activated carbon. Through a physical process called adsorption, the porous carbon traps volatile organic compounds (VOCs), exhaust fumes, ozone, and sulfur compounds. This is the optimal selection for urban commuters and daily highway drivers.
- HEPA and Antimicrobial Specialty Filters: True High-Efficiency Particulate Air (HEPA) filters capture 99.97% of particles down to 0.3 microns. While they offer superior protection against allergens, fine particulate matter (PM2.5), and mold spores, some heavy-density HEPA aftermarket units produce higher static pressure drops, which can slightly reduce maximum vent airspeed. Verify that any HEPA option chosen is engineered specifically for fifth-generation CR-V HVAC blower tolerances.
Required Tools, Materials, and Preparation
One advantage of the fifth-generation CR-V interior design is that Honda engineered the cabin filter housing for completely tool-free servicing. You do not need sockets, screwdrivers, or pry tools.
Materials Checklist
- Replacement Cabin Air Filter: Verified fitment for 2019 CR-V (approximate dimensions: 8.31" length × 8.07" width × 1.18" thickness / 211 mm × 205 mm × 30 mm).
- Shop Rag or Microfiber Towel: To wipe down dust from the interior tray and airbox perimeter.
- Flashlight or Headlamp: To inspect the blower motor chamber behind the filter slot for dropped leaves.
- Nitrile Gloves (Optional): To protect your hands from trapped organic matter, road grime, and allergens on the dirty filter.
Workspace Setup
Park the CR-V on a flat, level surface, switch the transmission to Park (P), apply the parking brake, and shut off the ignition completely. Keep the HVAC fan switched to "Off" before powering down to prevent the blower motor from spinning while the filter chamber is open. Slide the front passenger seat as far back on its adjustment rails as possible to maximize your working clearance.
Step-by-Step Replacement Instructions
Follow these sequenced steps to safely remove the saturated filter and seat the new element without breaking the plastic retention tabs or the glovebox damper linkage.
Step 1: Unhook Damper Arm (Right Side) Step 2: Squeeze Glove Box Sidewalls Inward Step 3: Lower Glove Box Assembly Step 4: Unclip Filter Housing Cover Step 5: Swap Media (Observe Airflow Arrow: Pointing DOWN) Step 6: Reassemble and Inspect
1. Clear the Glove Box
Open the glove compartment and remove all contents, including owner manuals, registration paperwork, tire pressure gauges, and loose items. A fully loaded glove box adds unnecessary weight that makes unseating the hinge tabs difficult and risks spilling belongings into the footwell.
2. Disconnect the Glove Box Damper Arm
On the outer right-hand exterior edge of the open glove box door, locate the black plastic damper cylinder and linkage arm. This hydraulic-style damper controls the soft-opening speed of the glovebox.
- Grasp the lower ring or collar of the damper linkage arm where it clips over the plastic peg on the side of the glove box frame.
- Push the linkage downward and slightly forward to pop the collar off the retention peg.
- Allow the damper arm to hang freely inside the right dashboard opening. Do not twist or bend the arm horizontally, as the pivot pin inside the dashboard can crack under lateral pressure.
3. Release the Glove Box Stopper Tabs
Look at the upper inner sidewalls of the glove box basin (both left and right sides). You will see molded structural tabs that prevent the glove box from falling past its standard horizontal stopping point.
- Place one hand on the outside left wall of the glove box and your other hand on the outside right wall.
- Squeeze both sidewalls inward toward the center of the glove compartment simultaneously with moderate force. This flexes the plastic sufficiently to allow the upper stopper ears to clear the dashboard frame stops.
- While keeping the sides compressed inward, pull the top of the glove box toward you and tilt it gently downward. Once the stop tabs clear the structural frame, release the sides.
- Let the glove box swing fully downward on its bottom hinges toward the carpeted floorboard. The lower hinges can remain connected; it is rarely necessary to detach the glove box entirely from its bottom mounting hooks.
4. Remove the Air Filter Housing Faceplate
With the glove box lowered, you will see a rectangular black plastic airbox directly ahead. A long, horizontal access door (faceplate) covers the filter slot.
- Locate the plastic squeeze tabs on the extreme left and right ends of the access cover.
- Press both retaining clips inward toward the center of the door.
- Pull the cover straight back toward the vehicle’s rear to detach it. Inspect the sponge-rubber weatherstripping on the back of this plate; if it is intact and clean, set the plate aside.
5. Extract the Saturated Filter Element
- Slide your fingers under the leading edge of the exposed filter.
- Pull the old filter straight outward horizontally. Take care to keep the filter completely flat as you withdraw it. Saturated filters often hold dried leaves, pine needles, dead insects, and loose sand on their upper surface; tilting the filter will dump this debris directly into the exposed squirrel-cage blower motor wheel underneath.
- Inspect the top of the removed filter to assess particulate load and moisture patterns.
6. Inspect and Clean the Airbox Plenum
Before installing the replacement:
- Shine your light into the filter slot and down onto the blades of the blower motor.
- If you spot loose leaves, seeds, or heavy dust accumulations sitting atop the motor fan or around the plastic housing ledges, clean them out. You can vacuum them out using a narrow crevice tool or wipe them with a damp microfiber cloth. Leaving debris in the blower housing leads to immediate rattling or vibrating sounds when the fan runs at medium to high speeds.
7. Install the New Filter (Confirming Airflow Direction)
The airflow in the 2019 Honda CR-V cabin ventilation stack travels vertically from top to bottom—air enters through the exterior cowl at the base of the windshield, passes downward through the filter, and flows directly down into the intake of the blower motor.
- Examine the markings printed along the side edge of your replacement filter.
- Ensure that the stamped indicator arrow labeled "AIR FLOW" points strictly downward.
- Caution on Brand Markings: Some third-party filters display an arrow indicating "THIS SIDE UP" rather than directional airflow. Read the text beside the arrow carefully. If the text says "AIR FLOW," the arrow must point down. If the text specifically says "UP," align it facing upward. When using Honda OEM filters (80292-TF0-G01), the printed arrow indicates airflow and must point down.
- Slide the new filter into the housing chamber. Align the pleated edges so the filter sits flat, squarely seated, and completely within the plastic guide tracks without bunching, buckling, or crimping along the sidewalls.
8. Reassemble the Dashboard Components
- Reattach the Cover: Align the filter cover over the opening and press it straight in until the plastic retention clips on both the left and right sides snap firmly into place. Pull gently on the center of the door to confirm it is latched.
- Raise the Glove Box: Swing the glove box upward on its bottom hinges. Press inward on the left and right sidewalls until the upper stopper tabs slip past the dashboard frame, allowing the glove box to return to its normal retained position.
- Reconnect the Damper Linkage: Pull the hanging damper arm on the right side forward and align its mounting loop over the round peg on the glove box door. Press the collar upward or snap it firmly over the peg until you feel and hear it click securely in position. Test the glove box by opening and closing it twice to confirm smooth, damped motion.
Cost Comparison: Professional Dealership vs. DIY Replacement
Replacing the cabin air filter yourself delivers substantial savings compared to scheduling the service at an authorized dealership or independent auto repair shop. Service centers classify this task as a standard billing unit that includes both parts markups and flat-rate labor charges.
| Expense Category | Dealership Service Dept. | Quick Lube / Chain Shop | DIY (At Home) |
|---|---|---|---|
| Filter Part Cost | $28.00 – $42.00 (OEM) | $22.00 – $35.00 (Standard) | $12.00 – $24.00 (OEM or Premium Aftermarket) |
| Billed Labor Cost | $45.00 – $80.00 | $25.00 – $45.00 | $0.00 |
| Total Typical Cost | $73.00 – $122.00 | $47.00 – $80.00 | $12.00 – $24.00 |
| Time Investment | 1 to 2 hours (transit & waiting) | 30 to 60 minutes | 8 to 10 minutes |
| Tools Required | None | None | None |
By spending less than ten minutes in your driveway, you eliminate the labor markup entirely and can choose a premium carbon-activated or allergen-grade filter for half the price of a standard OEM paper filter installed by a dealer.
Maintenance Minder System: Understanding Sub-Code 2
When your instrument cluster displays a wrench icon alongside an alphanumeric code such as A2 or B2, the numeric character "2" dictates the inspection and replacement of physical filters:
- Sub-code 1: Rotate tires and check tire pressures.
- Sub-code 2: Replace engine air cleaner element, replace dust and pollen filter, and inspect drive belt.
- Sub-code 3: Replace transmission fluid.
If you complete the 15,000-mile cabin filter replacement independently, you should reset the Maintenance Minder display to ensure that upcoming maintenance schedules remain synchronized.
Digital Cluster Reset Sequence (Steering Wheel Interface)
On 2019 CR-V trims equipped with the digital driver information center (EX, EX-L, Touring):
- Turn the vehicle ignition switch to ON (press the Engine Start button twice with your foot off the brake pedal; do not start the engine).
- Press the Enter/Selector Wheel (or the Information/I-button) on the left side of the steering wheel until the Maintenance Minder screen (oil life percentage) appears.
- Press and hold the Enter/Selector Wheel for roughly 10 seconds. The display will enter maintenance reset mode, and the individual sub-items will begin blinking.
- Scroll through the menu using the selector thumbwheel to highlight Item 2 only (or select "All Due Items" if you also performed the oil and engine air filter change).
- Press the Enter button once more to confirm the reset. The screen will display a reset confirmation message, returning the monitored life indicator to 100%.
Common Pitfalls and Troubleshooting
While the physical steps to replace a CR-V cabin filter are straightforward, several recurring errors can lead to HVAC performance problems, unusual noises, or broken trim parts.
Inverted Airflow Direction
Installing the filter upside down reduces system efficiency. While air will still pass through a backwards filter, the media pleats and support webbing are arranged directionally to maximize particulate capacity on the entry side without collapsing into the blower intake. If you reverse the installation, the structural netting cannot support the paper pleats properly, which can lead to pleat deformation, air bypass around the sides, and a higher whistling sound at high fan speeds.
Unseated Filter Tray Clips
If the filter cover is not snapped tightly into the housing on both ends:
- A gap remains in the pressurized HVAC chamber.
- The blower motor draws unfiltered, warm, humid air from behind the dashboard instead of conditioned cowl air.
- You will hear a distinct hissing or whistling sound when the fan operates above setting 3.
- Always tug lightly on the horizontal door to ensure that both snap latches are fully engaged before lifting the glove box back into position.
Unhooked or Snapped Damper Arm
If you lift the glove box and force it back into place without properly seating the side damper linkage, the damper arm can become jammed behind the glove box structural supports. In worst cases, forcing the glove box upward snaps the small plastic mount on the side of the compartment door. If the arm is omitted or disconnected, the glove box will drop down rapidly with an unrefined thud rather than gliding softly downward when unlatched.
Debris Dropping Into the Blower Fan
The most frequent post-replacement issue is an audible ticking, vibrating, or humming noise that changes frequency when adjusting fan speed. This occurs when dried leaves or twigs fall off the top of the old filter and drop directly into the squirrel-cage blower motor wheel during extraction.
- Resolution: Lower the glove box, remove the filter cover, slide the filter out, and use an inspection mirror or smartphone camera to view the bottom of the blower housing. Pick out any foreign objects or suction them out with a shop vacuum fitted with a narrow tube.
Frequently Asked Questions
Can I clean and reuse the 2019 Honda CR-V cabin air filter instead of buying a new one?
You should not clean and reinstall a standard factory or paper-based aftermarket cabin air filter. These filters use electrostatically charged, nonwoven microfibers that capture fine dust. Vacuuming or applying compressed air destroys these microscopic electrostatic fibers, dislodges pleat seals, and opens enlarged pores that allow pollen and soot to bypass the media. Washing them with water deteriorates the cellulose base and introduces moisture that promotes mold growth inside the HVAC vents. The only reusable filters are purpose-built, washable aftermarket units designed with oiled or dry washable synthetic mesh.
What is the difference between the engine air filter and the cabin air filter?
The engine air filter is located inside an airbox underneath the hood in the engine compartment. Its sole purpose is to clean incoming ambient air before it enters the intake manifold and turbocharger to protect internal combustion components from abrasive wear. The cabin air filter is mounted inside the vehicle behind the glove box and cleans the air supplied directly to the passenger compartment through the heating, cooling, and defrosting vents. Both are monitored under Honda Maintenance Minder sub-item 2, but they use different parts and require distinct replacement procedures.
How do I know if my cabin air filter needs replacement before the 15,000-mile mark?
Visible and environmental cues often indicate early saturation. Primary warning signs include:
- Persistent stale, sour, or musty smells when you first activate the A/C or heat.
- Reduced airflow through dashboard vents, requiring higher fan settings to achieve ordinary comfort levels.
- An unusual, faint whistling sound caused by air pushing through saturated pleats.
- Prolonged defroster clearing times on wet or freezing mornings.
- Increased interior dust accumulation along the dashboard surfaces. If you drive extensively on dirt roads or reside in regions with seasonal wildfires, inspect the filter media visually at 7,500 to 10,000 miles.
Does replacing the cabin air filter myself void my Honda factory or extended warranty?
No. Under the federal Magnuson-Moss Warranty Act in the United States (and similar consumer protection standards globally), vehicle owners have the legal right to perform routine scheduled maintenance or use compatible, non-OEM parts without voiding their manufacturer's warranty. To preserve your vehicle's service history, keep your purchase receipts for the replacement filters and note the mileage and installation date in your vehicle maintenance log. A warranty claim can only be denied if an improper installation directly causes component failure (for instance, dropping large debris into the blower motor and running it until the fan motor burns out).
Does the 2019 Honda CR-V Hybrid use the same cabin air filter and replacement process?
(Note for clarity across trims): The fifth-generation CR-V Hybrid (which launched in North America for the 2020 model year, though available in European and other global markets in 2019) shares the identical passenger compartment layout, glove box architecture, and HVAC housing dimensions as the standard 1.5-liter turbocharged and 2.4-liter gasoline CR-V models. The replacement process, airflow direction, and filter size requirements are entirely identical across all 2019 powertrains.
Final Recommendation and Next Actions
Conducting a cabin air filter replacement on your 2019 Honda CR-V at the 15,000-mile threshold is one of the most cost-effective and high-return DIY maintenance tasks you can perform. It directly prevents blower motor wear, maintains efficient defroster clearing, eliminates foul interior odors, and protects passengers from respirable road particulates.
To complete this service today:
- Confirm your current odometer reading to check if you have crossed the 15,000-mile or one-year mark since your last filter change.
- Order an OEM-spec (80292-TF0-G01) or a premium activated-carbon replacement filter from a reputable parts retailer.
- Empty your glove box, follow the ten-minute replacement process, ensure the airflow directional arrow points DOWN, and reset sub-item 2 on your dashboard Maintenance Minder display.