Running an official Apple diagnostics test on your iPhone allows you to evaluate internal hardware components—including the display, cameras, battery, micro-sensors, and wireless radios—for underlying faults. You can initiate Apple's official web-based diagnostic suite using a secondary web browser, enter diagnostic mode directly on the device, or request a remote diagnostic session through Apple Support.
Understanding Apple Diagnostics for iPhone
For years, comprehensive hardware diagnostic suites were reserved exclusively for Apple Store Genius Bars and Apple Authorized Service Providers (AASPs). When a customer brought in a malfunctioning device, technicians would connect it to an internal network and run propriety diagnostic software to evaluate component integrity.
Apple expanded access by releasing Apple Diagnostics for Self Service Repair. This web-based system gives independent technicians and individual consumers access to the same diagnostic tools used by authorized repair centers. The suite runs troubleshooting routines, assesses component health, and assists in calibrating replacement parts.
Apple diagnostics for iPhone generally fall into three distinct operational categories:
- Self Service Diagnostics (Web-Based Suite): Accessible via diagnostics.apple.com, this suite allows users to put their iPhone into a dedicated Diagnostic Mode and control hardware tests from a secondary device (such as a Mac, iPad, or Windows PC).
- Remote Apple Support Diagnostics: Initiated during a conversation with an Apple Support representative. The technician sends a diagnostic request directly to your device via an over-the-air session link or settings prompt.
- On-Device Analytics and System Health: Built-in iOS utilities—such as Battery Health monitoring, Parts & Service History verification, and system panic logs—that run natively within iOS without requiring external diagnostic servers.
Each method serves a different primary purpose. On-device health menus offer quick status updates, remote support diagnostics help customer service agents authorize official repairs or warranty claims, and the Self Service diagnostic web app gives you granular test controls to isolate specific hardware failures.
Prerequisites and Compatibility Requirements
Before attempting to run a full diagnostic suite on your iPhone, ensure your hardware and software meet Apple's operational prerequisites. Failing to meet these conditions can result in dropped connections, inconclusive test results, or an inability to initiate diagnostic mode.
Supported Devices and iOS Versions
Self Service Repair diagnostics were introduced for recent iPhone models (typically iPhone 12 and newer) running iOS 17.0 or later. Older legacy models may not support the web-based Self Service suite, though they remain compatible with Apple Support remote diagnostic sessions.
Secondary Device and Browser
To control the web-based diagnostic utility, you need a secondary device equipped with an active internet connection and a modern web browser. Supported control devices include:
- Mac computers running Safari, Chrome, or Firefox.
- iPads running iPadOS 17 or later.
- Windows PCs running an updated version of Microsoft Edge, Chrome, or Firefox.
- Secondary smartphones running a standard desktop-class browser.
Network and Power Setup
- Stable Wi-Fi Network: The target iPhone and the secondary control device must both be connected to a reliable Wi-Fi network with active internet access. Diagnostic Mode cannot operate over cellular data.
- Adequate Battery Charge: Your iPhone should have at least a 50% charge, or ideally remain connected to an external wall charger throughout the test process. Unexpected shutdowns during low-level hardware diagnostics can cause session interruptions or state corruption.
- Apple Account Credentials: You may need your Apple Account details to verify ownership or sign into the diagnostic portal.
Step-by-Step: Running Apple Diagnostics via the Web Suite
The web-based Apple Diagnostics test allows you to run low-level hardware checks directly on your device. Follow these steps to prepare your hardware, enter Diagnostic Mode, and initiate tests.
Diagnostic Process Flow:
- Power Off iPhone
- Hold Volume Buttons + Connect Cable
- iPhone Enters Diagnostic Mode
- Visit diagnostics.apple.com on Secondary Device
- Run Tests & View Telemetry
Step 1: Power Down the iPhone
Turn off your iPhone completely. Press and hold the Side button and Volume Down button (or Volume Up button) until the power-off slider appears, then slide to turn off the device. Wait at least 30 seconds to ensure all internal circuits have fully discharged.
Step 2: Boot into Diagnostic Mode
- Ensure your charging cable (Lightning or USB-C) is plugged into a power source or computer.
- Press and hold both the Volume Up and Volume Down buttons simultaneously on your iPhone.
- While continuing to hold both volume buttons, plug the charging cable into your iPhone.
- Keep holding the buttons until the Apple logo appears, followed by a screen displaying the word "Diagnostics" or a prompt asking you to select a Wi-Fi network.
- Release the volume buttons.
Step 3: Connect the Target iPhone to Wi-Fi
On the iPhone screen, select your local Wi-Fi network and enter the password when prompted. Once connected, your iPhone will display a serial number and a message stating that it is waiting for a diagnostic session to begin.
Step 4: Initiate the Session on Your Secondary Device
- Open a web browser on your secondary device (Mac, PC, or iPad) and navigate to diagnostics.apple.com.
- Click Start Session.
- Log in with your Apple Account if requested, or enter the Serial Number displayed on your target iPhone's screen.
- A prompt will appear on your iPhone asking you to confirm the diagnostic request. Tap Agree or Start on the iPhone screen to grant the web suite authorization to perform tests.
Step 5: Select and Run Diagnostics
Once connected, the secondary device displays the Diagnostic Suite Dashboard. You can select individual diagnostic routines based on the issue you are experiencing:
- Mobile Resource Inspector (MRI): Performs a comprehensive scan of overall hardware health, checking sensor readings, power distribution, thermal status, and memory modules.
- Display Output and Multi-Touch: Displays solid colors, grid patterns, and touch-tracking screens on the iPhone to detect dead pixels, backlight bleed, touch dead zones, and True Tone calibration issues.
- Audio Assessment: Tests the internal ear speaker, bottom speaker, and all integrated microphones by broadcasting tones at various frequencies and analyzing feedback.
- Camera and TrueDepth Diagnostics: Evaluates image sensor performance, optical image stabilization (OIS), auto-focus actuators, and the infrared dot projector used for Face ID.
Step 6: Review Results and Exit
After completing the selected routines, the browser interface will present a status summary for each component—typically indicating Passed, Issue Detected, or Test Incomplete.
To exit Diagnostic Mode, tap the information button (i) on your iPhone screen, select Exit Diagnostics, and choose Restart or Power Off.
How Remote Diagnostics Work via Apple Support
If you do not have a secondary device or prefer an Apple representative to analyze your hardware logs, you can request a remote diagnostic session. This process relies on securely transmitted telemetry directly to Apple's engineering support systems.
Remote Apple Support Diagnostics:
- Apple Support Initiates Request
- User Approves under Settings
- Diagnostic Suite Runs
- System Telemetry Uploaded to Server
Requesting a Remote Test
- Contact Apple Support via the official Apple Support Portal, the Apple Support app, or by telephone.
- Inform the advisor of the issue you are encountering (e.g., unexpected battery drain, erratic touch responses, or Wi-Fi dropouts).
- The advisor will push an automated diagnostic request to your device.
Granting Diagnostic Permissions
To initiate the session on your iPhone:
- Open Settings.
- Navigate to Privacy & Security.
- Scroll down and tap Analytics & Improvements.
- Tap Start Diagnostics with Apple Support.
- Review the terms of data submission and tap Agree.
Data Privacy and Security Boundaries
Apple's remote diagnostic process is strictly limited to hardware parameters and system performance metrics. The software collects internal telemetry such as:
- Battery state-of-health and cycle history.
- Temperature sensor readings and thermal throttling records.
- Crash logs, kernel panics, and application non-response metrics.
- Wi-Fi and Bluetooth signal strength metrics.
Remote diagnostics cannot view, access, or transmit personal data such as photographs, messages, browsing history, stored passwords, or contact lists. Once the session ends, the connection terminates automatically, and Apple support personnel cannot reconnect without explicit user consent.
On-Device Diagnostic Tools and Native System Metrics
Not all diagnostic checks require booting into a separate operating mode or contacting customer support. iOS includes several built-in tools that provide real-time hardware status metrics.
Battery Health and Charging Telemetry
You can check battery health by opening Settings > Battery > Battery Health & Charging. iOS provides essential diagnostic data:
- Maximum Capacity: Displays an estimated percentage of original battery capacity remaining relative to when the unit was brand new. Batteries operating below 80% original capacity generally trigger a recommendation for service.
- Cycle Count: Available natively on newer iPhone models (such as iPhone 15 and later), displaying the exact number of full charge-discharge cycles completed.
- Peak Performance Capability: Indicates whether the battery is delivering sufficient power to sustain peak CPU and GPU demands without causing unexpected shutdowns.
Parts and Service History Verification
If your iPhone has undergone a component replacement, iOS validates part authenticity through internal cryptographic handshakes. Navigate to Settings > General > About and look for Parts & Service History:
- Genuine Apple Part: Confirms that the replacement battery, display, or camera module was installed correctly and configured using Apple's official System Configuration repair assistant.
- Unknown Part: Indicates that the replaced component is non-genuine, was salvaged from another device without proper system configuration, or is failing to communicate correctly with the logic board.
| Status Message | Technical Meaning |
|---|---|
| Genuine Apple Part | Official part detected; calibrated correctly. |
| Unknown Part | Non-original, uncalibrated, or faulty part. |
| Finish Repair / Configure | Replacement part installed; needs calibration. |
Panic Logs and Analytics Data
When an iPhone experiences repeated unexpected restarts, it logs low-level diagnostic files called panic logs. While difficult to decipher without technical training, these files can reveal hardware faults.
To inspect panic logs:
- Go to Settings > Privacy & Security > Analytics & Improvements > Analytics Data.
- Scroll through the alphabetical list to search for entries beginning with
panic-full. - Tap an entry to view the raw log. Repeated terms such as
Panic String: AOP Panicor references to specific hardware buses (e.g.,I2C,SMC,Thermal) often point to physical component failures, liquid damage, or damaged motherboard traces.
Comparing Diagnostic Methods
Selecting the correct diagnostic approach depends on your hardware access, software build, and repair objectives. The following table highlights the operational differences across available diagnostic channels:
| Feature / Metric | Self Service Web Suite | Apple Support Remote | Native iOS Settings | Third-Party Diagnostic Apps |
|---|---|---|---|---|
| Access URL / Path | diagnostics.apple.com |
Settings > Privacy & Security | Settings > Battery / General | App Store Downloads |
| Secondary Device Required? | Yes (Mac, iPad, PC) | No | No | No |
| Hardware Components Tested | Full suite (Sensors, Display, Audio, TrueDepth) | Core systems (Battery, Thermal, Memory, Wireless) | Battery, System Assemblies, Parts Verification | Basic APIs (Screen touch, Accelerometer, Microphones) |
| System Calibration Capable? | Yes (via System Configuration) | No | No | No |
| Data Privacy Boundaries | No user content transmitted | Aggregated telemetry only | Stored locally on device | Varies; requires permission auditing |
| Cost | Free | Free | Free | Free / Freemium |
| Ideal Use Case | DIY Repair validation & component isolation | Pre-repair evaluation with official support | Quick operational checks & battery health | Basic sanity checks prior to selling |
How to Interpret Hardware Diagnostic Results
When a diagnostic test completes, understanding the output determines your next steps. The Apple Diagnostics suite categorizes results into clear operational states.
Common Status Indicators
- Passed: The tested hardware component responded within normal electrical, thermal, and mechanical tolerances. No further action is required.
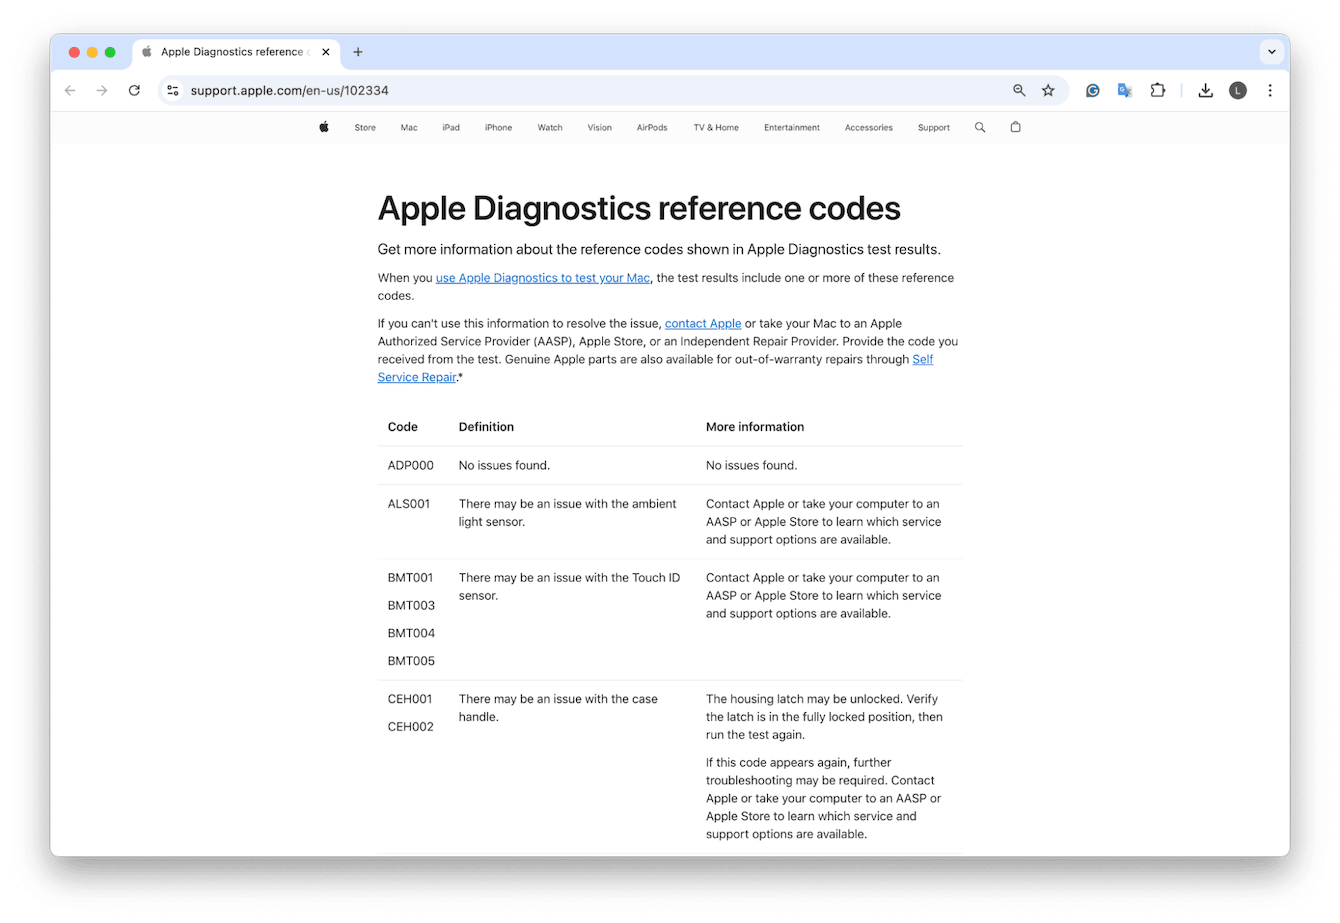
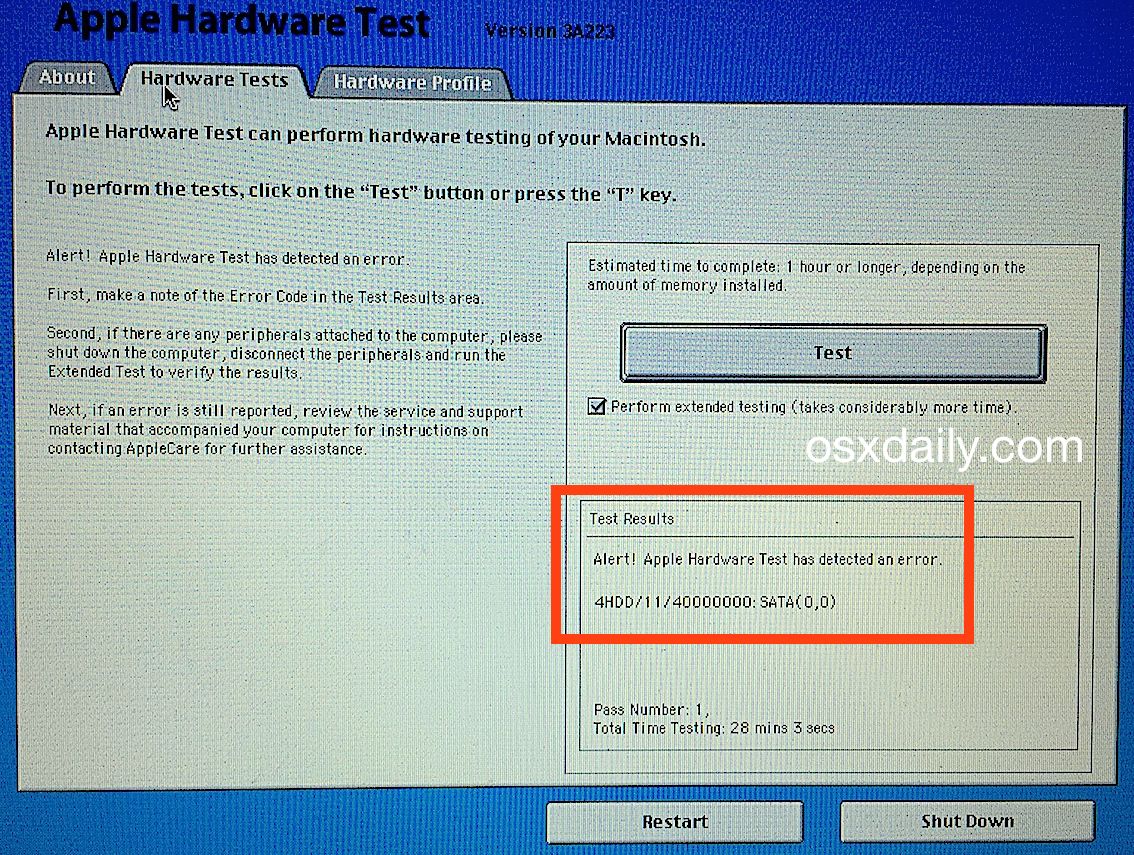
- Issue Detected (with Error Code): The component failed a specific hardware verification test. Diagnostic suites produce an alphanumeric reference code (e.g.,
VFD001for display issues,PPT004for battery degradation). - Test Could Not Be Completed: The diagnostic system lost communication with the target component, often due to an interrupted connection or a complete hardware failure.
Key Hardware Test Categories Explained
1. Mobile Resource Inspector (MRI)
The MRI serves as the primary health pass. It reads thermal sensors across the logic board, checks charge controller circuits, verifies power management ICs (PMICs), and confirms that internal buses are communicating correctly. A failure here generally points to a logic board component failure or liquid exposure.
2. Display and Touch Assessment
This suite checks pixel response and touch grid accuracy. If an area of your touch digitizer is unresponsive, the screen will indicate a Touch Matrix Failure. For displays replaced via Self Service Repair, this test also validates that color calibration files match the underlying panel hardware.
3. Audio and Sensor Diagnostic
During audio testing, your iPhone emits low and high-frequency tones while using internal microphones to measure audio response curves. If dust, debris, or water blocks the acoustic mesh, the diagnostic suite will register an audio attenuation error.
4. TrueDepth Camera and Sensor Calibration
Because the TrueDepth camera array coordinates closely with secure hardware enclaves for Face ID authentication, diagnostics verify the alignment between the infrared camera, flood illuminator, and dot projector. Failure messages here mean Face ID functionality will likely be disabled until repaired.
Troubleshooting Diagnostic Errors and Connection Issues
When running diagnostic tests, technical snags can prevent the tool from executing properly. Below are solutions for common diagnostic errors.
iPhone Stuck in Diagnostic Mode
If your iPhone becomes unresponsive while on the "Diagnostics" screen:
- Disconnect the USB cable from the iPhone.
- Perform a Force Restart:
- Press and quickly release Volume Up.
- Press and quickly release Volume Down.
- Press and hold the Side button until the Apple logo appears, then release.
"Unable to Verify Diagnostic Session"
This error typically occurs when the web browser on your secondary device loses communication with Apple's authentication servers.
- Ensure both devices are connected to the exact same Wi-Fi network subnet.
- Disable active Virtual Private Networks (VPNs) or custom DNS configurations (e.g., iCloud Private Relay) on the control device, as these can obscure IP routing during local verification handshakes.
- Clear your secondary browser's cache and cookies, or try using an incognito/private browsing window.
Wi-Fi Disconnection During Diagnostic Boot
If your iPhone drops its Wi-Fi connection while entering diagnostic mode:
- Move closer to your Wi-Fi router to eliminate signal interference.
- Avoid attempting diagnostic sessions on public captive-portal networks (such as coffee shops or hotels) that require web page login clicks. Use a secure home or office network.
Frequently Asked Questions
Can I run Apple Diagnostics on an iPhone without a secondary device?
You cannot run the full Self Service Repair Diagnostic Suite without a secondary browser device (such as a Mac, PC, or iPad), because the diagnostic interface requires an external device to send commands while the iPhone stays locked in Diagnostic Mode. However, you can initiate a Remote Diagnostic session directly on your iPhone by contacting Apple Support, or inspect built-in metrics under your iPhone's Settings menu.
Does running an official diagnostic test erase personal data on the iPhone?
No. Executing standard hardware diagnostics—whether through the web suite, remote support, or native settings—does not wipe your stored media, applications, or personal settings. Diagnostic Mode operates in an isolated environment that reads hardware state metrics without altering your user storage partitions. However, backing up your device to iCloud or a computer before troubleshooting is always a recommended precaution.
What is the difference between official Apple Diagnostics and third-party diagnostic apps?
Official Apple Diagnostic tools operate below the operating system level, accessing low-level hardware sensors, internal power rails, and encrypted calibration data on the logic board. Third-party apps downloaded from the App Store can only read standard iOS software APIs. They can check basic functions like multi-touch or speaker playback, but they cannot measure physical sensor voltages, verify part cryptographic keys, or read internal panic logs.
Why does my iPhone display an "Unknown Part" warning even if the component works?
When a major component (such as a screen, battery, or camera) is replaced, the new component must be cryptographically paired to your iPhone's logic board. If a part is replaced without running Apple's post-repair System Configuration routine (available through the Self Service Repair framework), iOS flags the component as an "Unknown Part," even if it is a genuine module pulled from another iPhone.
Is the Self Service Diagnostic tool available for all iPhone models?
The web-based Self Service diagnostic suite supports modern iPhone models (typically iPhone 12 and newer running iOS 17 or later). Older legacy iPhones are not compatible with the self-service web utility, but they can still undergo remote diagnostic sessions when connected directly with an Apple Support representative.
Summary and Practical Next Steps
Apple's diagnostic tools provide transparent access to your iPhone's hardware health. If your device displays unexplained battery drain, unresponsive touch zones, or sensor failures, running an official diagnostic check provides clear data to guide your next step:
- Perform Native Checks First: Start by reviewing Settings > Battery > Battery Health & Charging and Settings > General > About > Parts & Service History for immediate indicators.
- Execute a Self Service Diagnostic Session: If isolating a specific hardware issue, grab a secondary laptop or tablet, visit diagnostics.apple.com, and boot your target iPhone into Diagnostic Mode using the volume button sequence.
- Contact Authorized Technicians for Failed Hardware: If your diagnostic results yield specific failure codes (such as sensor, display, or power management errors), contact Apple Support or visit an Apple Authorized Service Provider. Bring your diagnostic session details to help technicians quickly confirm the issue and begin repairs.