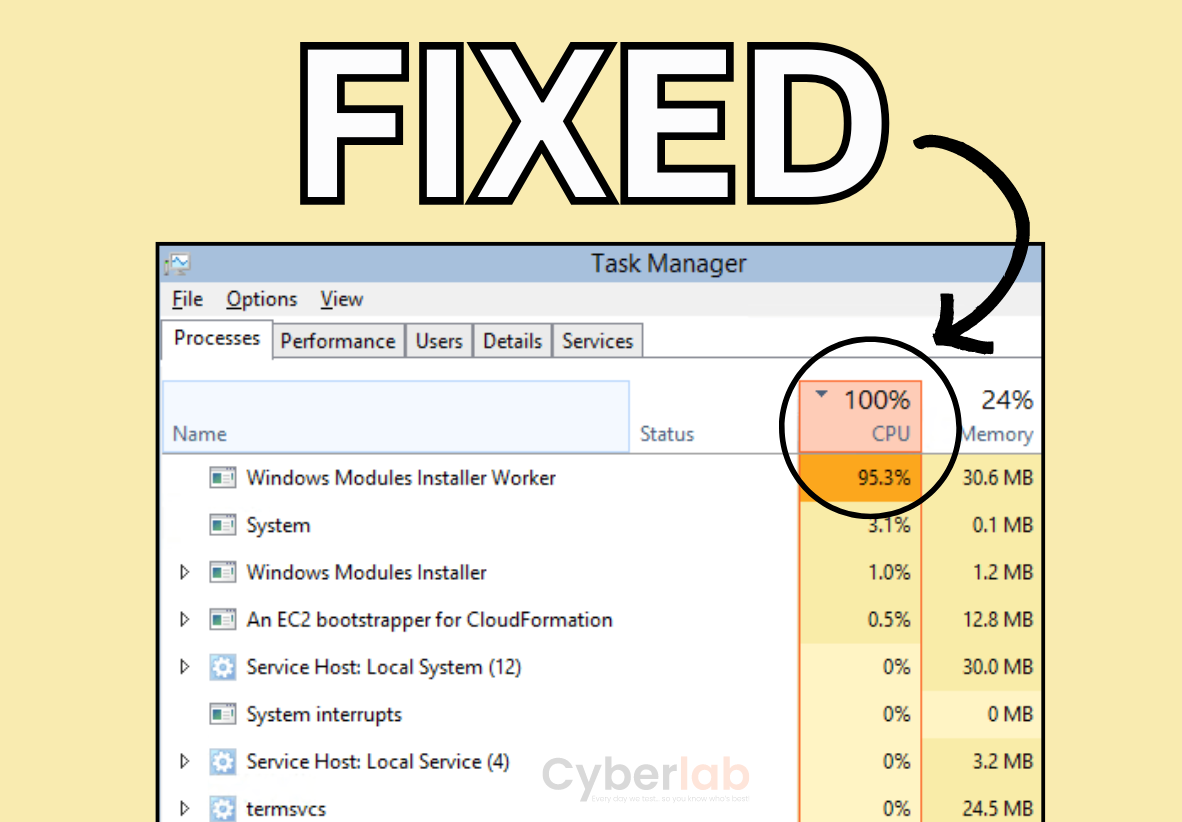
Experiencing 100% CPU usage on Windows 7 causes severe system sluggishness, unresponsiveness, and overheating due to background processes—most commonly Windows Update, the Windows Modules Installer, or runaway applications—overloading system resources. Resolving this issue requires stopping malfunctioning services, resetting update caches, updating drivers, and disabling unnecessary startup programs to restore normal hardware performance.
Understanding the Root Causes of High CPU Usage in Windows 7
When your Windows 7 computer suddenly becomes sluggish, stuttering under even the lightest tasks, a quick glance at the Windows Task Manager often reveals a startling reality: the Central Processing Unit (CPU) is running at 100% capacity. This phenomenon means that your processor's execution cores are working at their absolute maximum limit, creating a bottleneck that halts the smooth processing of foreground tasks, system animations, and user inputs.
To effectively apply a 100 cpu usage fix windows 7, you must first understand why this occurs. Unlike modern operating systems with advanced resource-governance features, Windows 7 handles background service scheduling in a way that can occasionally lead to resource loops. The most notorious culprit behind this symptom is the Windows Update client. When update detection fails or becomes stuck in an endless synchronization loop, the svchost.exe process hosting the Windows Update service consumes a full core or multiple threads, dragging overall system performance down.
Other frequent triggers include corrupted system files, malfunctioning device drivers (such as outdated graphics or network adapters), background malware infections, and third-party software background utilities. By diagnosing the exact process responsible through diagnostic tools, you can bypass generic trial-and-error troubleshooting and apply a targeted solution.
Step 1: Identifying the Culprit via Windows Task Manager
Before executing any systemic repairs, you must locate the exact executable file or service draining your processing power.
How to Access and Analyze Task Manager
- Press the Ctrl + Shift + Esc keys simultaneously to open the Windows Task Manager directly. Alternatively, press Ctrl + Alt + Delete and select "Start Task Manager".
- Click on the Processes tab to view a live list of all active applications and background executables.
- Click on the CPU column header twice. This sorts the processes in descending order, placing the application or service consuming the highest percentage of processor power at the very top of the list.
- If you cannot see processes running from other user accounts, click the Show processes from all users button at the bottom of the window.
Common Processes Responsible for High CPU Usage
svchost.exe(Service Host): A generic host process for Windows services. When this consumes excessive CPU, it usually points to Windows Update, Windows Audio, or the Windows Firewall service behaving abnormally.TrustedInstaller.exe(Windows Modules Installer): Associated with installing or configuring Windows updates and optional features.WmiPrvSE.exe(WMI Provider Host): Manages system monitoring data. High usage here indicates that a third-party application or service is constantly polling the operating system for metrics.explorer.exe: The graphical shell handling the taskbar, desktop, and file explorer. High usage here typically signals a corrupted shell extension or icon cache corruption.
Step 2: Fixing the Windows Update CPU Loop (Svchost.exe Issue)
By far the most common cause of sustained 100% CPU usage on Windows 7 is an issue within the Windows Update agent. Because Microsoft ended mainstream support for Windows 7, newer update metadata packages often cause the legacy update client to hang indefinitely while checking for updates, resulting in maxed-out processor utilization.
Method A: Stopping and Resetting the Windows Update Service
- Click the Start Menu, type
services.mscinto the search box, and press Enter. - Scroll down the list of services until you locate Windows Update.
- Right-click Windows Update and select Stop. Leave this window open.
- Open Windows Explorer and navigate to
C:\Windows\SoftwareDistribution. - Open the folder and delete all files and subfolders contained within it. (Note: If Windows states a file is in use, reboot your computer into Safe Mode by pressing F8 during boot, perform the deletion, and reboot normally).
- Return to the
services.mscwindow, right-click Windows Update, and select Start.
Method B: Installing Official Update Client Patches
If clearing the SoftwareDistribution folder does not permanently resolve the issue, your Windows 7 installation lacks the servicing stack updates required to process modern update metadata efficiently. You should manually download and install the Servicing Stack Update (SSU) and the latest Convenience Rollup or subsequent standalone update packages from the Microsoft Update Catalog via a secondary device, transfer them via a USB drive, and install them offline.
Step 3: Managing Malfunctioning System Services and Drivers
If the CPU spike is not related to Windows Update, background system services or outdated hardware drivers are the next most likely suspects.
Troubleshooting the WMI Provider Host (WmiPrvSE.exe)
If WmiPrvSE.exe is consuming your resources, a background service is querying WMI excessively.
- Open the Start Menu, type
eventvwr.mscand press Enter to open Event Viewer. - Navigate to Applications and Services Logs > Microsoft > Windows > WMI-Activity > Operational.
- Look for error events indicating client process IDs. Cross-reference those process IDs in Task Manager to identify the offending software package (frequently third-party antivirus or motherboard monitoring utilities).
Updating or Rolling Back Device Drivers
Outdated or corrupted drivers—particularly for network interface cards (NICs) and graphics chipsets—frequently spawn endless hardware interrupt requests that lock up the CPU.
- Right-click Computer on your desktop or Start Menu and select Manage.
- Click on Device Manager in the left-hand navigation pane.
- Expand categories such as Network adapters or Display adapters.
- Right-click your hardware device and select Update Driver Software, choosing automatic online search, or download the latest stable driver directly from the hardware manufacturer's official website.
Comprehensive Troubleshooting Comparison Matrix
To help you determine the most appropriate remediation path based on your Task Manager analysis, review the comparison matrix below outlining symptom characteristics, root causes, and recommended fixes.
| Offending Process | Typical Root Cause | Urgency Level | Recommended Fix Action |
|---|---|---|---|
svchost.exe |
Windows Update search loop | High | Stop Windows Update service, clear SoftwareDistribution, install servicing stack updates. |
TrustedInstaller.exe |
Stuck background installation | Medium | Allow process to finish (up to 2 hours) or restart Windows Modules Installer service. |
WmiPrvSE.exe |
Third-party software polling WMI | Medium | Identify client process ID via Event Viewer and uninstall/update offending software. |
explorer.exe |
Corrupted shell extension or icon cache | Low | Restart explorer.exe via Task Manager or clear the thumbnail and icon cache database. |
| Unknown Third-Party | Malware infection or bloatware | High | Run an offline malware scan using a reputable security scanner. |
Step 4: Disabling Unnecessary Startup Programs and Background Bloat
Over time, applications install background helper utilities that launch automatically every time Windows 7 boots up. These programs silently consume system resources, contributing to high idle CPU usage.
Using System Configuration (MSConfig)
- Press the Windows Key + R to open the Run dialog box.
- Type
msconfigand press Enter to open the System Configuration utility. - Click on the Startup tab to view all applications configured to launch at system startup.
- Carefully review the list. Uncheck any non-essential programs, startup updaters, or software helpers (such as download managers or printer monitors). Leave essential security software enabled.
- Click Apply and then OK.
- Restart your computer when prompted to apply the configuration changes.
Step 5: Checking for Malware and Cryptojacking Infections
Malicious actors frequently inject cryptojacking scripts or background botnet utilities into compromised Windows 7 systems. Because Windows 7 no longer receives standard security updates from Microsoft, it represents a primary target for unpatched system exploits that silently execute background mining tasks.
If your CPU usage instantly drops the moment you move your mouse or open Task Manager (a common evasion behavior of modern malware), your system may be compromised.
Recommended Remediation Steps:
- Download a portable, reputable malware scanner (such as Malwarebytes Anti-Malware or an offline rescue disk) on a clean computer.
- Transfer the installation file to the affected Windows 7 machine via an isolated USB flash drive.
- Boot your computer into Safe Mode with Networking by restarting and tapping F8 repeatedly before the Windows logo appears.
- Install and run a comprehensive full-system scan to detect and quarantine unauthorized background executables.
Preventive Maintenance and Long-Term System Health
Maintaining a stable Windows 7 environment requires ongoing vigilance regarding system maintenance. Because the operating system is legacy software, you must exercise caution regarding which applications you install. Avoid running modern web browsers with dozens of open tabs simultaneously, as unoptimized web scripts can easily exhaust older multi-core or dual-core processors.
Regularly clean out temporary system files using the built-in Disk Cleanup utility, ensure your third-party software remains updated to versions compatible with Windows 7, and monitor thermal paste degradation on your CPU heat sink. Physical dust buildup inside laptop or desktop cooling fans forces processors to throttle performance, which can manifest as persistent high resource utilization.
Frequently Asked Questions
Why does svchost.exe cause 100% CPU usage specifically on Windows 7?
The Windows 7 update client relies on an outdated local database comparison mechanism to check for missing security patches. Because the volume of updates released over the lifespan of Windows 7 is massive, the update agent encounters memory allocation bottlenecks and enters a perpetual search loop, keeping CPU utilization locked at 100%.
Is it safe to disable the Windows Update service permanently?
While stopping the Windows Update service temporarily breaks the CPU loop, leaving it disabled permanently leaves your system vulnerable to unpatched security exploits. It is strongly recommended to install the official Microsoft Servicing Stack Update and Convenience Rollup to fix the underlying update mechanism rather than leaving updates disabled indefinitely.
How can I tell if my high CPU usage is caused by hardware failure?
If Task Manager does not show any single process consuming high percentages of CPU power, yet your processor frequency remains locked at minimum speeds or temperatures exceed safe operating limits, the issue may stem from thermal throttling due to a failing cooling fan, dried thermal paste, or hardware power delivery degradation on the motherboard.
Does Windows 7 still receive security updates in 2026?
No. Standard and extended support for Windows 7 concluded on January 14, 2020. Extended Security Updates (ESU) for corporate environments also concluded. Running Windows 7 on devices connected to the internet carries inherent cybersecurity risks, and migration to a modern, actively supported operating system is strongly recommended.
What should I do if none of these fixes work?
If you have cleared the update cache, updated all device drivers, removed startup bloatware, and scanned for malware without success, the most reliable final solution is to back up your personal files and perform a clean reinstallation of Windows 7, or upgrade the underlying hardware to support a modern operating system.