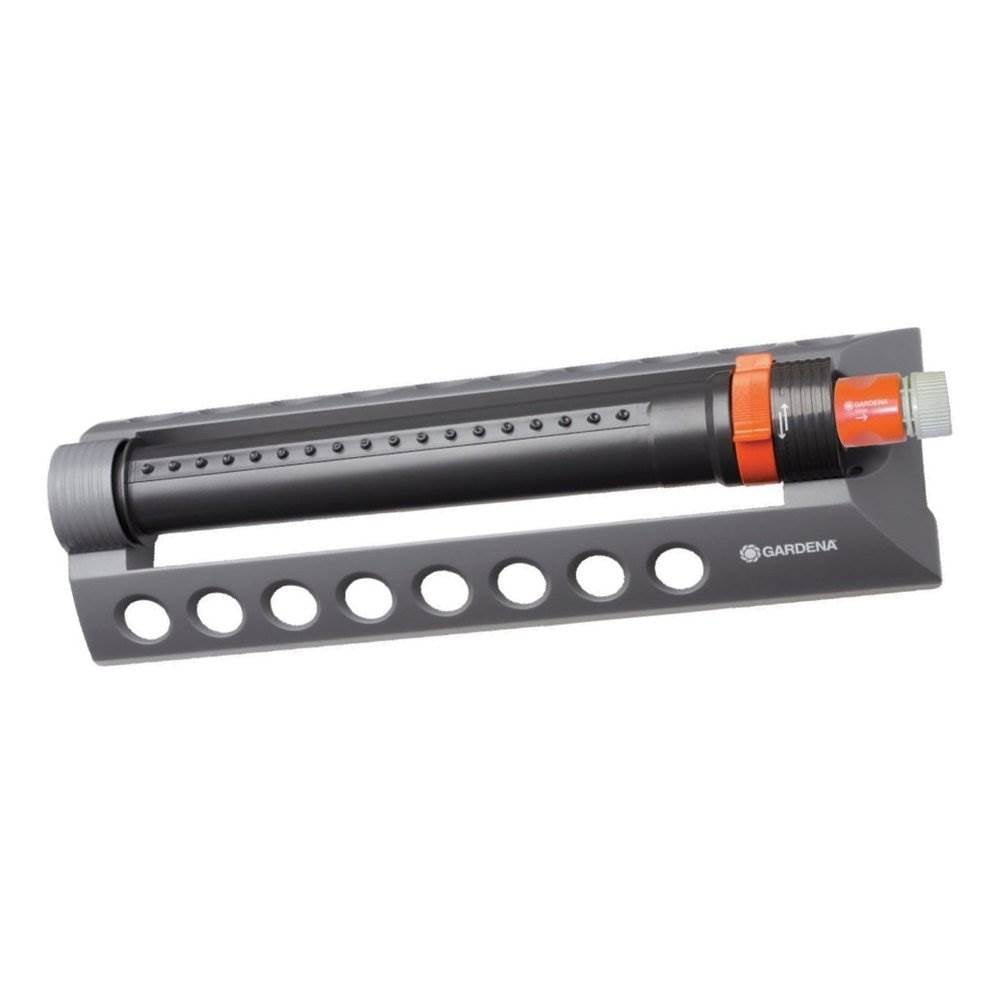
Adjusting an oscillating sprinkler involves manipulating the sliding range tabs to control the swing of the spray tube, rotating the flow control knob to manage water volume, and potentially narrowing or widening the spray pattern via nozzle adjustment dials. These adjustments allow you to tailor the watering area to your lawn's specific dimensions.
An oscillating sprinkler is a staple of residential lawn maintenance, valued for its ability to cover large, rectangular areas with a gentle, rain-like spray. However, simply connecting the hose and turning on the spigot is rarely enough to achieve uniform hydration. Improperly adjusted sprinklers lead to wasted water on sidewalks, underwatered "dead zones," and potential fungal issues from oversaturation. In 2026, as water conservation remains a priority for homeowners, understanding the mechanics of your watering equipment is essential for maintaining a healthy landscape while minimizing environmental impact.
Understanding the Anatomy of an Oscillating Sprinkler
Before making adjustments, it is vital to identify the primary components that dictate how an oscillating sprinkler functions. While designs vary between manufacturers, most models share a foundational set of mechanical parts.
The Spray Tube and Nozzles
The spray tube is the long bar—usually made of aluminum or UV-resistant plastic—that contains a series of precision-drilled nozzles. In higher-end models, these nozzles are made of flexible rubber, which allows for easier cleaning of mineral deposits. The number of nozzles typically ranges from 15 to 20. The curvature of this tube determines the maximum width of the spray, while the internal diameter affects the velocity of the water as it exits.
The Motor and Gear Train
The "oscillation" occurs because of a small internal water turbine or cam-drive motor. As water flows through the sprinkler, it spins a turbine connected to a series of gears. These gears translate the high-speed rotation of the turbine into a slow, back-and-forth sweeping motion. Modern 2026 models often feature "turbo-drive" motors, which are sealed to prevent sand and grit from entering the gear mechanism, ensuring a smoother transition at the ends of each stroke.
Range Control Collars (Sliding Tabs)
Located near the motor housing, these two sliding tabs are the most critical adjustment points. They define the "stop" points for the spray tube’s movement. By sliding these tabs closer together or further apart, you determine whether the sprinkler waters a full 180-degree arc, a narrow strip in the center, or a dedicated area to the far left or right.
Flow Control and Width Adjustment
Premium sprinklers include a flow control knob (usually a dial on the motor housing) and width adjustment levers. The flow control acts as a localized pressure regulator, allowing you to reduce the height and distance of the spray without returning to the faucet. Width adjustment levers typically tilt the outermost nozzles inward or outward, changing the footprint from a wide rectangle to a narrow strip.
Step-by-Step Guide to Adjusting the Range
The range adjustment determines how far the water travels forward and backward along the length of the "rectangle" being watered.
- Initial Positioning: Place the sprinkler in the center of the area you wish to water. Ensure the base is level; an uneven base will cause the gear mechanism to work harder on one side of the stroke, leading to premature wear.
- Setting the Left and Right Limits: Look for the sliding tabs on the neck of the sprinkler. Most models have markings or icons indicating "Full," "Partial," or "Center."
- To water a full area, move both tabs to their outermost positions.
- To water only one side (e.g., up to a fence line but not over it), move one tab to the center position and leave the other at the outer edge.
- To water a narrow center strip, move both tabs toward the middle.
- The "Dry Run" Test: It is a common mistake to adjust while the water is at full pressure, leading to a soaked operator. Instead, turn the water on just slightly—enough to see the tube move. Observe the "flip" point. If the water hits the house or the driveway, nudge the corresponding tab inward.
- Refining under Full Pressure: Once the limits are roughly set, turn the water to your desired operating pressure. High pressure can cause the spray tube to "over-travel" slightly due to momentum. Fine-tune the tabs by 1/8th of an inch until the coverage is precise.
Adjusting Spray Width and Density
While the range tabs control the "length" of your watering rectangle, the width and density are controlled by the nozzle configuration and water volume.
Utilizing Width Adjusters
Not every oscillating sprinkler has width adjustment, but if yours does, it likely features two levers or dials that control the angle of the spray jets. When these levers are pushed "out," the nozzles fan out to their maximum width. When pushed "in," the nozzles are angled more vertically, creating a narrower, more concentrated stream. This is ideal for watering side yards or narrow strips of turf between a driveway and a flower bed.
Managing Flow and Pressure
If your sprinkler is overshooting the lawn even with the tabs adjusted, or if the water is atomizing into a fine mist (which evaporates quickly), you need to adjust the flow.
- The Flow Control Knob: If your model has one, turn it clockwise to reduce the pressure. This will shorten the height of the water "fan" and reduce the total square footage covered.
- The Faucet Connection: If there is no dial on the sprinkler, you must regulate the pressure at the spigot. A common error is turning the faucet to "max" when only "half" is required.
The Role of Water Pressure (PSI) and Volume (GPM)
Successful adjustment is heavily dependent on your home's plumbing. Most oscillating sprinklers are designed to operate optimally at 40 to 60 PSI (pounds per square inch).
| Feature | Low Pressure (Under 30 PSI) | Optimal Pressure (40-60 PSI) | High Pressure (Over 80 PSI) |
|---|---|---|---|
| Movement | May stall or move jerkily | Smooth, consistent sweep | Rapid movement, potential gear skip |
| Coverage Area | Significantly reduced | Matches manufacturer specs | Increased, but prone to misting |
| Droplet Size | Large, heavy droplets | Uniform, rain-like droplets | Fine mist, high wind-drift |
| Motor Longevity | Low strain | Ideal operating conditions | High strain/potential seal failure |
If you find that your sprinkler refuses to "flip" at the end of its stroke, it is often a sign of insufficient pressure. The internal gears require a specific threshold of force to overcome the resistance of the trip-hammer mechanism. Conversely, if the sprinkler is leaking at the hose connection despite a fresh washer, your home's pressure may be too high, necessitating a pressure regulator.
Common Adjustment Mistakes to Avoid
- Ignoring the "Nozzle Plug": Many homeowners struggle with an uneven spray pattern and try to fix it by moving the tabs. Often, the issue is simply a clogged nozzle. Most oscillating sprinklers in 2026 come with a small plastic needle tool threaded into the end of the spray tube. Use this to clear mineral scale.
- Adjusting While the Gear is Engaged: While most modern sprinklers allow for adjustment during operation, forcing the tabs against the motion of the motor can occasionally strip plastic gears. It is safer to pause the water or wait for the tube to move away from the tab you are adjusting.
- Placement on Slopes: If you place an oscillating sprinkler on a significant slope without leveling the base, the gravity acting on the spray tube can cause it to "hang" at the top of its arc or move too quickly on the downward arc, resulting in uneven watering.
Maintenance for Precise Calibration
To keep your adjustments accurate over several seasons, basic maintenance is required. In 2026, the use of hard water remains a challenge for irrigation equipment. Calcium and magnesium deposits can build up inside the spray tube, altering the trajectory of the water.
- Seasonal Flushing: Periodically remove the end cap of the spray tube and run water through the system. This flushes out any sand or debris that has bypassed the hose filter.
- Lubrication: Do not use heavy greases on the external parts of the sprinkler, as these attract dirt and grit. If the range tabs become difficult to slide, a small amount of silicone-based spray is usually sufficient.
- Filter Screen Cleaning: The hose attachment point contains a small wire mesh screen. If this is clogged with sediment, the pressure reaching the motor will drop, rendering your range adjustments ineffective.
Environmental and Turf Health Considerations
The goal of adjusting your sprinkler is not just to "wet the grass," but to provide deep, even infiltration. The Environmental Protection Agency (EPA) WaterSense program emphasizes that improper irrigation leads to massive water waste.
- Evaporation Limits: Adjust your flow and width so that the water stays in large droplets. If your adjustments result in a fine mist, much of that water is lost to the air before it ever hits the soil.
- Runoff Prevention: Adjust the range tabs so that the spray does not overlap onto pavement. Water hitting concrete carries fertilizers and pesticides into storm drains, contributing to water pollution.
- Soil Saturation: Use a "tuna can test" to verify your adjustments. Place several empty cans across the lawn and run the sprinkler for 20 minutes. If the cans have vastly different amounts of water, your sprinkler needs further adjustment of the width or range collars to achieve uniformity.
Troubleshooting FAQ
Why does my sprinkler get stuck on one side of the arc? This is usually caused by low water pressure or a grit blockage in the gear train. First, check your hose for kinks. If the pressure is fine, try manually assisting the tube through its rotation once or twice to clear any minor internal obstructions. If it continues to stall, the internal spring in the trip mechanism may be worn.
How do I adjust for a circular lawn with an oscillating sprinkler? Oscillating sprinklers are fundamentally designed for rectangles. To water a circular or irregular area, you must set the range tabs to a narrow "Center" setting and move the sprinkler more frequently, or consider using an impact or rotary sprinkler instead.
Can I use an oscillating sprinkler on a timer? Yes, but you must calibrate the sprinkler adjustments first. Once the range and width are set, the mechanical settings will remain constant even when the water is toggled by an automatic timer. Ensure your timer does not significantly restrict water flow/pressure.
Why is the spray pattern crooked? A crooked or "leaning" spray pattern is almost always the result of clogged nozzles. Use a soft brush or the included cleaning pin to clear the holes. If the tube itself is bent (common with aluminum tubes), it may be impossible to achieve a straight spray pattern, and the unit should be replaced.
How does wind affect my adjustments? Oscillating sprinklers have a high "hang time," meaning the water stays in the air for a long period. In windy conditions, your carefully adjusted range will shift. It is always best to water in the early morning hours when winds are generally at their lowest.
Final Recommendation
To achieve the best results, start with the range tabs set to a "Narrow" pattern and slowly expand them until the water reaches the edges of your desired zone. Always perform a five-minute test run to observe the full cycle of the motor before leaving the sprinkler unattended. Regular cleaning of the inlet filter and nozzles will ensure that the adjustments you make today remain effective throughout the 2026 growing season. By taking ten minutes to properly calibrate your equipment, you save thousands of gallons of water and ensure a more resilient, healthy lawn.