Applying polygel to natural nails, a process known as a natural nail overlay, provides a protective barrier that combines the durability of acrylic with the flexibility of gel. This hybrid system involves preparing the nail plate, applying a base coat, and shaping the polygel using a slip solution before curing under an LED lamp for a long-lasting, chip-resistant finish.
Polygel has revolutionized the professional and DIY nail industry by offering a user-friendly alternative to traditional enhancement systems. Unlike acrylic, which requires a precise liquid-to-powder ratio and hardens via a chemical reaction once mixed, polygel remains malleable until it is exposed to ultraviolet (UV) or light-emitting diode (LED) light. For those focusing on natural nails rather than extensions, polygel acts as a structural reinforcement, allowing the natural nail to grow without the frequent breakage associated with standard gel polish.
Understanding Polygel Technology in 2026
In 2026, polygel formulations—often referred to in technical circles as "acrygel" or "hybrid gel"—have reached a pinnacle of stability and ease of use. The material is essentially a pre-mixed paste consisting of acrylic polymers suspended in a gel oligomer. This high-viscosity consistency is the defining feature of the product; it does not "self-level" or run into the cuticles, giving the user total control over the application time.
The primary benefit of a polygel overlay on natural nails is the elimination of the "monomer smell" typically found in salons. Since the product does not use high-evaporation liquids for polymerization, it is an ideal choice for home environments and sensitive individuals. Furthermore, 2026 formulations are engineered to be lighter than both hard gel and acrylic, reducing the "heavy" sensation on the nail bed while maintaining high impact resistance.
Required Tools and Professional Equipment
Before beginning the application, it is essential to assemble the correct kit. Using mismatched products can lead to improper curing or premature lifting.
- Polygel Tube: Available in clear, various shades of nude, and cover pinks.
- Slip Solution: A specialized liquid used to lubricate the brush. While 70% to 90% isopropyl alcohol is a common substitute, proprietary slip solutions often contain moisturizing agents to prevent the brush bristles from degrading.
- Dual-Ended Tool: A spatula on one end for slicing the product and a high-quality synthetic brush on the other for shaping.
- LED/UV Lamp: A lamp with at least 48 watts is recommended for 2026 standards to ensure a deep cure through the dense pigment of the gel.
- Preparation Files: A 180-grit file for the natural nail and a 150-grit file for shaping the cured product.
- Chemical Bonders: A pH dehydrator and a non-acid primer or "protein bond" to ensure chemical adhesion.
- Base and Top Coat: Specifically formulated for soak-off or hard gel systems.
The Science of Nail Preparation
The longevity of a polygel overlay is 90% dependent on the quality of the preparation. Most "lifting" issues (where the product separates from the nail) occur because of invisible cuticles or oils left on the nail plate.
Mechanical Preparation
Begin by pushing back the eponychium (the living skin at the base of the nail) and removing the true cuticle—the thin layer of dead skin cells attached to the nail plate. Use a 180-grit buffer or file to gently remove the "shine" from the natural nail. This is not about thinning the nail, but about creating microscopic grooves (mechanical "tooth") that allow the gel to anchor itself.
Chemical Dehydration and Priming
Once the dust is removed with a lint-free wipe and alcohol, apply a pH dehydrator. This temporarily removes moisture and oils from the top layers of the nail plate. Follow this with a primer. In 2026, most technicians prefer non-acid primers that act like double-sided tape, creating a sticky layer for the base coat to grab onto.
Step-by-Step Polygel Overlay Application
When applying polygel to natural nails, the goal is to create a thin, reinforced layer that mimics the natural curve of the nail.
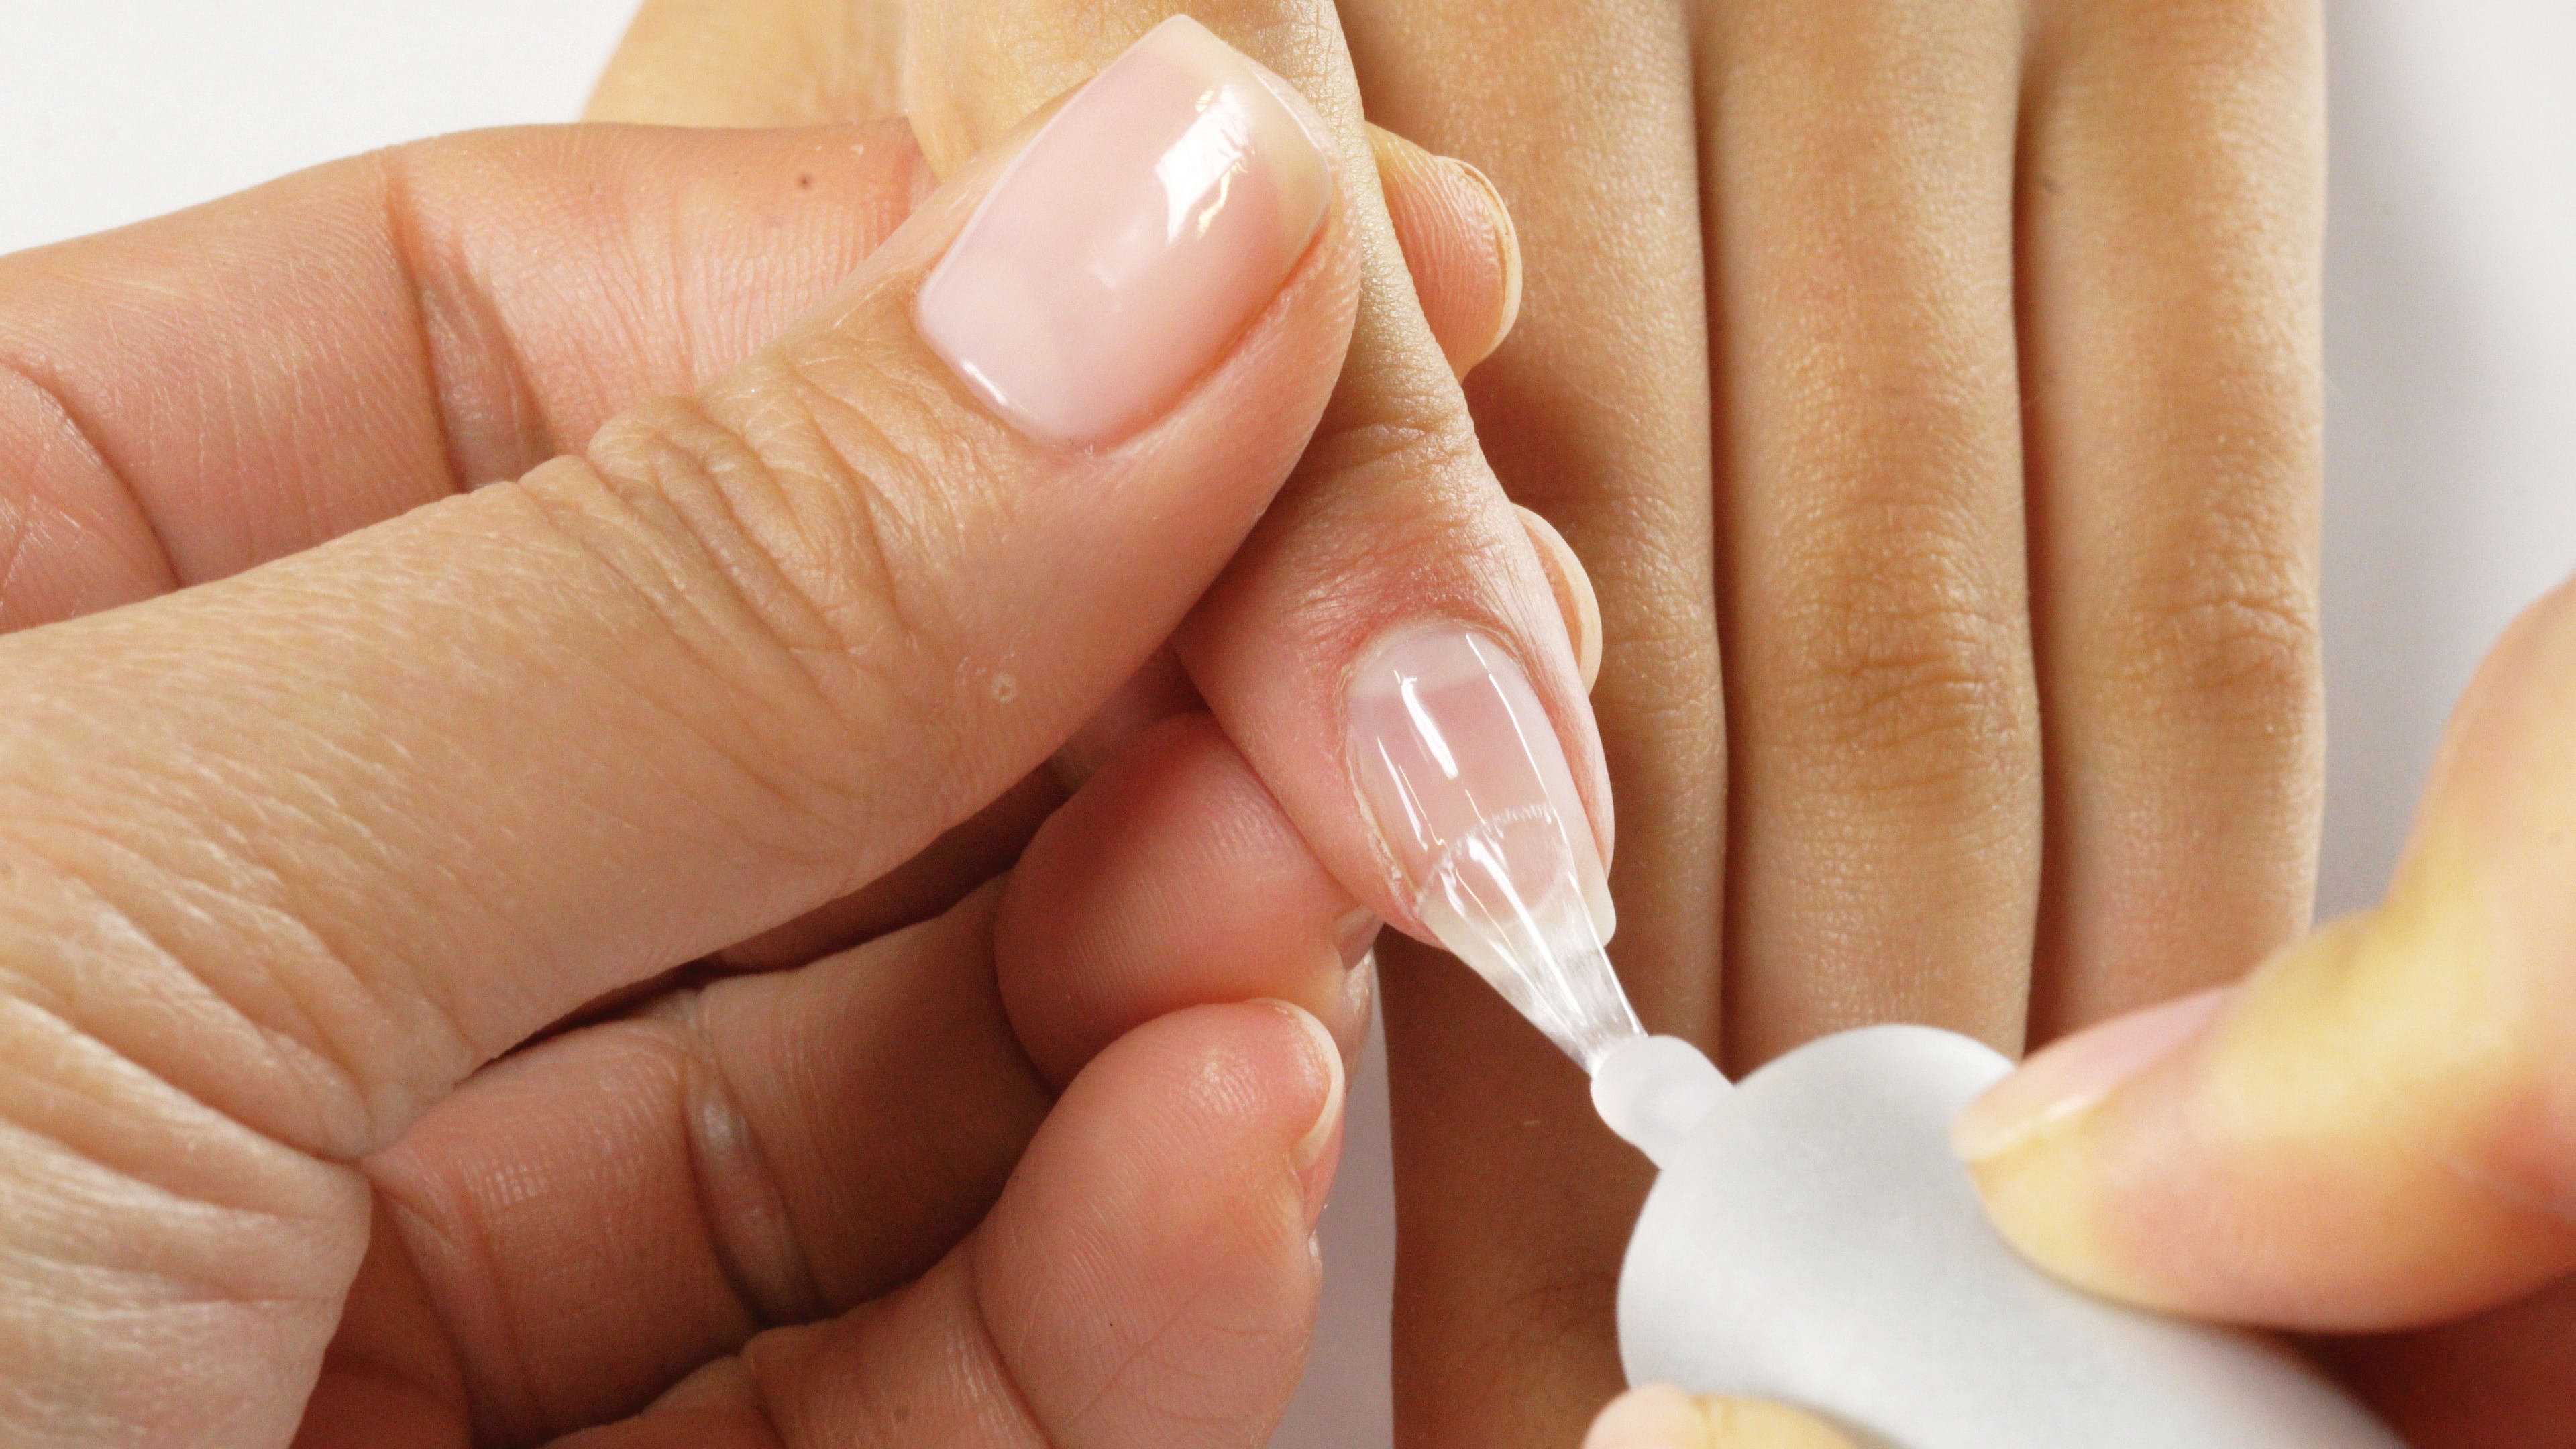
- Apply Base Coat: Brush on a thin, even layer of base coat. It is vital to "cap the free edge" by running the brush along the tip of the nail. Cure this for 30 to 60 seconds according to the manufacturer’s instructions.
- Dispense the Polygel: Squeeze a small, pea-sized bead of polygel from the tube. Use the spatula end of your tool to slice the bead and place it in the center of the nail plate.
- Saturate the Brush: Dip your brush into the slip solution. Wipe any excess liquid onto a lint-free paper towel. The brush should be damp, not dripping. Too much slip solution can break down the gel’s chemistry and cause lifting.
- Pat and Smooth: Gently pat the bead of polygel toward the cuticle, leaving a tiny gap (about the thickness of a hair) between the product and the skin. Then, pull the product toward the free edge and the side walls.
- Build the Apex: Even on natural nails, a slight "apex" or high point is needed over the stress area (where the nail usually breaks). Ensure the product is thinnest at the cuticle and the free edge, and slightly thicker in the middle.
- The Cure: Place the hand in the LED lamp. If you experience a "heat spike" (a burning sensation caused by rapid polymerization), remove your hand for a few seconds and then re-insert it. Most modern 2026 lamps have a "low heat mode" specifically for this purpose. Cure for a full 60 to 90 seconds.
Refining and Shaping the Overlay
Once cured, the polygel will have a "tacky" inhibition layer on the surface. Wipe this off with a high-percentage isopropyl alcohol. At this stage, the nail may look slightly bulky or uneven; this is normal.
Use a 150-grit or 180-grit file to refine the shape. Focus on the side walls to ensure they are straight and the cuticle area to ensure the product blends seamlessly into the natural nail. A seamless blend at the cuticle is the best defense against snagging in hair or clothing, which leads to lifting. After filing, buff the surface with a fine-grit buffer to remove any deep scratches before applying the top coat.
Comparative Analysis: Polygel vs. Other Enhancement Systems
Choosing the right system depends on your nail goals and lifestyle. The following table compares polygel to traditional alternatives as of 2026.
| Feature | Polygel Overlay | Hard Gel | Acrylic (L&P) | Gel Polish (Shellac) |
|---|---|---|---|---|
| Viscosity | Putty-like (Stays put) | Honey-like (Self-levels) | Liquid/Powder mix | Liquid |
| Odor | None | None | Strong | Low |
| Flexibility | Medium-High | High | Low (Rigid) | High |
| Durability | 3–4 Weeks | 3–4 Weeks | 4+ Weeks | 2 Weeks |
| Curing Method | LED/UV Light | LED/UV Light | Air Dry | LED/UV Light |
| Removal | File-off/Soak-off | File-off only | Soak-off | Soak-off |
Troubleshooting Common Issues
Even with professional tools, beginners often encounter specific hurdles when applying polygel to natural nails.
Lifting at the Cuticle
This is almost always caused by the product touching the skin or the presence of "invisible cuticle" on the nail plate. If the polygel cures onto the skin, it will inevitably peel as the skin moves and produces oils, creating a gap for water and bacteria to enter.
Bubbles in the Gel
Bubbles occur when the brush is "whipped" into the product or if too much slip solution is worked into the bead. Use a "patting" motion rather than a "stirring" motion to move the gel. If you see a bubble before curing, use the spatula to gently press it out.
Incomplete Curing
If the gel feels soft or "chewy" after the recommended cure time, it may be too thick or your lamp may be losing intensity. Apply polygel in thinner layers if you are using a highly opaque or dark-colored shade, as the pigments can block the UV rays from reaching the bottom of the layer.
Maintenance and Safe Removal
One of the greatest advantages of a polygel overlay is that it does not need to be fully removed every time.
Infilling: As your natural nail grows, a gap will appear at the cuticle. Every 2 to 3 weeks, you can "fill" this gap. File down the existing polygel to about 50% thickness, remove any lifted areas, and repeat the preparation and application process only on the new growth and over the thinned-out old product.
Safe Removal: To remove polygel without damaging the natural nail, it is best to file away the majority of the product using a 100/150 grit file or an e-file (if trained). Once a very thin layer remains, you can soak the nails in pure acetone for 10 to 15 minutes. The polygel will soften, allowing you to gently scrape it away with an orange wood stick. Never "pop" or peel the gel off, as this rips away the top layers of your natural keratin, leaving the nails thin and painful.
FAQs
Can I use polygel without a base coat?
No. Polygel is designed to bond to a cured base coat, not the natural nail directly. Skipping the base coat significantly increases the risk of the enhancement lifting within days. The base coat acts as the vital adhesive layer between the hard polygel and the flexible natural nail.
How do I stop the polygel from sticking to my brush?
The brush must be kept moist with slip solution or 70% isopropyl alcohol. If the product begins to "string" or follow the brush, it means the bristles are too dry. However, ensure you blot the brush on a paper towel after dipping it so that you aren't introducing excess liquid into the gel.
Is polygel better for your nails than acrylic?
Polygel is generally considered "better" for natural nails because it requires less aggressive filing during the prep phase and does not involve harsh chemicals like acid primers that are often used with older acrylic systems. Additionally, the flexibility of polygel allows it to bend with the natural nail, whereas rigid acrylic can cause the natural nail to snap under pressure.
Can I use a regular nail polish top coat over polygel?
While you can use regular polish, it will not provide the same strength or shine as a UV-cured gel top coat. If you choose to use regular polish, you must ensure the polygel is perfectly filed and buffed first, as regular polish is much thinner and will show every imperfection in the filing.
Why does my polygel feel sticky even after curing?
This is the "inhibition layer" or "tacky layer," which is a normal byproduct of the curing process where oxygen prevents the very top surface of the gel from hardening. Simply wipe it away with a lint-free wipe and alcohol to reveal the hard, cured surface underneath.
Practical Recommendation
For the best results when applying polygel to natural nails, focus on the "less is more" philosophy. It is easier to add a second thin layer of polygel than it is to file away a massive, uneven application. Invest in a high-quality, 48-watt LED lamp and ensure your prep work is meticulous. If you are a beginner, start with a clear or translucent pink gel, as these cure more easily and make it easier to see the boundary between the product and your natural skin.