Performing a 3D scan with an Android phone involves using specialized mobile applications that leverage built-in camera hardware, photogrammetry, or specialized depth sensors (like ToF sensors on supported devices) to capture physical objects or environments and convert them into digital three-dimensional models.
Introduction to Mobile 3D Scanning on Android
Capturing physical objects and spaces in three dimensions has traditionally required expensive hardware, dedicated LiDAR scanners, or complex studio setups. Modern advancements in mobile computing and sensor technology have shifted this capability into the palm of your hand. Executing a 3D scan with an Android phone is increasingly accessible, whether you are an engineer prototyping a replacement part, an interior designer mapping a room, a game developer asset-gathering, or an e-commerce seller displaying products.
However, achieving professional-grade results requires understanding the underlying technologies, choosing the correct software application, and mastering capture techniques. Because Android encompasses a vast ecosystem of hardware manufacturers—from entry-level devices to high-end flagships with advanced camera arrays and Time-of-Flight (ToF) sensors—performance, accuracy, and method availability vary significantly depending on the specific phone model you use.
Understanding the Underlying Technologies
Before launching an application and pointing your camera at an object, it is essential to understand how an Android smartphone captures three-dimensional data. Mobile 3D scanning generally relies on two primary methodologies: photogrammetry and active depth sensing (LiDAR or ToF).
Photogrammetry: The Principle of Overlapping Photos
Photogrammetry is a technique that calculates the positions of points in 3D space by analyzing overlapping 2D photographs. When you walk around an object and take dozens or hundreds of pictures from various angles, algorithms analyze visual features (such as edges, textures, and color variations) to reconstruct the geometry.
- Advantages: It works on almost any Android phone with a decent camera, yields high-resolution color textures, and is exceptional for capturing detailed surfaces.
- Limitations: It struggles with reflective, transparent, or uniformly colored objects that lack distinct visual features, and it requires significant processing power (often offloaded to cloud servers).
ToF Sensors and LiDAR: Active Depth Measurement
Some high-end Android smartphones feature Time-of-Flight (ToF) sensors or LiDAR (Light Detection and Ranging) modules. These sensors emit invisible infrared light pulses and measure the time it takes for the light to bounce back from the subject.
- Advantages: They provide real-time depth maps, excel at spatial mapping and room scanning, and reduce the processing burden required to understand scale and distance.
- Limitations: Hardware availability is restricted to specific flagship devices, and range or resolution is often lower than what dedicated professional scanning equipment provides.
Hardware Prerequisites and Device Preparation
Not all Android phones are created equal when it comes to 3D scanning. To achieve optimal results, you must evaluate your device's capabilities and prepare your environment before scanning.
Evaluating Your Android Device
Review your phone's specifications to determine its suitability for different scanning methods:
- Camera Resolution: A high-megapixel sensor with a clean, sharp lens is vital for photogrammetry. Smudges on the camera glass will severely degrade scan quality.
- Processor (SoC) and RAM: Processing 3D data locally requires a powerful chipset (such as recent Qualcomm Snapdragon or Google Tensor processors) and at least 6GB to 8GB of RAM to prevent app crashes during mesh generation.
- Sensors: Check if your device includes a ToF sensor or depth camera, which aids applications focused on room layout and indoor mapping.
Environmental Preparation
Even the best smartphone camera will fail if the physical environment is unsuited for data capture.
- Lighting: Avoid harsh, direct sunlight or deep shadows. Diffuse, even lighting—such as overcast daylight or multiple softbox lights indoors—prevents blown-out highlights and obscured geometry.
- Background: Position your object against a neutral, non-reflective, matte background. Busy backgrounds confuse tracking algorithms during continuous scanning.
- Surface Stability: If you are scanning a small object, place it on a stable turntable or ensure you can walk completely around it without obstruction.
Step-by-Step Guide: Capturing Your First 3D Scan
While various apps feature unique interfaces, the fundamental workflow for scanning an object with an Android phone remains consistent across most platforms.
Step 1: Choose and Install a Compatible App
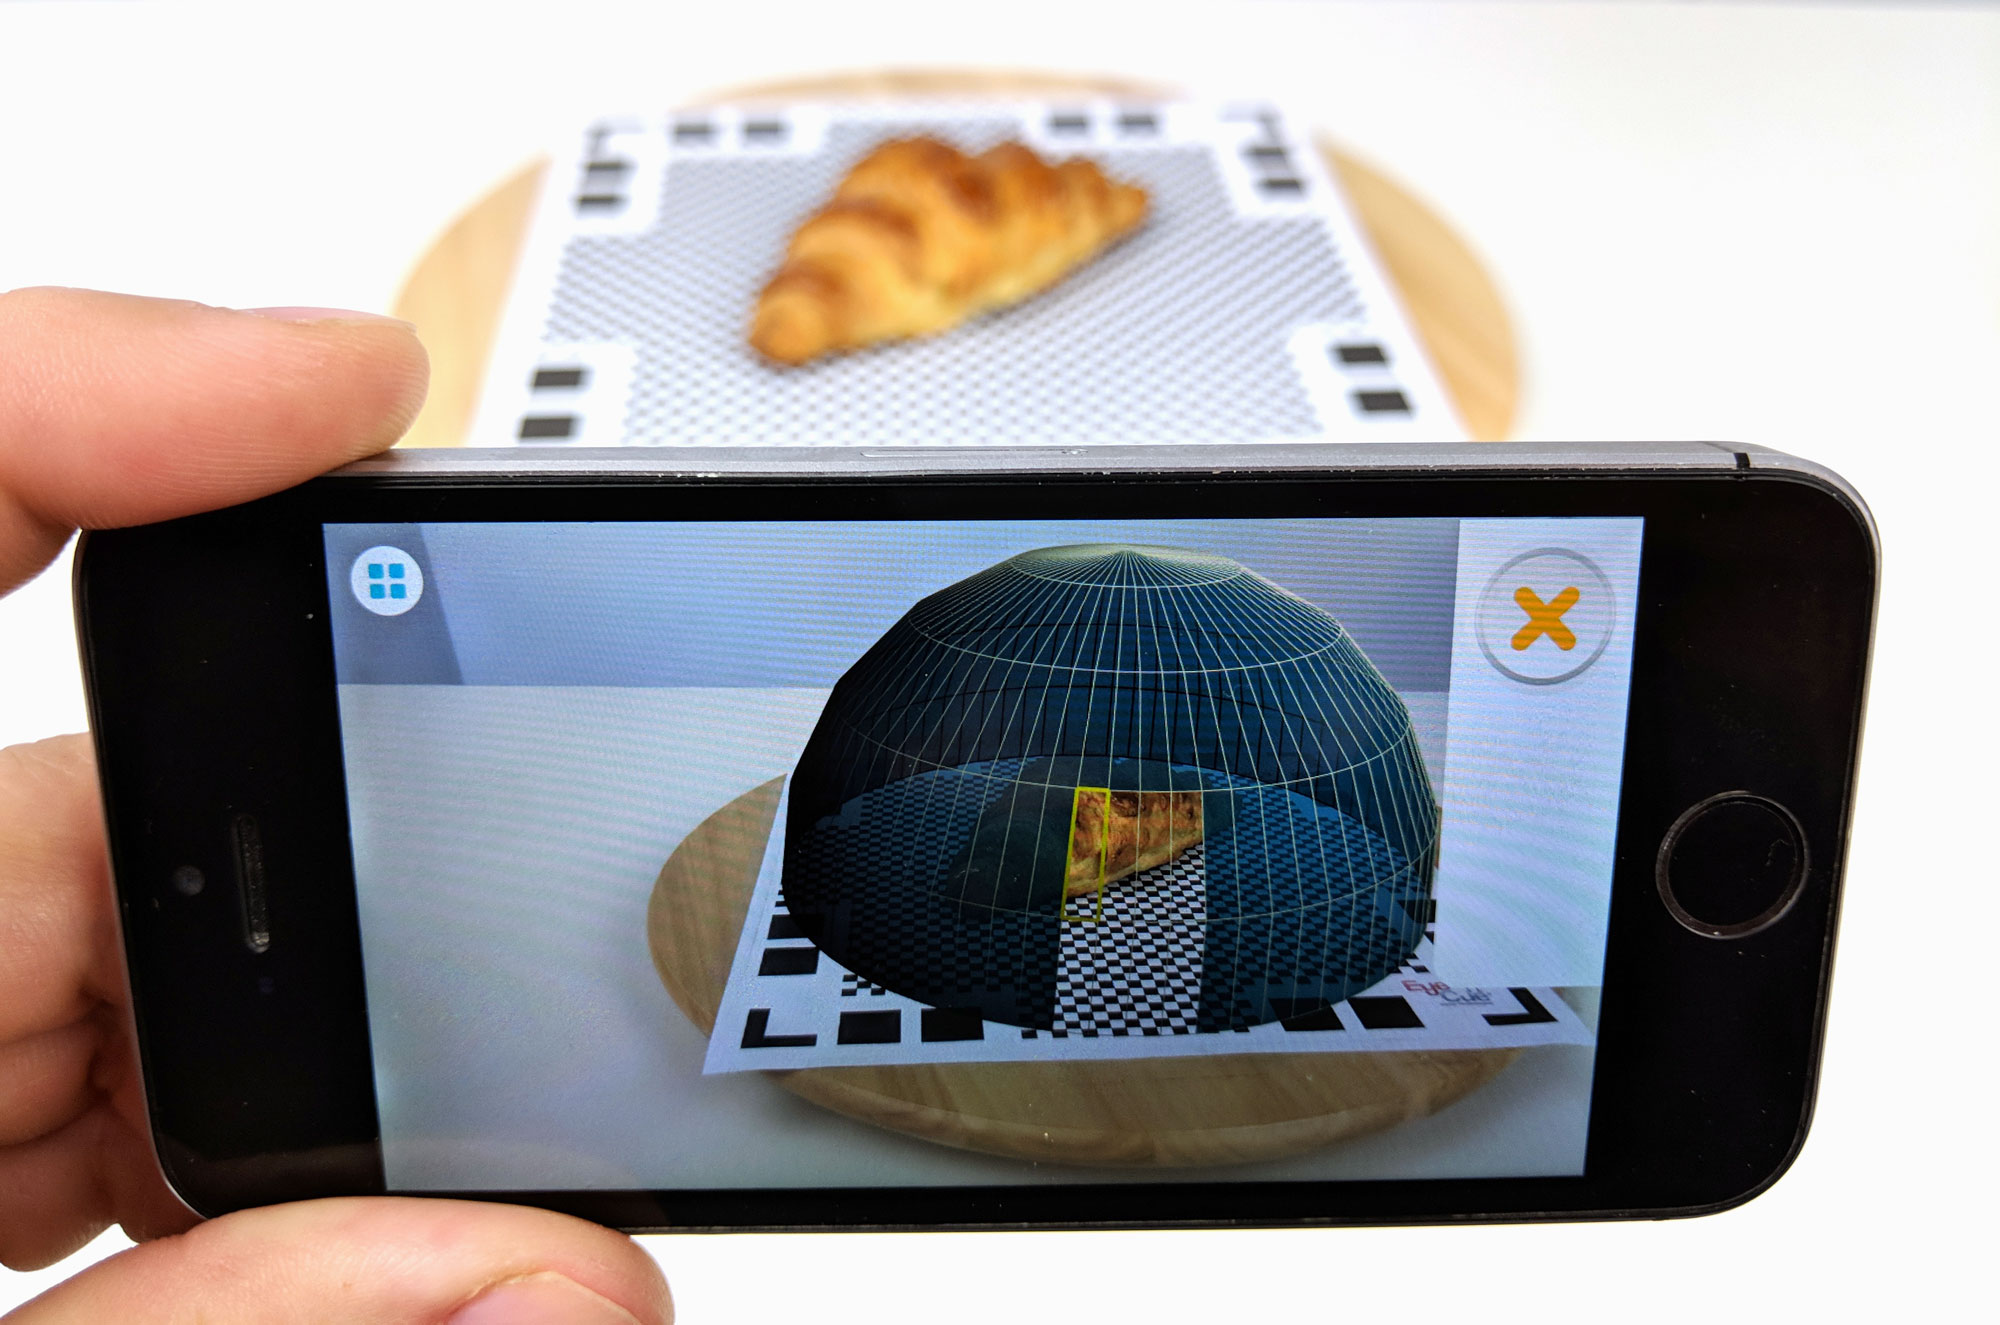
Select a reputable 3D scanning application from the Google Play Store based on your goals. Popular options include Qlone, RealityScan (by Epic Games), Widar, or Canvas (primarily for room scanning). Install the app and grant necessary camera and storage permissions.
Step 2: Frame and Initialize the Subject
Launch the app and select the scanning mode (object scan vs. room/space scan). Center your subject in the viewfinder. Many apps provide a dome or wireframe overlay to guide your positioning. Ensure the object fills a significant portion of the frame without cutting off edges.
Step 3: Execute the Capture Path
Move steadily around the object in a smooth, continuous motion.
- For small objects: Keep the phone steady and move around the object at a consistent distance. Take a low-angle pass, a mid-angle pass, and a top-down pass to capture hidden areas like the top of a rim or underside bevels.
- For rooms: Pan slowly along walls, floorboards, and ceilings, ensuring consecutive frames overlap by at least 50% so the software can stitch the geometry together.
Step 4: Process and Refine the Mesh
Once data capture is complete, initiate the processing phase. Depending on the app, this happens either on-device or via cloud rendering. Review the resulting 3D mesh for holes, artifacts, or warped geometry. Use built-in editing tools to crop away unwanted background floors, smooth rough edges, and fill small holes.
Step 5: Export in Standard Formats
Export your finished model in a format compatible with your downstream workflow. Common formats include:
- OBJ: Retains color textures and geometry, widely supported across 3D software.
- GLTF / GLB: Ideal for web viewing, augmented reality (AR), and e-commerce integration.
- STL: Best for 3D printing, as it focuses strictly on geometry and surface topology without color data.
| Feature / Method | Photogrammetry (Multi-Photo) | ToF / LiDAR Scanning (Real-Time) |
|---|---|---|
| Primary Hardware Need | High-resolution camera lens | Dedicated ToF/LiDAR sensor |
| Best Used For | Detailed objects, artifacts, textures | Rooms, furniture, spatial layout |
| Texture Quality | High-fidelity photorealistic color | Lower resolution, functional color |
| Processing Time | Slower (minutes to hours) | Near instantaneous |
| Device Compatibility | Broad (most Android phones) | Narrow (flagship devices only) |
Common Mistakes and Troubleshooting
Users attempting to scan with an Android phone frequently encounter specific obstacles. Recognizing these issues helps streamline the workflow.
- Motion Blur: Moving the phone too quickly introduces blur, destroying the sharp visual features photogrammetry relies on. Move deliberately and maintain a stable grip.
- Reflective and Transparent Surfaces: Glass, polished metal, and glossy plastic bounce light unpredictably, creating holes in the 3D model. Apply a temporary matte spray (such as foot powder or specialized scanning spray) to shiny surfaces before scanning.
- Inconsistent Lighting: Changes in lighting mid-scan cause stitching errors and color patches. Keep lighting constant throughout the entire capture process.
- Drift and Tracking Loss: During spatial scanning, rapid movements can cause the app to lose its tracking position, resulting in a misaligned room layout. Re-orient the camera toward a previously scanned, feature-rich anchor point to recover tracking.
Frequently Asked Questions
Can any Android phone perform a 3D scan?
Most Android phones can perform photogrammetry-based 3D scanning because it relies on standard 2D camera imagery and software processing. However, real-time depth-sensing apps require specific hardware, such as a built-in Time-of-Flight (ToF) or LiDAR sensor, which is typically found on flagship models.
What is the best app for 3D scanning on Android?
The "best" app depends on your objective. RealityScan is exceptional for free, high-detail object capture using photogrammetry. Qlone offers an intuitive augmented reality dome system for beginners. For interior room measurements and floor plans, apps like Canvas or specialized spatial mapping tools are more effective.
Can I 3D print a model scanned with my phone?
Yes. Once you process the scan and export it as an STL or OBJ file, you can import the mesh into slicing software (such as PrusaSlicer or Cura) to prepare it for 3D printing. Ensure you check the mesh for non-manifold edges and close any open holes before sending it to the printer.
Why does my scanned 3D model look warped or distorted?
Distortion usually occurs due to insufficient overlap between consecutive photos, erratic camera movement, or moving shadows. Ensure you capture every angle with steady movements, overlapping each frame by at least 50%, and maintain stable, even lighting.
Do I need internet access to process a 3D scan?
It depends on the application. Some apps process models locally on your phone’s processor, requiring no internet connection but demanding high hardware specs. Other apps upload your photos to cloud servers for intensive photogrammetry calculations, which requires an active internet connection.
Conclusion and Next Actions
Performing a 3D scan with an Android phone bridges the gap between physical objects and digital workflows without requiring expensive hardware investments. Start by cleaning your camera lens, selecting a well-lit object with a matte surface, and downloading a reputable app like RealityScan or Qlone. Practice capturing simple objects by maintaining a slow, steady orbit while overlapping your frames. Once you master object capture, explore room-scanning applications or export your models into CAD software and 3D printers to unlock the full potential of mobile 3D capture.