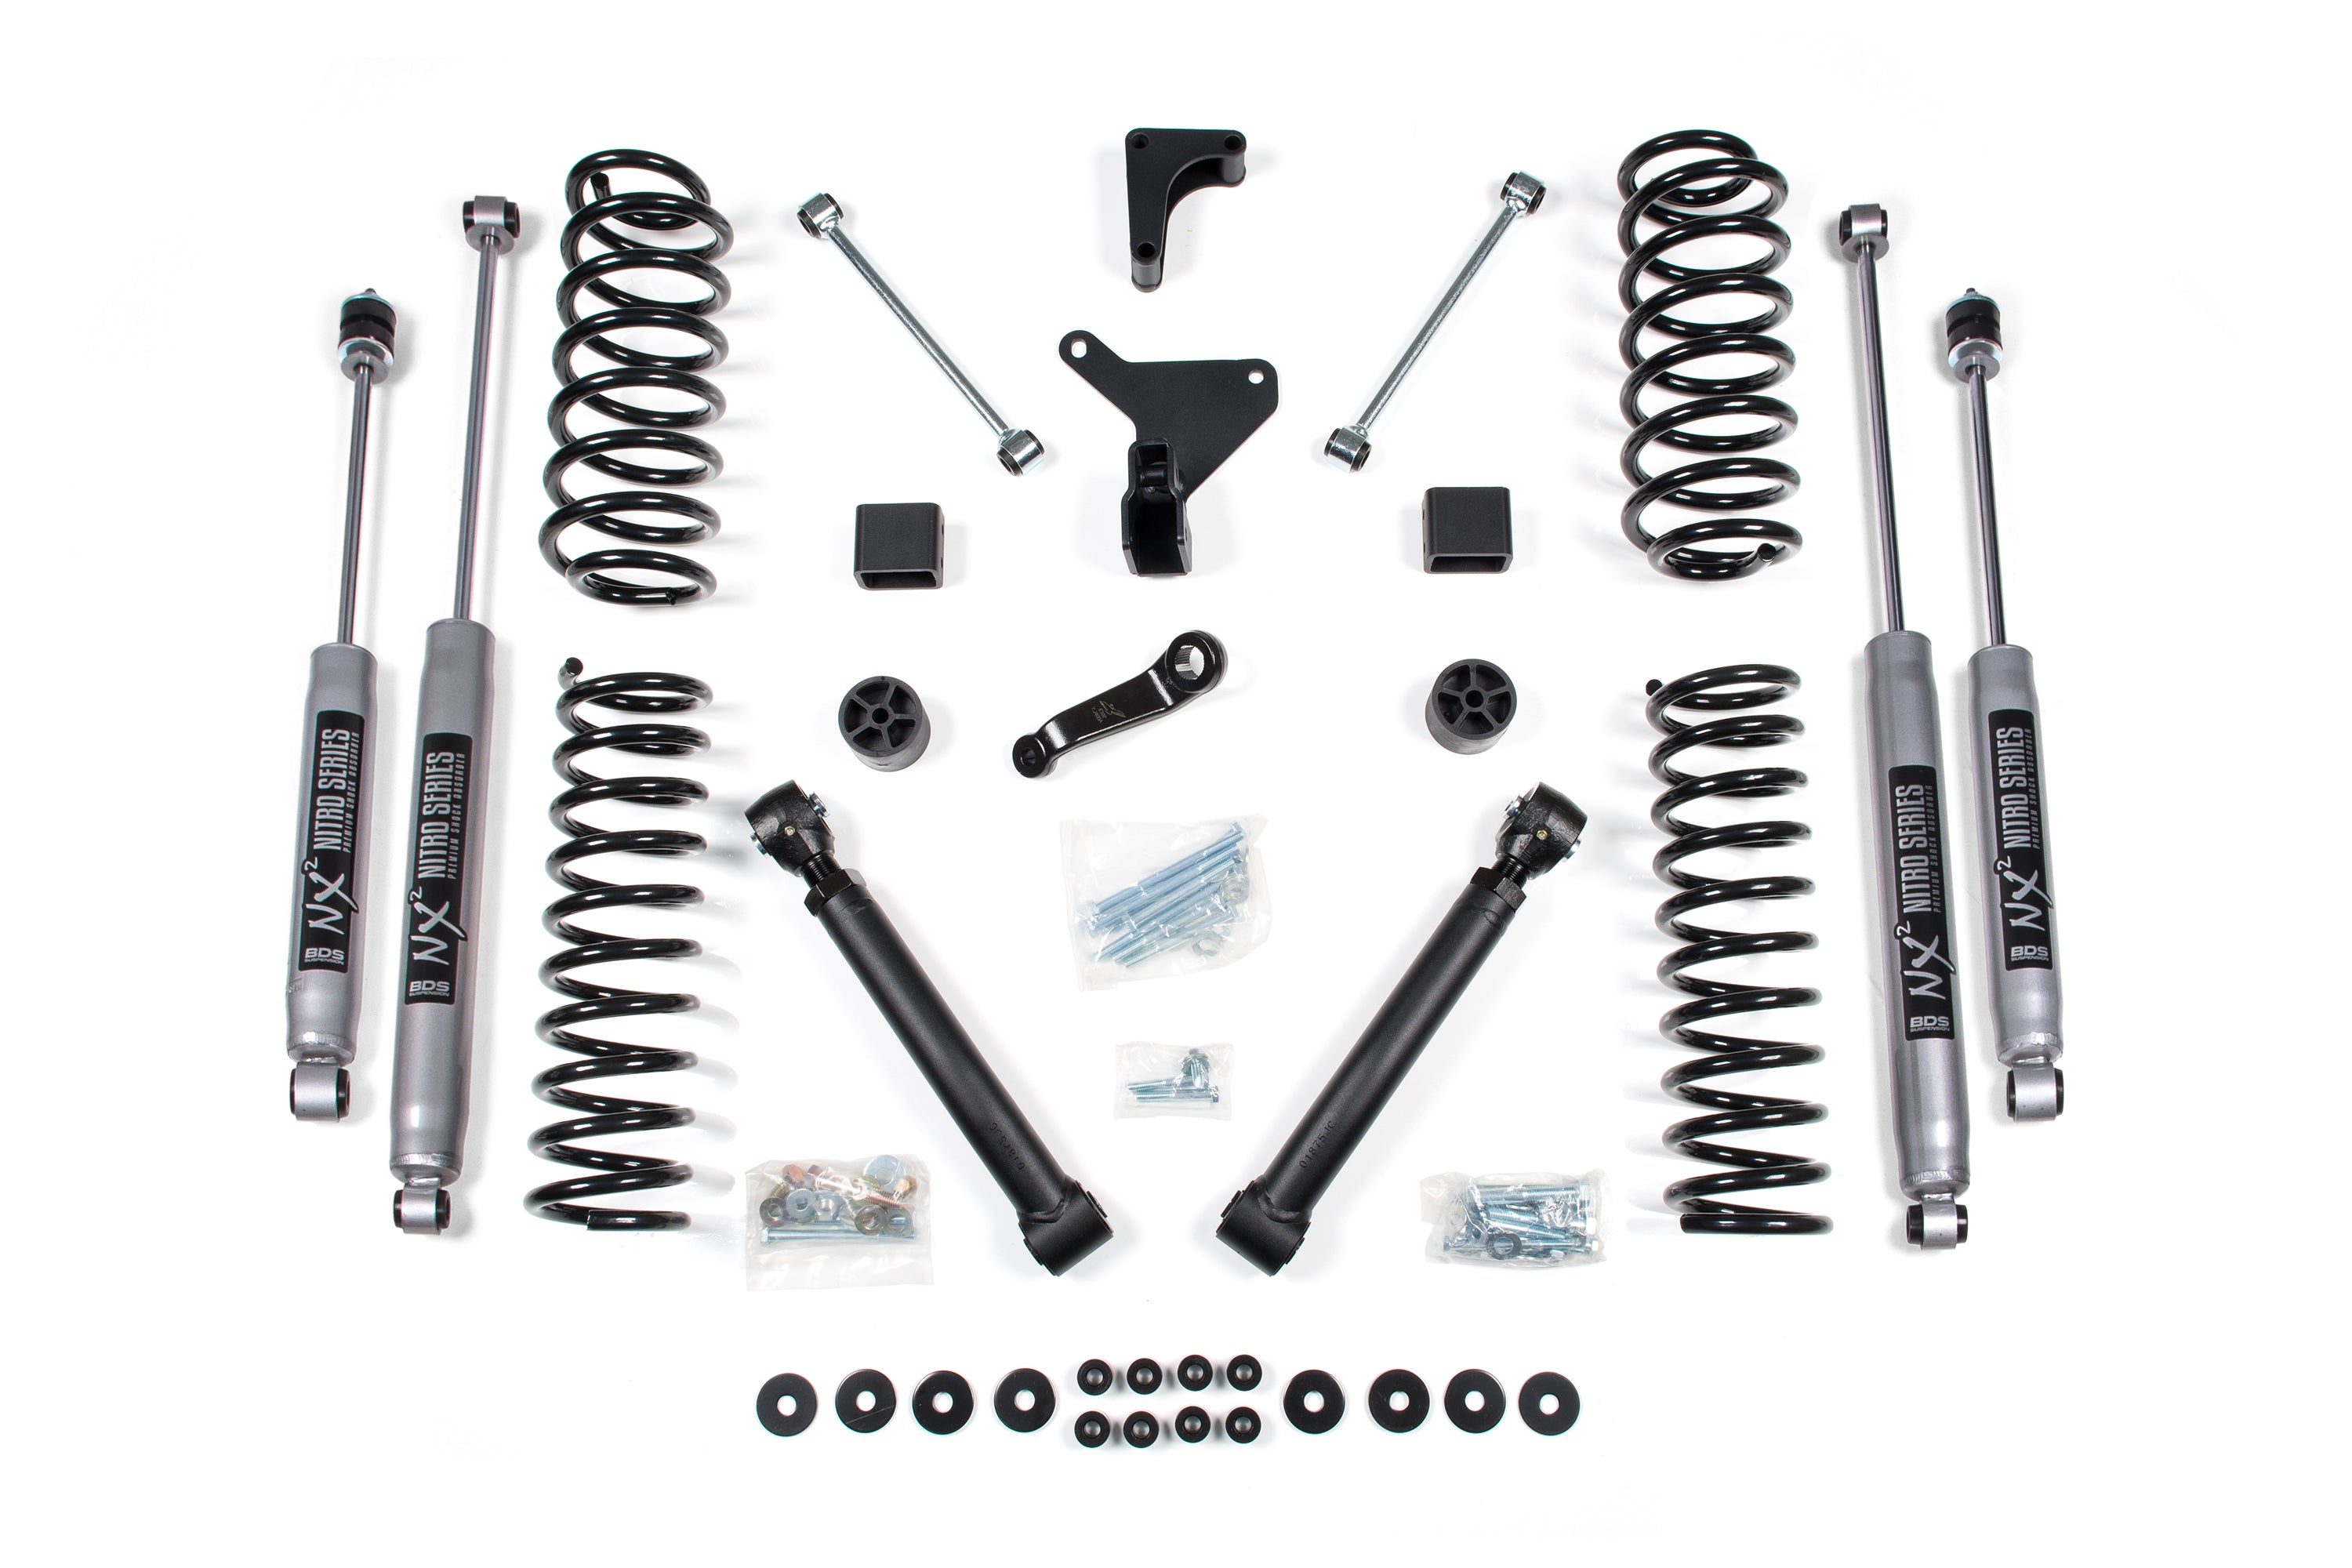
Modifying a 2005 Jeep Grand Cherokee (WK generation) requires understanding suspension evolution, kit choices, installation steps, and long-term mechanical impacts. This guide provides a detailed technical roadmap, historical context of suspension development for the WK platform, and practical advice for executing a successful lift project.
Evolution of the WK Platform Suspension: Historical Context
The 2005 model year marked a complete redesign for the Jeep Grand Cherokee, introducing the WK chassis. Departing from the solid front axle design of the preceding WJ generation, Jeep equipped the 2005 model with an independent front suspension (IFS) utilizing short-long arms (SLA) and a coil-sprung rear multi-link solid axle. This engineering shift dramatically improved on-road handling, steering precision, and ride comfort, but it fundamentally changed how enthusiasts approach suspension modifications.
In the early aftermarket landscape of 2005 through 2008, lift kit options for the WK generation were sparse. Early adopters relied on basic budget boost spacers made of polyurethane or high-density nylon that installed on top of the factory coil springs. These rudimentary kits provided two inches of lift without altering factory spring rates or damping characteristics, but they offered limited wheel articulation.
By the late 2000s and early 2010s, specialized off-road manufacturers began engineering comprehensive suspension systems tailored to the WK's geometry. Companies introduced replacement coil springs matched with longer-travel shock absorbers, upper control arms designed to correct ball joint angles at higher ride heights, and specialized hardware to address front differential drop requirements. Understanding this historical progression helps modern builders select parts that avoid the design pitfalls common to early WK modifications.
Types of Lift Kits and Technical Comparison
Selecting the right lift kit depends on your intended use, budget, and mechanical skill level. WK lifts generally fall into four distinct categories, ranging from cosmetic height increases to heavy-duty off-road systems.
| Lift Type | Height Range | Components Included | Primary Pros | Primary Cons |
|---|---|---|---|---|
| Budget Boost | 1.5 to 2.0 inches | Polyurethane/metal spacers, shock extensions (optional) | Inexpensive, retains factory ride, easy installation | No suspension travel increase, potential for top-out |
| Coil/Spacer Hybrid | 2.0 to 2.5 inches | Upgraded front struts or springs, rear coils, matched shocks | Better weight capacity, improved handling over stock | Moderate cost, limited maximum articulation |
| Full Suspension System | 3.0 to 4.0 inches | Replacement front struts, rear springs, extended shocks, aftermarket upper control arms, adjustable track bar | Maximum articulation, corrected suspension geometry, superior off-road performance | High cost, complex installation, requires alignment and potential driveline adjustments |
| Long-Arm Conversion | 4.0 inches and above | Extended control arms, crossmembers, custom mounting brackets | Extreme wheel travel, exceptional rock-crawling capability | Permanent frame modification, very high cost, intensive labor |
Step-by-Step Lift Installation Timeline and Procedure
Installing a 2.0 to 3.5-inch suspension lift on a 2005 Jeep Grand Cherokee requires specialized tools, mechanical competence, and a structured approach. Plan for a weekend project (approximately 8 to 14 hours) if working in a home garage with proper floor jacks and jack stands.
Phase 1: Preparation and Safety
- Workspace and Vehicle Securing: Park the vehicle on a level concrete surface, engage the parking brake, and block the rear wheels. Loosen the lug nuts on all four wheels before raising the vehicle.
- Lifting the Chassis: Raise the vehicle using a hydraulic floor jack placed under safe factory jacking points, and support the frame securely with heavy-duty jack stands. Remove all four wheels to gain full access to the wheel wells.
- Disconnecting Electrical and Brake Lines: Disconnect the negative battery terminal. Carefully unclip ABS sensor wires and brake line brackets from their factory mounting points to prevent tension and stretching during axle and suspension drops.
Phase 2: Front Suspension Disassembly and Installation
- Unbolting the Front Strut Assembly: Disconnect the sway bar end links from the steering knuckles or lower control arms. Remove the upper stem nuts securing the front strut assembly to the upper shock tower, followed by the lower bolt connecting the strut to the lower control arm.
- Removing the Factory Strut: Carefully maneuver the factory strut assembly out of the wheel well. Note: If installing a spacer kit, use a spring compressor to disassemble the strut, install the top spacer, and reassemble. If installing a full replacement strut, skip this step.
- Replacing Upper Control Arms (Recommended for 3+ inch lifts): Unbolt the upper ball joint from the steering knuckle using a ball joint separator tool if necessary. Remove the long pivot bolt securing the upper control arm to the chassis, and install the aftermarket adjustable upper control arm to correct caster angles.
- Installing the Lifted Strut: Guide the modified strut assembly back into position, securing the lower bolt loosely first, then tightening the upper mounting nuts to factory torque specifications. Reconnect the sway bar links and brake line brackets.
Phase 3: Rear Suspension Disassembly and Installation
- Supporting the Rear Axle: Place a hydraulic jack under the center of the rear differential housing to support the weight of the solid axle.
- Releasing Axle Tension: Remove the lower shock absorber bolts and the rear track bar bolt. Slowly lower the floor jack to allow the axle to drop down, keeping a close eye on brake lines and vent tubes to ensure they do not overextend.
- Swapping Coil Springs: Once the axle is lowered sufficiently, pull out the factory rear coil springs and rubber isolators. Install the taller aftermarket coil springs along with any required spacers or modified isolators.
- Installing Extended Shocks: Raise the axle gently with the floor jack until the new, longer rear shocks can be bolted into their upper and lower mounting points. Reinstall the rear track bar and torque all suspension fasteners to specification while the vehicle's weight is resting on the suspension.
Post-Installation Verification, Alignment, and Troubleshooting
Completing the physical installation is only half the process. Proper verification ensures safety, prevents premature tire wear, and maintains predictable handling characteristics on public roads.
Professional Wheel Alignment
Because lifting a 2005 Jeep Grand Cherokee alters the factory suspension geometry, a professional four-wheel alignment is mandatory immediately after the installation.
- Caster and Camber: On 3-inch or higher lifts, factory upper control arms often push the ball joint into an angle that causes erratic steering and vague on-road tracking. Aftermarket adjustable upper control arms allow technicians to dial in proper caster angles to restore return-to-center steering feel.
- Toe-In Adjustment: Adjust the front toe setting to eliminate tire feathering and ensure straight-line stability.
Common Post-Lift Issues and Solutions
- Driveline Vibrations: WK models equipped with the Quadra-Drive II or Quadra-Trac II systems can experience front or rear cardan joint vibrations due to altered pinion angles. Installing a front differential drop kit or adjusting control arm lengths can correct these driveline angles.
- Vibration Under Acceleration: If you notice a shudder during acceleration, inspect the CV joints on the front driveshaft. The steeper operating angle caused by a lift can accelerate boot wear and joint failure.
- Bumper or Fender Rubbing: Installing larger tires (such as 265/70R17 or 285/70R17) alongside a lift frequently results in rubbing against the plastic inner fender liners or the pinch weld at the back of the front wheel well. Remedy this by performing the common "pinch weld mod" (hammering the sharp metal seam flat) and trimming the inner plastic liners.
Frequently Asked Questions
What is the maximum tire size I can fit on a 2005 Jeep Grand Cherokee with a 2-inch lift?
With a standard 2-inch budget boost or suspension lift, you can typically fit a 265/70R17 tire (roughly 31.6 inches in diameter) on factory wheels without significant rubbing, provided you maintain standard factory wheel backspacing. Anything larger will likely require minor trimming of the plastic front bumper fascia and inner liner.
Do I need to replace my upper control arms with a 2-inch lift?
No. A 1.5 to 2-inch lift is generally considered mild enough to retain the factory upper control arms and ball joints without causing severe binding or uncorrectable alignment issues. However, lifts exceeding 2.5 to 3 inches strongly benefit from aftermarket upper control arms to restore proper suspension geometry.
How does lifting a WK Grand Cherokee affect fuel economy?
Lifting the vehicle increases aerodynamic drag by raising the body further off the ground, and installing heavier, more aggressive off-road tires adds rotating mass and rolling resistance. Most owners experience a decrease of 1 to 3 miles per gallon (MPG) depending on the final tire selection and overall weight of added off-road armor.
Is a differential drop kit necessary for a 3-inch lift?
While not strictly mandatory for every WK, a front differential drop kit helps reduce the operating angle of the front CV axle shafts. Lowering the differential slightly relieves stress on the inner and outer boot CV joints, extending their operational lifespan when running lifts of 3 inches or higher.
Practical Recommendation
For most 2005 Jeep Grand Cherokee owners seeking a balance between daily drivability and trail capability, a 2-inch to 2.5-inch coil and shock suspension kit represents the optimal sweet spot. This height provides sufficient clearance for moderately sized all-terrain tires, avoids the complex geometry corrections required by taller lifts, and preserves the ride comfort that defines the WK platform. Always prioritize quality matched components over simple height gains to ensure long-term reliability both on the highway and off the pavement.