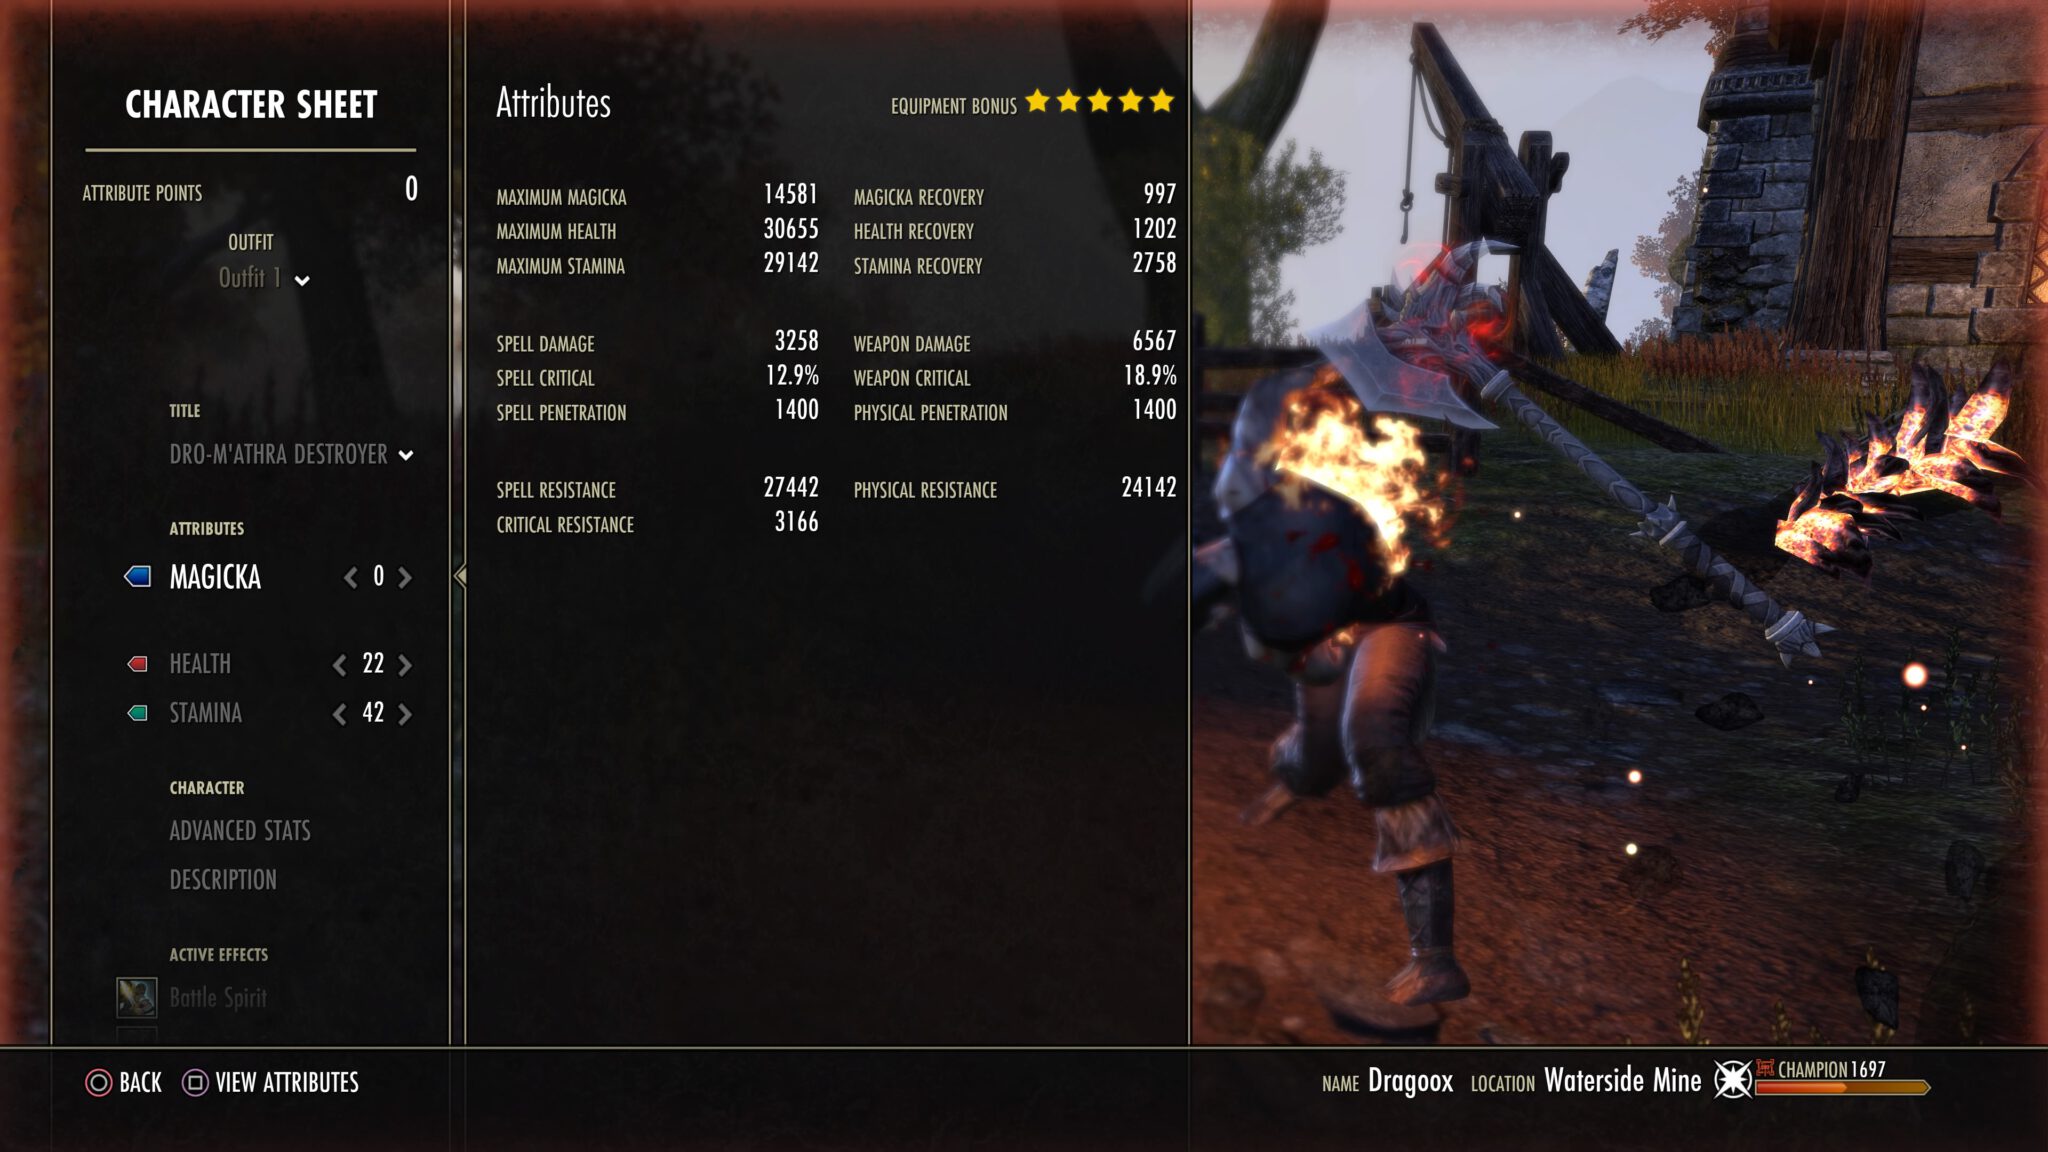
An Argonian Dragonknight (DK) Tank build in The Elder Scrolls Online (ESO) delivers the ultimate combination of resource sustain, group utility, and sheer survivability. By stacking the Argonian racial passive Resourceful with the Dragonknight's Battle Roar and Helping Hands class passives, this build converts potions and ultimates into instant resource restores, allowing you to tank veteran dungeons, hard modes, and trial encounters with maximum efficiency.
Why Choose Argonian for Dragonknight Tanking?
Selecting the Argonian race for a Dragonknight tank creates one of the most resilient combinations in ESO. While Imperial and Nord offer excellent raw mitigation and ultimate generation, Argonians excel at resource management and healing throughput, which are crucial for maintaining taunts, crowd control, and block uptime during prolonged encounter phases.
Key Racial Synergies
- Resourceful: Restores 3,625 Health, Magicka, and Stamina whenever you consume any potion, in addition to granting 1,000 Max Magicka. When combined with Tri-Stat potions (Essence of Health), an Argonian tank instantly refills over half of their total resource pools with a single button press.
- Life-Mender: Increases Healing Done by 6%. This boosts self-healing abilities like Coagulating Blood or Green Dragon Blood, as well as area-of-effect group support heals like Echoing Vigor.
- Argonian Resistance: Grants 1,000 Max Health and 2,310 Disease and Poison Resistance, providing built-in durability that lowers your gear attributes reliance on pure Health stacking.
- Amphibious: Increases swim speed by 50%, providing minor QoL during specific dungeon and trial navigations.
Class and Racial Passive Integration
The defining feature of an Argonian Dragonknight tank is the double-loop resource engine powered by class passives:
- Battle Roar (Draconic Power): When you cast an Ultimate ability, you restore Health, Magicka, and Stamina based on the ultimate's cost.
- Helping Hands (Earthen Heart): Casting an Earthen Heart ability (such as Igneous Shield or Stone Giant) restores Stamina instantly.
- Iron Skin (Draconic Power): Increases the amount of damage you block by 10%.
- Elder Dragon (Draconic Power): Increases your Health Recovery for each Draconic Power skill slotted.
When combining an Argonian's Resourceful with Battle Roar, pressing a potion or dropping an Ultimate like Aggressive Horn or Magma Shell fully replenishes your resources regardless of debuffs or stamina-drain mechanics like prolonged blocking.
Attribute Point Allocation, Mundus Stone, and Consumables
Proper stat distribution ensures you reach the necessary defensive caps while retaining sufficient Magicka to cast utility shields and crowd control skills.
Attribute Points
- Health: 30–40 Points (Aim for 40,000–45,000 total Health with food buff active).
- Stamina: 15–20 Points (Must remain higher than total Magicka).
- Magicka: 10–15 Points (Sufficient to support shield and pull rotations).
Important Mechanic: Ensure your total Maximum Stamina is slightly higher than your Maximum Magicka. Synergy effects like Synergy / Spear Shards and Energy Orb automatically restore your highest maximum resource pool. As a tank, you need this to default to Stamina so you can continue blocking and breaking free.
Mundus Stone Selection
- The Atronach: Increases Magicka Recovery. This is the standard choice for endgame trial tanks because DK utility skills (Igneous Shield, Chains, Engulfing Flames) heavily consume Magicka.
- The Steed: Increases movement speed and Health Recovery. Excellent for encounters requiring heavy kite-tanking or fast add positioning.
- The Lord: Increases Max Health. Ideal for entry-level progression tanks building up their base durability pool.
Food, Drinks, and Potions
- Best-in-Slot Food: Bewitched Sugar Skulls (Increases Max Health, Max Stamina, Max Magicka, and Health Recovery).
- Alternative Food: Longfin Pasty with Melon Sauce or Tri-Stat Crown Meals (Max Health, Max Stamina, Max Magicka).
- Potions: Essence of Health (Tri-Stat Potions) crafted with Water Hyacinth, Luminous Russula, and Mountain Flower. These trigger the Argonian Resourceful passive, granting instant Health, Stamina, and Magicka on a 45-second cooldown.
Skill Bar Configuration
This bar setup balances taunts, defensive mitigations, group buffs, and crowd control. The primary weapon setup utilizes a Sword and Shield on the front bar for low block-cost mitigation, and an Ice Staff (Frost Staff) on the back bar for ranged taunts, elemental debuffs, and damage shields.
| Front Bar (Sword & Shield) | Main Taunt, Debuffs & Primary Mitigation |
|---|---|
| Slot 1 | Pierce Armor (Morph of Puncture) |
| Slot 2 | Heroic Slash (Morph of Low Slash) |
| Slot 3 | Defensive Stance (Morph of Defensive Posture) / Igneous Shield |
| Slot 4 | Coagulating Blood (Morph of Dragon Blood) |
| Slot 5 | Hardened Armor (Morph of Spiked Armor) |
| Ultimate | Magma Shell (Morph of Dragonknight Standard) or Reviving Barrier |
| Back Bar (Ice Staff) | Crowd Control, Group Buffs & AoE Debuffs |
|---|---|
| Slot 1 | Destructive Clench / Frost Clench (Morph of Destructive Touch) |
| Slot 2 | Elemental Blockade (Morph of Wall of Elements) |
| Slot 3 | Unrelenting Grip (Morph of Fiery Grip) |
| Slot 4 | Igneous Shield (Morph of Obsidian Shield) |
| Slot 5 | Engulfing Flames (Morph of Fiery Breath) / Deep Breath |
| Ultimate | Aggressive Horn (Morph of War Horn) |
Detailed Skill Explanations
Front Bar Skills
- Pierce Armor: Your primary melee taunt. Applies Major Breach and Minor Breach, reducing the target's Physical and Spell Resistance by a combined total of nearly 9,000 points.
- Heroic Slash: Applies Minor Maim to lower enemy damage output by 5% and grants you Minor Heroism, generating 1 Ultimate every 1.5 seconds for 12 seconds.
- Coagulating Blood: Your main burst self-heal. Heals based on your missing Health, scaling higher when your health drops into critical thresholds. Supported by the Argonian 6% healing done bonus.
- Hardened Armor: Provides Major Resolve (increasing Physical and Spell Resistance by 5,948) and grants a damage shield based on your Max Health.
- Defensive Stance: Reduces block cost and increases block mitigation. Can be flexed for Igneous Shield or Choking Talons depending on encounter requirements.
Back Bar Skills
- Frost Clench: Ranged soft-taunt and major group debuff skill. Applies Taunt, Major Maim (reducing enemy damage done by 10%), and Minor Brittle (increasing critical damage taken by the enemy by 10%) when using a Frost Staff.
- Elemental Blockade (Blockade of Frost): Triggers your backbar weapon enchant (such as Crusher) even while swapped to the front bar. Provides a protective shield to allies against projectiles and chilled status effects.
- Unrelenting Grip: Pulls adds directly to your position and refunds the Magicka cost if the target is immune to crowd control. Generates Major Expedition for quick positioning.
- Igneous Shield: Grants a damage shield to you and nearby group members while triggering the Helping Hands passive (restoring Stamina) and Minor Timbery/Minor Foster effects.
- Engulfing Flames / Choking Talons: Engulfing Flames increases the Flame Damage targets take based on your total stats, boosting your group's overall DPS. Swap to Choking Talons for dungeon add control to root mobs in place.
Gear Progression and Best-in-Slot Set Combinations
Tank gear in ESO is designed around party utility rather than self-survival alone. As an Argonian DK tank, your high natural survivability allows you to wear support sets that drastically increase your group’s damage output.
1. Endgame Meta Combination (Trials & Veteran Hard Modes)
- Primary Set 1 (Body): Pearlescent Ward (Lucent Citadel Trial)
- Effect: Grants Minor Aegis to the group. When all group members are alive, it grants up to 180 Weapon and Spell Damage to the party. As group members die, it shifts to grant up to 66% damage reduction to surviving members.
- Primary Set 2 (Weapons & Jewelry): Turning Tide (Shipwright's Regret)
- Effect: Blocking creates a charge. Bash an enemy while charged to apply Major Vulnerability to all enemies in a line, increasing their damage taken by 10% for 10 seconds.
- Monster Helmet Set: Nazaray (Shipwright's Regret)
- Effect: Using an Ultimate capability extends the duration of all Major and Minor debuffs on nearby enemies by up to 15 seconds, based on the amount of Ultimate spent. Synergizes perfectly with high ultimate generation routines.
2. General Dungeon & Off-Tank Setup
- Primary Set 1: Crimson Oath’s Rive (The Dread Cellar) – Reduces enemy Armor by up to 3,541 when you apply a buff to yourself or an ally while near enemies.
- Primary Set 2: Drake’s Rush (Black Drake Villa) – When you use a Bash ability, you and up to 3 group members gain Major Heroism for 12 seconds, generating 3 Ultimate every 1.5 seconds.
- Monster Helmet Set: Roksa the Warped or Engine Guardian – Provides extraordinary Health, Magicka, and Stamina recovery for intense block-heavy encounters.
3. Accessible Entry-Level Setup (Crafted / Overland)
- Set 1: Torug’s Pact (Crafted - 3 Traits) – Enhances the potency and reduces the cooldown of your Weapon Glyph (Crusher).
- Set 2: Plague Doctor (Deshaan Overland) – Grants huge flat Max Health bonuses to help new tanks cross the 40k–45k Health threshold easily.
- Monster Helmet Set: Tremorscale (Volenfell) – Decreases enemy Physical Resistance when you use a Taunt ability.
Gear Configuration & Enchantment Matrix
To ensure your tank reaches optimal mitigation, block efficiency, and stat caps, apply the following traits and enchantments across your gear slots:
| Gear Slot | Recommended Set | Item Armor Type | Trait | Enchantment |
|---|---|---|---|---|
| Head | Nazaray / Roksa | Heavy Armor | Infused | Prismatic Defense (Tri-Stat) |
| Shoulders | Pearlescent Ward | Heavy Armor | Divines / Sturdy | Prismatic Defense (Tri-Stat) |
| Chest | Pearlescent Ward | Heavy Armor | Infused | Prismatic Defense (Tri-Stat) |
| Hands | Pearlescent Ward | Heavy Armor | Sturdy | Max Health / Tri-Stat |
| Waist | Pearlescent Ward | Light or Medium | Sturdy | Max Health / Tri-Stat |
| Legs | Pearlescent Ward | Heavy Armor | Infused | Prismatic Defense (Tri-Stat) |
| Feet | Pearlescent Ward | Heavy Armor | Sturdy | Max Health / Tri-Stat |
| Necklace | Turning Tide | Jewelry | Infused / Tri-Slash | Magicka Recovery |
| Ring 1 | Turning Tide | Jewelry | Infused / Tri-Slash | Block Cost Reduction |
| Ring 2 | Turning Tide | Jewelry | Infused / Tri-Slash | Block Cost Reduction |
| Main Hand | Turning Tide Sword | One-Hand Weapon | Decisive / Defending | Weapon Shielding / Absorbing |
| Off Hand | Turning Tide Shield | Shield | Sturdy | Prismatic Defense (Tri-Stat) |
| Back Bar | Turning Tide Ice Staff | Frost Staff | Infused | Glyph of Crusher (Armor Reduction) |
Champion Point (CP) Allocation
The Champion Point system enhances your passive defensive mitigation, resource efficiency, and ultimate timing.
Warfare Tree (Blue Points)
- Duelist's Rebuff (Slottable): Reduces damage taken from single-target attacks by up to 10%.
- Enduring Resolve (Slottable): Reduces damage taken from damage-over-time effects by up to 10%.
- Unassailable (Slottable): Reduces damage taken from area of effect (AoE) attacks by up to 10%.
- Ironclad (Slottable): Reduces damage taken from direct attacks by up to 10%.
- Passive Node Priorities: Heavy Armor Focus, Preparation, Quick Recovery, Elusive Mist.
Fitness Tree (Red Points)
- Ironclad / Boundless Vitality (Slottable): Grants up to 1,400 Max Health.
- Strategic Reserve (Slottable): Grants Health Recovery based on your current unspent Ultimate pool (up to 500 Health Recovery at 500 Ultimate).
- Bracing Anchor (Slottable): Increases block mitigation by up to 20%, but reduces movement speed while blocking.
- Rejuvenation (Slottable): Grants flat Health, Magicka, and Stamina recovery bonuses.
- Passive Node Priorities: Tumbling, Defiance, Savage Defense, Tireless Guardian.
Craft Tree (Green Points)
- Steed's Blessing (Slottable): Increases out-of-combat movement speed.
- Rationer (Slottable): Increases the duration of eaten food or drinks by up to 30 minutes.
- Liquid Efficiency (Slottable): Grants a chance to not consume a potion upon activation, saving costly Tri-Stat consumables.
Combat Mechanics and Resource Rotation Strategy
Tanking in ESO is not merely absorbing damage—it is controlling enemy positioning, keeping debuffs active, and weaving resource-restoring actions into your movement.
- Apply Pierce Armor (Melee) or Frost Clench (Ranged Taunt)
- Cast Heroic Slash (Minor Heroism) & Hardened Armor (Major Resolve)
- Swap to Back Bar - Cast Blockade of Frost (Triggers Crusher Glyph)
- Gather Adds: Cast Unrelenting Grip & Choking Talons / Igneous Shield
- Resource Low? - Drink Tri-Potion (Triggers Argonian Resourceful) OR Drop Aggressive Horn / Magma Shell (Triggers DK Battle Roar)
1. Pulling and Stacking Adds
Before initiating a boss phase or trash pack:
- Cast Hardened Armor on the approach to establish Major Resolve.
- Cast Frost Clench or Unrelenting Grip to pull priority ranged archers or spellcasters into a tight group.
- Drop Blockade of Frost on top of the mob pack to trigger your Crusher enchantment, reducing their Armor while slowing their movement.
- Root the stacked group using Choking Talons.
2. Maintaining Taunts and Debuffs
- Keep Pierce Armor continuously applied to the primary boss target to maintain Major Breach and Minor Breach.
- Reapply Heroic Slash every 12 seconds for constant Minor Heroism, accelerating your Ultimate building cycle.
- Ensure Blockade of Frost stays active beneath the boss so your backbar Infused Crusher Glyph continuously refreshes every 5 seconds.
3. Executing the Argonian Sustain Loop
When your Stamina or Magicka drops below 30% during intense block phases:
- Do not drop your block recklessly.
- Activate a Tri-Stat Potion. The Argonian Resourceful passive immediately restores over 3,600 Health, Magicka, and Stamina on top of the potion’s base restore values.
- If your potion is on cooldown, cast Igneous Shield. This triggers the Helping Hands passive, converting Magicka into instant Stamina while absorbing incoming damage.
- If your resources remain critically low, cast your Ultimate (Aggressive Horn for group burst or Magma Shell for survival emergency). Battle Roar will instantly restore hundreds of points of all three attributes, immediately bringing your pools back to full capacity.
Frequently Asked Questions
Why is an Argonian DK tank better than a Nord or Imperial DK tank?
Argonians feature superior resource replenishment mechanics thanks to their Resourceful passive. Imperial tanks excel at overall stat cost reduction, and Nord tanks generate ultimate faster while having higher base physical mitigation. However, Argonian tanks possess the highest absolute emergency recovery potential in high-intensity progression content where resource drain is severe.
Should an Argonian DK Tank use an Ice Staff or a Shield on the back bar?
An Ice Staff (Frost Staff) is highly recommended on the back bar for endgame content. Ice Staff heavy attacks absorb damage using Stamina, and abilities like Elemental Blockade trigger backbar enchantments (such as Crusher) automatically even after swapping back to the front bar. A double Sword and Shield setup is playable, but restricts your group support and ranged debuff application.
How much Health should my Argonian Dragonknight Tank have?
Aim for a baseline of 40,000 to 45,000 Health with your food buff active (Bewitched Sugar Skulls). Going above 50,000 Health results in diminishing returns, wasting stat points that could otherwise support your Magicka recovery and Stamina capacity.
What is the most emergency-defensive skill for a Dragonknight Tank?
Magma Shell (morph of Dragonknight Standard). When activated, it caps all incoming damage to a maximum of 3% of your Max Health per hit for 10–12 seconds while providing massive damage shields to nearby allies. Combined with Battle Roar, it also instantly refills your Health, Magicka, and Stamina.
How do I trigger the Crusher Enchantment reliably?
Place an Infused Ice Staff on your back bar equipped with a Glyph of Crusher. When you cast Elemental Blockade (Wall of Elements) on your back bar, the area-of-effect damage ticks will automatically refresh the Crusher armor-reduction debuff on targets inside the area every few seconds, even after you swap back to your front bar.
Next Steps for Building Your Argonian DK Tank
- Unlock Racial and Class Passives: Ensure all racial passives (Resourceful, Life-Mender, Argonian Resistance) and Draconic Power / Earthen Heart passives are fully maxed at Level 50.
- Farm Core Starter Gear: Start by crafting a set of Torug's Pact or purchasing Plague Doctor gear from overland zones to establish your baseline survivability stats.
- Progress to Veteran Dungeons: Run veteran dungeons like Shipwright's Regret to collect the Turning Tide armor set and Nazaray Monster Helmet.
- Master Potion Timing: Practice monitoring your resource pools during veteran dungeon encounters, using Tri-Stat potions deliberately when Stamina drops below half to maximize the Resourceful passive returns.