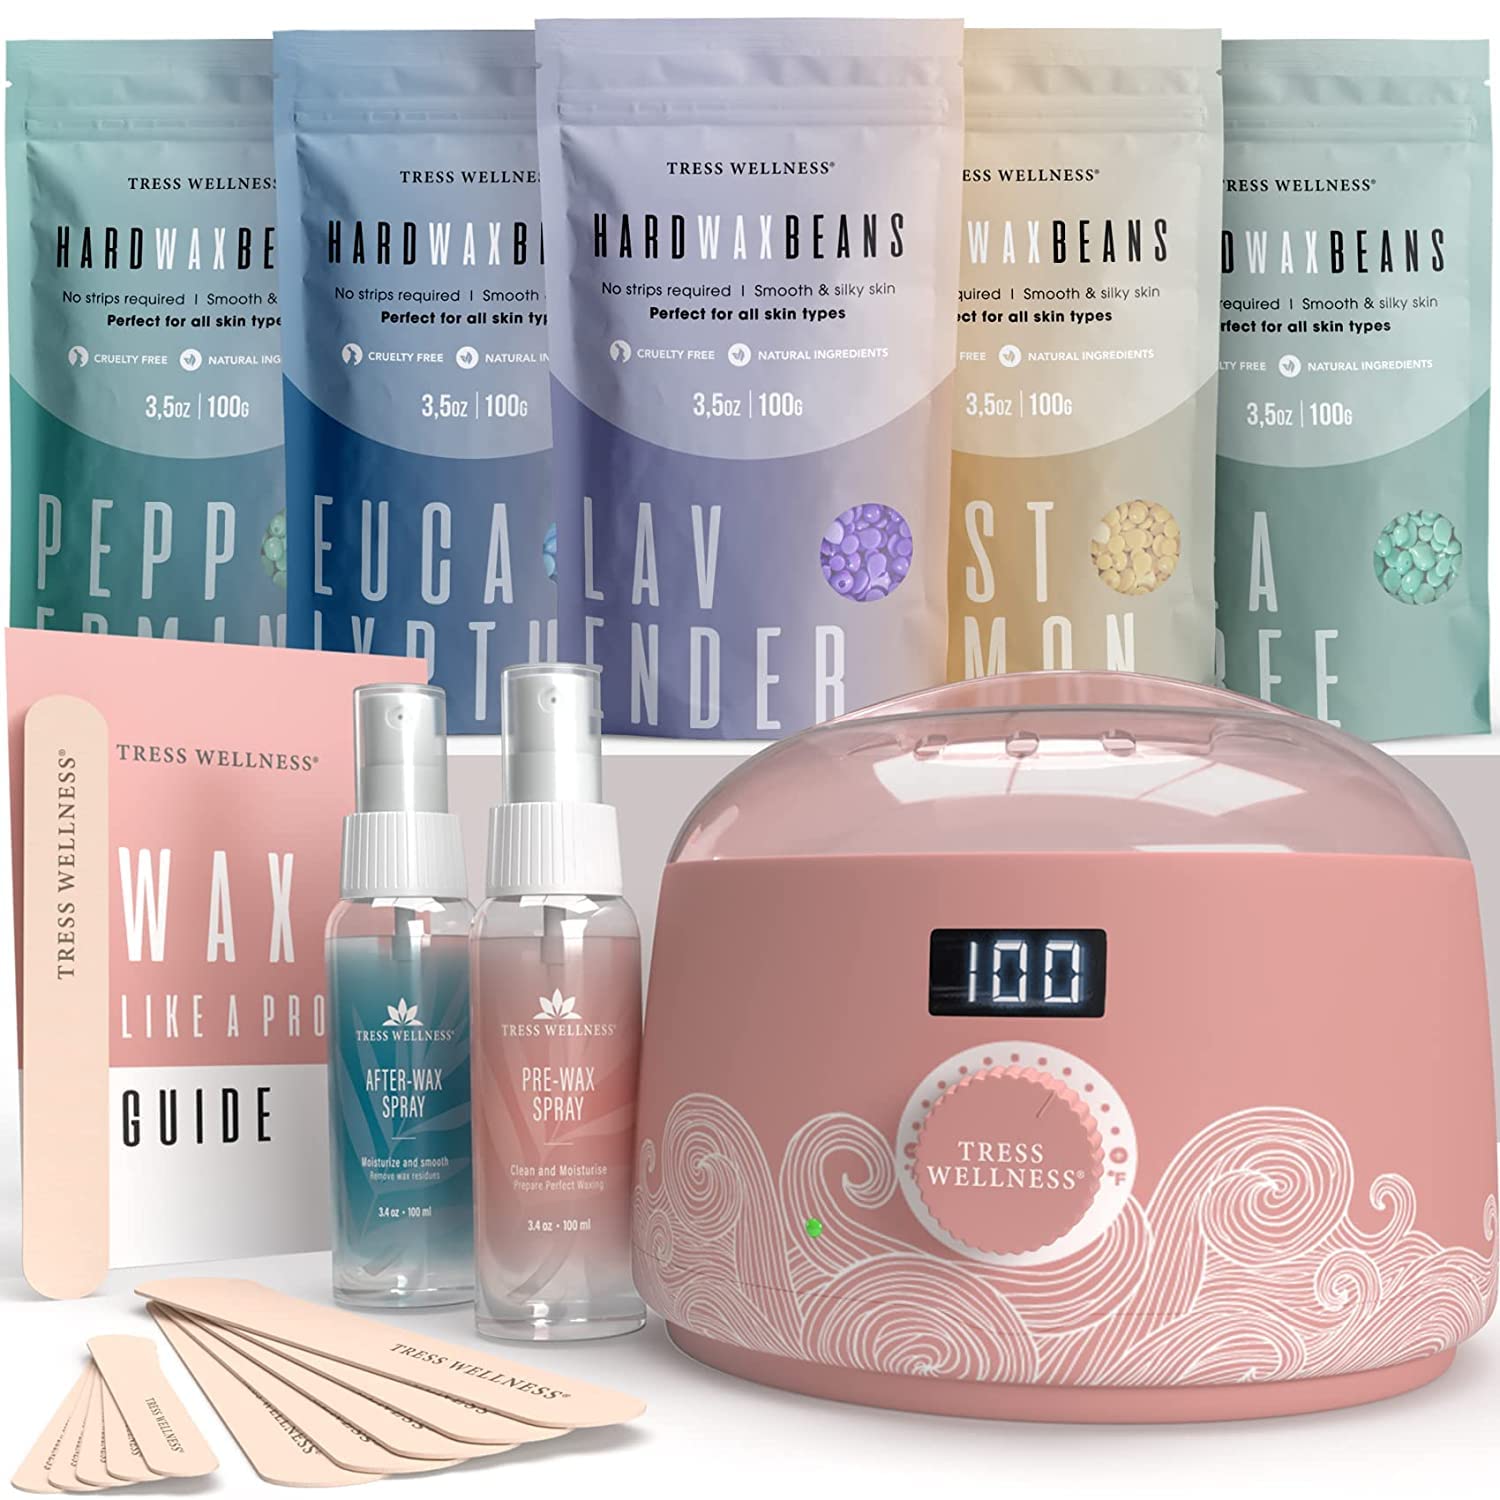
At-home waxing kits offer a cost-effective, long-lasting hair removal solution by extracting hair directly from the follicle. Navigating the market requires choosing between hard wax warmers, roll-on systems, soft strip wax, natural sugaring pastes, and ready-to-use cold strips based on your target body region, skin sensitivity, and experience level. Safe and effective usage depends on proper skin preparation, precise temperature calibration, and correct application technique.
The At-Home Waxing Kit Market: Categories and Core Technologies
The global consumer market for personal hair removal has expanded significantly, driven by advancements in thermal safety, formulation chemistry, and ergonomic design. Modern consumers have access to professional-grade formulations and specialized equipment designed for domestic use. Selecting the appropriate product requires an understanding of how different wax formulations interact with hair follicles and the stratum corneum (the outermost layer of the skin).
At-home waxing products fall into distinct market categories based on their thermal requirements, removal mechanisms, and structural formulas.
Technical Breakdown of Wax Formulations
1. Hard Wax (Stripless Wax)
Hard wax is engineered primarily from natural rosins (colophony), synthetic resins (such as polycyclopentadiene), beeswax, and flexible polymers (like ethylene-vinyl acetate). It is applied warm in a thick layer and hardens as it cools, encapsulating individual hair shafts without adhering aggressively to live skin cells.
- Melting Point: Operates at a relatively low melting temperature, typically between 45°C and 55°C (113°F to 131°F).
- Ideal Use Cases: High-sensitivity regions with coarse, dense hair, including the bikini line, brazilian area, underarms, and facial zones (lip, chin, brows).
- Key Advantage: Minimizes skin trauma because it adheres directly to the hair shaft rather than the epidermis.
2. Soft Wax (Strip Wax)
Soft wax relies on a combination of pine resins, mineral oils, and soothing agents. It is spread in a very thin layer across the target area and requires a non-woven fabric or paper strip pressed on top to facilitate removal.
- Melting Point: Requires a higher working temperature, generally between 55°C and 65°C (131°F to 149°F).
- Ideal Use Cases: Large, flat body surfaces with finer hair or expansive coverage demands, such as the legs, arms, back, and chest.
- Key Advantage: High speed and efficiency across large skin surface areas. However, because soft wax binds to the stratum corneum, repeated applications over the same skin patch during a single session can cause epidermal lifting and skin redness.
3. Sugaring Paste (Water-Soluble Wax Alternative)
Traditional sugaring formulations consist of simple, natural ingredients: refined sugar, water, and citric acid (lemon juice). Cooked into a pliable, candy-like gel, sugaring paste operates at body temperature.
- Melting Point: Applied near room temperature or slightly warmed (around 30°C to 37°C / 86°F to 98.6°F).
- Ideal Use Cases: Sensitive skin prone to allergic reactions, contact dermatitis, or eczema, as well as full-body hair removal.
- Key Advantage: Highly water-soluble, making cleanup straightforward with warm water alone. Furthermore, sugaring paste is applied against the direction of hair growth and removed with the direction of growth, which reduces hair breakage and follicle distortion.
4. Cold Wax Strips
Cold wax strips consist of pre-apportioned wax layers coated onto paper or plastic backing strips. They require no electronic heating appliance; instead, users warm the strips briefly between their hands prior to application.
- Melting Point: Ambient/body temperature.
- Ideal Use Cases: Travel, quick touch-ups, and straightforward areas like the lower legs or forearms.
- Key Advantage: Portability and zero setup time. However, cold wax lacks thermal heat to open pores, which can lead to higher hair breakage rates on coarse hair compared to warm waxing methods.
Detailed Overview of Market Kit Configurations
When shopping for an at-home waxing system, consumers encounter several packaging configurations. Understanding the hardware and included accessories helps ensure you select a kit that aligns with your skill level and target hair removal zones.
- AT-HOME WAXING KIT MARKET OPTIONS
- Electric Warmers (Hard/Soft Wax)
- Roll-On Systems (Large Areas)
- Cold Strips & Sugaring (Travel / Sensitive)
Electric Wax Warmer Kits
Electric wax pot warmers represent the standard for home hair removal. These units feature an electric heating base, an internal aluminum pot or removable silicone liner, and adjustable temperature dials or digital LED displays.
- Hardware Features: Advanced kits include PTC (Positive Temperature Coefficient) heating elements that distribute heat evenly, reducing localized hot spots. Digital models display exact temperature settings in Celsius or Fahrenheit, whereas manual models rely on variable thermostat dials (Low-Medium-High).
- Bundled Accessories: Typically include 400g to 1000g of hard wax beads, pre-wax cleansing sprays, post-wax calming oils, and wooden applicator spatulas in various sizes (large for body, thin for eyebrows).
Cartridge and Roll-On Waxing Systems
Roll-on waxing kits utilize handheld, dockable heating units that accept standardized 100g wax cartridges equipped with a roller-head applicator.
- Mechanics: The base station heats the cartridge to liquid consistency. The user rolls the device directly across the skin, applying a uniform layer of soft wax.
- Target Audience: Ideal for individuals who find traditional spatula application messy or time-consuming, specifically when waxing long stretches of the legs or arms.
Microwavable Wax Containers
Microwavable wax kits eliminate the need for dedicated electronic heating hardware. The wax is packaged in heat-safe plastic or glass jars designed to be heated in a standard kitchen microwave in short increments.
- Operational Considerations: While convenient and low-cost, microwavable wax pots suffer from inconsistent thermal distribution. The core of the container often remains solid while the outer edges become scalding hot. Thorough stirring and careful temperature testing are mandatory prior to skin application.
Comparative Analysis of At-Home Waxing Kit Options
The table below compares the primary at-home waxing options across key performance parameters, technical requirements, and suitability for various body zones.
| Kit Category | Primary Body Areas | Skill Level Required | Heating Requirement | Skin Impact & Adhesion | Hair Extraction Efficiency |
|---|---|---|---|---|---|
| Hard Wax Warmer Kit | Bikini, Brazilian, Underarms, Face | Intermediate | Electric Warmer (45°C–55°C) | Low (Binds predominantly to hair) | High on coarse & short hair |
| Soft Wax Warmer Kit | Legs, Arms, Back, Chest | Beginner to Intermediate | Electric Warmer (55°C–65°C) | Moderate (Binds to skin & hair) | High on long & fine hair |
| Roll-On Cartridge Kit | Legs, Arms | Beginner | Docking Heater Base | Moderate (Requires strip removal) | High on large, flat surfaces |
| Cold Wax Strips | Face, Legs, Eyebrows | Beginner | Friction / Hand Warming | Variable (Can cause friction drag) | Moderate; higher hair breakage |
| Organic Sugaring Kit | Full Body, Sensitive Areas | Intermediate to Advanced | Minimal (Body temp to ~37°C) | Very Low (Water-soluble gel) | High; reduces ingrown hairs |
Critical Safety Guidelines and Pre-Wax Prerequisites
Executing a safe at-home waxing session requires rigorous adherence to skin health assessment, hygiene protocols, and thermal safety checks. Neglecting these prerequisites can lead to skin tearing, thermal burns, hyperpigmentation, or bacterial infections.
Hair Length Requirements
For wax to grip hair effectively without slipping, hair length must be between 1/4 inch (6 mm) and 1/2 inch (12 mm).
- If hair is too short (< 1/4 inch): The wax cannot establish sufficient mechanical adhesion to the hair shaft, resulting in incomplete removal and requiring repeated passes that irritate the skin.
- If hair is too long (> 1/2 inch): The wax can tangle and mat, causing increased pain, hair breakage above the root, and uneven extraction. Trim overly long hair with clean grooming shears before application.
Skincare Product and Medication Contraindications
Certain dermatological treatments and topical active ingredients thin the stratum corneum or increase epidermal fragility, making waxing unsafe. Do not perform waxing treatments if you are currently using or have recently used:
- Prescription Oral Isotretinoin (Accutane): Must be discontinued for at least 6 to 12 months prior to waxing, as it severely compromises skin healing and structural integrity.
- Topical Retinoids: Tretinoin, Adapalene, Tazarotene, or high-potency retinol products applied to the target area. Discontinue topical retinoids on the target zone for at least 7 to 14 days before waxing.
- Alpha & Beta Hydroxy Acids (AHAs/BHAs): Glycolic acid, lactic acid, and salicylic acid exfoliants. Cease use 3 to 5 days prior to treatment.
- Active Skin Conditions: Never wax over sunburned skin, active acne breakouts, open wounds, eczema flare-ups, psoriasis patches, or suspicious moles.
Thermal Calibration and Patch Testing
To prevent thermal burns, always test heated wax on the inside of your wrist or inner forearm prior to full application.
- Viscosity Check: Hard wax should exhibit a smooth, honey-like consistency. If it is watery or runny, it is too hot and must be allowed to cool.
- Patch Test: Apply a small dab to the wrist. It should feel comfortably warm, not uncomfortably hot or stinging.
- Allergy Patch Test: If using a synthetic resin or scented wax formulation for the first time, perform a patch test 24 hours in advance to monitor for allergic contact dermatitis.
Step-by-Step Usage Guide: How to Wax at Home Safely
Following a structured, step-by-step procedure ensures maximal hair removal with minimal discomfort and minimal epidermal trauma.
- PRE-WAX PREP (Clean & Dry)
- THERMAL TEST (Honey Texture)
- APPLICATION (With Growth)
- EXTRACTION (Against Growth)
- POST-CARE (Oil & Soothe)
Step 1: Cleansing and Pre-Wax Preparation
- Cleanse: Wash the target area with a mild, oil-free cleanser to remove surface sebum, lotion, deodorant, and sweat residue. Pat thoroughly dry with a clean towel.
- Dusting Powder: Apply a lightweight dusting of pure cornstarch or talc-free pre-wax powder to the skin. Powder absorbs residual moisture and creates a barrier between the skin and the wax, enhancing hard wax performance and reducing skin adhesion.
Step 2: Heating and Stirring
- Place your wax beads or soft wax pot into the warmer liner. Set the temperature dial to the high setting to melt the wax rapidly.
- Once partially melted, turn the thermostat down to the recommended operational maintaining temperature (usually indicated by the manufacturer, between 45°C and 55°C for hard wax).
- Stir the wax thoroughly with a disposable wooden spatula to eliminate internal heat pockets and ensure uniform texture.
Step 3: Precise Wax Application Mechanics
- Spatula Loading: Dip the end of the wooden spatula into the wax, twirling it horizontally to prevent drips.
- Skin Tension: Hold the surrounding skin taut with your non-dominant hand. Taut skin is critical; loose skin moves during extraction, causing bruising, skin lifting, and uneven hair removal.
- Application Direction: Press the flat side of the spatula firmly against the skin at a 45-degree angle. Spread the wax smoothly in the exact direction of hair growth.
- Creating a Lip (Hard Wax): When using hard wax, leave the trailing edge (the "lip") slightly thicker and raised away from the skin. This provides a secure grip tab for removal once the wax sets.
Step 4: Extraction Mechanics
- Curing Time: Allow hard wax to set for 15 to 30 seconds. It should feel firm and non-tacky to the touch, but remain flexible. If hard wax cures for too long, it can become brittle and snap during removal.
- Stabilization: Re-anchor and stretch the skin taut behind the wax strip using your non-dominant hand.
- Removal Motion: Grasp the raised edge/strip. Pull the wax off in one rapid, continuous motion IN THE OPPOSITE DIRECTION of hair growth.
- Angle of Pull: Pull the wax back parallel and close to the skin surface. Never pull upwards or outward away from the body, as this upward tension lifts the epidermis, tears the skin, and creates bruising (ecchymosis).
- Immediate Pressure: Immediately press your fingertips firmly onto the freshly waxed skin for 3 to 5 seconds to neutralize pain signals sent to sensory nerve endings.
- CORRECT REMOVAL ANGLE: Pull back parallel to skin surface
- INCORRECT REMOVAL ANGLE: Pulling upwards/outwards (Causes skin tearing & bruising) from skin surface
Step 5: Post-Wax Cleanup and Skin Soothing
- Residue Removal: Apply a dedicated post-waxing oil, mineral oil, or baby oil to a cotton pad and wipe away leftover wax residue. Water and soap will not break down non-water-soluble waxes.
- Soothe: Apply a cooling, non-comedogenic aloe vera gel or witch hazel extract to calm mild inflammation.
- Aftercare Restrictions: For 24 to 48 hours post-waxing, avoid hot showers, saunas, steam rooms, intense workouts (excessive sweating), sun exposure, tanning beds, tight synthetic clothing, and heavily fragranced lotions. Waxing leaves hair follicles wide open, making them susceptible to bacterial intrusion and heat-induced irritation.
Managing Post-Wax Skincare and Troubleshooting Common Issues
Even with proper technique, post-waxing skin reactions can occur. Understanding how to manage common complications ensures long-term skin health.
1. Preventing and Treating Ingrown Hairs (Pseudofolliculitis)
Ingrown hairs occur when a regenerating hair curls inward and pierces the follicular wall, triggering a localized inflammatory response.
- Prevention: Wait 48 hours after waxing before initiating gentle physical or chemical exfoliation. Use a body lotion containing salicylic acid or glycolic acid 2 to 3 times per week to slough off dead skin cells that block hair pore openings.
- Treatment: Avoid aggressive manual squeezing or picking with non-sterile tweezers. Apply a spot treatment containing 2% salicylic acid or tea tree oil to calm inflammation.
2. Soothing Erythema and Follicular Edema
Erythema (redness) and follicular edema (small, raised red bumps centered around individual hair follicles) are normal histamine responses immediately following hair extraction.
- Duration: These symptoms typically resolve spontaneously within 2 to 24 hours.
- Intervention: Apply a cold compress or a soothing hydrogel pack. If redness persists beyond 48 hours or develops purulent drainage (pus), consult a healthcare provider to evaluate for bacterial folliculitis (often caused by Staphylococcus aureus).
3. Resolving Skin Lifting and Epidermal Abrasion
Skin lifting occurs when top layers of the epidermis are torn away alongside the wax, leaving a raw, shiny, or weeping wound.
- Root Causes: Waxing over the same area multiple times in one session, applying wax at excessively high temperatures, using soft wax on thin skin, or failing to pull parallel to the skin.
- Treatment: Treat lifted skin as a superficial wound. Keep the area clean, avoid further hair removal, and apply a thin layer of plain petroleum jelly (such as Vaseline) or an antibacterial ointment. Protect the region from direct sun exposure to prevent post-inflammatory hyperpigmentation (PIH).
Economic and Practical Comparison: At-Home Waxing vs. Professional Salon Services
Investing in an at-home waxing system involves weighing financial savings against the convenience and expertise offered by professional estheticians.
Financial Breakdown
- At-Home Waxing: An initial investment in an electric warmer kit ranges from $30 to $80. Replacement wax beads cost approximately $15 to $30 per kilogram. A single batch of wax beads provides multiple full-body or targeted sessions, bringing the cost per treatment down to a fraction of salon rates.
- Professional Salon Waxing: Salon treatments range from $20–$40 for small areas (lip, eyebrows, underarms) to $60–$120+ for larger regions (full legs, Brazilian). Over a year of maintenance (waxing every 4–6 weeks), professional costs accumulate significantly.
Convenience vs. Skill Curve
While home kits offer long-term financial savings and scheduling privacy, they require a learning curve. Self-waxing hard-to-reach areas—such as the back of the legs or full Brazilian zones—demands flexibility, patience, and practice to master proper skin-stretching techniques.
Frequently Asked Questions
What is the ideal hair length required for at-home waxing?
Hair should be between 1/4 inch and 1/2 inch long (roughly 6 mm to 12 mm). If the hair is shorter than 1/4 inch, the wax cannot grip it effectively, leading to incomplete hair removal. If it is longer than 1/2 inch, trim it down with clean scissors before waxing to avoid excessive pulling and pain.
What is the main difference between hard wax and soft wax for home use?
Hard wax sets on the skin and is pulled off directly without fabric strips; it adheres primarily to the hair shaft rather than the skin, making it ideal for sensitive zones like the face, underarms, and bikini area. Soft wax requires paper or cloth strips for removal and adheres to both hair and skin, making it best for large, less sensitive areas like the legs, arms, and back.
How do I prevent skin lifting when waxing sensitive areas at home?
To prevent skin lifting, ensure the skin is thoroughly clean, dry, and lightly dusted with cornstarch before applying wax. Never apply soft wax to the exact same spot more than once during a single session. Always hold the surrounding skin firmly taut with your non-dominant hand and pull the wax strip parallel and close to the skin rather than lifting upwards away from the body.
How can I safely remove stubborn wax residue left on my skin?
Non-water-soluble waxes (hard wax, soft wax, and cold strips) must be removed using an oil-based product. Apply body oil, mineral oil, baby oil, or post-wax oil to a cotton pad and gently rub over the residue. Water and standard soap will not break down resin-based waxes. If using water-soluble sugar paste, warm water and a washcloth will dissolve the residue instantly.
Can I wax if I am using topical anti-aging or acne treatments?
No. You should not wax areas treated with topical retinoids (such as tretinoin, retinol, or adapalene) or alpha/beta hydroxy acids (glycolic or salicylic acids), as these products thin the upper layers of skin and increase the risk of skin tearing. Discontinue topical exfoliants and retinoids for at least 7 to 14 days before waxing the area. If taking oral isotretinoin (Accutane), waxing is strictly contraindicated for 6 to 12 months after stopping the medication.
Actionable Next Steps for Success
To achieve smooth, safe, and professional-quality results with an at-home waxing kit, follow these practical steps:
- Select the Right Kit: Choose a digital electric hard wax warmer kit if your focus is sensitive zones (bikini, underarms, face), or a roll-on cartridge system if your main target is large areas like legs and arms.
- Audit Your Skincare: Check your current medications and topical skincare products for active retinoids or hydroxy acids that require a wait period prior to waxing.
- Prep the Hair & Skin: Ensure hair is grown out to at least 1/4 inch. Gently exfoliate 24–48 hours before waxing, and wash and dry the skin thoroughly on the day of treatment.
- Master Temperature Control: Always conduct a temperature test on your inner wrist before applying warm wax to larger body surfaces.
- Establish Proper Technique: Practice holding your skin completely taut and pulling the wax back parallel to the skin surface in one quick motion. Keep post-wax calming oils and aloe vera gel on hand for immediate aftercare.