Adding an audio track in Adobe Premiere Pro is a foundational skill for any video editor, enabling the layering of voiceovers, music, sound effects, and ambient noise to create a professional soundscape. By default, Premiere Pro organizes the timeline into distinct video and audio tracks, allowing users to import, position, and customize audio files alongside their visual sequences to achieve precise synchronization and balance.
Understanding the Adobe Premiere Pro Timeline Structure
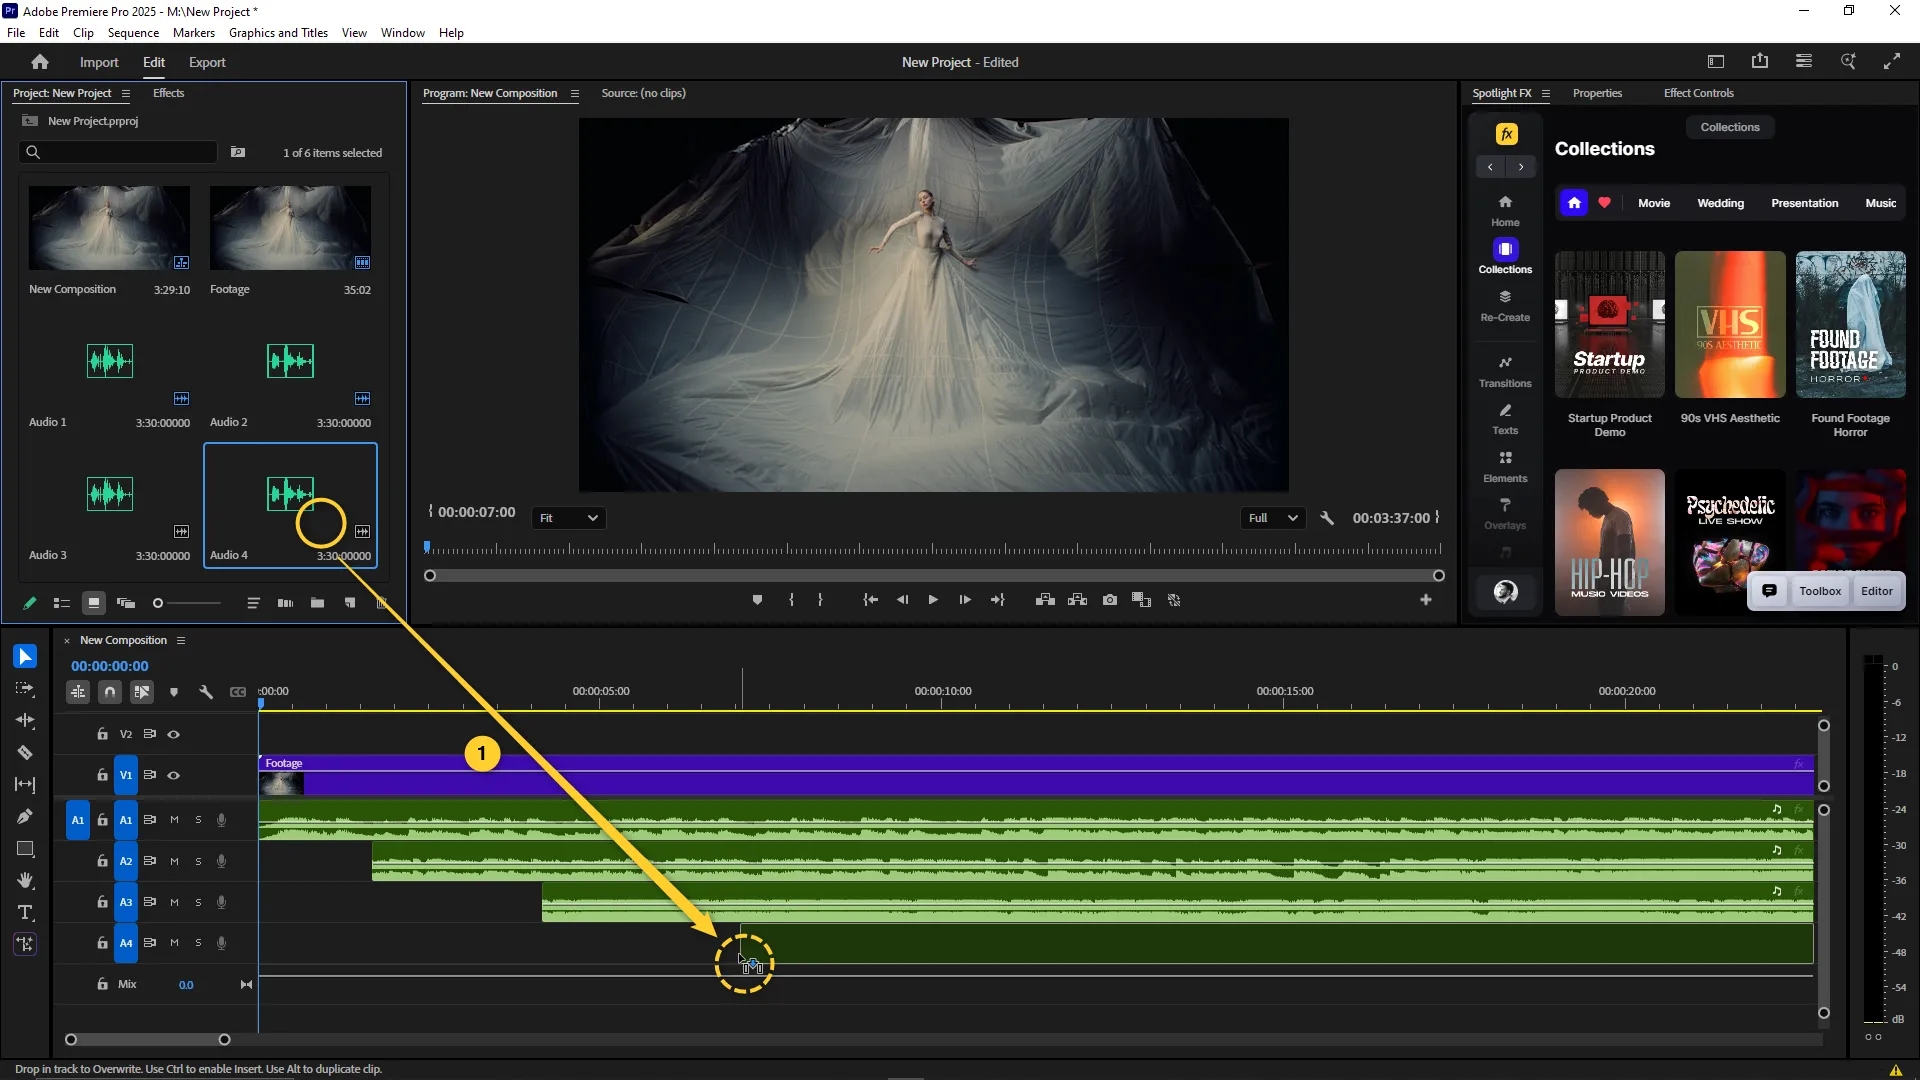
Before you can add an audio track, it is essential to understand how the timeline in Adobe Premiere Pro handles media. The interface is designed as a non-linear editor (NLE) that separates visual data from auditory data. While visual clips occupy video tracks (labeled V1, V2, V3, etc.), audio files must reside on audio tracks (labeled A1, A2, A3, etc.).
Unlike video tracks, which often behave as "intelligent" layers where upper tracks obscure lower ones, audio tracks are additive. This means that if you have audio on A1 and A2 playing simultaneously, they will be summed together in the final mix. This is a critical distinction, as it allows for the mixing of multiple sources—such as a dialogue track, a background music track, and a spot effect track—without any one signal being cut off by the presence of another.
Prerequisites for Importing Audio
To add an audio track effectively, you must ensure your project is set up to handle the specific file types you intend to use. Premiere Pro supports a wide array of formats, including WAV, AIFF, MP3, and AAC.
Before dragging files into your sequence:
- File Organization: Keep your audio assets in a dedicated folder on your local drive or server to prevent "media offline" errors.
- Sample Rates: Ideally, your audio should match your project settings (commonly 48kHz). If they differ, Premiere Pro will process them in real-time, but rendering may take longer.
- Project Panel: Always import your audio files into the Project Panel first, rather than dragging them directly from your operating system’s file explorer, to ensure Adobe Media Encoder and other background processes can track the links properly.
Methods for Adding Audio to the Timeline
There are three primary ways to add an audio track in Premiere Pro, depending on whether you are adding a new file or creating an empty track for future work.
1. Importing New Audio Files
The most common method involves bringing an external audio file into an existing sequence. Once the file is visible in your Project Panel:
- Drag and Drop: Simply click and drag the file from the Project Panel onto any available audio track in the Timeline. If you drag it to a region where no audio track exists, Premiere Pro will automatically create a new track (e.g., A4) to accommodate the file.
- Source Monitor: Double-click the file in the Project Panel to open it in the Source Monitor. From there, you can set "In" and "Out" points to define exactly which portion of the audio you want to bring into the sequence. Once set, click the "Drag Audio Only" icon (represented by a waveform symbol) and move it into the sequence.
2. Creating an Empty Audio Track
If you need to organize your workspace before adding assets, you can create empty tracks manually:
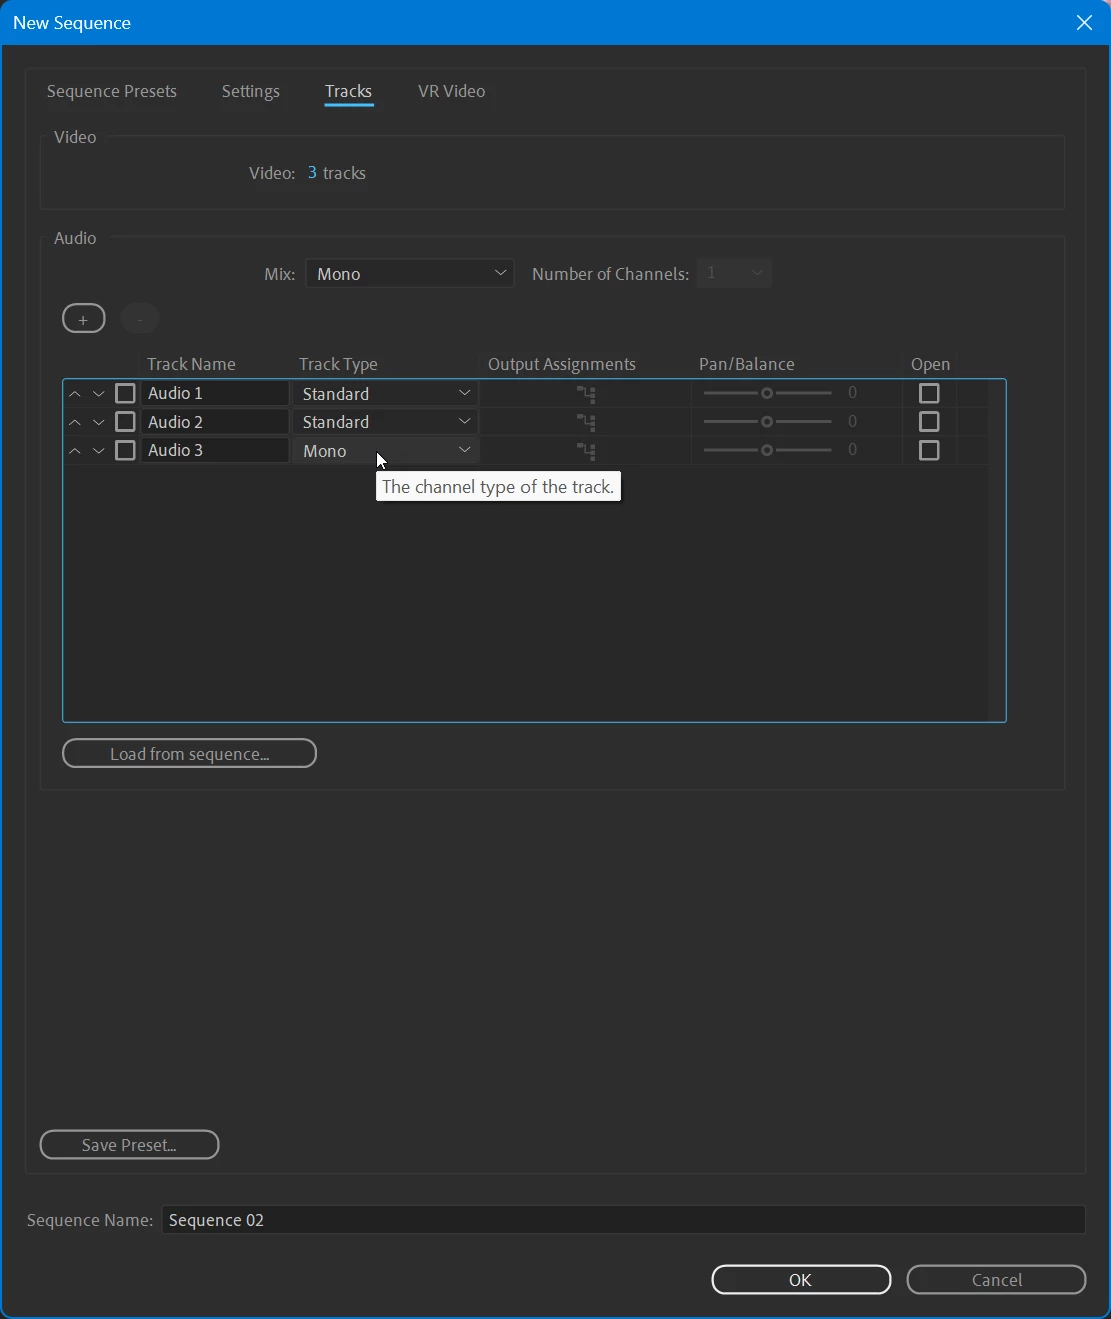
- Right-Click Method: Right-click the header area of any existing audio track (where it says A1, A2, etc.). Select "Add Tracks."
- Configuration: A dialog box will appear asking how many tracks you want to add, where to place them (before or after existing tracks), and the track type (Standard, Mono, Stereo, 5.1, or Adaptive).
Table: Comparison of Audio Track Types
| Track Type | Best Use Case | Channel Configuration |
|---|---|---|
| Standard | General editing, music, and voiceovers. | Flexibly handles Mono or Stereo. |
| Mono | Single-channel dialogue or raw field recordings. | One channel output. |
| Stereo | Music beds or mastered soundscapes. | Two-channel output. |
| Adaptive | Advanced multi-channel workflows. | User-defined channel routing. |
Advanced Track Management and Patching
One common source of frustration for new users is "source patching," which determines where audio goes when you use keyboard shortcuts to insert clips. Look at the far left side of the timeline panel; you will see small blue boxes with "A1" written in them. These are your Source Patching indicators.
If the "A1" button on the far left is highlighted blue, Premiere Pro will map the audio from your source file to track A1. If it is unselected, the video will be inserted, but the audio will be dropped or ignored. Mastering this system allows for fast, efficient editing where you can toggle which tracks receive incoming media without having to drag and drop everything manually.
Common Pitfalls and Troubleshooting
Users often encounter issues where audio seems to be "missing" or "not working" despite being on the timeline.
- Muted Tracks: Check the "M" button on the track header. If it is highlighted, the entire track is muted.
- Soloing: If the "S" (Solo) button is active on any track, you will only hear that track, and all others will be silenced. This is often accidentally toggled on.
- Audio Hardware Settings: If the audio appears to be playing (the meters are moving) but you hear nothing, navigate to Edit > Preferences > Audio Hardware and ensure your "Default Output" is correctly set to your speakers or headphones.
- Waveform Generation: Sometimes, a file may look blank. Premiere Pro generates audio waveforms as a background process. If you have just imported a long file, it may take a moment for the peaks to appear.
Working with Multi-Channel Audio
Modern production environments often require managing more than simple stereo tracks. If you are working with a camera that records four channels of audio, importing them as a single "Standard" track might limit your ability to mix them individually.
To gain full control, right-click the clip in the Project Panel, select Modify > Audio Channels. Here, you can change the "Clip Channel Format" to "Mono" and increase the number of clips to match your source. This allows you to place each channel on its own individual track in the timeline, which is vital for balancing a boom mic against a lavalier microphone during post-production.
Best Practices for Professional Audio Organization
Consistency is the hallmark of professional editing. Always adopt a logical naming and placement convention for your audio tracks:
- Track A1-A2: Dialogue / Interviews
- Track A3-A4: Sound Effects (SFX)
- Track A5-A6: Music/Score
- Track A7-A8: Room Tone or Ambient Noise
By grouping similar types of audio onto the same vertical tracks, you can apply global effects (like a compressor or limiter) to an entire track header in the Audio Track Mixer rather than having to copy and paste effects onto dozens of individual clips.
Frequently Asked Questions
How do I delete an empty audio track? Right-click on the track header (A1, A2, etc.) and select "Delete Tracks." You will have the option to delete "All Empty Tracks," which is a fast way to clean up your timeline after a project is finished.
Why does my audio sound distorted when I add it to the timeline? This is typically caused by "peaking," where the volume levels exceed 0dB. Check your Audio Meters panel. If the levels are hitting the red, reduce the clip volume in the Effect Controls panel or use an "Amplitude and Compression" effect to normalize the audio.
Can I convert a Mono track to Stereo? Yes, but it is better to set this during the import phase. If you already have it in the timeline, you can use the "Fill Left with Right" or "Fill Right with Left" audio effects to ensure the sound plays out of both speakers.
What is the difference between a submix and a standard track? A standard track contains clips. A submix track is a "virtual" track used for routing multiple tracks together. You can send the output of all your dialogue tracks to a single dialogue submix, allowing you to control the volume of all dialogue at once with a single fader.
How do I adjust audio volume for a specific clip?
Select the clip and press Shift + 5 to open the Effect Controls panel. Expand the "Volume" section and adjust the "Level." Alternatively, you can toggle the "Show Clip Keyframes" option in the timeline to draw volume automation lines directly onto the clip.
Final Recommendation
To become proficient with audio in Premiere Pro, start by strictly organizing your tracks by type (Dialogue, SFX, Music) as soon as you begin a project. Master the "Audio Track Mixer" for real-time adjustments and the "Source Patching" controls to speed up your workflow. By treating your timeline as a structured soundboard rather than a simple scratchpad, you ensure that your projects remain scalable, easy to mix, and professional in their final output.