Arduino Android integration allows developers to bridge the gap between physical hardware and mobile software, enabling Android devices to act as sophisticated interfaces, controllers, or data loggers for Arduino microcontrollers. This is typically achieved through Bluetooth, USB On-The-Go (OTG), or Wi-Fi connections, utilizing standardized communication protocols to exchange data between the two ecosystems.
Understanding the Landscape of Arduino Android Integration
By 2026, the integration of Arduino and Android has matured from a hobbyist niche into a standard approach for rapid prototyping in the Internet of Things (IoT) and industrial monitoring sectors. The fundamental goal is to leverage the high-resolution displays, touch interfaces, and powerful processing capabilities of Android smartphones to complement the real-world input/output (I/O) capabilities of Arduino boards.
Integrating these two platforms requires a multi-layered understanding of hardware compatibility, communication protocols, and software development. Unlike standalone embedded systems, an integrated project must manage two separate runtime environments: the real-time execution of the Arduino sketch and the event-driven lifecycle of an Android application.
The primary use cases for this integration involve remote sensing, where an Android device visualizes data from sensors connected to an Arduino; robotics, where the phone’s accelerometer or touch screen controls motors; and smart home automation, where the Android device serves as a central hub.
Primary Communication Protocols
The success of an Arduino Android project depends heavily on choosing the correct communication medium. Each protocol offers distinct advantages regarding range, power consumption, and bandwidth.
Bluetooth and Bluetooth Low Energy (BLE)
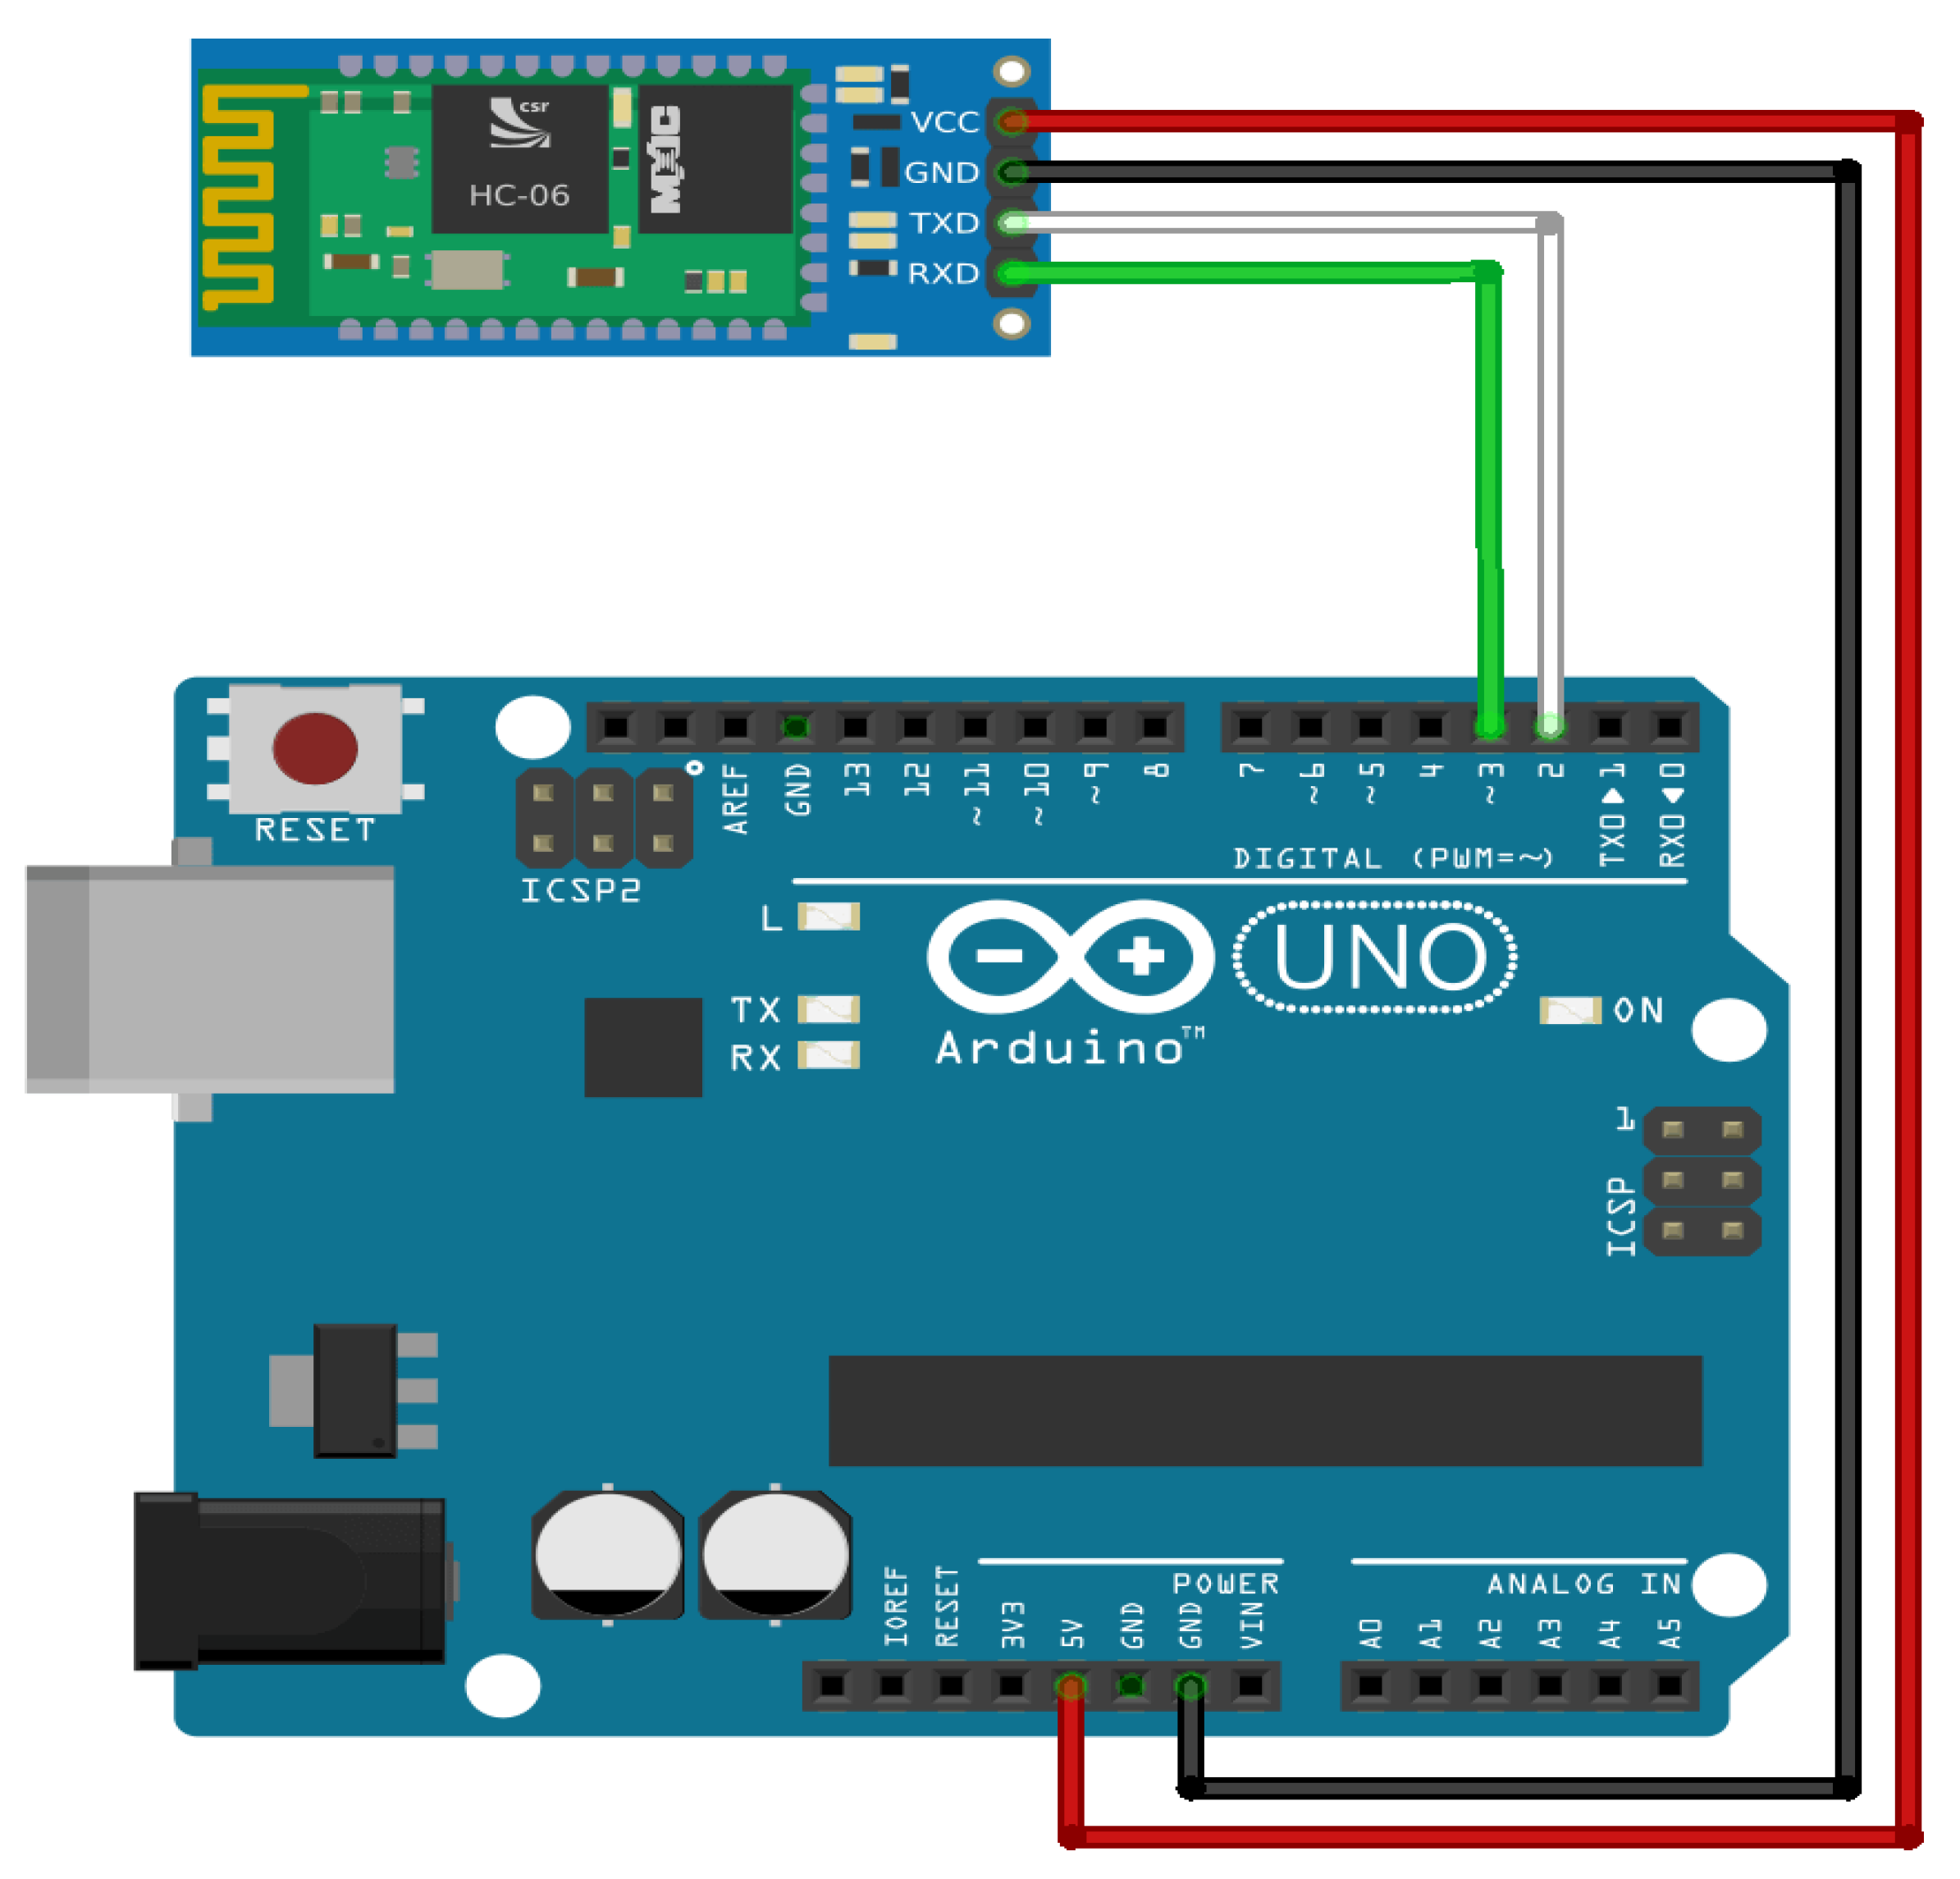
Bluetooth remains the most popular choice for short-range integration. Standard Bluetooth (Classic) is often used with modules like the HC-05 or HC-06 for simple serial communication. However, in 2026, Bluetooth Low Energy (BLE) has become the industry standard due to its significantly lower power profile and native support in modern Android versions.
BLE operates using a GATT (Generic Attribute Profile) architecture, where the Arduino (acting as a peripheral) provides services and characteristics that the Android device (the central) can read, write, or subscribe to. This is ideal for battery-operated sensors where data only needs to be transmitted at specific intervals.
USB On-The-Go (USB OTG)
For environments where wireless interference is a concern or where high reliability is required, USB OTG provides a direct, wired serial connection. By using a USB OTG adapter, an Android phone acts as a USB Host, powering the Arduino and communicating via the Serial protocol. This method is particularly useful for debugging or for projects located in shielded environments where RF signals cannot penetrate. It requires the Android device to support USB Host mode and usually involves the use of specialized libraries like usb-serial-for-android to handle the driver logic within the app.
Wi-Fi and Cloud Intermediaries
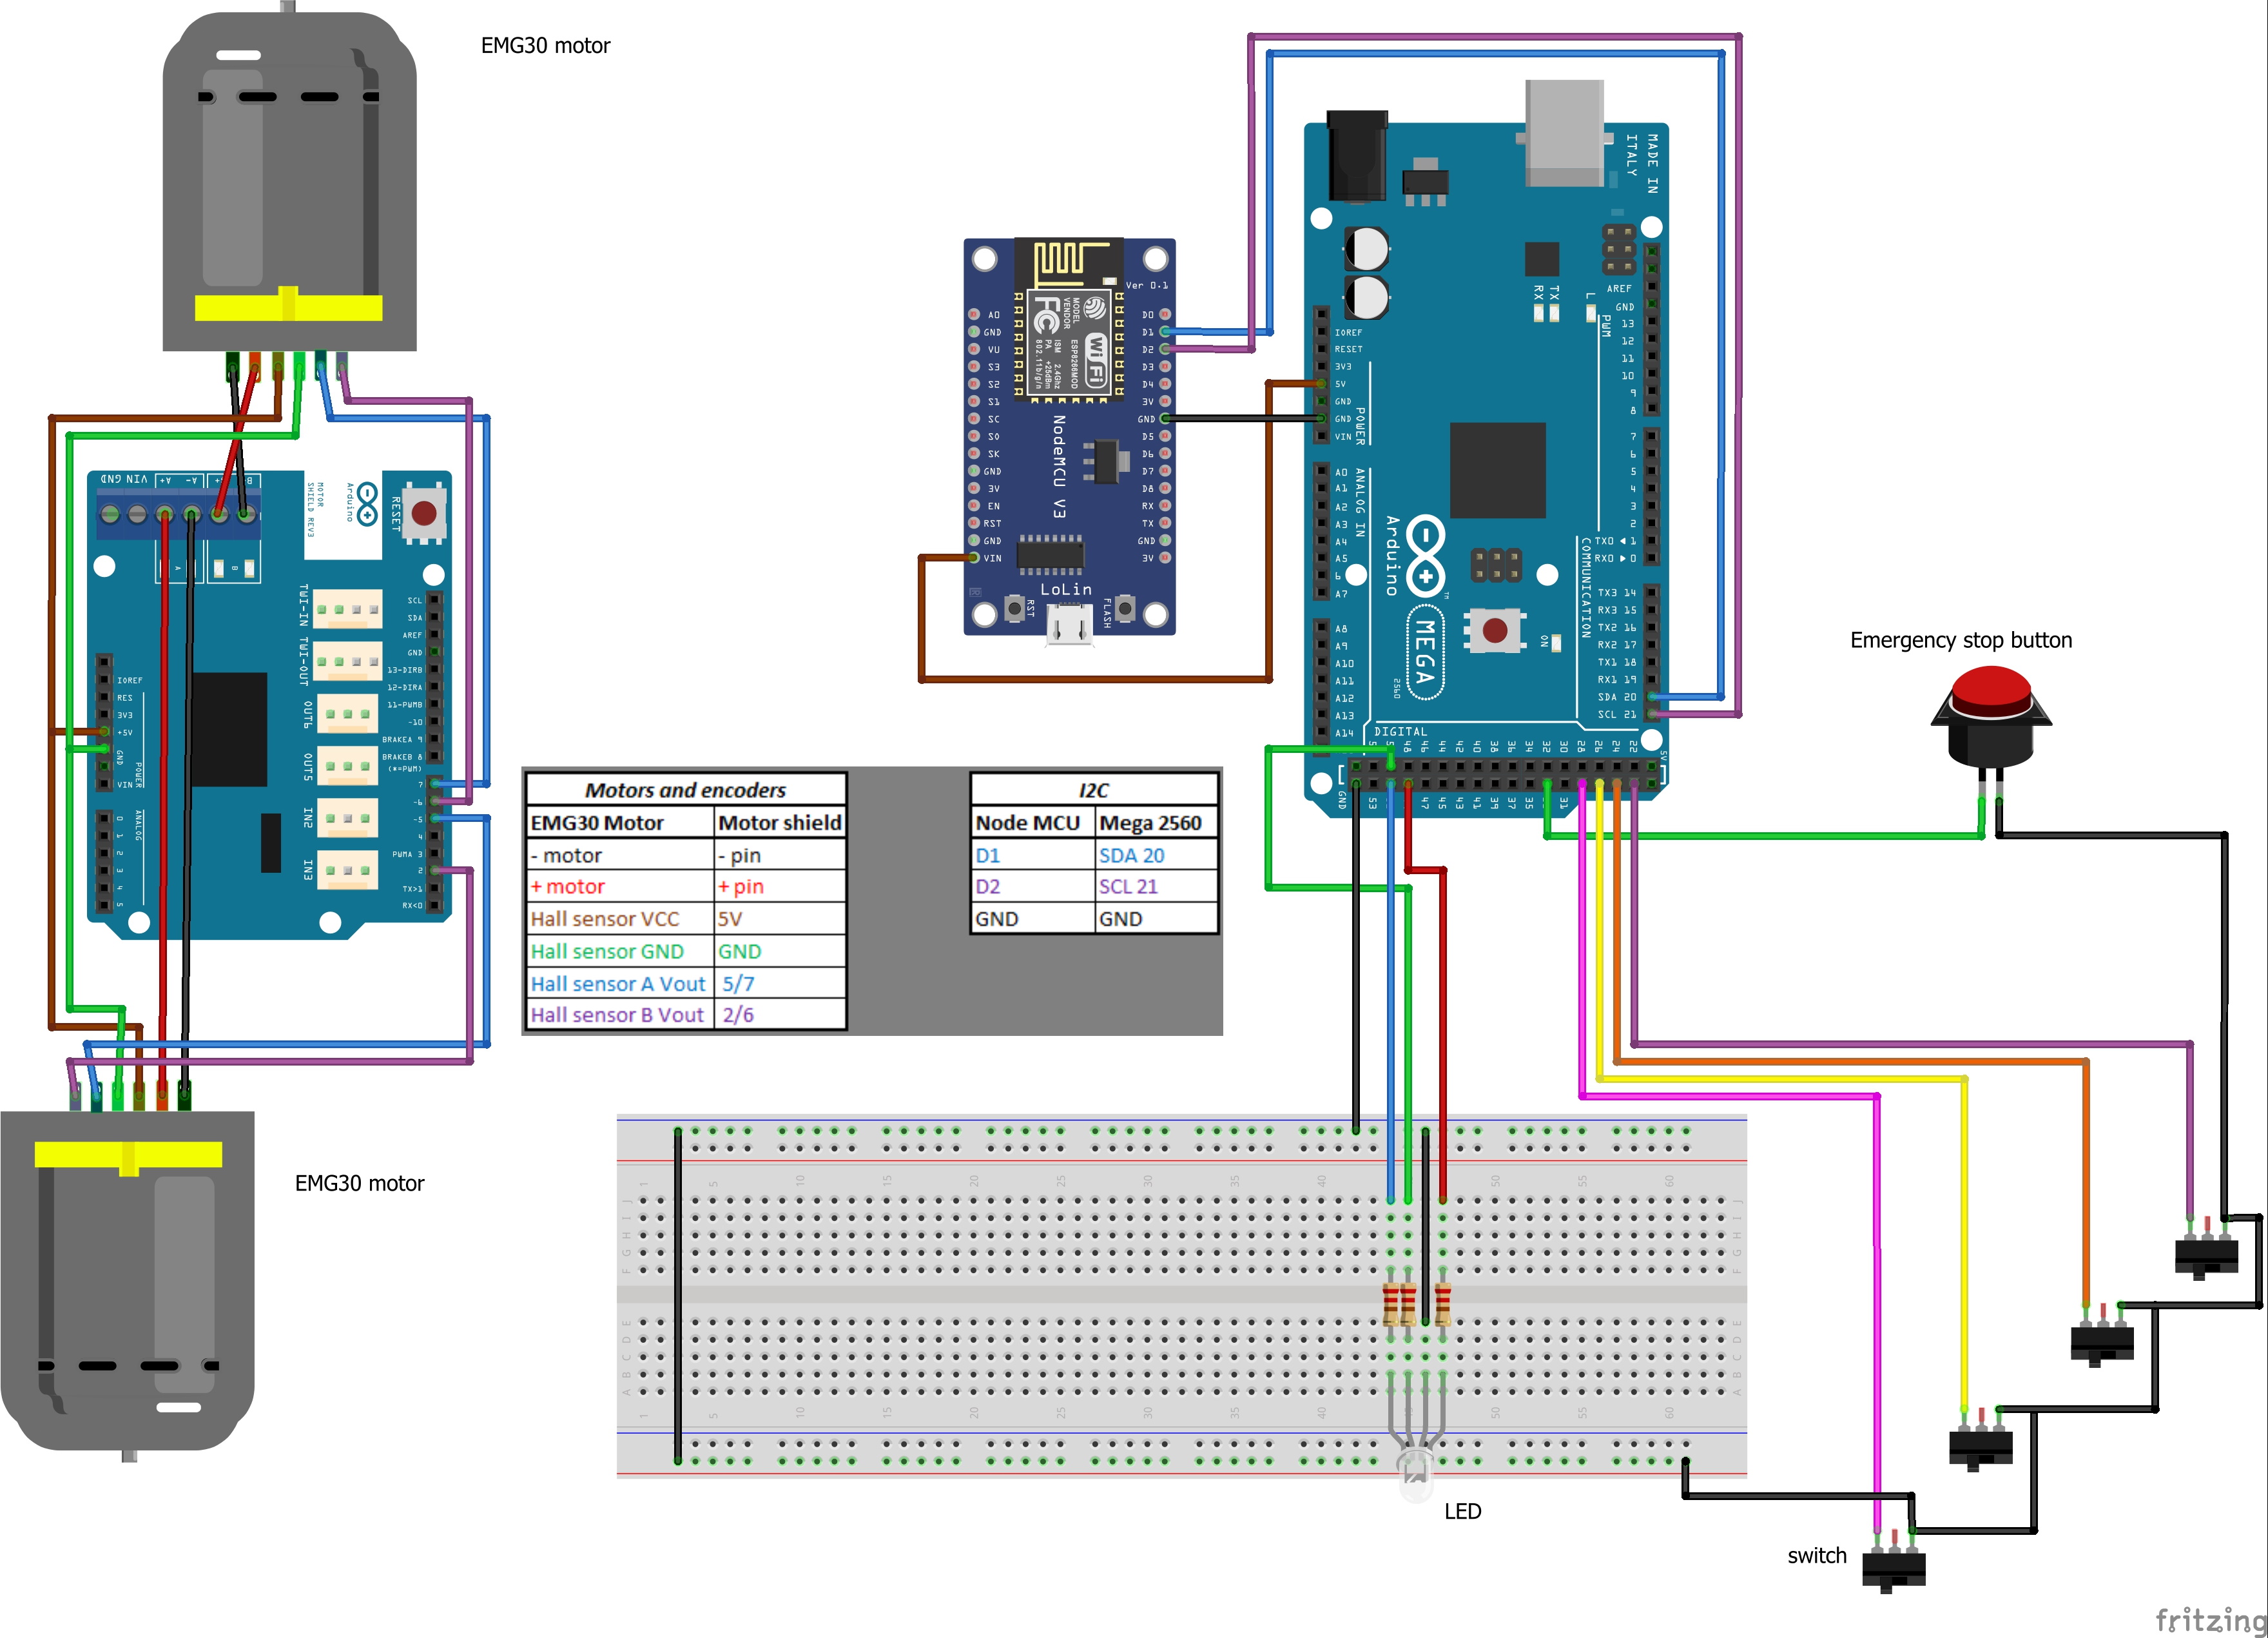
Wi-Fi integration, often facilitated by boards like the ESP32 or the Arduino Nano Matter, allows for long-distance communication. Instead of a direct peer-to-peer link, the Arduino and Android devices typically communicate through a local network or a cloud-based broker using the MQTT (Message Queuing Telemetry Transport) protocol. This approach is essential for home automation where the user might want to control the Arduino from another room or even another city.
Hardware Requirements and Compatibility
Selecting the right hardware is the first technical hurdle. Not all Arduino boards are created equal when it comes to connectivity.
The Microcontroller Side
Modern Arduino boards often feature integrated connectivity. The Arduino Nano RP2040 Connect or the Arduino Uno R4 WiFi are excellent choices because they eliminate the need for external modules. If using older hardware like the Arduino Uno R3, external modules such as the HC-05 for Bluetooth or an ESP8266 for Wi-Fi are necessary. These modules communicate with the Arduino via UART (Universal Asynchronous Receiver-Transmitter) pins, specifically the TX (Transmit) and RX (Receive) pins.
The Android Side
On the Android side, hardware requirements are generally minimal, but software permissions are stringent. As of 2026, Android's security model requires explicit user permission for "Nearby Devices" to access Bluetooth and "Fine Location" for certain Wi-Fi scanning operations. Developers must ensure the target Android device supports the specific version of Bluetooth (e.g., Bluetooth 5.2 or later) required by the Arduino module to ensure stable pairing and data throughput.
Software Frameworks for Integration
Writing the code for an integrated system involves two distinct development environments.
The Arduino Environment
On the Arduino side, the code is typically written in C++ using the Arduino IDE. The primary task is to establish a Serial or BLE service and then format data for transmission. A common mistake is sending raw binary data without a clear protocol, which can lead to desynchronization. Professionals often use JSON (JavaScript Object Notation) for data packets, utilizing the ArduinoJson library to ensure that complex data structures can be easily parsed by the Android application.
The Android Environment
Developing the Android application offers several paths depending on the developer’s expertise:
- Native Development (Android Studio): Using Kotlin or Java provides the most control and performance. Developers can use the official Android Bluetooth and USB APIs to build custom, high-performance interfaces.
- Cross-Platform Frameworks (Flutter/React Native): These are increasingly popular for IoT because they allow for rapid UI development and have robust plugins for Bluetooth and Serial communication.
- Low-Code Solutions (MIT App Inventor/Blynk): For rapid prototyping, tools like MIT App Inventor allow users to drag and drop visual blocks to create functional apps. Blynk 2.0 remains a dominant player in 2026 for cloud-based integration, providing a ready-made mobile dashboard that connects to Arduino via a simple API.
Data Serialization and Protocol Design
A robust integration relies on a well-defined communication protocol. If the Arduino sends a temperature value and a humidity value, the Android app needs a way to distinguish between them.
A simple delimited protocol might look like this: T:22.5|H:60.0. The Android app receives this string, splits it by the pipe character, and then parses the values based on the prefixes. For more complex systems involving multiple sensors or control commands, moving to a structured format like JSON is highly recommended. JSON allows for key-value pairs, making the code more readable and easier to maintain. For example: {"temp": 22.5, "hum": 60, "status": "OK"}. While JSON adds some overhead to the packet size, the processing power of modern Arduino boards like the Uno R4 makes this negligible.
Comparison of Integration Methods
The following table summarizes the primary methods for Arduino Android integration to help in selecting the right approach for a specific project.
| Feature | Bluetooth Classic | Bluetooth Low Energy (BLE) | USB OTG (Wired) | Wi-Fi (MQTT/Local) |
|---|---|---|---|---|
| Range | ~10 Meters | ~50-100 Meters | Cable Length | Global (via Cloud) |
| Power Consumption | Medium | Very Low | High (on Phone) | High |
| Data Rate | ~2 Mbps | ~1-2 Mbps | High (~12 Mbps+) | Very High |
| Ease of Setup | Moderate | Complex (GATT) | Simple | Complex |
| Reliability | Good | Excellent | Superior | Variable (Network) |
| Best Use Case | Legacy Projects | Battery Sensors | Industrial Control | Smart Home / IoT |
Step-by-Step Implementation Workflow
To successfully integrate Arduino with Android, follow this professional workflow to minimize debugging time.
Step 1: Hardware Interfacing
Connect your communication module to the Arduino. If using a 3.3V module like the HC-05 with a 5V Arduino Uno, use a voltage divider on the RX pin of the module to prevent damage. Ensure the power supply can handle the peak current of the wireless module, especially for Wi-Fi, which can draw up to 250mA during transmission.
Step 2: Developing the Arduino Sketch
Initialize the serial communication at a standard baud rate (9600 or 115200). Use the Serial.print() or specific Bluetooth library functions to send data. It is crucial to include a termination character, such as a newline (\n), so the Android app knows when a complete message has arrived.
Step 3: Establishing Android Connectivity
In your Android code, implement the discovery and pairing logic. For Bluetooth, this involves scanning for devices with the specific UUID (Universally Unique Identifier) of your service. For USB, it involves requesting permission from the user to access the attached device.
Step 4: Data Parsing and UI Update
Once the connection is established, start an asynchronous thread or use a reactive pattern to listen for incoming data. Avoid updating the UI directly from the background thread; use a handler or a LiveData object to pass the parsed values to the main thread for display.
Troubleshooting Common Integration Issues
Integration projects often fail due to a few common pitfalls that are easily avoidable with systematic checking.
Power Management and Grounding
A frequent cause of intermittent connection drops is inadequate power. Wireless modules often spike in power usage during data transmission. If the Arduino is powered via a computer's USB port, it might not provide enough current for both the board and a Wi-Fi module. Additionally, always ensure a "Common Ground" between the Arduino and any external communication modules to maintain signal integrity.
Buffer Overflows and Latency
If the Arduino sends data faster than the Android app can process it, the serial buffer will overflow, leading to corrupted data. Implement a "handshake" or a timed interval (e.g., sending data every 500ms) to ensure the Android side can keep up. On the Android side, ensure that data processing is efficient and does not block the main thread, which would cause the app to freeze.
Permission and Versioning Conflicts
Android's security updates frequently change how apps interact with hardware. In 2026, apps targeting the latest Android APIs must handle "Runtime Permissions" for Bluetooth and Location. Failure to declare these in the AndroidManifest.xml and request them at runtime will result in the app silently failing to find any Arduino devices.
The Future of Integration: Matter and Beyond
As we move through 2026, the Matter protocol is becoming increasingly relevant for Arduino Android integration. Matter is a unified IP-based connectivity protocol that allows different devices from different manufacturers to work together seamlessly. Many new Arduino boards now support Matter, which simplifies the integration process by providing a standardized layer that Android recognizes natively through the Google Home or similar ecosystems, reducing the need for custom-built Android apps for simple control tasks.
Furthermore, Edge AI is changing the dynamic of this integration. Instead of the Android device merely acting as a display, it can now perform heavy machine learning inference on data sent from the Arduino. For example, an Arduino could send raw vibration data from a machine, and a TensorFlow Lite model running on the Android app could analyze that data in real-time to predict mechanical failure.
Recommendation for Next Actions
For those starting a new project in 2026, the recommended path is to use an ESP32-based Arduino board combined with BLE for local connectivity or MQTT for cloud connectivity. The ESP32 offers the most flexibility, built-in wireless capabilities, and extensive library support. Begin by using a pre-built dashboard like Blynk to verify that your hardware is transmitting data correctly before investing time in developing a fully custom Android application. This "MVP" (Minimum Viable Product) approach ensures that your hardware logic is sound before you tackle the complexities of mobile development.
Frequently Asked Questions
Can I connect an Arduino to an Android phone without a special app?
Yes, you can use generic Bluetooth terminal apps available on the Google Play Store to send and receive raw text data. However, for a customized user interface or automated data processing, a dedicated app developed via Android Studio, Flutter, or a low-code platform like MIT App Inventor is required.
Do I need to root my Android device for USB OTG integration?
No, rooting is not necessary for USB OTG communication. Standard Android APIs support USB Host mode, which allows apps to communicate with USB-to-Serial chips (like the ATmega16U2, CH340, or FTDI) found on Arduino boards, provided you use the correct driver libraries within your application.
Why is my Android app not finding the Arduino via Bluetooth?
The most common reason is missing permissions. Ensure your app has requested BLUETOOTH_SCAN, BLUETOOTH_CONNECT, and ACCESS_FINE_LOCATION permissions. Additionally, check that the Bluetooth module is in "pairing mode" and that it is not already connected to another device, as most modules only support a single active connection.
How do I handle long-distance communication between Arduino and Android?
For distances beyond 100 meters, Wi-Fi is the preferred method. You can set up the Arduino as a Web Server that the Android phone accesses via an IP address, or use an MQTT broker (like Mosquitto or HiveMQ). This allows the devices to communicate as long as both have an internet connection, regardless of the physical distance between them.
What is the best way to send sensor data: Raw bytes or JSON?
While raw bytes are more efficient for bandwidth, JSON is much better for reliability and ease of development. JSON's key-value structure prevents data from being misassigned if a packet is partially lost. For most 2026 applications, the overhead of JSON is negligible compared to the benefits of structured data.