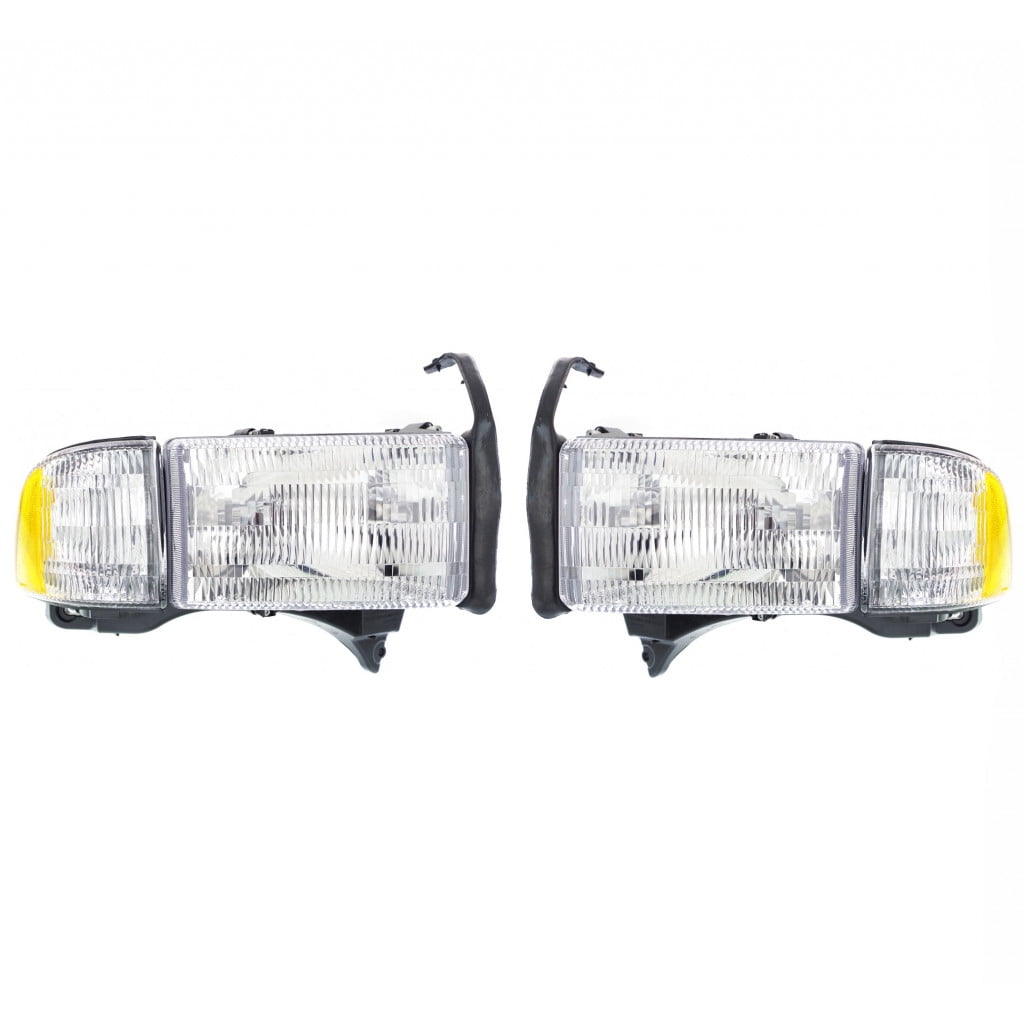
Replacing or upgrading the headlights on a 2001 Dodge Ram 2500 is one of the most effective ways to restore nighttime visibility, modernize the truck's exterior appearance, and ensure road safety. The second-generation Ram platform utilizes a standard 9007 dual-filament bulb configuration for both high and low beams, housed in composite headlight assemblies that are prone to UV fading, yellowing, and moisture intrusion over decades of service.
Understanding the 2001 Ram 2500 Lighting System
The 2001 Dodge Ram 2500 occupies a unique space in automotive history, sitting at the tail end of the second-generation styling era (1994–2002). Factory lighting on these trucks consisted of standard halogen capsules seated in multi-reflector composite plastic assemblies. Over time, exposure to sunlight, road salt, and thermal cycling degrades the outer polycarbonate lens, scattering light beams and drastically reducing forward projection.
When planning a headlight service or upgrade for a 2001 Ram 2500, owners must consider whether they are merely replacing burned-out bulbs, restoring oxidized lenses, swapping out the entire factory housing, or upgrading to modern aftermarket technologies like projector housings and LED conversion kits. Each path carries specific technical considerations, installation nuances, and regulatory implications.
Factory Specifications and Bulb Sizes
Knowing the exact specifications of the lighting circuits prevents electrical faults and ensures proper beam patterns. The front lighting configuration on the 2001 Ram 2500 relies on distinct bulb types for various functions:
- Headlights (High and Low Beams): 9007 (HB5) dual-filament halogen bulbs.
- Front Turn Signals / Parking Lights: 3157 dual-filament wedge bulbs.
- Fog Lights (If equipped): 893 or 880 single-filament halogen bulbs, depending on the specific bumper trim package.
The stock headlight wiring harness on second-generation Rams routes all headlamp current directly through the headlight switch and multifunction switch inside the cab. Due to the high electrical resistance in these aging factory wires and switches, voltage drop is a common issue, often resulting in dim headlights even with new bulbs installed.
Common Headlight Issues on Second-Generation Rams
Owners of 2001 Dodge Ram 2500 trucks frequently encounter a predictable set of lighting challenges. Recognizing these symptoms helps isolate whether the root cause is a failing bulb, compromised wiring, or a degraded assembly.
Lens Oxidation and Yellowing
Polycarbonate plastic lacks natural UV resistance, relying instead on a factory-applied top coat. Once this protective layer wears away, ultraviolet radiation oxidizes the plastic, turning it hazy, yellow, or opaque. This surface degradation blocks a significant percentage of light output and can cause light to scatter uncontrollably, blinding oncoming drivers while failing to illuminate the road ahead.
Moisture Intrusion and Housing Cracks
The rubber seals and back caps on factory headlight assemblies deteriorate over 25 years of service. When these seals fail, humidity and rainwater enter the housing, condensing on the inside of the lens. Trapped moisture accelerates the corrosion of the bulb base, reflector bowl plating, and electrical terminals, eventually leading to premature bulb failure or complete electrical shorting.
Dim Lighting and Voltage Drop
As noted, the factory wiring setup on the 2001 Ram 2500 sends full operating current through the interior dashboard switches. Over time, contacts inside the multifunction switch and headlight switch pit and corrode, introducing resistance. Measuring voltage at the headlight plug with the engine running often reveals a drop of 1 to 2 volts below charging system voltage, which visibly reduces halogen bulb output intensity.
Upgrading and Replacement Options
When addressing lighting deficiencies on a 2001 Ram 2500, several aftermarket and OEM-style paths are available. Selecting the right option depends on budget, aesthetic preference, and performance goals.
| Upgrade Type | Pros | Cons | Best For |
|---|---|---|---|
| OEM-Style Halogen Assemblies | Direct fit, affordable, factory beam pattern, street legal. | Same stock performance limitations, plastic still prone to future UV fading. | Stock restorations and budget-conscious repairs. |
| Aftermarket Projector Headlights | Modern styling, sharp cutoff line (if properly aimed), integrated LED accent bars. | Variable build quality, prone to moisture leaks if seals are subpar. | Custom styling enthusiasts and modern updates. |
| Upgraded Heavy-Duty Wiring Harness | Eliminates dashboard switch voltage drop, protects switches, maximizes bulb brightness. | Requires installation under the hood and battery connections. | Anyone running stock or high-performance halogen bulbs. |
| LED / HID Retrofits | Massive lumen output, modern white color temperature, long lifespan. | Can blind oncoming traffic in reflector housings; legal compliance varies by state. | Off-road use or complete projector retrofits. |
Complete Headlight Assembly Replacement
Replacing the entire housing is often the most cost-effective long-term solution if the original lenses are severely oxidized or cracked. Aftermarket manufacturers produce direct-fit replacement assemblies that match the factory mounting points precisely.
- Tools Required: 10mm socket, ratchet, extension, flathead screwdriver or trim removal tool.
- Removal Steps:
- Open the hood and locate the fasteners securing the grille assembly. Remove the plastic push pins and screws holding the upper and lower grille.
- Carefully pull the grille forward to release the spring clips, then set it aside.
- Locate the three 10mm bolts securing each headlight assembly—two on top and one accessed through an opening or behind the core support panel.
- Unbolt the housing, pull it slightly forward, and twist the bulb sockets counterclockwise to disconnect them.
- Remove the assembly completely.
Installing Replacement Assemblies
Reinstallation is the reverse of removal, but extra attention must be paid to alignment and weather sealing. Ensure the rubber gasket seating around the back of the new housing sits flush against the truck's sheet metal to prevent water leaks.
- Plug the 9007 bulb socket securely into the new housing. Twist clockwise until locked.
- Position the headlight housing pins into their respective alignment grommets.
- Install and snug the three 10mm mounting bolts. Do not overtighten, as excessive torque can crack the plastic mounting tabs.
- Reinstall the front grille and secure all push pins.
Aiming and Adjusting 2001 Ram 2500 Headlights
Properly aiming headlights is a critical safety step that must be performed after any assembly replacement or suspension modification. Misaligned headlights either fail to illuminate the road at a safe distance or blind oncoming motorists.
How to Aim Ram Headlights
- Prepare the Vehicle: Ensure the truck is parked on a level surface facing a blank wall or garage door, exactly 25 feet away. The fuel tank should be reasonably full, and tire pressures correctly set.
- Locate Adjustment Screws: The 2001 Ram 2500 headlight housing features adjustment screws accessible from the rear of the core support—typically one for vertical adjustment (up/down) and one for horizontal adjustment (left/right).
- Establish Baseline: Measure the height from the ground to the center of the headlight lens. Mark a corresponding horizontal line on the wall 2 inches lower than that center measurement, as headlights should slope downward slightly over distance.
- Perform Adjustment: Turn on the low beams and adjust the vertical screws until the top edge of the high-intensity beam pattern sits right along the taped line on the wall.
Troubleshooting Electrical and Lighting Faults
If new bulbs or assemblies fail to illuminate, or if performance remains subpar, methodical troubleshooting is required to isolate the fault.
- Check Fuses and Relays: Inspect the Power Distribution Center (PDC) under the hood for blown fuses related to exterior lighting.
- Inspect Grounds: Corrosion on the chassis ground points near the battery and radiator support frequently causes intermittent headlight operation or dim flickering. Clean bare metal surfaces with a wire brush.
- Test Voltage at Plug: Use a digital multimeter at the 9007 connector. With the headlights switched on, verify that battery voltage (approximately 12.6V engine off, 14.2V engine running) reaches the connector. A reading significantly lower than system voltage points toward switch degradation or wiring resistance.
Conclusion
Maintaining or upgrading the headlights on a 2001 Ram 2500 ensures safe nighttime operation while preserving the rugged aesthetic of a classic heavy-duty truck. Whether addressing hazy lenses with a full housing swap, installing heavy-duty wiring relays to eliminate voltage drop, or adjusting beam alignment, systematic execution yields reliable, long-lasting results. Select quality replacement components, verify electrical integrity, and properly aim the beams to complete the project successfully.