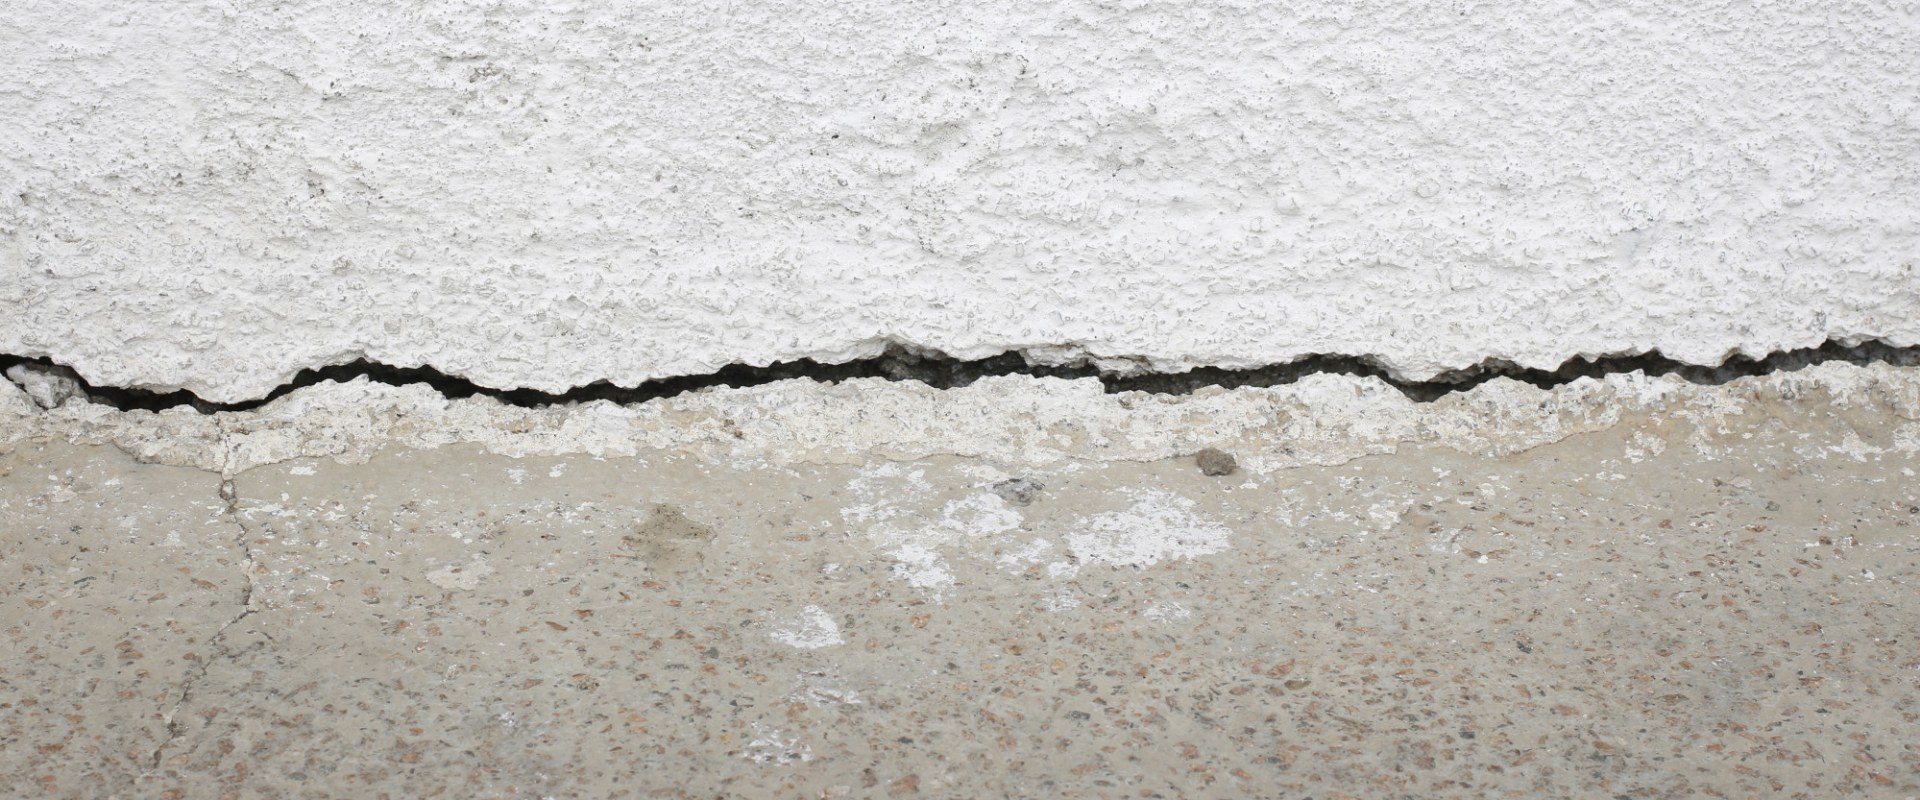
To repair a 1/16 inch horizontal crack in a concrete block foundation, the most effective structural method is low-pressure epoxy injection. This process involves cleaning the crack, installing injection ports at regular intervals, sealing the surface with an epoxy paste, and injecting a low-viscosity structural epoxy to bond the block fragments and restore the wall's integrity.
Horizontal cracks in concrete masonry units (CMU) are more than just aesthetic flaws; they are often the first sign of lateral pressure issues. While a 1/16 inch crack may appear minor, it indicates that the foundation is beginning to yield to external forces—usually hydrostatic pressure from saturated soil or the freeze-thaw cycles of the ground. By 2026, the building industry has further standardized epoxy injection as the primary "weld" for concrete, ensuring that the repaired section is often stronger than the surrounding material.
Understanding the Severity of Horizontal Cracks in 2026
In the context of modern residential engineering, a horizontal crack in a concrete block foundation is treated with higher priority than a vertical or diagonal crack. Vertical cracks often result from the natural settling of a footing, but a horizontal crack typically signifies that the wall is bowing inward.
When a crack measures 1/16 of an inch, it is at a critical "intervention stage." At this width, the crack is large enough to allow moisture and soil gases (like radon) to enter the basement, but small enough that the structural integrity can still be preserved without resorting to massive interventions like steel I-beams or wall anchors, provided the bowing is minimal (less than 1/4 inch).
The Anatomy of a Concrete Block Crack
Concrete blocks are hollow-core units. A horizontal crack usually occurs along the mortar joint or through the center of a block course, typically near the mid-height of the wall where the lateral pressure is greatest. Because blocks are hollow, the "1/16 inch" measurement refers to the visible gap on the face shell. The repair method must ensure that the epoxy bonds the thickness of this face shell effectively to prevent further shearing.
Prerequisites for a Successful Epoxy Repair
Before beginning the repair, you must evaluate the environmental conditions and the stability of the foundation. Epoxy does not bond well to wet surfaces unless you use a specific moisture-insensitive resin.
- Moisture Assessment: Ensure the crack is dry. If water is actively seeping through the 1/16 inch gap, you must first address exterior drainage or use a specialized water-activated polyurethane foam to stop the leak before attempting a structural epoxy bond.
- Structural Stability: Confirm that the wall is not actively moving. If the crack has grown from 1/32 to 1/16 within a single season, the underlying cause—such as poor site drainage or expansive clay soil—must be addressed alongside the repair.
- Temperature Requirements: In 2026, most high-performance epoxies require an ambient temperature between 45°F and 85°F (7°C to 29°C) for optimal curing. Cold temperatures significantly increase the viscosity of the epoxy, making it difficult to inject into a narrow 1/16 inch crack.
Required Tools and Materials
For a professional-grade repair, a comprehensive injection kit is recommended over haphazardly buying individual components.
| Component | Specification/Purpose |
|---|---|
| Structural Epoxy Resin | Low-viscosity (LV) for 1/16" cracks to ensure deep penetration. |
| Surface Seal Paste | Two-part rapid-cure epoxy paste to hold ports and seal the crack face. |
| Injection Ports | Plastic "T-ports" or surface-mounted nozzles spaced every 6–8 inches. |
| Wire Brush/Grinder | Used to clean the crack to a "white metal" equivalent cleanliness. |
| Caulking Gun | High-ratio (26:1) gun for dual-component cartridges. |
| PPE | Nitrile gloves, safety goggles, and a vapor respirator. |
| Acetone | For cleaning tools and prepping the concrete surface. |
The Step-by-Step Injection Method
1. Surface Preparation
The most common cause of epoxy failure is poor adhesion due to dust or efflorescence (the white salty crust often found on basement walls). Use a stiff wire brush to scrub the crack and the area two inches on either side of it. For a 1/16 inch crack, avoid using a mechanical grinder to "V-groove" the crack unless it is necessary to remove heavy paint. Grinding can drive dust deep into the narrow opening, blocking the path of the epoxy.
Once brushed, use compressed air or a vacuum to remove all loose particles. Finally, wipe the area with acetone to remove any oils or residual contaminants.
2. Port Placement and Spacing
Injection ports serve as the entry points for the resin. For a horizontal crack, ports should be placed every 6 to 8 inches.
- The Rule of Thumb: The spacing between ports should generally equal the thickness of the wall. Since a standard concrete block face shell is about 1.25 to 1.5 inches thick, but the total block is 8 inches, a 6-to-8-inch spacing ensures the epoxy travels along the crack to the next port before curing.
- Attachment: Apply a small amount of the two-part surface seal paste to the base of the port, being careful not to plug the center hole. Press the port directly over the crack.
3. Sealing the Crack Face
Once the ports are set, apply the surface seal epoxy paste over the entire length of the crack. The paste should be applied approximately 1 inch wide and 1/8 inch thick. This "cap" creates a closed pressure vessel. If you leave any gaps in the surface seal, the liquid epoxy will leak out during injection rather than being forced deep into the crack.
Allow the surface seal to cure completely. Depending on the product used in 2026, this typically takes 30 to 60 minutes.
4. The Injection Process
Start at one end of the horizontal crack and work toward the other.
- Initial Injection: Insert the resin cartridge into the caulking gun and attach the mixing nozzle. Connect the nozzle to the first port.
- Slow and Steady Pressure: Squeeze the trigger with steady, low pressure. For a 1/16 inch crack, the epoxy needs time to find its way through the narrow gap and into the hollow core of the block.
- Monitor for Travel: Continue injecting into the first port until you see epoxy appearing at the base of the next port.
- Cap and Move: Once the epoxy reaches the next port, cap the current port with the provided plastic plug and move the injection nozzle to the next port.
- Refusal: If the epoxy stops flowing or begins to leak from the surface seal, you have reached "refusal."
5. Post-Injection and Finishing
Leave the ports in place for at least 24 hours to allow the structural epoxy to reach its full Shore D hardness. In 2026, many homeowners choose to leave the ports on if the area is unfinished. However, for a finished look, you can strike the ports off with a hammer or cut them with a flush-cut saw. The surface seal can then be ground flat with a small hand grinder if you intend to paint the wall.
Common Pitfalls to Avoid
Over-Pressurizing the System
One of the most frequent mistakes is applying too much pressure. A 1/16 inch crack is narrow; if you force the epoxy too quickly, you risk "blowing out" the surface seal. Modern 2026 injection resins are designed to flow under low pressure (roughly 20-40 psi).
Ignoring the Hollow Core
Because concrete blocks are not solid, some epoxy will inevitably drip down into the hollow "cells" of the block. This is expected. However, the goal is to create a bridge across the crack in the face shell. If you find that you are pumping an entire cartridge into a single port without it appearing at the next port, the epoxy is likely just filling the bottom of the block cell. In this case, use a slightly higher-viscosity (thickened) epoxy to ensure it stays within the crack's horizontal plane.
Repairing the Symptom, Not the Cause
If the horizontal crack is caused by a clogged footing drain or a downspout discharging right against the foundation, the repair will eventually fail as the hydrostatic pressure continues to mount. Always verify that the exterior grade slopes away from the foundation at a rate of at least 6 inches of drop over the first 10 feet.
Professional vs. DIY: 2026 Cost and Scope Analysis
While a 1/16 inch crack is often a DIY-friendly project, certain conditions necessitate professional intervention. According to The Foundation Repair Association, professional epoxy injection offers the benefit of high-pressure equipment and specialized resins that can penetrate even tighter fissures.
| Factor | DIY Approach | Professional Service |
|---|---|---|
| Material Cost | $150 – $300 (Kit + Tools) | Included in labor |
| Labor Cost | $0 (4–6 hours of work) | $800 – $1,500 per crack |
| Warranty | None (Manufacturer only) | 5–25 years structural |
| Equipment | Manual Caulking Gun | Pneumatic/Electric Injection |
| Success Rate | Moderate (Depends on prep) | High |
When to Consult a Structural Engineer
Before performing an epoxy repair on a horizontal crack, consult a licensed structural engineer if any of the following are true:
- The wall is bowing inward by more than 1/4 inch.
- The crack is located in the bottom three courses of blocks (indicating high soil pressure).
- The crack extends across the entire length of the wall.
- There are multiple horizontal cracks parallel to each other.
A structural engineer can determine if the wall requires reinforcement such as carbon fiber straps. In 2026, carbon fiber is frequently used in conjunction with epoxy injection to provide tensile strength that epoxy alone cannot offer.
Frequently Asked Questions
Can I use hydraulic cement instead of epoxy?
Hydraulic cement is not recommended for structural horizontal cracks. While it is excellent for stopping active water leaks, it does not bond the two sides of the crack together. It acts as a plug, not a weld. Under the lateral pressure that causes horizontal cracks, hydraulic cement will eventually pop out or crack again because it lacks the tensile and shear strength of epoxy.
How long does the epoxy repair last?
A properly executed epoxy injection is considered a permanent repair. The epoxy resins used in 2026 are formulated to be stronger than the concrete itself. If the foundation cracks again, it will typically crack in a new location rather than through the epoxy bond, provided the underlying cause of the movement was addressed.
Is polyurethane foam better than epoxy for block foundations?
It depends on the goal. Polyurethane foam expands to fill voids and is superior for stopping water leaks because it remains flexible. However, for a horizontal crack where structural stability is the concern, epoxy is the better choice. Epoxy is rigid and restores the "monolithic" nature of the wall, whereas polyurethane does not provide structural reinforcement.
Will the crack reappear in the winter?
If the crack was caused by "frost heave" (expanding frozen soil), it may reappear or the wall may crack elsewhere if the soil is not properly drained. Epoxy injection fixes the damage, but it does not fix the soil. Ensuring your gutters are clean and your downspouts are extended is essential to prevent the crack from returning during the winter months of 2026 and beyond.
Next Actions for Homeowners
To ensure a successful repair, start by marking the ends of the crack with a pencil and dating them. Monitor the crack for two weeks to see if there is active movement. If the crack remains stable at 1/16 of an inch, purchase a high-quality, low-viscosity structural epoxy injection kit.
Always perform the repair during a dry spell when the water table is low. After the repair is complete, review your home’s exterior drainage. Standard 2026 maintenance guidelines suggest that foundation health is 90% drainage management and 10% structural repair. If you observe any increase in the crack width or significant inward bowing of the wall, pause the repair and contact a structural professional immediately to discuss mechanical stabilization options.