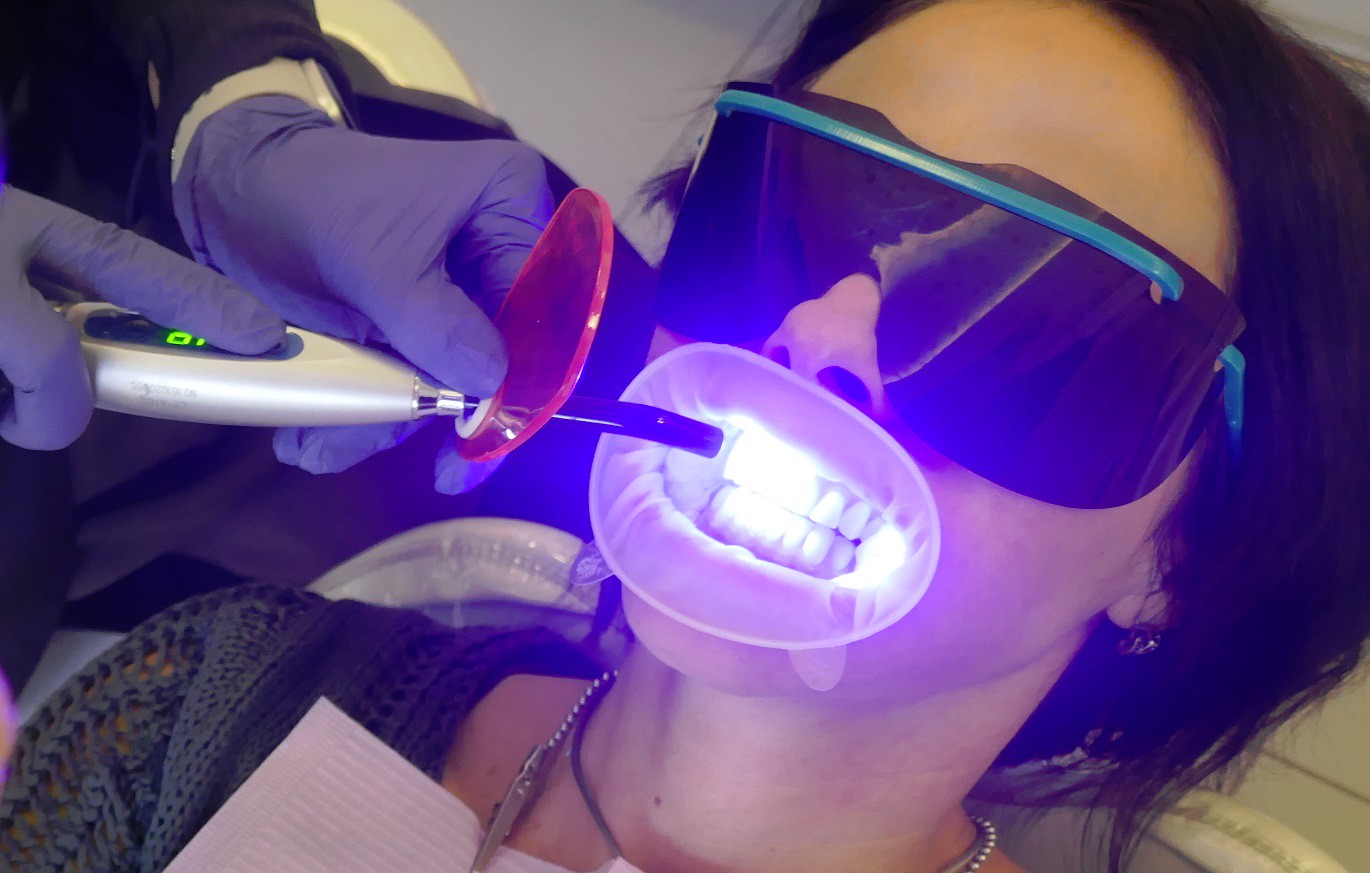
At-home UV teeth whitening is a cosmetic dental procedure that uses a light-emitting device—typically a blue LED lamp—in conjunction with a peroxide-based whitening gel to accelerate the removal of deep-seated stains. By activating the oxygen molecules within the gel, the light speeds up the chemical reaction that breaks down discolored molecules on the enamel, resulting in a significantly brighter smile in a shorter timeframe than gel-alone treatments.
Understanding the Technology: UV vs. Blue LED Light
While the term UV teeth whitening remains a popular search phrase, it is essential to distinguish between true ultraviolet (UV) radiation and the high-intensity blue LED light found in most 2026 consumer kits. In the early days of cosmetic dentistry, true UV lamps were occasionally used in clinical settings, but they carried risks of thermal damage to the dental pulp and soft tissue burns.
Modern at-home kits almost exclusively utilize Blue Light Emitting Diodes (LEDs). These devices emit light within the visible blue spectrum (typically between 400 and 450 nanometers). This specific wavelength is effective at energizing the whitening agent without the ionizing radiation risks associated with UV light. The light serves as a catalyst; it does not whiten the teeth on its own, but rather increases the kinetic energy of the hydrogen peroxide or carbamide peroxide molecules, allowing them to penetrate the porous enamel more efficiently.
The Photo-Fenton Reaction
The science behind this acceleration is often attributed to the "Photo-Fenton" or similar photochemical processes. When the light hits the gel, it triggers a faster release of hydroxyl radicals. These radicals are highly reactive and seek out the long-chain carbon molecules that cause organic staining (from coffee, tea, wine, or tobacco). By breaking these chains into smaller, colorless components, the teeth appear whiter to the naked eye.
The Chemistry of Whitening Gels
The efficacy of any at-home light-activated system depends heavily on the concentration and type of whitening agent provided. Most kits in 2026 utilize one of two primary chemicals:
- Hydrogen Peroxide (HP): This is the strongest and fastest-acting agent. It breaks down quickly and releases most of its whitening power within the first 30 to 60 minutes. It is the preferred choice for "express" kits that require only 10–15 minutes of light exposure.
- Carbamide Peroxide (CP): This is a more stable form of peroxide that breaks down into hydrogen peroxide and urea. It works more slowly, typically releasing about 50% of its power in the first two hours. Because of its slower release, it is often found in kits designed for overnight use or for individuals with higher tooth sensitivity.
In 2026, many premium kits have introduced PAP+ (Phthalimidoperoxycaproic Acid). This is a non-peroxide alternative that aims to oxidize stains without the acidic byproduct that often leads to tooth sensitivity. When combined with LED activation, PAP+ provides a viable alternative for users who historically could not tolerate peroxide-based treatments.
Prerequisites and Suitability: Who Should Use It?
Before initiating an at-home whitening regimen, a baseline of oral health is mandatory. Light-accelerated whitening is a powerful process that can exacerbate underlying dental issues if they are not addressed beforehand.
Candidates for Whitening
Ideal candidates are those with extrinsic stains—discoloration located on the outer surface of the teeth caused by lifestyle factors. However, users must be aware of the following limitations:
- Restorations: Whitening gels and LED lights do not change the color of porcelain, composite resin, or ceramic. If you have crowns, veneers, or white fillings on your front teeth, they will remain their original color while your natural enamel whitens, potentially leading to an uneven appearance.
- Intrinsic Stains: Gray or brownish discoloration caused by medications (like tetracycline) or excessive fluoride during tooth development (fluorosis) may not respond well to at-home kits. These cases often require professional-grade internal bleaching or veneers.
- Gum Health: Individuals with active periodontal disease or receding gums should avoid these kits. The high-intensity light and peroxide can cause significant pain if they come into contact with exposed tooth roots (cementum), which lack the protective shield of enamel.
Age and Medical Considerations
The American Dental Association (ADA) and other global dental bodies generally recommend that whitening be postponed until all permanent teeth have erupted and the pulp chambers are fully developed, usually around age 16. Pregnant or nursing individuals are typically advised to delay elective cosmetic procedures like UV whitening due to a lack of comprehensive safety data regarding the systemic absorption of whitening byproducts.
Step-by-Step Guide to Using an At-Home Whitening Kit
Achieving professional-level results at home requires precision and adherence to safety protocols. Deviating from the manufacturer’s instructions can lead to chemical burns or permanent enamel damage.
1. Preparation
Start by brushing your teeth with a non-fluoridated, non-whitening toothpaste. You want a clean surface, but you also want to avoid any "barrier" films that some specialized toothpastes create. Floss thoroughly to ensure the gel can reach the proximal surfaces between the teeth. Dry your teeth with a clean cloth or tissue before application; saliva can dilute the gel and reduce its effectiveness.
2. Gel Application
Apply a thin, continuous bead of gel into the upper and lower troughs of the mouth tray. Avoid overfilling. When the tray is pressed against the teeth, excess gel will squeeze out onto the gums, which is the primary cause of soft tissue irritation. If your kit uses a "paint-on" pen, apply the gel directly to the teeth, focusing on the "smile zone" (the front six to eight teeth).
3. Light Activation
Insert the mouth tray and turn on the LED device. Most modern kits in 2026 feature a built-in timer that automatically shuts off after 10, 15, or 30 minutes. Ensure the light sits snugly against the tray. If the device is wireless, you can move around; however, try to avoid excessive talking, as this can shift the tray and displace the gel.
4. Post-Treatment Care
Once the timer expires, remove the tray and rinse your mouth with lukewarm water. Avoid extremely cold or hot water immediately after, as the teeth are often temporarily more sensitive to temperature. Clean the LED device and tray with mild soap and water, ensuring no gel residue remains for the next session.
Comparison of Whitening Methods (2026 Standards)
The market offers various tiers of whitening technology. The following table compares at-home LED kits with other common alternatives available in 2026.
| Feature | Standard Whitening Strips | At-Home LED/UV Kits | Professional In-Office Treatment |
|---|---|---|---|
| Active Ingredient | 5-10% Hydrogen Peroxide | 10-35% Carbamide or PAP+ | 25-40% Hydrogen Peroxide |
| Acceleration | None (Natural oxidation) | Blue LED Light (400-450nm) | High-Power Plasma or Laser |
| Treatment Time | 30-60 mins / 14 days | 10-30 mins / 7-10 days | 60 mins / 1 session |
| Ease of Use | Moderate (can slip) | High (structured trays) | Professional Application |
| Sensitivity Risk | Low to Moderate | Moderate (User-dependent) | High (due to concentration) |
| Average Cost | $30 - $60 | $100 - $250 | $500 - $1,200 |
| Longevity | 3-6 Months | 6-12 Months | 1-2 Years |
Safety, Risks, and Side Effects
While at-home UV (LED) whitening is generally safe when performed correctly, it is not without potential complications. Users must be vigilant for signs of "over-whitening" and tissue damage.
Dentin Hypersensitivity
The most common side effect is transient dentin hypersensitivity. Peroxide opens the microscopic tubules within the enamel to reach the discolored molecules. This allows temperature and pressure to reach the nerve more easily. In 2026, most high-quality kits include a "Remineralization Gel" or "Desensitizing Gel" containing Potassium Nitrate or Calcium Phosphate to seal these tubules after treatment.
Gingival Irritation (Chemical Burns)
If the gel makes contact with the gums for an extended period, it can cause "blanching"—where the gums turn white and feel painful. This is essentially a minor chemical burn. While usually temporary, repeated irritation can lead to gum recession. If blanching occurs, you should stop the treatment for 24–48 hours and apply vitamin E oil to the affected area.
Enamel Erosion
There is a persistent myth that whitening "melts" enamel. However, research published in journals like the Journal of the American Dental Association (JADA) suggests that when used according to guidelines, peroxide-based whitening does not significantly alter the micro-hardness or mineral content of the enamel. The danger arises from "over-bleaching"—using the product for more hours or days than recommended—which can lead to a translucent, "blueish" appearance of the teeth that cannot be reversed.
Maximizing and Maintaining Your Results
The longevity of your whitening results is determined less by the light and more by your post-treatment habits. The 48 hours following a session are critical, as the enamel pores remain slightly open.
The "White Diet"
For at least two days after whitening, follow a "white diet." Avoid any food or drink that would stain a white t-shirt. This includes:
- Coffee, black tea, and red wine.
- Dark berries (blueberries, blackberries).
- Soy sauce, balsamic vinegar, and turmeric-heavy curries.
- Tobacco products and e-cigarettes.
Maintenance Cycles
In 2026, many users opt for a "maintenance" approach rather than a single heavy treatment. This involves one or two 10-minute LED sessions every month to combat daily staining. Using a whitening foam or a high-quality electric toothbrush can also extend the time between full whitening cycles.
Troubleshooting Common Issues
The light won't turn on: Check for a small plastic disc under the batteries in the LED unit. Many manufacturers include this to prevent the device from activating during shipping. If the device is rechargeable, ensure you are using the correct voltage; modern wireless kits often require a specific inductive charging pad.
Uneven whitening: If your teeth appear splotchy or have white spots after the first session, don't panic. This is often due to dehydration of the enamel. As the teeth rehydrate over the next several hours, the color usually evens out. Additionally, ensure you are applying the gel evenly; air bubbles in the tray can prevent the gel from contacting the tooth surface.
Excessive saliva: It is natural for your mouth to produce more saliva when a tray is inserted. If you find the saliva is flooding the tray and washing away the gel, try leaning back or lying down during the treatment. This helps keep the gel in place against the teeth and prevents dilution.
Frequently Asked Questions
Does the blue light really make a difference?
Research indicates that blue light activation can speed up the whitening process, allowing for shorter wear times compared to gel alone. However, the light itself does not whiten; it is a catalyst for the peroxide. In a clinical study shared by the National Center for Biotechnology Information (NCBI), light-activated systems showed a faster initial color change, though long-term results (at 6 months) were often comparable to high-concentration non-light treatments.
How often can I safely use an at-home UV whitening kit?
A full whitening cycle usually lasts 7 to 10 consecutive days. Most dentists recommend performing a full cycle no more than twice a year. Over-whitening can lead to permanent tooth sensitivity and a porous enamel surface that actually picks up stains faster than before.
Is it safe for people with sensitive teeth?
Yes, but precautions are necessary. If you have sensitive teeth, look for kits that use Carbamide Peroxide (which releases more slowly) or PAP+. You should also use a desensitizing toothpaste for two weeks prior to starting the treatment and shorten the light-activation sessions to 5 or 10 minutes.
Can I use the kit if I have braces?
It is strongly recommended to wait until your braces are removed before whitening. The brackets block the gel and light from reaching the enamel directly beneath them. If you whiten with braces on, you will likely have dark squares on your teeth once the orthodontics are removed.
Will the light damage my DNA or cause cancer?
The LED lights used in 2026 consumer whitening kits do not emit ionizing radiation. Unlike UV tanning beds, these devices use narrow-band blue light that does not have enough energy to damage DNA. However, they are very bright and can cause eye strain; it is advisable to avoid looking directly at the light while it is active.
Final Recommendation
At-home UV (LED) teeth whitening is a highly effective tool for those seeking a brighter smile without the high cost of in-office procedures. For the best results in 2026, choose a kit that offers a balanced concentration of peroxide (around 10-15% Hydrogen Peroxide or 35% Carbamide Peroxide) and includes a remineralization treatment.
Always consult with a dental professional before starting a new regimen to ensure your enamel and gums are healthy enough for the procedure. If you experience sharp pain (often called "zingers") during or after treatment, stop immediately and increase the time between sessions. Persistence with a gentle approach will yield a more natural and sustainable white than aggressive, high-frequency bleaching.