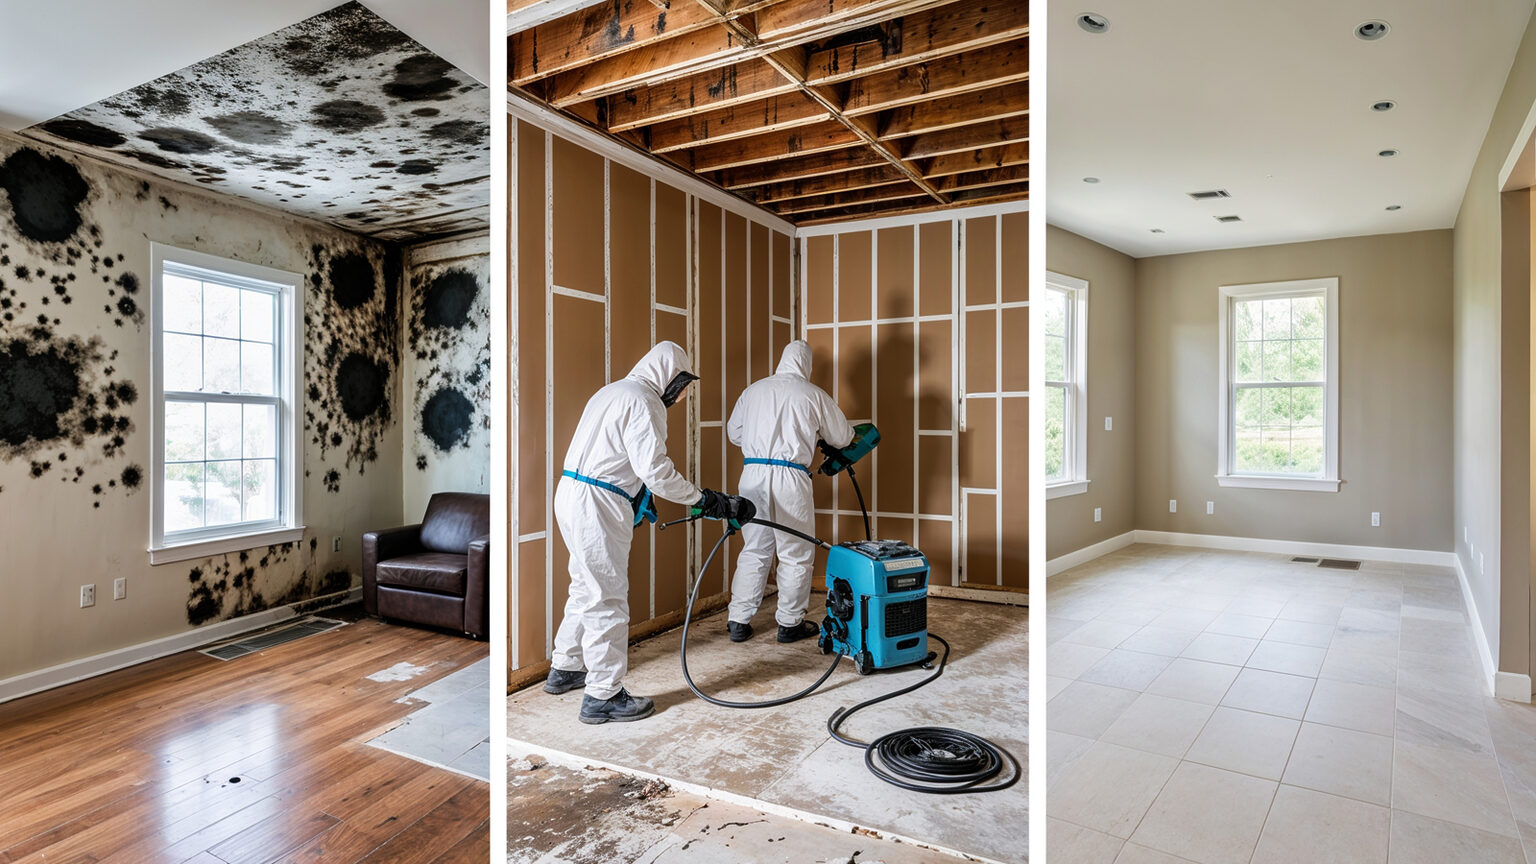
Aftershock mold remediation in your home requires identifying hidden moisture leaks caused by post-earthquake structural shifts, isolating contaminated zones with negative air containment, safely removing compromised materials, and drying framing to below 16% moisture content. Following seismic events, immediate inspection and professional containment protocols prevent toxic fungal spores from compromising structural integrity and indoor air quality.
The Mechanics of Post-Seismic Mold Growth
When an earthquake or minor aftershock hits a residential area, the immediate focus typically centers on visible structural damage: shattered glass, cracked drywall, or displaced masonry. However, seismic tremors frequently inflict secondary, subterranean, or concealed damage within a building's envelope. Vibrations dislodge supply line connections, crack rigid PVC and cast-iron drain lines inside wall cavities, rupture roof seals around flashing, and create micro-fractures in concrete foundations.
These structural disruptions allow water to intrude into hidden spaces. Mold spores exist naturally in indoor and outdoor environments in a dormant state. They require three core elements to germinate and proliferate: a organic carbon source (such as drywall paper facing, plywood subflooring, or wood framing), ambient temperatures generally between 60°F and 80°F, and elevated moisture levels. According to the U.S. Environmental Protection Agency (EPA), mold spores can begin colonizing organic substrates within 24 to 48 hours of exposure to water.
- Seismic Event / Aftershock
- Structural Shift / Micro-Fractures (Pipes crack, roof seals break, foundations rupture)
- Concealed Water Intrusion (Moisture accumulates inside wall cavities & crawlspaces)
- Spore Germination (24–48 Hours) (Dormant spores feed on drywall, wood, and insulation)
- Active Mold Remediation Required
Post-seismic mold outbreaks present unique challenges compared to standard plumbing leaks. Standard water leaks usually remain localized around a failing appliance or fixture. In contrast, aftershocks often produce widespread, multi-point moisture intrusion points across multiple levels of a structure. Furthermore, structural settling after a tremor can trap standing water in subfloors and crawlspaces, preventing natural evaporation and creating a persistent high-humidity environment that accelerates fungal growth throughout the entire home.
Assessing Structural and Environmental Damage After Seismic Shocks
Before beginning any physical mold remediation, a thorough structural and environmental assessment must be conducted to locate all moisture entry points and determine the extent of contamination. Attempting cleanup without fixing underlying structural defects caused by seismic shifts will result in recurring mold growth.
Visual and Olfactory Inspection
Visual cues for mold growth following an aftershock are not always obvious. While surface mold may appear as black, green, white, or fuzzy patches along baseboards or ceilings, secondary mold often hides behind wall paneling, beneath carpeting, or within crawlspaces.
Key indicators to watch for include:
- Drywall Efflorescence and Discoloration: Yellowish or brownish water stains, bubbling paint, or peeling wallpaper indicate active moisture transfer behind surfaces.
- Musty Odors: A persistent, damp, earthy smell usually signals active microbial volatile organic compounds (mVOCs) being released by colonies growing inside structural cavities.
- Structural Deformation: Buckling hardwood floors, saggy ceiling tiles, or warped baseboards point to prolonged liquid water exposure and wood fiber swelling.
Advanced Diagnostic Equipment
To pinpoint hidden water intrusion without unnecessarily destroying intact surfaces, remediation professionals utilize specialized diagnostic tools:
- Moisture Meters: Dual-mode moisture meters measure the moisture content (%MC) of building materials. Pin-type meters measure electrical resistance across wood fibers, while pinless meters use electromagnetic sensors to scan dense materials like concrete or plaster. Structural framing wood should generally remain below 16% MC to prevent decay and mold growth.
- Infrared (Thermal Imaging) Cameras: Thermal cameras detect subtle surface temperature differentials caused by evaporative cooling. Cold spots on walls or ceilings frequently indicate trapped moisture hidden behind plaster or drywall.
- Hygrometers: Thermo-hygrometers measure relative humidity (RH) and dew point within living spaces and enclosed cavities. Indoor relative humidity levels consistently above 60% create ideal conditions for airborne mold amplification.
Step-by-Step Professional Remediation Protocol
Remediating mold after an aftershock requires strict adherence to industry standards, such as the Standard for Professional Mold Remediation (IICRC S520). The process follows a systematic sequence designed to eliminate fungal colonies while preventing cross-contamination to unimpacted areas of the residence.
- Safety Assessment & PPE Setup
- Containment & Negative Air Pressure
- Source Control & Water Repair
- Removal of Compromised Materials
- HEPA Cleaning & Antimicrobial Application
- Structural Dehumidification (<16% MC)
- Post-Remediation Clearance Testing
1. Safety Assessment and PPE Procurement
Personal safety is critical during mold cleanup, as disturbing mold colonies releases millions of microscopic spores, structural dust, and potential mycotoxins into the air. Individuals performing inspection or removal work should wear appropriate Personal Protective Equipment (PPE) specified by the Occupational Safety and Health Administration (OSHA):
- Respiratory Protection: N-95, N-100, or half-face/full-face elastomeric respirators equipped with P100 HEPA filters.
- Eye Protection: Unvented safety goggles to protect eyes from airborne spores and cleaning chemicals.
- Protective Clothing: Disposable Tyvek suits with elastic wrist and ankle closures, along with heavy-duty nitrile or neoprene gloves.
2. Containment and Air Pressure Control
To prevent microscopic spores from dispersing into clean living spaces during demolition, remediation zones must be isolated.
- Critical Barriers: Heavy-duty polyethylene sheeting (6-mil thickness) is taped over all doors, windows, supply vents, return air ducts, and structural breaches within the work zone.
- Negative Air Pressure: High-Volume HEPA-filtered air scrubbers exhaust air outside the home or into an adjacent contained space. This creates negative pressure, drawing clean air into the work zone and keeping spores from escaping into non-affected rooms.
3. Source Control and Plumbing Repair
Remediation cannot move forward until all seismic water damage sources are permanently repaired. Plumbers must pressure-test supply lines, inspect drain lines for hairline stress fractures, and re-seal flashing around chimney bases, vents, and roof valleys that shifted during tremors.
4. Removal of Compromised Porous Materials
Building materials respond differently to water exposure and fungal colonization depending on their porosity:
- Porous Materials: Drywall, acoustic ceiling tiles, fiberglass insulation, carpet padding, and particleboard furniture cannot be fully decontaminated once deeply penetrated by hyphae (mold root structures). These items must be carefully double-bagged in 6-mil plastic trash bags, sealed, and disposed of as construction waste.
- Semi-Porous and Non-Porous Materials: Structural wood framing, concrete, brick, tile, and glass can usually be restored. Heavy fungal growth on solid wood studs is addressed through controlled media blasting (such as soda or dry-ice blasting), wire brushing, and mechanical sanding.
5. Deep HEPA Cleaning and Antimicrobial Treatment
Once physical removal is complete, remaining structural elements must be cleaned:
- HEPA Vacuuming: Surface dust and loose spores are removed using commercial HEPA-filtered vacuums capable of trapping particles down to 0.3 microns with 99.97% efficiency.
- Damp Wiping: Hard surfaces are wiped clean using EPA-registered antimicrobial solutions, fungicides, or biocide treatments. Cleaning products should always be applied according to manufacturer label directions.
- Note on Chlorine Bleach: Both the EPA and the Centers for Disease Control and Prevention (CDC) discourage using household liquid bleach on porous structural surfaces like wood framing or drywall. Bleach's high surface tension prevents its active chlorine from penetrating porous materials, leaving behind water that can actually foster future fungal growth.
6. Structural Dehumidification and Drying
After cleaning, high-capacity commercial LGR (Low Grain Refrigerant) dehumidifiers and axial air movers are deployed within the containment space. Forced air circulation speeds up evaporation from damp framing, while the dehumidifiers extract airborne moisture. Drying must continue uninterrupted until moisture meter readings confirm that structural wood components fall below 16% moisture content, with optimal long-term target levels between 10% and 12%.
Technical Comparison of Remediation Methods and Materials
Selecting the right remediation method depends heavily on the specific building material and the structural impact of the aftershock. The following table compares common structural components, their vulnerability to seismic water intrusion, standard remediation protocols, and moisture thresholds.
| Material / Component | Seismic Vulnerability Mechanism | Action & Remediation Protocol | Target Moisture Content / Clean Standard | Professional Restoration Complexity |
|---|---|---|---|---|
| Interior Drywall & Plaster | Shear stress causes wall cracking; concealed pipe leaks saturate paper backing. | Remove & Replace: Cut back affected material at least 24 inches past visible mold/water lines. | Replace completely; wall space ambient RH < 50%. | Moderate |
| Structural Wood Studs & Joists | Foundation shifts cause structural binding; water collects around wall plates. | Remediate in Place: Mechanical sanding, wire brushing, HEPA vacuuming, and EPA-registered fungicide. | Subsurface Moisture Content < 16% (ideal 10–12%). | High |
| Fiberglass / Cellulose Insulation | Traps water against studs; loses R-value; high moisture retention. | Remove & Replace: Discard immediately; cannot be effectively disinfected or dried. | Replace completely upon structural dry-out. | Low to Moderate |
| Poured Concrete / Block Foundations | Micro-fractures allow subterranean water penetration and efflorescence build-up. | Clean & Seal: Wire brush efflorescence, apply antimicrobial wash, seal cracks with polyurethane/epoxy. | Surface dry; no active liquid hydrostatic seepage. | High |
| Subfloor (Plywood / OSB) | Liquid pools beneath finish flooring after pipe rupture; causes delamination. | Assess & Dry/Replace: Sand surface layer if structural integrity remains; replace if delamination occurs. | Subfloor Moisture Content < 14%. | High |
DIY vs. Professional Mold Remediation
Homeowners often ask whether post-aftershock mold remediation can be managed without hiring certified professionals. The answer depends primarily on the size of the affected area, structural stability, and safety conditions.
- Is the mold area smaller than 10 sq ft?
- YES (No structural damage or raw sewage): DIY Remediation Feasible
- NO (Structural damage, HVAC impact, or >10 sq ft affected area): Hire Certified Professional (IICRC / AMRT)
When DIY Remediation May Be Feasible
Homeowners can typically handle minor mold issues under the following conditions:
- The total surface area of mold contamination is less than 10 square feet (roughly a 3-foot by 3-foot section), as recommended by EPA guidelines.
- The moisture source was a simple surface leak, not contaminated greywater or blackwater (sewer backup).
- The structural framing and internal wall cavities have not been compromised by seismic movement.
When Professional Services Are Essential
Professional remediation services (certified under standards like IICRC Applied Microbial Remediation Technician) should be retained when:
- Mold covers an area greater than 10 square feet.
- The aftershock has compromised structural stability, making demolition unsafe without temporary shoring.
- Moisture has penetrated the HVAC ducting system, which can spread spores throughout the entire dwelling.
- Immune-compromised individuals, elderly residents, or young children inhabit the property.
- Water intrusion involves sewage or external groundwater runoff.
Navigating Insurance Claims for Aftershock Water and Mold Damage
Filing an insurance claim for mold following an aftershock can be complex because standard policy structures separate earthquake coverage from general water and mold endorsements.
- Standard Homeowners Policy (HO-3)
- Covers: Sudden internal plumbing bursts (if not caused by quake)
- Excludes: Earth movement, foundation settling, flood
- Earthquake Policy / Endorsement
- Covers: Direct structural damage from tremors/aftershocks
- Note: Mold coverage often requires specific moisture-damage riders
Policy Coverage Breakdown
- Standard Homeowners Policies (HO-3): Traditional policies usually cover sudden and accidental water damage (such as a burst interior pipe), but explicitly exclude damage caused by earth movement, earthquakes, or seismic aftershocks. Additionally, standard policies often cap mold remediation coverage at $5,000 to $10,000 unless extra endorsements are purchased.
- Earthquake Insurance Policies: Dedicated earthquake policies (such as those written through private carriers or public entities like the California Earthquake Authority) cover direct physical loss caused by tremors. However, secondary mold damage is only covered if the water intrusion directly resulted from an earthquake-damaged structural element, and if the damage was addressed promptly to mitigate further harm.
Documenting Claims for Maximum Reimbursability
To ensure claims are processed smoothly, policyholders should follow these steps:
- Document Immediate Aftermath: Take detailed, date-stamped photographs and video of all structural cracks, broken pipes, shifted rooflines, and initial water damage prior to starting demolition.
- Maintain a Remediation Log: Keep clear records of moisture meter readings, relative humidity logs, equipment deployment dates, and written reports from structural engineers or certified mold assessors.
- Establish Cause and Effect: Obtain a formal written evaluation from a licensed contractor or engineer connecting the plumbing failure or water intrusion point directly to the seismic event.
- Mitigate Damage Promptly: Insurance policies require property owners to take reasonable steps to protect the property from further harm. Setting up drying equipment and contacting emergency restoration crews quickly helps fulfill this requirement.
Structural Fortification and Long-Term Prevention
Preventing recurring mold issues after an aftershock involves structural retrofitting and proactive moisture management. Preparing your home for future seismic events helps protect against secondary water damage.
Post-Seismic Fortification Checklist:
- Install flexible stainless steel water/gas connectors
- Apply elastomeric coatings & polyurethane crack injection
- Lay 6-mil polyethylene vapor barrier over crawlspace soil
- Set up continuous smart leak detectors & auto-shutoff valves
- Calibrate HVAC & whole-home dehumidifiers (Maintain RH < 50%)
Structural and Mechanical Retrofits
- Flexible Utility Connections: Replace rigid metal or plastic water supply lines connected to water heaters, sinks, and toilets with corrugated, flexible stainless-steel connectors. Flexible lines absorb seismic shock without snapping or pulling away from wall junctions.
- Foundation Sealing and Waterproofing: Fill non-structural foundation cracks using high-pressure polyurethane or epoxy injection systems. Apply elastomeric waterproof membranes to exterior foundation walls to prevent subterranean water from seeping through post-quake stress fractures.
- Crawlspace Encapsulation: Cover exposed soil in crawlspaces with heavy-duty 6-mil or 10-mil polyethylene vapor barriers. Seal all seams with specialized waterproof tape to prevent ground moisture from migrating upward into subflooring.
Continuous Environmental Control
- Smart Leak Detection Systems: Install electronic inline leak detection devices and automatic water shutoff valves. These systems monitor flow rates and pressure drops; if a pipe breaks during an aftershock, the system automatically shuts off the main water supply to prevent flooding.
- Automated Humidity Control: Install whole-home dehumidifiers tied directly into the primary HVAC system to keep ambient relative humidity consistently below 50%.
- Routine Structural Inspections: Schedule an inspection of your home's roof, flashing, foundation, and crawlspace following any seismic event measuring 4.0 magnitude or higher, even if no immediate damage is visible inside the living areas.
Frequently Asked Questions
How quickly does mold start growing after an aftershock breaks a pipe inside a wall?
Under optimal conditions—warm temperatures, static air, and organic materials like drywall—mold spores can germinate and form visible colonies within 24 to 48 hours. Prompt water shutoff and moisture extraction within the first 24 hours are critical to preventing widespread contamination.
Will standard homeowners insurance pay for mold remediation after an earthquake?
Standard homeowners policies generally exclude damage caused by earth movement, including earthquakes and aftershocks. Mold resulting from seismic structural damage typically requires a dedicated earthquake insurance policy or specific water-damage riders. Check your policy terms and consult your insurance agent to confirm your specific coverage details.
How can I tell if mold is growing inside my walls after a seismic event?
Common indicators of hidden wall mold include persistent musty odors, yellow or brown water staining on drywall, peeling paint, or visible bowing of wall boards. Remediation professionals can confirm hidden growth without cutting into walls by using non-invasive thermal imaging cameras and pinless moisture meters.
Why is using chlorine bleach on structural wood framing discouraged during mold cleanup?
Chlorine bleach is effective on hard, non-porous surfaces like porcelain or glass, but it is inefficient on porous materials like wood or drywall. The chlorine chemical stays on the surface while water penetrates into the porous substrate, providing moisture that can fuel future fungal growth. Industry guidelines recommend mechanical cleaning, HEPA vacuuming, and EPA-registered fungicides instead.
What is the maximum safe moisture level in structural wood framing before drywall can be reinstalled?
Structural wood framing should be dried to below 16% moisture content (%MC) before installing new insulation or drywall. Ideal target readings typically range between 10% and 12% MC. Closing in framing with higher moisture levels traps water inside wall cavities, creating ideal conditions for recurring mold growth.
Recommended Next Actions
If your home has recently experienced a seismic event or aftershock, take these practical steps immediately:
- Turn Off Primary Water Supplies: If you suspect hidden structural movement or pipe breaks, shut off the main water line to prevent concealed flooding.
- Perform a Visual and Instrument Inspection: Inspect your foundation perimeter, roofline, baseboards, and water heater connection points. Use a basic pinless moisture meter or hire a technician to test suspicious wall cavities.
- Initiate Structural Drying: Set up high-capacity LGR dehumidifiers and air movers in any damp areas within 24 hours to keep moisture levels low and prevent spore germination.
- Consult Certified Professionals: For mold growth larger than 10 square feet or complex structural moisture issues, contact an IICRC-certified mold remediation company and a licensed structural engineer to safely restore your home.