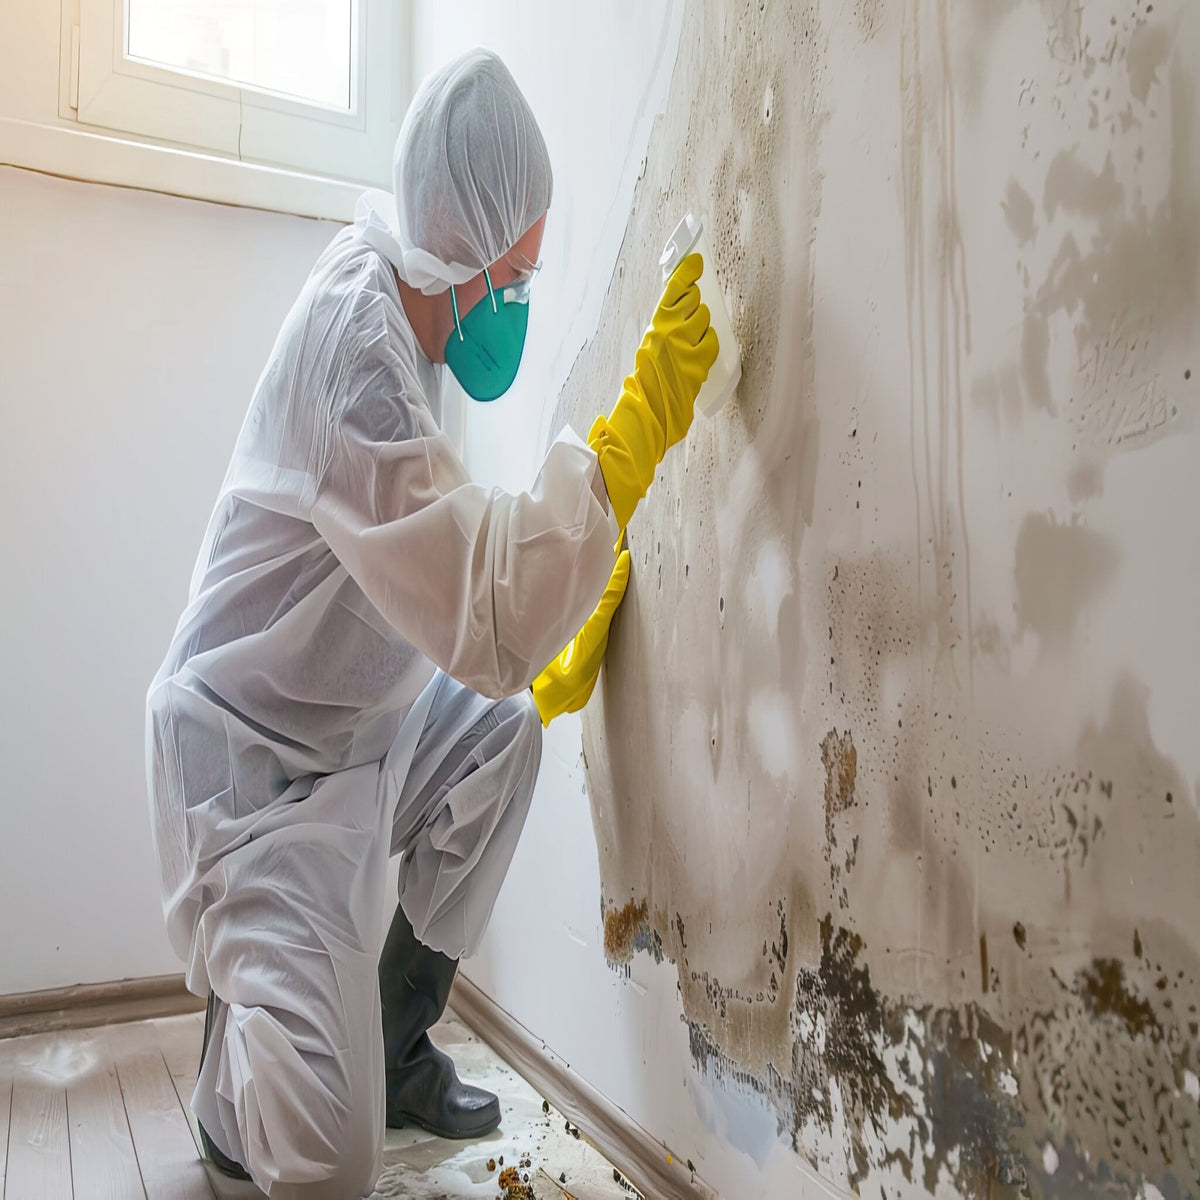
Professional mold remediation by specialized contractors like Adams Mold Remediation involves identifying hidden moisture sources, isolating contaminated zones under negative air pressure, physically removing fungal colonies, and restoring indoor air quality. By following strict industry protocols such as the IICRC S520 standard, certified technicians safely eliminate hazardous mold spores and prevent structural property damage.
The Critical Need for Professional Mold Remediation
Mold contamination in residential and commercial properties represents far more than an aesthetic nuisance; it poses significant risks to structural integrity and indoor environmental quality. Fungal spores exist naturally in outdoor environments, but when water intrusions, plumbing leaks, or persistent high humidity create elevated indoor moisture, spores rapidly germinate on organic building materials such as drywall, plywood, framing timber, carpet backing, and ceiling tiles.
When indoor moisture remains unaddressed for 24 to 48 hours, dormant fungal spores can activate and establish growing colonies. Species such as Aspergillus, Penicillium, Cladosporium, and Stachybotrys chartarum (commonly referred to as toxic black mold) synthesize volatile organic compounds (VOCs), mycotoxins, and microscopic spores. Inhaling or contacting these biological agents can trigger respiratory distress, allergic rhinitis, asthma exacerbations, skin irritation, and chronic inflammatory response symptoms in sensitive individuals.
| Timeframe | Fungal Amplification Timeline |
|---|---|
| 0 - 24 Hours | Water intrusion occurs; porous materials absorb moisture. |
| 24 - 48 Hours | Dormant fungal spores germinate on organic substrates. |
| 48 - 72 Hours | Visible colonies form; hyphae penetrate porous drywall & wood. |
| 72+ Hours | Spore generation accelerates; mycotoxins release into indoor air. |
Attempting to resolve extensive mold growth with surface sprays, consumer bleach, or cosmetic paint overcoats fails to resolve the underlying fungal network. Fungal structures called hyphae penetrate deep into porous substrates. Surface-level cleaning leaves root structures intact within wood framing or drywall cores, allowing the colony to regrow rapidly as soon as ambient relative humidity rises. Certified remediation services provide the technical diagnostics, engineering controls, physical extraction techniques, and structural drying equipment necessary to solve mold problems permanently.
Industry Standards Governing Remediation Operations
Professional remediation services operate under established guidelines published by standard-setting bodies and public health authorities. The primary reference standard for professional mold abatement is the Institute of Inspection, Cleaning and Restoration Certification (IICRC) S520 Standard for Professional Mold Remediation.
Core Principles of the IICRC S520 Standard
The IICRC S520 categorizes indoor mold contamination into three distinct operational conditions:
- Condition 1 (Normal Fungal Ecology): An indoor environment that exhibits a normal fungal ecology, characterized by settled spores and fungal structures consistent with outdoor background levels, without active growth or indoor amplification.
- Condition 2 (Settled Spores): An indoor environment contaminated with settled spores or fungal fragments that originated from an active growth site elsewhere in the building, but without active growth occurring on the immediate surface.
- Condition 3 (Active Growth): An indoor environment characterized by active fungal growth, hyphal formation, and visible spore production on building materials, requiring physical containment and specialized extraction protocols.
Professional remediation aims to return a Condition 3 or Condition 2 environment to a clean Condition 1 status. The U.S. Environmental Protection Agency (EPA) also provides procedural frameworks for mold remediation in commercial buildings and educational institutions, emphasizing worker safety, environmental isolation, and root-cause moisture management.
Phase-by-Phase Professional Mold Remediation Workflow
A thorough, certified remediation strategy requires a disciplined, multi-step execution model. Skipping diagnostic assessments or engineering controls risks spreading microscopic spores throughout clean HVAC systems and living spaces.
- Phase 1: Inspection & Moisture Diagnostic
- Phase 2: Containment & Negative Pressure
- Phase 3: Material Extraction & Cleaning
- Phase 4: Drying & Clearance Verification
Phase 1: Inspection and Moisture Diagnostic Mapping
Before deploying containment equipment or removing building materials, qualified technicians perform a quantitative moisture assessment to trace the source of water intrusion. Mold growth is always a secondary symptom of an underlying moisture anomaly.
- Infrared Thermal Imaging: Thermography cameras detect temperature differentials across walls, ceilings, and flooring. Evaporative cooling caused by trapped moisture behind plaster or drywall appears as distinct cold patterns on thermal scans, revealing hidden leaks inside wall cavities without destructive demolition.
- Pin and Pinless Moisture Meters: Moisture meters quantify the precise moisture content percentage (%MC) within structural framing and finish materials. Concrete, timber, drywall, and subflooring are compared against baseline dry standards to establish exact drying targets.
- Thermo-Hygrometers: These precision meters track ambient relative humidity (RH), dry-bulb temperature, dew point, and specific humidity (grains per pound of dry air) to assess atmospheric moisture load.
- Surface and Air Sampling: When visible mold identity or spore concentration needs scientific confirmation, technicians collect air samples using calibrated spore-trap cassettes or take surface tape-lift and swab samples. Independent accredited microbiology laboratories analyze these samples to measure spore counts per cubic meter ($\text{spores}/m^3$) and identify dominant fungal genera relative to outdoor baseline controls.
Phase 2: Containment and Negative Air Pressure Isolation
The primary risk during structural remediation is cross-contamination. Physical agitation of moldy drywall or structural wood releases millions of microscopic spores into the air. If uncontained, these spores travel through hallway corridors, return-air vents, and open doors, contaminating clean areas of the property.
- Contained Remediation Zone
- Active Contaminant (Condition 3)
- HEPA Air Scrubber (Extracts Spores)
- Exhaust Air (Duct Outing)
- External Environment
- Exhaust Air (Duct Outing)
- Critical Barriers: Technicians seal off windows, doors, supply registers, return vents, and structural openings using 6-mil flame-retardant polyethylene sheeting fastened with industrial tape and spring-loaded containment poles.
- Decontamination Airlocks: For extensive remediation projects (greater than 100 square feet of continuous growth), multi-chambered zipper airlocks or flap doors maintain a transition zone between the clean area and the work zone for worker entry and debris egress.
- Negative Pressure Engineering: High-output HEPA air scrubbers pull air continuously out of the contained work space and exhaust it outside the building envelope (or into a secondary filtered space). This creates negative static air pressure inside the containment zone. Air continuously flows inward through small access seams, preventing volatile mold spores from escaping into non-contaminated living areas.
- Personal Protective Equipment (PPE): Remediation specialists wear N-95 or full-face P100 respirator masks equipped with organic vapor cartridges, disposable Tyvek suits with integrated boots, and nitrile or heavy-duty chemical gloves to limit skin and inhalation exposure.
Phase 3: HEPA Vacuuming, Material Extraction, and Surface Cleaning
Once isolation barriers and negative air pressure systems are fully established, physical removal of contaminated substrates begins based on material porosity.
Porous Materials (Non-Restorable)
Gypsum drywall, fiberglass insulation, acoustic ceiling tiles, carpet padding, and soft upholstery exposed to Condition 3 active growth cannot be completely sanitized inside their interior matrix. Technicians carefully cut out drywall extending at least 24 inches beyond the last visible boundary of mold growth. Extracted debris is double-bagged in 6-mil heavy-duty waste bags, wiped down on the exterior surface inside the airlock, and discarded according to local environmental regulations.
Semi-Porous Materials (Restorable through Mechanical Cleaning)
Solid wood studs, structural framing beams, tongue-and-groove subflooring, and masonry block can often be preserved. Technicians scrub these surfaces using specialized tools:
- HEPA Vacuuming: Industrial vacuum units equipped with certified High-Efficiency Particulate Air (HEPA) filters capturing 99.97% of particles down to 0.3 microns are applied directly to surfaces to capture loose spores and hyphal fragments.
- Controlled Abrasion: Wire brushing, detailed hand-sanding, or media blasting (such as dry-ice blasting) strips embedded fungal hyphae from structural wood components without compromising structural integrity.
- EPA-Registered Antimicrobials: Scrubbing surfaces with EPA-registered fungicides, fungistats, and bactericides kills remaining micro-colonies. Botanical antimicrobials (such as thymol-based solutions) or quaternary ammonium compounds are frequently selected for their high efficacy and low VOC profile.
Non-Porous Materials (Fully Cleanable)
Glass, metal framing, sealed tile, and hard plastic surfaces are thoroughly washed with disinfectant solutions and micro-fiber wiping protocols, followed by final HEPA vacuuming.
Phase 4: Structural Drying, Dehumidification, and Clearance Verification
Removing visible mold does not conclude the restoration process; structural wood framing and surrounding materials must be thoroughly dried to natural equilibrium moisture content (EMC) levels to prevent secondary microbial growth.
Structural Drying Mechanics
Technicians deploy Low Grain Refrigerant (LGR) dehumidifiers or desiccant dehumidification systems alongside high-velocity axial air movers. LGR units draw ambient relative humidity down below 40%, pulling moisture trapped deep inside wood studs outward toward the surface, where air movers evaporate it into the air stream for condensation and removal.
Post-Remediation Verification (PRV) and Clearance Testing
Before dismantling containment barriers, an independent Certified Microbial Consultant (CMC) or Certified Indoor Environmentalist (CIE) inspects the work area:
- Visual Inspection: The space must be entirely free of dust, debris, water staining, and visible microbial growth.
- Moisture Verification: Meter readings must confirm that structural wood framing has returned to dry standards (typically below 12% to 15% moisture content depending on geographic region).
- Air Clearance Sampling: Spore trap air samples collected inside the contained area must demonstrate total spore counts equal to or significantly lower than control samples gathered outside the building, with zero non-typical dominant species like Stachybotrys.
| Post-Remediation Clearance Checklist |
|---|
| [ ] 100% Visual clearance (no visible dust, soot, or hyphae) |
| [ ] Structural wood moisture content below 15% |
| [ ] Ambient relative humidity maintained below 50% |
| [ ] Air clearance sample counts equal to or lower than outdoors |
| [ ] Zero active leaks or water intrusion vectors remaining |
Cost Factors and Project Scope Comparison
The total cost of professional mold remediation depends on the physical square footage of the affected area, accessibility, contamination severity, and structural repairs required. The table below illustrates standard industry cost profiles, timelines, and technical requirements across typical scope levels.
| Remediation Scope | Typical Square Footage | Containment Requirements | Equipment Required | Average Estimated Cost Range | Expected Project Duration |
|---|---|---|---|---|---|
| Localized Spot Scope (Small bathroom, sink cabinet leak) | < 30 sq. ft. | Mini-containment / poly bags | HEPA vacuum, air scrubber, antimicrobial wash | $500 – $1,500 | 1 Day |
| Moderate Structural Scope (Single room, basement wall section) | 30 – 100 sq. ft. | Standard single-barrier poly containment, negative air pressure | HEPA air scrubbers, LGR dehumidifier, axial air movers, antimicrobial spray | $1,500 – $4,000 | 2 – 3 Days |
| Extensive Whole-Zone Scope (Flooded crawl space, attic, multi-room) | 100 – 500+ sq. ft. | Full critical barrier isolation, multi-chamber airlock, continuous negative air pressure | Multiple HEPA scrubbers, desiccant/LGR dehumidifiers, media blasting | $4,000 – $10,000+ | 3 – 7 Days |
| HVAC System Remediation (Ductwork & air handler contamination) | Whole HVAC System | Isolation of supply/return registers, local equipment isolation | High-vacuum containment systems, rotary brush agitation, mechanical duct sanitizer | $1,500 – $5,000 | 1 – 2 Days |
Insurance Coverage and Financial Considerations
Navigating property insurance claims for mold remediation requires understanding policy terms, endorsements, and exclusions.
Covered Perils vs. Maintenance Exclusions
Standard Homeowners Policy Forms (such as HO-3) generally cover mold remediation only if the mold is a direct result of a covered "sudden and accidental" water event. Examples include:
- Burst supply pipes or ruptured appliance hoses.
- Accidental water heater failure.
- Roof damage caused by a fallen tree branch during a sudden storm.
Conversely, insurance carriers routinely deny claims if the mold growth stems from prolonged neglect or poor maintenance, such as:
- Deferred roof repairs or ongoing window seal leaks.
- Long-term condensation caused by inadequate attic ventilation.
- Unaddressed basement seepage or poor exterior grading over months or years.
Mold Endorsement Sub-Limits
Even when mold damage results from a covered water loss, standard policies frequently include sub-limits on microbial remediation. While a general water damage claim might have a structural limit of $200,000, the mold endorsement cap within the policy may limit recovery to $5,000 or $10,000 total for containment, testing, removal, and disposal. Property owners should review policy declarations pages carefully and consult their insurance adjuster or an independent public adjuster to verify specific policy endorsements.
Common DIY Mistakes vs. Professional Protocols
Homeowners often attempt to tackle mold growth using consumer products or quick-fix online advice. These approach mistakes frequently exacerbate indoor air contamination and increase long-term restoration expenses.
- DIY Bleach Treatment vs. Professional Remediation
- DIY (Chlorine Bleach):
- Water Component (Soaks in): Drives moisture into wood
- Chlorine (Stays on Surface): Cannot penetrate deep roots
- Professional (Extraction + Antimicrobials):
- Structural Drying: Eliminates moisture root
- HEPA Physical Extraction: Removes spores & hyphae
- Penetrating Fungicide: Sanitizes wood interior
- DIY (Chlorine Bleach):
1. Applying Chlorine Bleach to Porous Substrates
Chlorine bleach is effective for sanitizing non-porous surfaces like porcelain or glass. However, when applied to porous wood or drywall, the chlorine molecule's chemical structure prevents it from penetrating deep into substrate pores. The water component of the bleach solution penetrates the material, soaking the fungal hyphae root structure with moisture and accelerating mold growth once the surface dries.
2. Scraping or Sanding Mold Without Containment
Dry-scraping, wire-brushing, or removing moldy drywall without establishing negative pressure containment disperses millions of fine spores into the indoor air volume. Air currents distribute these airborne particles into central HVAC ductwork, turning a localized wall leak into a building-wide environmental hazard.
3. Painting Over Active Mold Growth with Encapsulants
Applying stain-blocking primers or antimicrobial paint over uncleaned, active mold colonies fails to bond to the material and does not kill the fungus beneath. Hyphae will decompose the new paint layer from underneath, popping the coating off within weeks and allowing spores to erupt back into the living room.
4. Ignoring the Core Moisture Vector
Focusing entirely on removing visible mold growth while ignoring structural leaks, poor ventilation, or elevated indoor humidity guarantees fungal recurrence. Mold remediation is only effective when paired with permanent moisture control strategies.
Long-Term Mold Prevention and Moisture Control Strategies
Once professional remediation returns a property to a Condition 1 normal fungal ecology, maintaining appropriate indoor environmental controls is vital to prevent future growth.
| Control Parameter | Long-Term Moisture Control Thresholds |
|---|---|
| Indoor Relative Humidity | Keep strictly between 30% and 50% |
| Crawl Space Soil Barrier | 12-mil vapor barrier with sealed seams |
| Exterior Soil Grading | Pitch downward 6 inches over 10 feet |
| Gutter Downspouts | Extend discharge 5+ feet away from wall |
1. Relative Humidity and Psychrometric Control
Maintain indoor relative humidity continuously below 50% (ideally between 30% and 45%). High ambient humidity alone provides sufficient hygroscopic moisture for species like Aspergillus to thrive on wall surfaces, even without liquid plumbing leaks.
- Whole-Home Dehumidification: Install dedicated whole-house dehumidifiers integrated into central HVAC ductwork in humid climates or properties built over crawl spaces.
- Air Conditioning Sizing: Ensure A/C systems are properly sized; oversized units cool the air too quickly without running long enough to pull moisture out of the air, resulting in high indoor humidity.
2. Structural Envelope and Crawl Space Encapsulation
- Crawl Space Vapor Barriers: Unsealed dirt crawl spaces transfer ground moisture into floor joists via capillary action and stack effect forces. Encapsulating crawl spaces with heavy 12-mil or 20-mil reinforced polyethylene vapor barriers, sealing foundation vents, and adding a mechanical dehumidifier protects subflooring from structural decay.
- Attic Ventilation: Ensure soffit, ridge, and gable vents remain unobstructed. Inadequate attic airflow allows warm, moist air from living spaces to condense against the underside of cold roof sheathing during winter, fostering widespread attic mold colonies.
3. Landscape Drainage and Foundation Protection
- Exterior Grading: Grade soil away from foundation walls with a minimum slope of 6 inches over the first 10 feet.
- Gutter Downspout Extensions: Direct downspout runoff at least 5 to 10 feet away from the home's foundation to prevent water from pooling against basement walls.
Frequently Asked Questions
How long does a typical professional mold remediation project take?
Most residential remediation projects require between two and five days to complete. The exact duration depends on the total square footage affected, whether structural materials must be cut out and removed, and the time required for LGR dehumidifiers to dry structural framing wood down to target moisture thresholds.
Is it safe to stay inside the home during mold remediation?
If the remediation is confined to a single isolated room (such as a small bathroom) under negative air pressure containment, residents can often remain in uncontained portions of the home. However, if mold contamination affects main living zones, HVAC ductwork, or requires extensive demolition, temporary relocation is recommended to protect occupants from exposure to elevated airborne spore levels and construction noise.
What is the difference between mold removal and mold remediation?
"Mold removal" is a loose marketing term; it is impossible to remove 100% of mold spores from an indoor environment, as fungal spores naturally exist in all outdoor and indoor air. "Mold remediation" is the correct scientific process of physically extracting active fungal growth, restoring ambient spore counts to normal background levels (Condition 1), and correcting moisture issues to prevent recurrence.
Will standard bleach kill toxic black mold on drywall?
No. Household bleach should not be used on porous drywall. Bleach consists mostly of water, which penetrates drywall and feeds fungal roots deep inside the material, while the active chlorine component stays on the surface. To treat drywall effectively, contaminated sections must be cut out and discarded under proper negative pressure containment.
How can I verify that the mold remediation work was successful?
Success is verified through Post-Remediation Verification (PRV) testing conducted by an independent indoor air quality consultant. This includes a thorough visual inspection showing no remaining dust or fungal growth, moisture meter checks confirming dry structural framing, and air spore-trap samples confirming indoor airborne spore levels are equal to or lower than outdoor baseline samples.
Actionable Next Steps for Property Owners
When facing suspected mold growth or water damage, immediate, methodical action preserves structural integrity and human health:
- Stop the Moisture Source: Shut off water supply lines or repair roof leaks immediately to halt fungal growth.
- Schedule an Independent Environmental Assessment: For widespread contamination, hire an independent Certified Microbial Consultant (CMC) to perform baseline testing and author an objective scope of work.
- Engage Certified Remediation Specialists: Hire professional restoration contractors certified under the IICRC S520 standard to implement containment, negative air filtration, HEPA extraction, and structural drying.
- Document Everything for Insurance: Photograph damaged areas, archive laboratory test reports, maintain contractor receipts, and contact your insurance provider promptly to determine policy coverage sub-limits.
- Implement Permanent Moisture Safeguards: Install whole-home dehumidification systems, maintain crawl space vapor barriers, and ensure proper exterior drainage to maintain clean indoor air quality permanently.