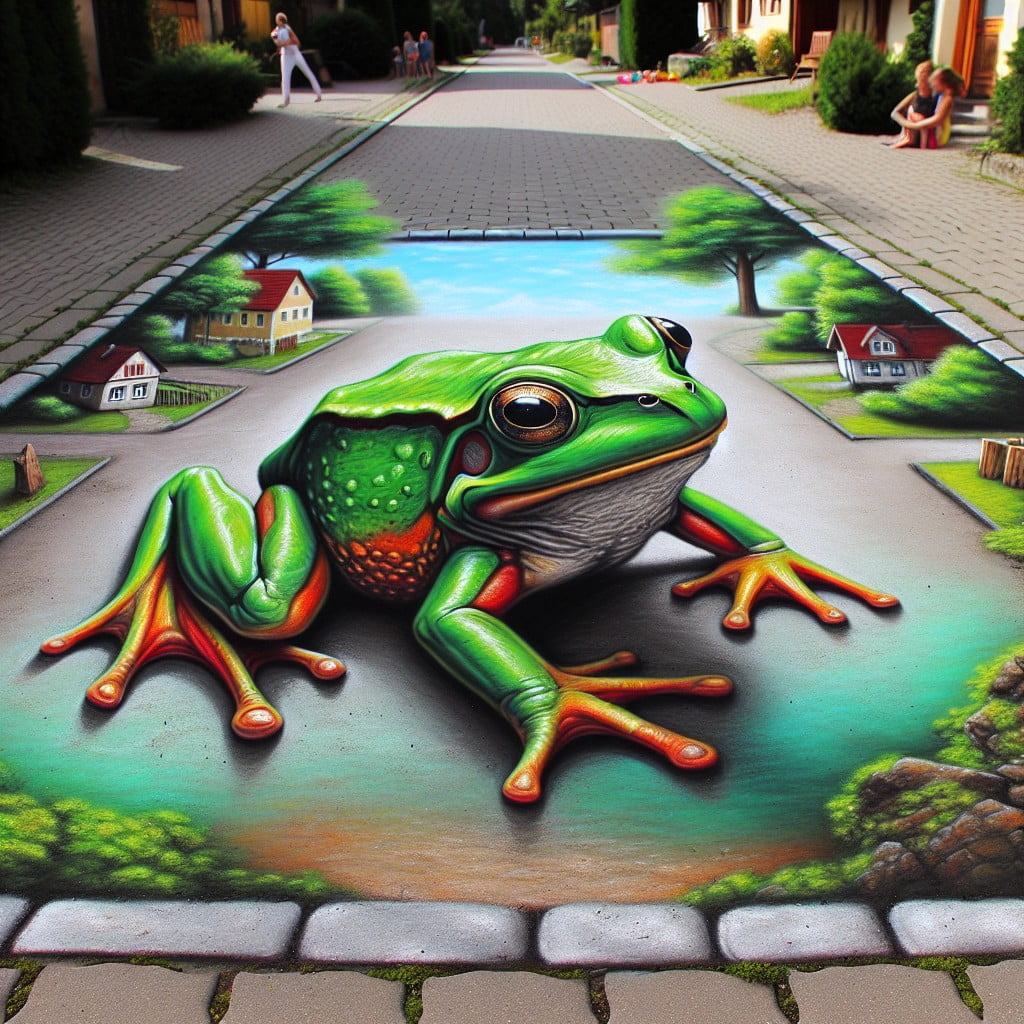
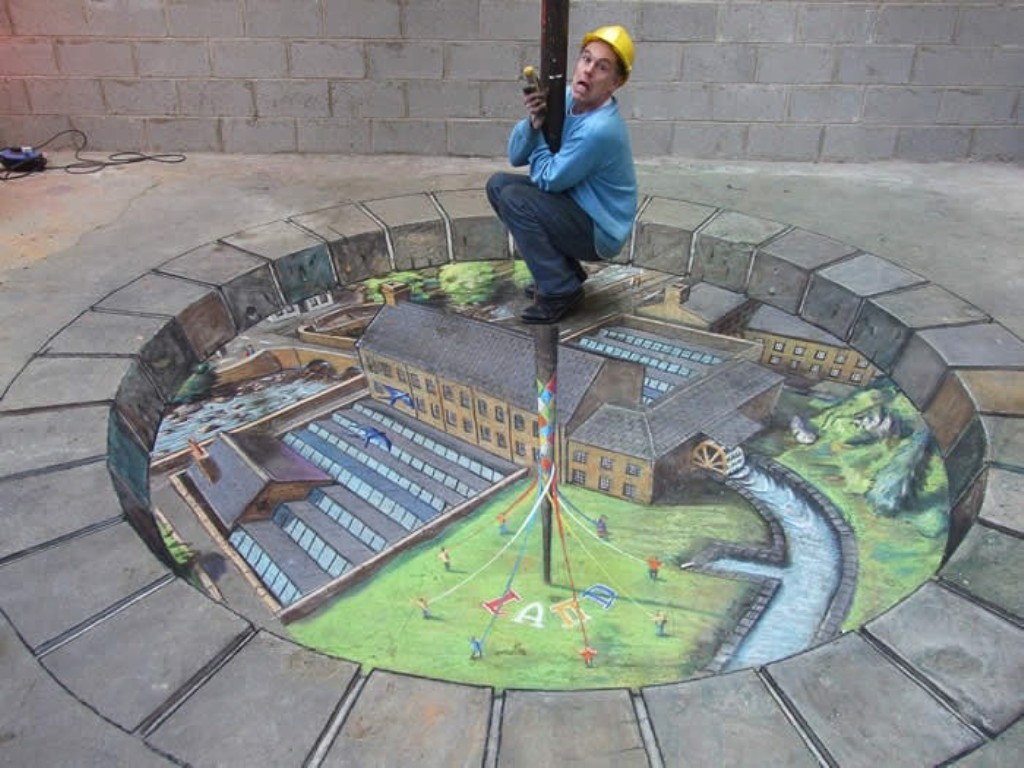
Creating striking 3D sidewalk chalk drawings transforms a flat pavement surface into an astonishing optical illusion of depth, chasms, floating objects, or emerging creatures. Mastering this art form requires an understanding of anamorphic perspective, careful color layering, and specific material selection to ensure your temporary masterpieces withstand the elements and capture the imagination of every passerby.
Introduction to Anamorphic Sidewalk Art
Sidewalk chalk art has evolved far beyond simple hopscotch grids and amateur sketches into a sophisticated branch of street painting known as anamorphic art. At its core, a 3D sidewalk chalk drawing relies on a specific optical illusion. When viewed from one precise vantage point, a heavily distorted, elongated image on the flat ground snaps into three-dimensional focus, making holes look deep, objects appear airborne, and cartoon characters seem to step right off the pavement.
Achieving this effect does not require a degree in advanced geometry, but it does demand patience, an understanding of vanishing points, and high-quality materials. Whether you are a parent looking to liven up a weekend driveway project, an aspiring street artist testing large-scale visual techniques, or an educator seeking engaging outdoor geometry lessons, exploring ten distinct 3D sidewalk chalk concepts will provide both structural inspiration and the practical mechanics needed to bring them to life.
Essential Materials and Pavement Preparation
Before putting chalk to concrete, assembling the right toolkit is essential for achieving the vibrant saturation and longevity characteristic of professional street art. Standard classroom chalk will quickly crumble, yield muted colors, and wash away with the slightest breeze or moisture.
Recommended Chalk Types
- Artist-Grade Soft Pastels: While technically pastels rather than children's chalk, soft pastels contain pure pigment with minimal binder. They deliver deep, rich blacks, brilliant highlights, and smooth blending capabilities.
- Jumbo Sidewalk Chalk: Excellent for blocking out large base areas quickly, though they require harder pressure and layering to build intense color depth.
- Chalk Powders and Liquid Chalk: Useful for covering massive background areas rapidly or creating smooth, streak-free gradients in skies and deep chasms.
Pavement Requirements and Safety
Select a smooth, unsealed concrete surface or fine-grained asphalt. Rough, heavily pebbled asphalt tears chalk quickly and obscures fine perspective lines, while slick or newly sealed surfaces prevent chalk dust from gripping the substrate. Always check local public property regulations before initiating large-scale street art projects, and ensure your working area remains safely cordoned off from pedestrian and vehicular traffic.
The 10 Essential 3D Sidewalk Chalk Drawing Concepts
To build a diverse repertoire of anamorphic street art, examine ten distinct 3D sidewalk drawing ideas categorized by complexity, visual impact, and technical challenge.
1. The Classic Pavement Chasm
- Visual Concept: A crumbling, fractured sidewalk revealing a deep, rocky abyss or subterranean cavern beneath.
- Execution Strategy: Draw jagged, broken concrete edges pointing toward a central vanishing point. Use dark charcoals and deep purples at the deepest section to simulate shadow, transitioning to warm browns and grays on the fractured ledges.
2. The Floating Magic Carpet
- Visual Concept: An ornate Persian rug hovering a foot off the ground, casting a realistic shadow on the pavement below.
- Execution Strategy: Elongate the rug vertically. Paint a crisp, dark shadow underneath the elevated edges while keeping the far end of the rug wider to reinforce the forced perspective.
3. Emerging Sea Creature
- Visual Concept: A giant octopus or shark bursting up through a broken circle in the concrete, reaching toward the viewer.
- Execution Strategy: Create a circular "hole" frame. The tentacles or dorsal fin must extend far outside the upper boundary of the circle toward the camera viewpoint to maximize the pop-out effect.
4. The Infinite Staircase Downward
- Visual Concept: A spiral or straight flight of stone steps descending deep into the ground.
- Execution Strategy: Utilize strict parallel vanishing lines that narrow rapidly. Each successive step must be drawn shorter and closer together than the last to trick the eye into reading depth.
5. The Glass Bottled Landscape
- Visual Concept: A giant glass bottle lying on its side, containing a miniature mountain range or forest inside.
- Execution Strategy: Draw sharp, curved white highlights along the bottle glass to denote transparency, allowing the interior landscape colors to show through distorted outlines.
6. The Leaning Tower Illusion
- Visual Concept: A famous architectural landmark, such as the Leaning Tower of Pisa, appearing to tilt precariously over the viewer.
- Execution Strategy: Exaggerate the taper of the building's columns and windows, ensuring the base appears much larger and wider than the upper stories when viewed from the correct angle.
7. The Giant Stepping Stone Bridge
- Visual Concept: Massive stone blocks suspended over a rushing river or void, inviting the viewer to step across.
- Execution Strategy: Focus heavily on the underside bevels of the stones. Shading the bottom planes darker creates the illusion of thickness and elevation.
8. The Pop-Up Cartoon Character
- Visual Concept: A beloved animated character bursting out of a TV screen or torn paper frame drawn flat on the ground.
- Execution Strategy: Draw the framing device (like a ripped piece of notebook paper) in severe anamorphic perspective, while rendering the character with normal proportions overlapping the frame edge.
9. The Underground Vault Safe
- Visual Concept: A heavy steel bank vault door swung open, revealing stacks of gold bars or glowing crystals inside.
- Execution Strategy: Use metallic gray and silver pastels, emphasizing specular highlights on the heavy locking bolts and circular hinges.
10. The Waterfall Cascade
- Visual Concept: A rushing mountain stream pouring out of a flat pavement fissure into an unseen basin.
- Execution Strategy: Blend bright whites, cyans, and deep blues with vertical streak lines, adding frothy white foam highlights where the water hits the "lower" level.
Comparative Overview of Chalk Drawing Techniques
| Drawing Concept | Primary Skill Required | Estimated Time | Recommended Viewing Distance |
|---|---|---|---|
| Pavement Chasm | Shadow mapping & blending | 2–4 Hours | 6–10 Feet |
| Floating Carpet | Drop-shadow realism | 1–3 Hours | 5–8 Feet |
| Emerging Sea Creature | Dynamic overlapping | 3–5 Hours | 8–12 Feet |
| Infinite Staircase | Linear perspective | 2–3 Hours | 6–10 Feet |
| Glass Bottle Landscape | Reflection rendering | 3–4 Hours | 4–7 Feet |
Step-by-Step Execution Workflow
Site Selection & Cleaning
Establish Viewpoint Marker
Grid or Anchor Sketching
Base Color Blocking
Shadow & Highlight Layering
Sealing & Final Review
Site Selection and Cleaning: Sweep the pavement thoroughly to remove loose grit, dust, and leaves. A clean surface ensures the chalk bonds directly with the concrete pores.
Establish the Viewpoint Marker: Place a small stone, piece of tape, or chalk dot where the photographer or viewer must stand. Every perspective line must radiate from or relate to this exact spot.
Anchor Sketching: Lightly sketch your design using a neutral-colored chalk (such as pale yellow or light gray). For complex shapes, use a string grid anchored to the viewpoint to plot out major coordinates.
Base Color Blocking: Fill in large shapes with solid blocks of color, working from background elements forward to foreground details.
Shadow and Highlight Integration: This is the critical step that creates the 3D effect. Add dark, opaque shadows beneath all elements that are supposed to be "hovering" or protruding. Add crisp white highlights on top edges where light naturally hits.
Common Mistakes and Troubleshooting
- Incorrect Viewing Angle Alignment: If you move your head while drawing, the perspective will warp. Always lock your viewpoint position early by setting up a camera on a tripod at your target height (typically 4 to 5 feet off the ground) and checking the live screen as you work.
- Weak Contrast: Pavement reflects a tremendous amount of ambient light. If your shadows are too gray or your highlights too dull, the 3D illusion will flatten out under direct sunlight. Always push your darks darker and your lights brighter than you think is necessary.
- Weather Vulnerability: Sudden wind gusts or unexpected rain can ruin hours of work in seconds. Check local weather forecasts carefully, and consider using a light fixative spray designed for pastels if you need the artwork to survive brief environmental exposure.
Frequently Asked Questions
How do artists know where to stand when drawing 3D chalk art?
Artists use a fixed camera viewfinder or a sighting monocular pegged to a specific ground marker. By looking through the lens while drawing or projecting a digital grid onto the pavement from that exact vantage point, they distort the proportions so the camera (or viewer's eye) perceives correct proportions.
What is the best way to make sidewalk chalk look shiny or metallic?
Achieving a metallic or glassy sheen relies on extreme contrast between pure white highlights and pitch-black shadows. Leaving sharp, unblended white lines where light hits a curved edge creates an immediate reflection effect.
Can you use regular kids' sidewalk chalk for 3D art?
Yes, but with limitations. Regular chunky sidewalk chalk is excellent for large background fills, but its high binder content makes fine detail work and rich color saturation difficult. Pairing chunky chalk with artist soft pastels yields the best results.
How long do 3D sidewalk chalk drawings typically last?
Without rain, foot traffic, or physical disturbance, high-quality chalk and pastel drawings on dry concrete can last anywhere from several days to a week. However, heavy morning dew, wind, or light rain will dissolve or wash away water-soluble chalk pigments almost instantly.
Do I need to seal the drawing when finished?
Sealing is optional and generally unnecessary for temporary street art. If you wish to preserve the work against light mist or wind, a light application of a workable pastel fixative spray can help, though it may alter the color saturation slightly and complicate eventual cleanup.
Conclusion and Next Actions
Mastering 3D sidewalk drawing combines artistic creativity with optical geometry. Begin your next outdoor art project by selecting a smooth patch of concrete, establishing a fixed viewing spot, and starting with a simpler concept like a floating object or a shallow crevice before graduating to complex chasms and creatures. Grab a box of vibrant pastels, secure your viewing angle, and transform ordinary pavement into an extraordinary visual experience.