Air conditioner coil replacement involves swapping out a damaged evaporator or condenser coil, typically due to refrigerant leaks or corrosion. This complex, labor-intensive repair requires a licensed HVAC technician to recover refrigerant, unbraze lines, and install a matched component, often costing between $900 and $2,500 depending on accessibility, system size, and warranty coverage.
Understanding Air Conditioner Coils: Evaporator vs. Condenser
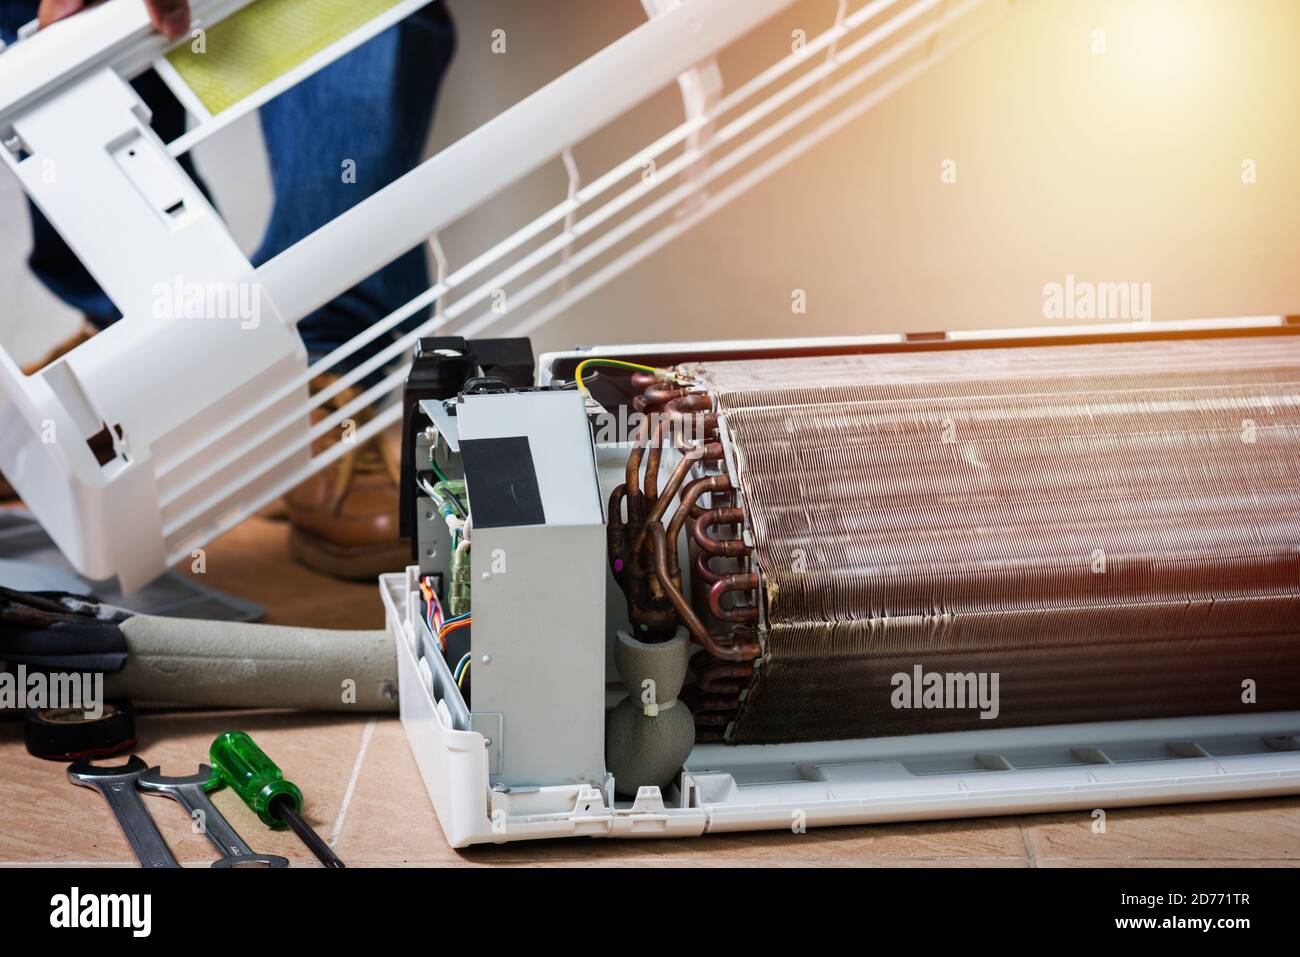
An air conditioning system relies on two primary heat exchangers to transfer thermal energy out of a building and release it outdoors: the evaporator coil and the condenser coil. Both components are constructed of serpentine copper or aluminum tubing surrounded by thin metal fins designed to maximize surface area for heat transfer. However, their locations, operating environments, and failure modes differ significantly.
THE REFRIGERATION CYCLE
- [Indoor Space]
- Evaporator Coil (Cold) <---> Condenser Coil (Hot)
- Absorbs indoor heat
- Prone to formicary corrosion
- [Outdoor Environment]
- Condenser Coil (Hot)
- Releases heat outside
- Exposed to outdoor debris
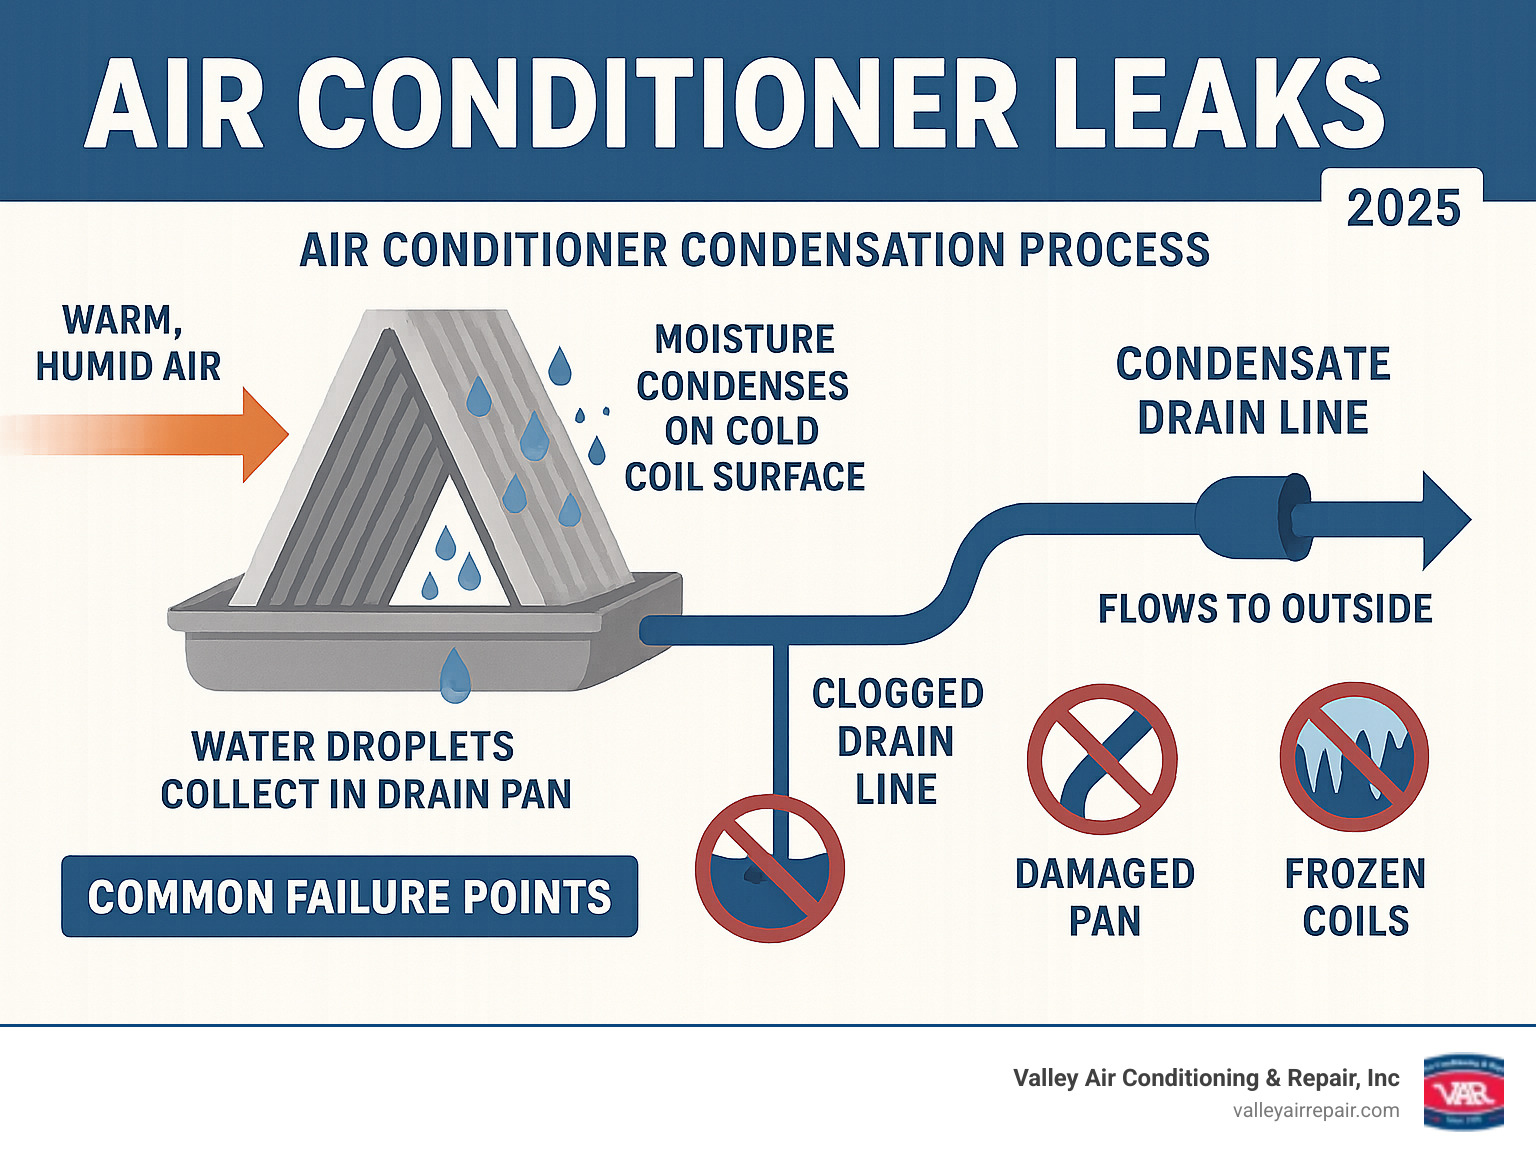
The evaporator coil is located inside the home, usually housed within the air handler, above the furnace, or inside a dedicated modular blower cabinet. As warm indoor air is forced across this cold coil by the blower fan, the liquid refrigerant inside absorbs heat, turning into a low-pressure gas. Because moisture from the indoor air constantly condenses on the cold surface of the evaporator coil, it operates in a damp environment. This perpetual moisture, combined with airborne volatile organic compounds (VOCs) from household cleaners, paints, and building materials, creates a chemical environment prone to formicary corrosion—microscopic pinhole leaks that drain the system of refrigerant.
Conversely, the condenser coil resides inside the outdoor condensing unit. It receives high-pressure, high-temperature refrigerant gas from the compressor and releases the absorbed indoor heat into the outside air as a outdoor fan pulls ambient air through the unit. Because the condenser coil is exposed to the elements, it faces a different set of hazards, including lawnmower debris, hail, dirt, cottonwood seeds, and corrosive coastal salt air. While condenser coils are generally built from thicker tubing than modern indoor evaporator coils, physical damage or severe corrosion can still compromise their integrity, necessitating a full replacement rather than a simple patch.
Signs Your Air Conditioner Coil Needs Replacement
Recognizing the early warning signs of a failing coil can prevent secondary damage to expensive components like the compressor. Homeowners typically notice a gradual degradation in system performance before a complete breakdown occurs.
1. Reduced Cooling Capacity and Warm Air Vents
When a coil develops a refrigerant leak, the mass flow rate of the refrigerant drops, reducing the system's ability to absorb heat from the indoor air. You may notice that the air coming out of the supply registers feels lukewarm or that the system runs continuously without satisfying the thermostat setpoint.
2. Ice Buildup on the Indoor Coil or Refrigerant Lines
A common misconception is that ice on an air conditioner indicates the unit is working too well. In reality, a shortage of refrigerant lowers the evaporating temperature inside the coil to below freezing. The moisture condensing on the coil's surface freezes, creating an insulating layer of ice that further inhibits heat transfer. If you see frost or solid ice on the copper suction line outside or coating the indoor evaporator coil, a refrigerant leak or severe airflow restriction is present.
3. Hissing or Bubbling Noises
Refrigerant circulates under high pressure. When a pinhole leak forms in the copper tubing or at a brazed joint, the escaping gas often produces a distinct hissing or whistling sound. This noise is frequently audible near the indoor air handler or inside the outdoor unit when the compressor is running.
4. Frequent Refrigerant Recharges
If an HVAC technician adds R-410A or another refrigerant to your system only for the cooling to fail again a few weeks or months later, you have a leak. While technicians can sometimes locate and braze a accessible leak, multiple leaks or leaks located within the hairpin turns of a coil mean the component must be replaced.
5. Water Leaks and Drainage Overflows
During normal operation, condensation drips from the evaporator coil into a drain pan. However, if the coil is damaged, dirty, or frozen and subsequently thaws rapidly, water can overflow the primary drain pan, bypassing the secondary safety switch and causing water damage to ceilings, walls, or flooring.
Repair vs. Replace: Making the Right Decision
Deciding whether to replace a leaking coil or invest in an entirely new air conditioning system is one of the most consequential financial choices a homeowner faces. Several engineering and economic factors must be weighed before committing to a major repair.
| Factor | Repair Coil | Replace System |
|---|---|---|
| System Age | Under 8-10 years | Over 10-12 years |
| Warranty Status | Active parts warranty | Expired warranties |
| Refrigerant Type | R-410A | Older R-22 (Phased out) |
| Extent of Damage | Single localized leak or minor fin damage | Widespread corrosion, compressor failure, or multiple leaks |
| Cost Ratio | Repair is < 30% of replacement | Repair exceeds 50% of system value |
System Age and Life Expectancy
The typical lifespan of a split-system central air conditioner is 12 to 15 years. If your equipment is approaching or has exceeded this window, investing $1,500 to $2,500 into a new coil is rarely economical. Other aging components—such as the compressor, fan motor, and electrical capacitors—are likely to fail soon after, leaving you with a patchwork system and wasted repair dollars.
Refrigerant Compatibility and Environmental Regulations
The type of refrigerant your system uses is a critical deciding factor. Systems manufactured before 2010 typically use R-22 (Freon), an ozone-depleting hydrochlorofluorocarbon whose production and import were banned in the United States under Clean Air Act regulations. Because virgin R-22 is scarce and expensive, recharging an older system after a coil repair is cost-prohibitive. If your system runs on R-22, replacing just the coil is almost always a poor financial choice compared to upgrading to modern R-410A or R-32 equipment.
The Component Match Rule (AHRI Certification)
When replacing an evaporator coil, the new coil must be certified by the Air-Conditioning, Heating, and Refrigeration Institute (AHRI) to match your existing outdoor condenser. Mismatching coil capacities, internal volume, or expansion valve types can severely degrade system efficiency, reduce dehumidification performance, and cause liquid refrigerant to flood back into the compressor, destroying the motor.
The Air Conditioner Coil Replacement Procedure
Replacing an air conditioner coil is a specialized mechanical task regulated by federal environmental laws. Under Section 608 of the Clean Air Act administered by the U.S. Environmental Protection Agency (EPA), technicians handling refrigerants must be certified. Attempting a DIY replacement is illegal, dangerous, and virtually impossible without specialized recovery equipment, torches, and gauges.
Step 1: System Pump-Down or Refrigerant Recovery
Before any refrigerant lines can be opened, the system must be evacuated to prevent venting ozone-depleting substances or greenhouse gases into the atmosphere. Depending on the configuration, the technician will either "pump down" the refrigerant into the outdoor condensing unit by closing liquid line service valves or use a dedicated refrigerant recovery machine to pull all gas into an approved recovery cylinder.
Step 2: Accessing and Disconnecting the Faulty Coil
For an indoor evaporator coil, the technician powers off the electrical supply to the air handler or furnace. They remove access panels, disconnect the foil-backed insulation tape, and unbolt or slide out the old coil housing. Next, they use an acetylene torch to unbraze the copper liquid and suction lines connected to the coil stub-outs, taking care not to overheat the service valves or nearby insulation.
Step 3: Installing the Replacement Coil and Expansion Valve
The old coil is removed and replaced with a factory-matched unit. Modern coils utilize either a Thermal Expansion Valve (TXV) or a Electronic Expansion Valve (EEV) to regulate refrigerant superheat. The technician installs the correct metering device, slides the new coil assembly into the cabinet, and re-establishes sheet metal connections with mastic tape or foil tape to prevent conditioned air leakage.
Step 4: Nitrogen Purging and Brazing
To prevent the formation of copper oxide scale (internal soot) inside the tubing when subjected to high torch temperatures, the technician flows dry nitrogen through the copper lines while brazing the joints with a high-silver alloy filler metal. Clean brazed joints are vital to prevent future micro-leaks.
Step 5: Pressure Testing and Deep Vacuum
Once the system cools, the technician pressurizes the lineset and new coil with dry nitrogen to approximately 150 to 250 psi and uses soap bubble solutions or an electronic leak detector to verify joint integrity. After confirming zero pressure drop, the nitrogen is released, and a high-capacity vacuum pump is attached to evacuate all moisture and non-condensable gases from the lines. The system must pull down below 500 microns to ensure a dry, moisture-free internal environment.
Step 6: Charging and Performance Verification
Finally, the system is opened to release the stored refrigerant (or fresh refrigerant is weighed in). The technician turns on the system, measures superheat and subcooling temperatures, checks electrical amp draws, and verifies proper airflow across the coil to ensure optimal operating efficiency.
Cost Breakdown for Air Conditioner Coil Replacement
Pricing for coil replacement varies widely based on geographic region, contractor overhead, labor time, and equipment specifications. Homeowners should expect a comprehensive invoice that accounts for parts, labor, and mandatory environmental fees.
Material and Equipment Costs
- Evaporator Coil Unit: $400 to $1,200 depending on tonnage (1.5 to 5 tons), brand, and whether it includes a factory-installed TXV valve.
- Condenser Coil Unit: $600 to $1,500; outdoor coils are generally more expensive due to larger surface areas and heavier-duty external housing structures.
- Refrigerant: $100 to $400 per system charge depending on current market prices for R-410A and the total pounds required.
- Consumables (Nitrogen, Silver Solder, Flux, Insulation): $50 to $100.
Labor and Overhead
Labor typically accounts for the largest share of the bill. Replacing an indoor coil requires 4 to 8 hours of skilled labor by one or two technicians. Labor rates range from $150 to $250 per hour depending on local market conditions, bringing total labor expenses to $600 to $1,500.
Warranty Protections
Before paying out of pocket, check your equipment's manufacturer warranty. While standard parts warranties last 5 years, many brands offer 10-year warranties if the original equipment was registered online within 60 to 90 days of installation. Note that warranties cover the cost of the replacement part only; labor, refrigerant recovery, and shipping charges are almost never covered unless you purchased a separate extended labor warranty from the installing contractor.
Frequently Asked Questions
Can I repair a leaking AC coil instead of replacing it?
In rare cases where a leak occurs at an easily accessible brazed joint, a technician can clean the area and re-braze the joint. However, if the leak is caused by internal corrosion within the coil fins or tubing, patching is ineffective. Pinhole leaks often occur in clusters due to manufacturing defects or formicary corrosion, making full replacement the only reliable fix.
How long does an air conditioner coil replacement take?
A standard evaporator coil replacement takes between 4 and 8 hours. The duration depends on the accessibility of the air handler (such as cramped attic installations versus spacious utility closets), the need for sheet metal modifications, and the time required to pull a proper deep vacuum on the refrigerant lines.
Will a new coil improve my energy bills?
If your old coil was dirty, partially blocked, or starved of refrigerant, replacing it and restoring proper refrigerant charge will significantly improve heat transfer efficiency. Your system will run for shorter cycles to reach the thermostat setpoint, leading to a noticeable reduction in monthly electricity consumption.
What causes AC coils to fail prematurely?
Premature coil failure is most frequently caused by aggressive chemical exposure (formicary corrosion driven by indoor air pollutants like cleaning solvents and building materials), lack of routine air filter changes that cause freezing and thermal stress, and factory manufacturing defects in copper tubing walls.
Is it better to replace just the indoor coil or the entire system?
If your system is under 8 years old and the coil failure is covered under a parts warranty, replacing the coil is practical. If your equipment is over 10 years old, uses obsolete R-22 refrigerant, or has suffered multiple major failures, investing in a complete new system is more cost-effective over the long term.
Next Actions and Recommendations
If you suspect your air conditioning coil is leaking or damaged, schedule an inspection with a licensed HVAC contractor immediately. Ask the technician to perform an electronic leak test or nitrogen pressure test to confirm the diagnosis, request a written estimate that itemizes parts and labor separately, and verify whether any component costs are covered under active manufacturer warranties before authorizing the work.