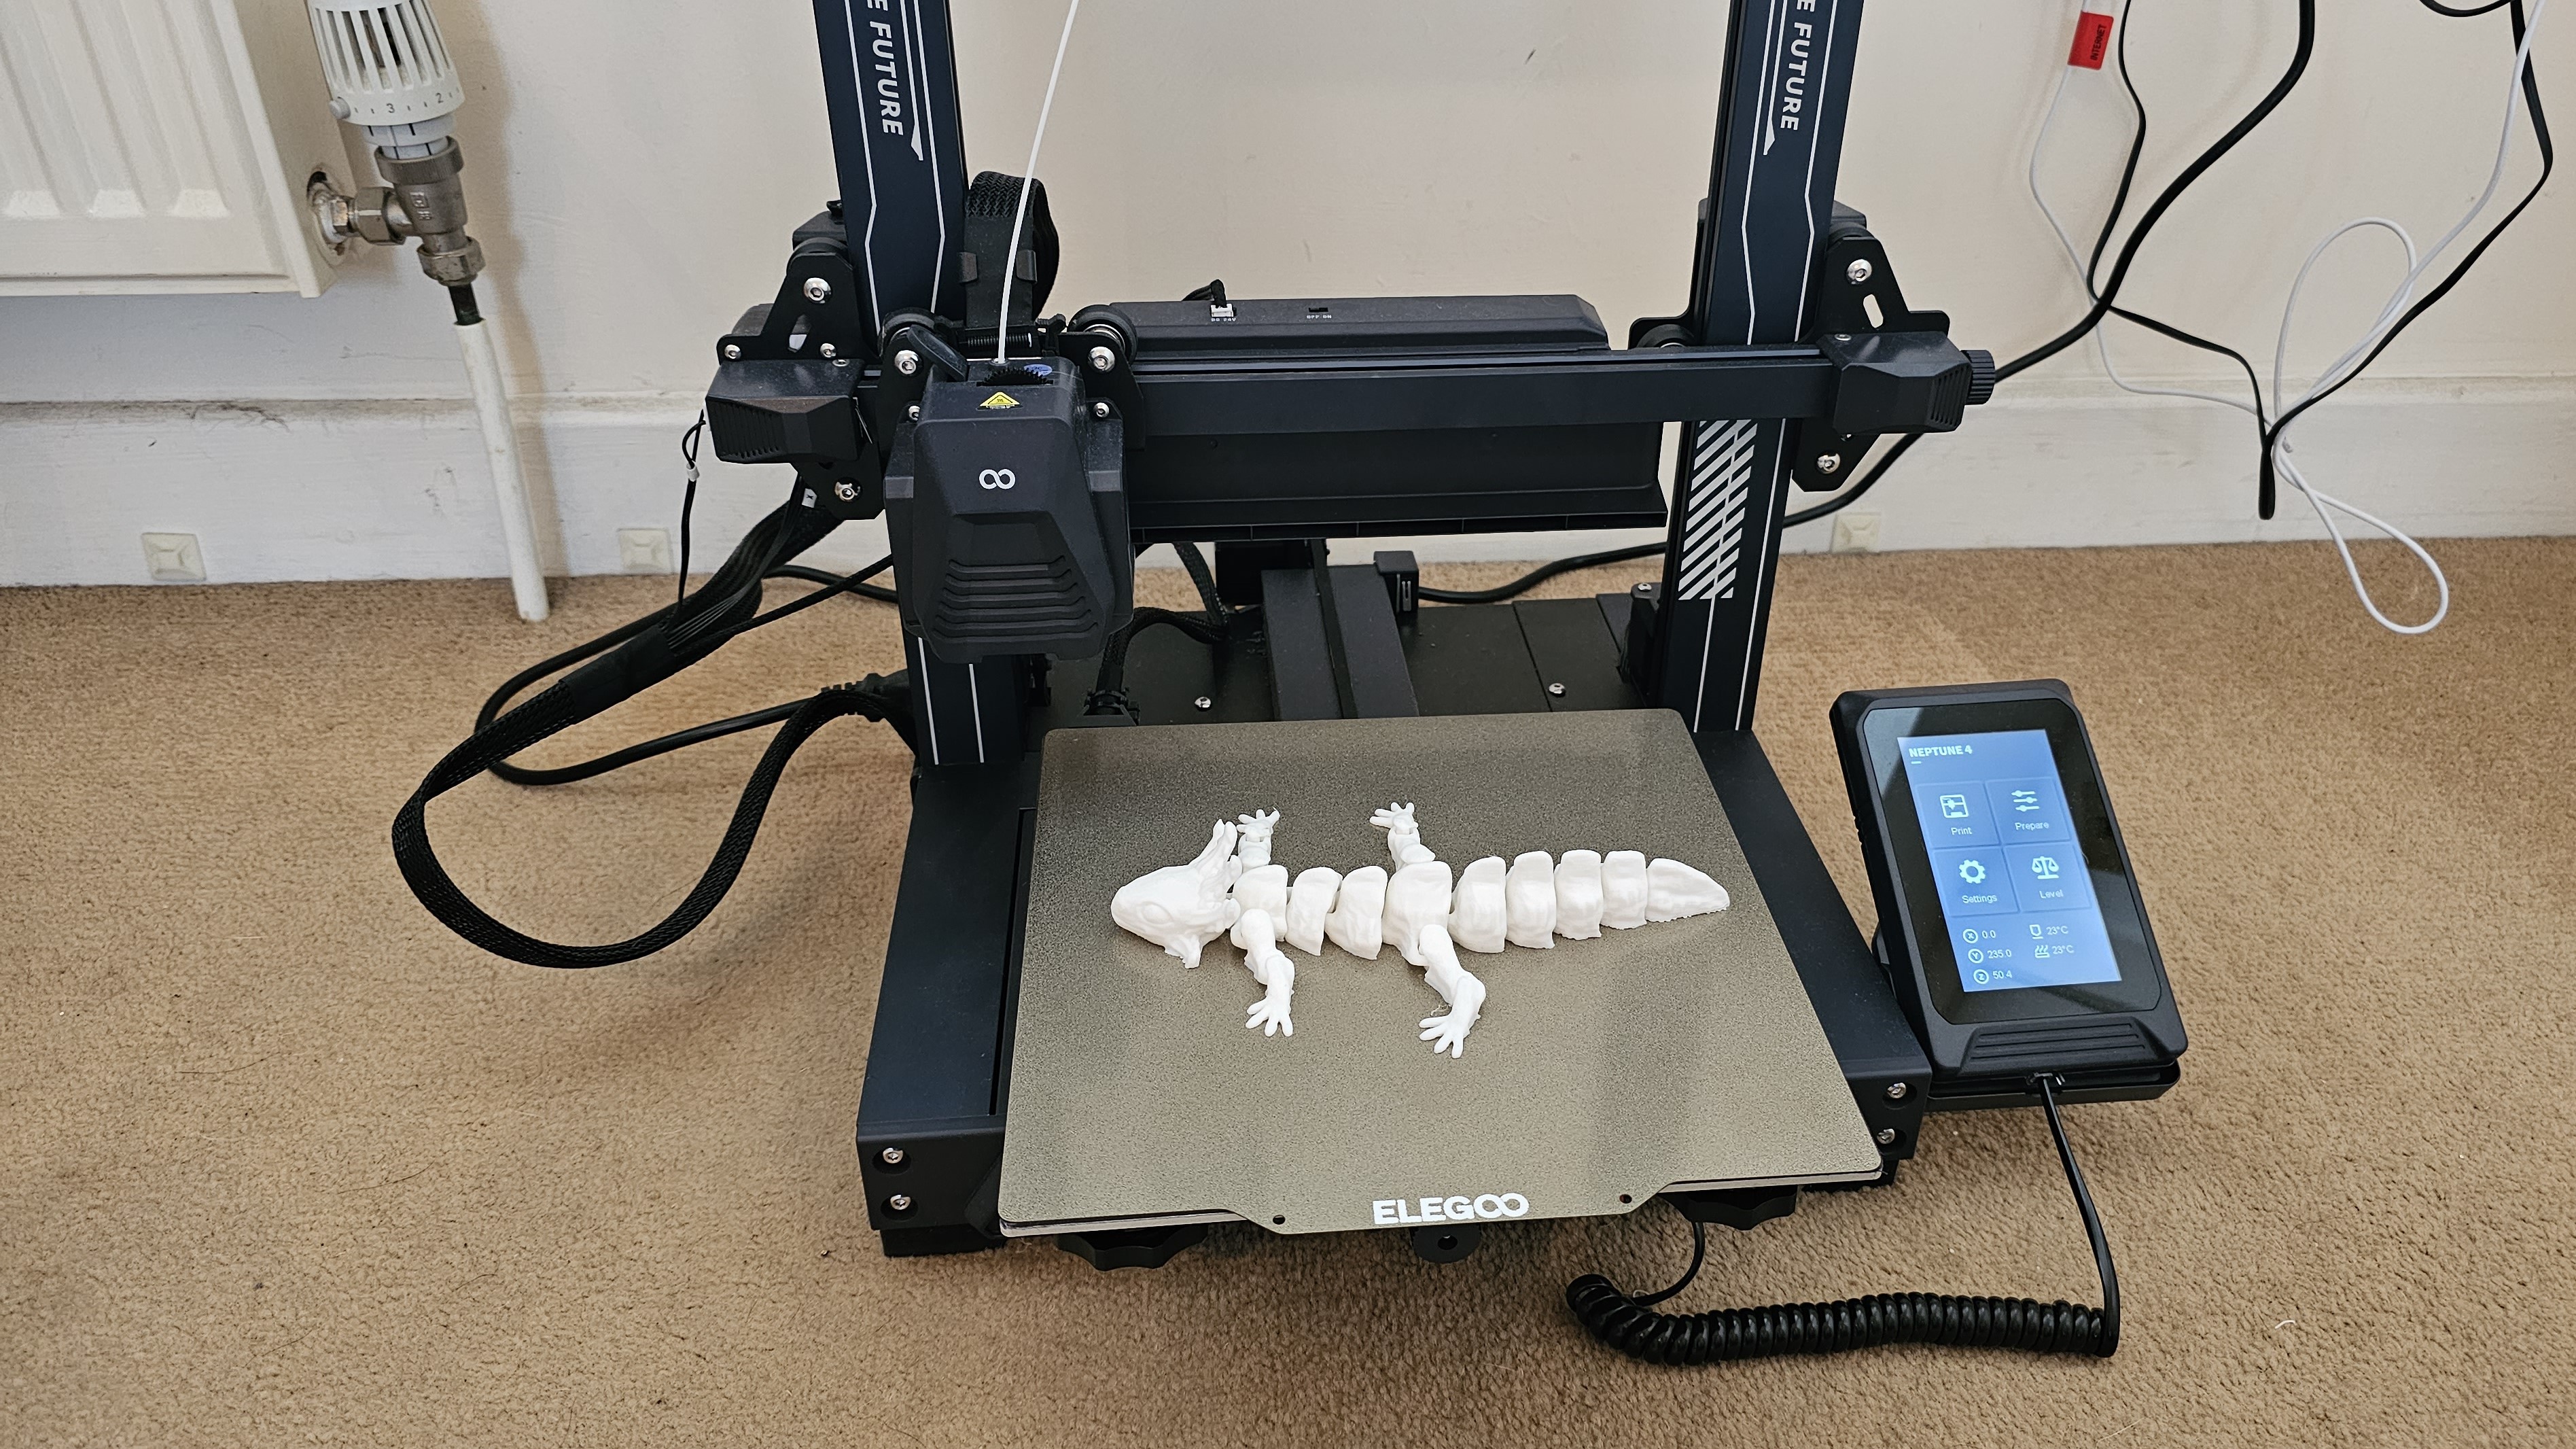
An affordable 3D printer typically costs between $150 and $350, delivering high-precision desktop manufacturing without requiring a massive financial investment. Modern budget printers standardly feature automatic bed leveling, flexible magnetic PEI build plates, and accelerated print speeds, providing reliable performance for beginners, hobbyists, students, and educators.
1. FDM vs. Resin: Deciding on the Right Printing Technology
Before comparing specific models, you must select the underlying manufacturing technology that matches your intended projects. Desktop 3D printing falls into two primary categories: Fused Deposition Modeling (FDM) and Stereolithography / Masked SLA (Resin/MSLA).
- Desktop 3D Printing
- FDM (Fused Deposition)
- Uses thermoplastic spools
- Strong, functional parts
- Large build volumes
- Minimal post-processing
- Resin / MSLA (Curing)
- Uses liquid photopolymer resin
- Ultra-fine visual detail
- Small, intricate miniatures
- Requires alcohol wash & UV
- FDM (Fused Deposition)
Fused Deposition Modeling (FDM)
FDM printers work by feeding a solid spool of thermoplastic filament through a heated nozzle. The molten plastic is deposited layer by layer onto a build platform, where it cools and solidifies.
- Best For: Functional prototypes, household utility items, replacement parts, storage organizers, and large cos-play props.
- Advantages: Clean operation, low ongoing material costs, wide material selection (PLA, PETG, TPU), and larger physical build volumes for the price.
- Drawbacks: Visible layer lines on curved surfaces, louder mechanical movement, and lower tolerance for extremely fine, microscopic details.
Resin (MSLA / LCD)
Resin printers use a ultraviolet (UV) light engine placed beneath a liquid photopolymer resin vat. An LCD screen acts as a stencil, masking out precise shapes to cure each liquid resin layer into solid plastic.
- Best For: Tabletop gaming miniatures, jewelry prototypes, intricate sculptures, and highly detailed visual models.
- Advantages: Exceptional surface smoothness, crisp feature reproduction down to sub-millimeter tolerances, and uniform print time across the entire LCD area regardless of model count.
- Drawbacks: Requires chemical post-processing (washing in isopropyl alcohol and UV curing), sticky liquid handling, volatile organic compound (VOC) emissions requiring dedicated ventilation, and smaller build volumes on entry-level models.
2. Essential Features to Look For in a Budget 3D Printer
Entry-level 3D printers were once sold as partially assembled kits that required hours of manual tuning, soldering, and troubleshooting before producing a usable object. The current generation of budget machines offers significantly better out-of-box usability. When evaluating low-cost options, prioritize machines that incorporate the following modern technical features.
Automatic Bed Leveling (ABL)
Physical bed leveling—adjusting tiny thumbscrews under the print bed while sliding a piece of paper back and forth—was historically the single primary cause of print failures for beginners. Modern budget printers include induction, optical, or strain-gauge sensors that scan the print surface before printing. The printer creates a digital mesh map of the bed's subtle tilt and surface irregularities, dynamically compensating Z-axis height during the first layer to ensure uniform adhesion across the entire platform.
Extruder Configuration: Direct Drive vs. Bowden
The extruder assembly pushes plastic filament into the hotend melt zone.
- Direct Drive Extruders: The extruder motor is mounted directly above the hotend assembly. This short path gives precise control over retractions, minimizes stringing, and allows easy printing of flexible materials like TPU (Thermoplastic Polyurethane). While a direct drive adds weight to the print head assembly, modern structural frames handle this added mass effectively.
- Bowden Tube Extruders: The motor is mounted on the frame, pushing filament through a long PTFE tube to the hotend. This lightens the moving print head, allowing faster acceleration, but makes flexible filaments difficult to print and requires higher retraction distances.
For general versatility in budget printing, a direct drive extruder is typically preferred.
- Direct Drive Configuration:
- Extruder Motor
- Heated Hotend
- Nozzle / Bed
- Bowden Tube Configuration:
- Extruder Motor
- PTFE Guide Tube
- Heated Hotend
- Nozzle / Bed
Flexible PEI Build Plates
Textured or smooth Polyetherimide (PEI) spring-steel build plates have largely replaced plain glass and adhesive sheets. PEI provides strong mechanical adhesion when heated and releases parts naturally once cooled. The flexible spring steel allows users to snap finished prints off the surface by bending the plate slightly, eliminating the need for hazardous metal scrapers that can gouge print beds or injure hands.
Accelerated Print Speeds and Advanced Firmware
Older budget printers typically maxed out at printing speeds of 40 to 60 mm/s due to 8-bit microcontrollers and basic firmware. Modern budget 3D printers feature 32-bit mainboards running advanced control algorithms (such as optimized Marlin or Klipper derivatives). Features like Input Shaping (vibration compensation) and Pressure Advance (flow control) allow modern machines to maintain high print quality at real-world speeds of 150 to 300 mm/s, dramatically reducing total print times.
Filament Runout & Power Loss Recovery
Integrated filament sensors pause prints automatically when the spool runs empty or snaps, preventing a job from failing midway through a multi-hour cycle. Similarly, power loss recovery saves print position data to onboard non-volatile memory, allowing the printer to resume automatically when electricity is restored after a momentary power flash.
3. Comparison of Budget 3D Printer Categories
Understanding hardware specifications helps narrow down which machine type matches your footprint, budget, and project requirements.
| Feature Category | Standard Entry FDM | High-Speed Compact FDM | Entry Resin / MSLA |
|---|---|---|---|
| Typical Price Range | $180 – $280 | $220 – $350 | $150 – $260 |
| Average Build Volume | 220 × 220 × 250 mm | 180 × 180 × 180 mm | 143 × 89 × 165 mm |
| Max Print Speed | 150 – 250 mm/s | 300 – 500 mm/s | 30 – 70 mm/hr (height) |
| Layer Resolution | 0.10 – 0.35 mm | 0.08 – 0.28 mm | 0.01 – 0.05 mm |
| Primary Material | PLA, PETG, TPU | PLA, PETG, TPU | Photopolymer Resin |
| Assembly Required | 15–30 minutes (Semi-assembled) | Near Plug-and-Play | 10 minutes |
| Required Space / Vents | Desktop / Normal Ventilation | Desktop / Normal Ventilation | Well-ventilated area / Enclosure |
| Post-Processing Need | Low (Remove support structures) | Low (Remove support structures) | High (Wash with IPA, UV Light Cure) |
4. Hidden Costs and Total Cost of Ownership
The purchase price of an affordable 3D printer represents only your baseline capital investment. Operating a additive manufacturing setup requires ongoing supplies, accessories, and maintenance consumables.
Total Operating Cost = Base Machine + Raw Materials + Post-Processing Gear + Maintenance Parts
Raw Materials (Filaments and Resins)
- Standard PLA (Polylactic Acid): $15 – $25 per 1 kg spool. Easy to print, biodegradable organic origin, low odor. Ideal for visual parts and general prototyping.
- PETG (Polyethylene Terephthalate Glycol): $18 – $28 per 1 kg spool. Higher heat resistance and chemical durability; ideal for functional outdoor parts.
- TPU (Thermoplastic Polyurethane): $25 – $35 per 1 kg spool. Flexible rubber-like material for gaskets, grips, and dampeners.
- Standard Photopolymer Resin: $20 – $35 per 1 kg bottle. Highly detailed but brittle; specialized tough or plant-based resins run $30 – $50 per bottle.
Post-Processing Supplies & Safety Equipment
- For FDM Printing: Deburring tools, flush cutters, brass wire brushes for cleaning nozzles, and extra nozzles (typically $1 to $3 each for standard brass).
- For Resin Printing: Isopropyl Alcohol (IPA 91%+ concentration) or specialized wash solvents ($20–$40 per 5-liter container), nitrile gloves, safety goggles, organic vapor respirators, and a dedicated wash/cure station or UV lamp setup ($50–$120).
Electricity and Maintenance Costs
Most desktop FDM printers draw between 100 to 350 Watts while heating and printing. Under regular continuous usage, power consumption adds a negligible amount to monthly energy bills. Spare parts such as replacement PTFE tubes, mechanical belts, spare thermistors, and replacement PEI build surfaces should be budgeted annually at approximately $30 to $50.
5. Step-by-Step Setup and First-Print Calibration
Even factory-assembled budget printers require careful initial setup to perform reliably over time. Following a structured assembly methodology prevents premature mechanical failures and poor print quality.
- Frame Alignment
- Belt Tensioning
- Z-Offset Calibration
- Slicer Configuration
Step 1: Mechanical Frame Squaring
When unboxing an FDM printer, verify that all aluminum extrusions are strictly perpendicular before tightening assembly bolts.
- Place the printer frame on a completely flat, level work table.
- Use a machinist's square to check that vertical Z-axis gantries form precise 90-degree angles with the base frame.
- Tighten all structural screws gradually in a diagonal pattern to avoid twisting the frame out of alignment.
- Verify that eccentric nuts on the motion car carriages are adjusted so rollers hold zero slop while turning freely by hand without flat-spotting.
Step 2: Mechanical Belt Tensioning
Drive belts drive the movement of the X and Y axes. Loose belts lead to oval circles and sloppy corners, while overtightened belts bind motors and cause premature wear.
- Pluck the exposed belt like a guitar string; it should produce a low musical resonance without sagging visibly.
- Check that pulleys and motor gear teeth line up straight with the belt path to eliminate fraying along the edges.
Step 3: Z-Offset and Mesh Bed Calibration
Automatic bed leveling determines relative surface height, but the Z-offset dictates the precise physical gap between the nozzle tip and the build surface on the first layer.
- Run your printer's automated leveling menu to generate a bed mesh.
- Place a standard piece of 20lb printer paper between the nozzle and bed.
- Lower the Z-offset setting in small increments (0.02 mm steps) until you feel smooth, light resistance when dragging the paper back and forth.
- Execute a single-layer test print (a large square flat patch).
- Too High: Filaments separate easily, showing gaps between extruded lines.
- Too Low: Nozzle gouges into plastic, dragging ridges, or failing to extrude due to backpressure.
- Correct: Extruded lines squash together evenly to form a smooth, unbroken plastic sheet.
- Nozzle Too High (Gaps/Loose)
- Nozzle Too Low (Scraped/Squished)
- Correct Z-Offset (Smooth/Flat)
Step 4: Slicing Software Setup
3D models (.STL or .3MF format) must be converted into machine-readable code (.GCODE) using slicing software. Popular open-source and free slicer programs include PrusaSlicer, Cura, and OrcaSlicer.
- Select the exact manufacturer machine profile matching your printer.
- Use pre-configured print profiles for your target material (e.g., standard PLA settings with hotend at 200–210°C and bed at 50–60°C).
- Configure infill density based on your model's function: 10–15% infill is sufficient for decorative models, whereas 25–40% infill with extra wall perimeters is best for structural parts.
6. Common Troubleshooting Protocols for Budget 3D Printers
Understanding how to diagnose and resolve physical print flaws ensures a smooth, long-term 3D printing experience.
Problem: Poor Bed Adhesion & Warping
- Symptom: Print edges lift off the bed mid-print, or the entire object detaches and slides around the build platform.
- Primary Causes: Contaminated build surface, incorrect Z-offset height, or ambient draft cooling the print unevenly.
- Solution: Clean the PEI build surface thoroughly using warm water and dish soap to remove oils, followed by a wipe-down with 90%+ Isopropyl Alcohol. Re-check the Z-offset distance. If using PETG or ABS materials, disable part cooling fans during the initial 3 layers and shield the machine from room drafts.
Problem: Extruder Clogging & Underextrusion
- Symptom: Printer operates normally, but no plastic extrudes, or extruded lines appear thin, holy, and sponge-like.
- Primary Causes: Heat creep, debris inside nozzle, or low printing temperature.
- Solution: Heat the hotend to 230°C and perform a "cold pull" using nylon or standard PLA filament to remove carbonized debris from inside the nozzle chamber. If clogs recur frequently, replace the brass nozzle or verify that the small heatsink cooling fan operates at 100% capacity whenever the hotend is active.
Problem: Stringing and Oozing
Symptom: Thin, spiderweb-like strands of plastic stretch across open gaps between separate regions of the print.
Primary Causes: Retraction settings configured incorrectly, nozzle temperature set too high, or moisture absorbed into raw filament spools.
Solution: Lower nozzle temperature in 5°C increments. Increase retraction speed and retraction distance within your slicer software. Wet filament causes water to steam inside the hotend, pushing melted plastic out; dry moist filament spools using a dedicated filament dryer or food dehydrator at 45–50°C for 6 hours.
Stringing Issues (High heat / No retraction)
Clean Retraction (Optimized settings)
7. Frequently Asked Questions
What is the absolute lowest price I should pay for a dependable 3D printer?
While budget machines appear online for as little as $100, printers in the $180 to $300 price bracket provide significantly better build quality, reliable automatic bed leveling, modern safety features, and active software updates. Machines below this price point often rely on outdated 8-bit electronics and sub-standard hardware components, leading to frequent maintenance issues.
Are cheap 3D printers safe to run unattended or overnight?
Modern 3D printers from established manufacturers include thermal runaway protection built into their firmware, which cuts power immediately if a thermal sensor fails. However, running any electrical heating device continuously presents minor risks. Place your printer on a non-flammable surface, maintain smoke detectors nearby, keep flammable liquids clear of the machine, and avoid leaving prints unmonitored for long periods during initial machine testing.
How loud is an entry-level modern 3D printer?
Current budget printers feature silent stepper motor drivers (such as Trinamic TMC series drivers) that reduce mechanical movement noise to under 50 decibels. The primary operational sound comes from cooling fans. While you can comfortably work in the same room as an active modern FDM printer, keeping the printer inside a bedroom while sleeping is generally not recommended.
Can cheap FDM printers process engineering materials like ABS, Nylon, or Carbon Fiber?
Standard open-frame budget printers can process PLA, PETG, and TPU materials reliably. Printing high-temperature engineering plastics like ABS or Nylon effectively requires a fully enclosed build chamber to trap heat and prevent part warping. They also require an upgraded all-metal hotend capable of maintaining temperatures above 260°C. Attempting to print carbon-fiber filled materials on standard machines will quickly wear down soft brass nozzles; hardened steel nozzles must be installed first.
Is resin printing safer or cleaner than FDM printing?
No, resin printing involves liquid chemicals that require protective equipment. Liquid photopolymers emit volatile organic compounds (VOCs) that irritate skin, eyes, and respiratory paths. Resin setups require a dedicated, well-ventilated room, disposable nitrile gloves, safety goggles, and a systematic cleaning workflow using solvents. FDM printing with PLA is significantly cleaner and safer for standard living environments.
Summary and Practical Next Steps
An affordable 3D printer can reliably deliver impressive manufacturing capability directly to your desktop. To maximize your investment and ensure long-term printing success:
- Match Technology to Use Case: Choose FDM for practical household items, functional brackets, larger props, and low-maintenance operation. Choose Resin/MSLA if your primary goal is printing intricate, highly detailed tabletop gaming miniatures or micro-sculptures.
- Prioritize Key Convenience Features: Verify that your chosen hardware includes automatic bed leveling (ABL), a flexible magnetic PEI build plate, and a 32-bit silent mainboard.
- Plan for Total Costs: Budget an extra $50 to $100 alongside your hardware purchase for raw material spools, extra nozzles, cleaning tools, and essential safety equipment.
- Master Setup Fundamentals: Spend time squaring your mechanical frame, calibrating your Z-offset height, and tuning slicer profiles before starting large, long-duration prints.