Achieving smooth, seam-free wall surfaces requires specialized drywall tools designed for distinct phases of installation: layout cutting, mechanical fastening, joint taping, mud application, and dust-controlled sanding. From essential manual hand tools like joint knives and mud pans to automatic taping and finishing (ATF) systems, selecting the proper tooling directly dictates finish quality, workflow speed, and labor efficiency.
Phase 1: Drywall Layout, Cutting, and Hanging Tools
Installing drywall (gypsum board) requires specialized tools to measure, cut, position, and secure heavy panels against wood or light-gauge steel framing. Precision during the hanging phase ensures tight butt joints, clean inside corners, and minimal waste, laying the groundwork for seamless taping and finishing.
1. Layout and Manual Cutting Tools
- 48-Inch Drywall T-Square: Constructed from extruded aluminum or heavy-duty steel, a 48-inch T-square spans the full width of a standard wallboard panel. The head hooks over the edge of the sheet, allowing installers to guide a utility knife along the blade for straight, full-sheet cuts.
- Drywall Utility Knives and Rasp Blades: Standard retractable utility knives score the front paper face of the gypsum board. Once scored, the gypsum core snaps cleanly along the cut line, and the rear paper backing is sliced. A hand rasp or drywall scoring knife with integrated rasping teeth smooths rough snapped edges to ensure tight butt-joint fitment.
- Keyhole and Jab Saws: Featuring a thick, rigid blade with aggressive triangular teeth and a sharpened tip, jab saws punch directly through wallboard without pilot holes. They cut small openings for junction boxes, plumbing stub-outs, and HVAC registers.
2. Rotary Cut-Out Tools
For high-volume installation, electric or cordless rotary cut-out tools (zip saws) replace hand jab saws. Operating at 20,000 to 30,000 RPM with specialized spiral bits, these power tools cut around electrical outlet boxes, recessed lighting canisters, and architectural penetrations after panels are tacked onto framing.
The guide tip on drywall bits rides along the outer perimeter of an electrical box without cutting into plastic or metal enclosures, producing precise cutouts in seconds.
3. Panel Handling and Positioning Equipment
- Drywall Panel Lifts (Hoists): Cradle lifts equipped with tilting heads and manual winches allow a single technician to lift 4x8 to 4x16-foot sheets up to vertical walls or flat/sloped ceilings. Mechanical locks prevent slipping while fasteners are driven.
- Foot Jacks and Sheet Grippers: A foot-operated drywall jack acts as a lever to lift wall sheets off the subfloor by 3/8 inch to 1/2 inch, creating the required clearance above non-structural floor plates while keeping the panel tight against top plates during fastening.
- Carrier Grippers: Rubberized clamp handles fit over sheet edges, enabling ergonomic single-person transport of heavy moisture-resistant or fire-rated (Type X) drywall panels without edge damage or spinal strain.
4. Fastening Systems
Proper fastener seating is critical. If a drywall screw breaks the face paper, the structural holding capacity of the board is compromised by up to 50%. If the head sits proud of the paper surface, joint compound knives will click against the metal fastener during finishing.
Correct Screw Seat: Fastener dimples paper face without tearing upper fibers.
Over-driven Screw: Fastener breaks paper face, puncturing into gypsum core (failure).
Under-driven Screw: Fastener sits proud of surface, obstructing taping knife path.
Depth-Sensitive Screw Guns: Dedicated drywall screw guns feature high-RPM motors (2,500–4,000 RPM) paired with adjustable depth-sensitive nosepieces ("clutches"). The clutch disengages the drive bit the instant the screw head forms a dimple in the paper without tearing through to the gypsum core.
Auto-Feed Screwdriver Attachments: Collated screw systems feed plastic-linked strips of screws continuously into an auto-feed mechanism, accelerating production on large commercial wall spans.
Phase 2: Manual Joint Taping and Hand Finishing Tools
Once drywall panels are fastened, the joints, internal corners, external corners, and fastener heads must be sealed and feathered using joint compound ("mud") and reinforcement tape. Manual tools offer maximal control for detail work, repairs, and residential remodeling.
Wall Finishing Tool Sequence:
- Taping Knife (4"-6") (Tape Embedding)
- Finishing Knife (8"-12") (Feathering Coats)
- Skimming Blade (16"-48") (Level 5 Skim Coating)
Joint Knives and Taping Knives
Knives vary by blade width, metal composition, and handle design:
- 4-Inch and 6-Inch Taping Knives: Narrow knives apply setting-type compound into recessed flat joints and inside corners, seat paper or fiberglass mesh tape into the mud bed, and fill isolated fastener dimples.
- 8-Inch and 10-Inch Feathering Knives: Broader flexible blades apply second (fill) coats over joint tape, spreading compound outward to taper the joint edge smoothly onto the board surface.
- 12-Inch and 14-Inch Finishing Knives: Wide blades apply final (finish) coats, spanning wider joint recesses to create visually flat surfaces across drywall seams.
Metallurgical Comparisons: Steel Types
The blade alloy directly impacts flex, corrosion resistance, and knife lifespan:
| Steel Type | Flexibility & Feel | Corrosion Resistance | Maintenance Requirements | Ideal Application |
|---|---|---|---|---|
| Carbon Steel | High flex; excellent tactile feedback | Low; prone to flash rusting if left wet | Must be dried immediately and oiled for storage | Professional hand taping where blade flex is critical |
| Blue Steel | Superior flex and memory; thin blade profile | Moderate; resists rust better than carbon steel | Clean and dry thoroughly after daily use | High-end joint feathering and detailed hand finishing |
| Stainless Steel | Stiffer flex profile; highly durable | High; virtually immune to rust and chemical pitting | Wash with water; low maintenance demand | Rental fleets, wet environments, setting compounds |
Mud Pans, Hawks, and Finishing Trowels
- Stainless Steel Mud Pans: Featuring continuous heli-arc welded seams and contoured bottoms, metal mud pans hold mixed compound. The top edges are ground sharp to scrape excess mud off knife blades cleanly. Models equipped with non-slip neoprene bottom grips reduce hand fatigue.
- Drywall Hawks: Lightweight aluminum plates (typically 12x12 or 14x14 inches) with a central wooden or rubberized handle. Installers load compound onto the hawk surface and pick up mud using curved finishing trowels, a preferred method for plasterers and high-volume hand finishers.
- Curved Finishing Trowels: Featuring a subtle concave curve along the blade length, drywall trowels apply compound with crown build in the center while automatically feathering outer edges in one pass.
Skimming Blades for Large-Surface Level 5 Finishes
Skimming spatulas feature ultra-thin (0.3 mm to 0.5 mm) flexible stainless steel blades mounted in rigid aluminum extruded housings. Available in widths from 16 to 48 inches, these tools connect to extendable fiberglass poles. Installers roll joint compound onto entire wall planes with a paint roller and draw the skimming blade vertically or horizontally across the surface, removing excess mud while filling microscopic paper pores to create a uniform Level 5 finish.
Phase 3: Automatic Taping and Finishing (ATF) Systems
Automatic Taping and Finishing (ATF) tools automate joint compound distribution and tape application through mechanical pumps and cable-driven metering mechanisms. According to industry studies, complete ATF systems increase finishing speed by 300% to 400% compared to traditional hand tool methods on large commercial projects.
ATF Compound Distribution System:
- Joint Compound Bucket
- Loading Pump
- Automatic Taper ("Bazooka")
- Flat Boxes (7", 10", 12", 14")
- Corner Applicator & Angle Heads
1. The Automatic Taper ("Bazooka")
The automatic taper is the cornerstone of mechanical drywall finishing. It consists of a long aluminum cylinder loaded with joint compound via a manual loading pump fitted with a gooseneck attachment.
- Operation Mechanism: A spool of paper tape mounts near the bottom of the tube. As the operator advances the drive wheel along a wall seam, an internal piston driven by a cable assembly forces compound through the head, evenly coating the back of the paper tape while creasing it for corners.
- Creaser Wheel and Cut-Off Blade: A lever on the handle engages an internal creaser wheel to push tape into inside 90-degree corners, while a sliding drive tube activates a rotary blade that cuts the tape cleanly at the end of a joint run.
2. Loading Pumps and Filler Accessories
Mechanical ATF tools rely on a foot-stabilized mechanical compound pump. Fitted with interchangeable adapters:
- Gooseneck Attachment: Hooks into the head of an automatic taper to fill the main barrel with compound in seconds.
- Box Filler Nozzle: Refills flat boxes, corner applicators, and nail spotters directly from joint compound pails without opening box lids.
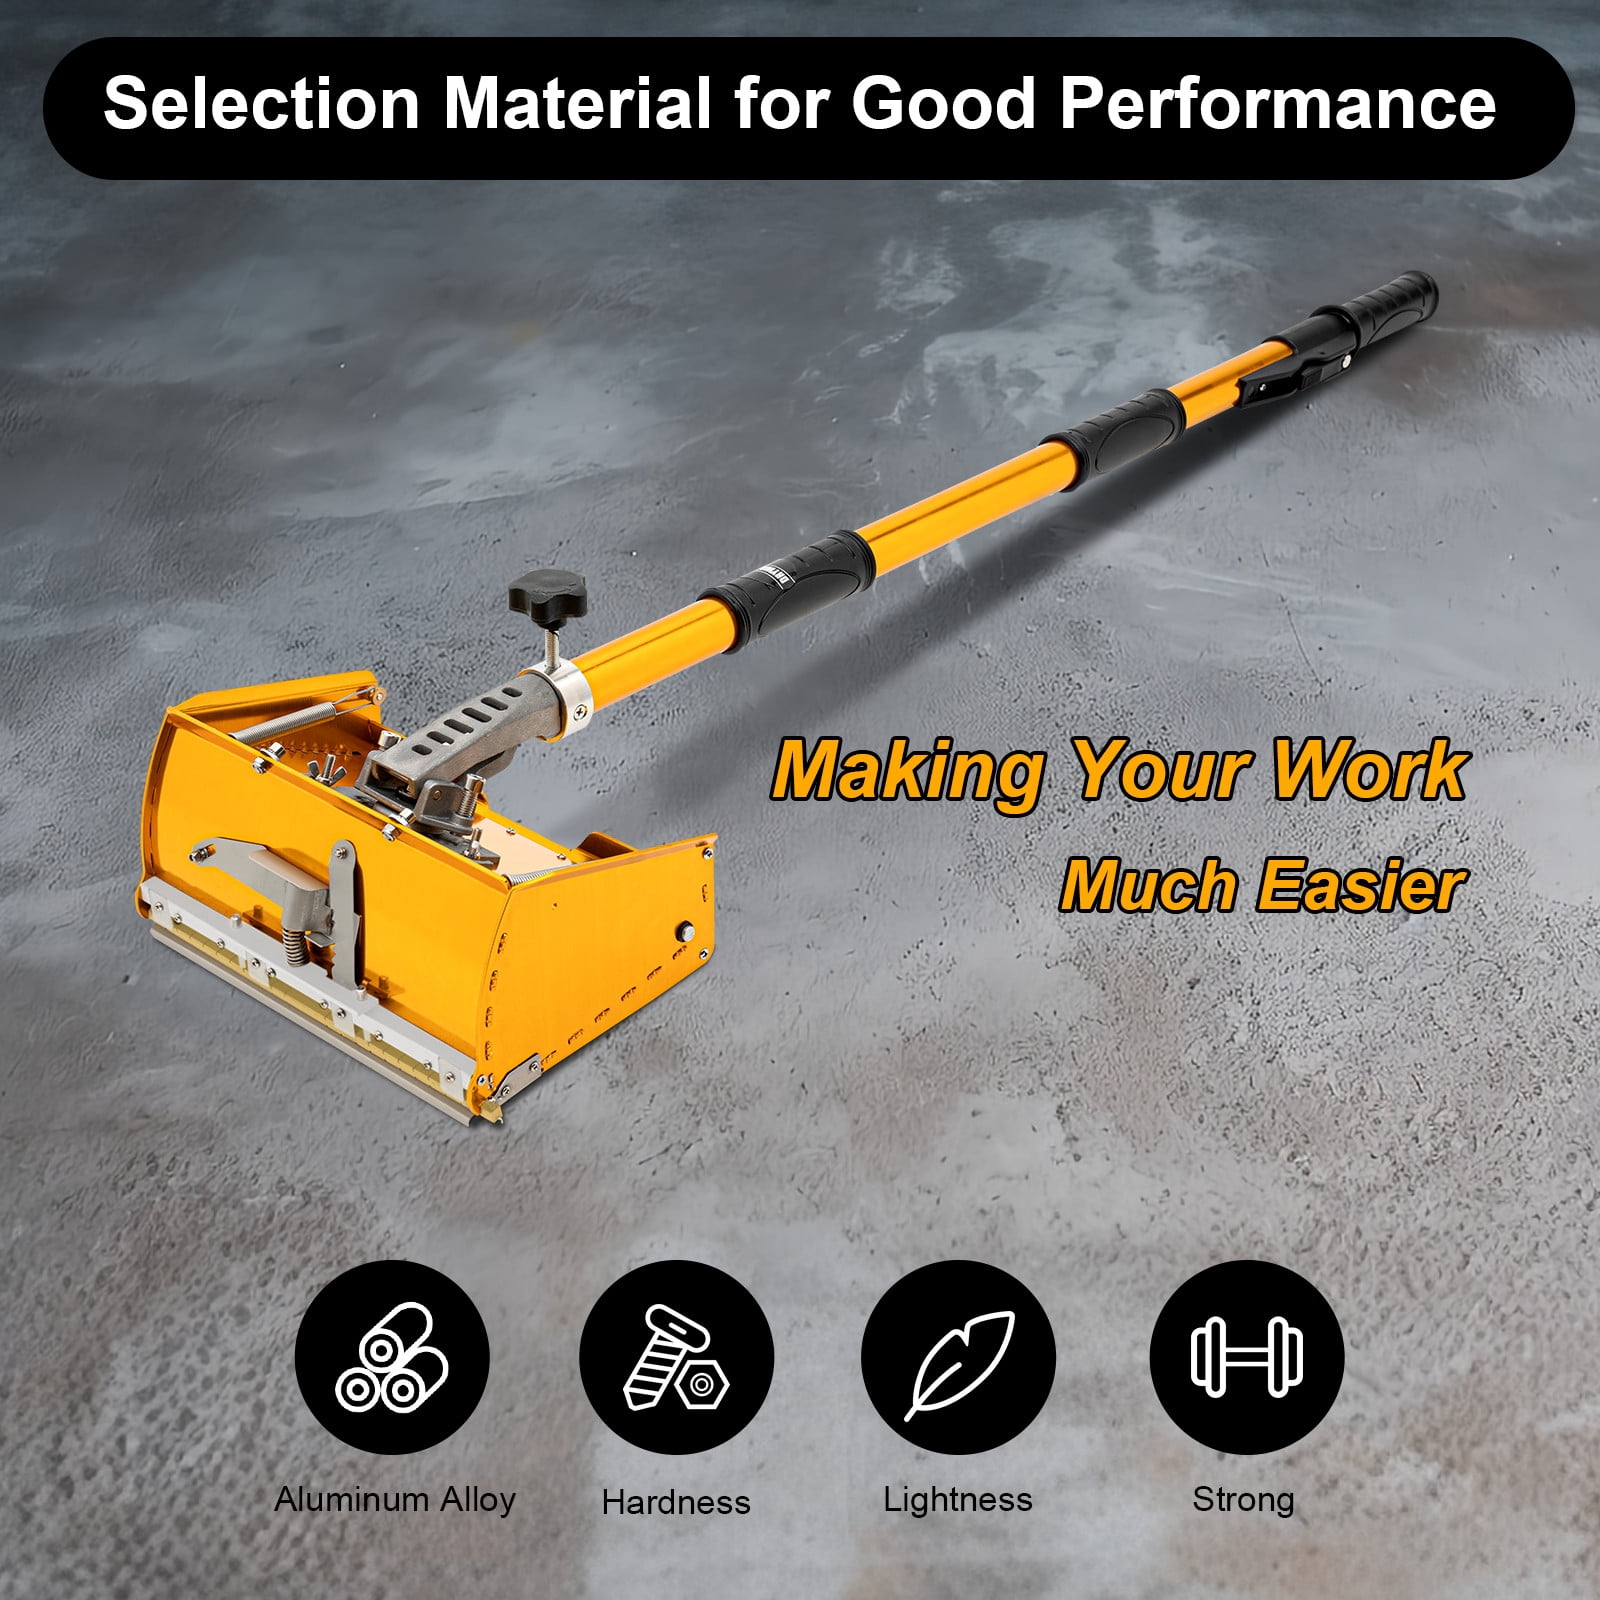
3. Flat Finishing Boxes and Extension Handles
Flat boxes consist of an aluminum mud chamber, a pressure plate, and a calibrated adjustable brass blade held under spring tension.
Flat Box Internal Cross-Section:
- Mud Storage Chamber
- Pressure Plate: Compound Flow
- Adjustable Dial (1-5 Tension)
- Flexible Stainless Blade: Feathered Bead
Flat boxes apply a metered layer of mud over flat seams while feathering both outer edges simultaneously:
- 7-Inch Box: Embeds tape and applies the initial filler coat over flat joints.
- 10-Inch Box: Applies the second (fill) coat, widening the mud bed.
- 12-Inch and 14-Inch Boxes: Apply the final finish coat, spanning wide butt joints to eliminate visual shadows under ambient light.
- Extendable Handles: Brake-controlled handles allow operators to control box angle and apply pressure at variable wall heights without ladders or scaffolding.
4. Corner Finishing Tools
- Corner Rollers: Embedded stainless steel or aluminum wheels roll directly over freshly taped inside corners, forcing air bubbles out and embedding tape firmly into the corner apex.
- Angle Heads (Corner Finishers): Spring-loaded brass or stainless steel heads featuring angled wiper blades. Mounted on applicator handles, angle heads wipe both sides of an internal corner simultaneously, feathering the compound edges cleanly at exact 90-degree angles.
- Corner Applicators (Mud Heads): L-shaped mud chambers that force a continuous bead of compound into inside corners ahead of paper tape or composite structural corner bead installation.
5. Mechanical Nail Spotters
Nail spotters feature a narrow (2-inch or 3-inch) mud box mounted on a long lever handle. Equipped with a skid plate and flexible wiper blade, a nail spotter skims over rows of recessed fastener dimples in a single continuous upward stroke, filling screw holes cleanly while scraping off excess compound.
Phase 4: Sanding, Dust Extraction, and Surface Preparation
After joint compound dries, the wall surface must be sanded flat to eliminate lap marks, ridge lines, and surface imperfections before painting or wallcovering application.
Manual vs. Dust-Controlled Sanding Systems
- Pole Sanders: Standard pole sanders feature a pivoting rectangular pad mounted to a 4-to-6-foot threaded pole. While low-cost, traditional hand sanding generates airborne crystalline silica dust that hovers in the air column for hours, requiring extensive containment and cleanup.
- Radial Hand Sanders: Circular sanding heads utilizing hook-and-loop mesh discs resist flipping over during strokes, preventing gouges along joint borders.
- Electric Power Sanders with Vacuum Extraction: Modern electric drywall sanders feature long-reach poles with random orbital sanding heads driven by brushless motors. They couple directly to industrial HEPA dust extractors equipped with automatic filter-cleaning mechanisms.
Dust Extraction Airflow Circuit:
- Orbital Sanding Head (Vacuum Shroud)
- Anti-Static Hose
- HEPA Vac with Auto-Clean Filter
Safety and Regulatory Standards
Respirable crystalline silica dust generated during drywall joint sanding is regulated under strict occupational safety standards. The U.S. Occupational Safety and Health Administration (OSHA Crystalline Silica Standard) sets a Permissible Exposure Limit (PEL) of 50 µg/m³ as an 8-hour time-weighted average.
Using vacuum-shrouded power sanders paired with certified HEPA filtration lowers airborne dust concentrations by up to 95%, satisfying engineering control requirements while keeping job site environments clean and safe.
| Sanding Method | Exposure Level & Status |
|---|---|
| Open Pole Sanding | 150 - 400 µg/m³ (Exceeds OSHA PEL) |
| HEPA Vacuum Sanding | 5 - 25 µg/m³ (Fully Compliant) |
Surface Inspection Glancing Lights
To detect subtle surface hollows, scratches, or paper fuzz prior to primer application, finishers utilize high-output LED glancing lights (raking lights). Positioned flat against the wall plane, these lights project low-angle illumination across the drywall face, casting long shadows behind minor imperfections that are invisible under direct overhead light.
Drywall Tool Specification and Application Matrix
| Tool Category | Specific Tool | Primary Purpose | Required Skill Level | Applicable Finish Level (GA-214) | Performance Advantage |
|---|---|---|---|---|---|
| Hanging & Layout | Drywall T-Square & Utility Knife | Layout scoring and full-panel sheet cutting | Entry / Basic | All Levels (0–5) | Delivers straight, true edges for tight panel alignment |
| Hanging & Layout | Electric Cut-Out Tool | Rapid cutting of electrical outlets and light cans | Intermediate | All Levels (0–5) | Cuts sheet openings up to 5x faster than manual jab saws |
| Fastening | Depth-Sensitive Screw Gun | Driving fasteners to exact depth without tearing paper | Entry / Basic | All Levels (0–5) | Eliminates popped screws and broken paper face failures |
| Manual Finishing | 6-Inch Stainless Joint Knife | Tape embedding and screw dimple filling | Basic | Level 1–5 | High edge control; precise mud application in tight spaces |
| Manual Finishing | 12-Inch Blue Steel Knife | Applying finish coats over flat seam joints | Intermediate | Level 3–5 | Flexible memory steel feathers compound edges to zero |
| Manual Finishing | 32-Inch Skimming Blade | Surface smoothing and full-wall skim coating | Advanced | Level 5 | Eliminates joint telegraphing under high-gloss paints |
| Automatic (ATF) | Automatic Taper ("Bazooka") | Simultaneous paper tape and mud embedding | Advanced / Pro | Level 2–5 | Tapes flat and corner joints up to 400% faster than hand tools |
| Automatic (ATF) | 10-Inch / 12-Inch Flat Boxes | Metered application of fill and finish coats | Advanced / Pro | Level 3–5 | Deposits consistent mud thickness across flat joints in one pass |
| Sanding | Vacuum-Assisted Power Sander | Dust-free sanding of finished seams and walls | Intermediate | Level 3–5 | Captures up to 95% of airborne silica dust; reduces cleanup |
Selecting Equipment Based on Drywall Finish Levels
The Gypsum Association document GA-214: Recommended Levels of Finish for Gypsum Board defines six distinct finish levels (Level 0 through Level 5). Selecting the appropriate tool setup depends entirely on the specified finish standard:
GA-214 Drywall Finish Levels:
- Level 0 (No Finish)
- Level 1 (Fire Tape)
- Level 2 (Tile Prep)
- Level 3 (Heavy Tex)
- Level 4 (Standard)
- Level 5 (Skim Coat)
Level 0 & Level 1: Temporary & Fire-Tape Applications
- Application: Mechanical rooms, attic spaces, and temporary dust partitions where aesthetics are irrelevant.
- Required Tools: T-square, utility knife, screw gun, and a standard 6-inch joint knife to embed tape in joint compound. Fastener heads and mud do not need to be smooth.
Level 2: Substrate for Tile Backer
- Application: Garages, storage closets, and wall areas designated as substrates for tile or heavy wallcoverings.
- Required Tools: 6-inch and 8-inch taping knives or automatic tapers. A thin coat of compound is drawn over joints and fastener heads, leaving a functional moisture/fire seal.
Level 3: Medium-to-Heavy Textured Surfaces
- Application: Interior walls scheduled to receive medium or heavy spray textures (knockdown, orange peel) prior to painting.
- Required Tools: Automatic taper or hand knives, 8-inch to 10-inch flat boxes or hand finishing knives, corner rollers, and pole sanders equipped with 120-grit sand-mesh.
Level 4: Standard Commercial & Residential Painted Walls
- Application: Standard interior walls scheduled for flat, eggshell, or satin paint finishes without heavy textures.
- Required Tools: Full ATF suite (automatic taper, 7/10/12-inch flat boxes, angle heads, nail spotters) or complete hand knife set (4" to 14"), followed by 150-to-180-grit fine sanding. Three separate coats of joint compound are applied over all flat seams and fastener rows.
Level 5: Premium Smooth Finishes & Gloss Paints
- Application: High-end architectural spaces, corridors with severe side lighting, and walls receiving dark gloss or semi-gloss paints.
- Required Tools: Complete Level 4 setup plus 24" to 48" flexible skimming blades (or high-volume airless paint sprayers loaded with un-thinned joint compound) to skim coat the entire wall plane, eliminating absorption differences between paper face and compound joints.
Essential Maintenance Practices for Drywall Tooling
Drywall compounds are water-soluble but dry into hard, abrasive solids that can damage precision moving parts in mechanical taping tools. Proper daily maintenance protects your tool investment and ensures smooth operation:
- Immediate Post-Use Washing: Clean all mud pans, knives, automatic tapers, and flat boxes with clean water and stiff nylon brushes immediately after work stops. Setting-type (hot) compounds must never be allowed to harden inside pump cylinders or flat box chambers.
- Lubrication of Moving Assemblies: Apply food-grade silicone spray or specialized tool lubricant to automatic taper cable chains, drive wheels, cut-off blades, box springs, and pump seals after every wash. Avoid petroleum-based lubricants, which can degrade rubber O-rings and ruin future mud coats.
- Blade Inspection and Dress: Inspect finishing knife edges for nicks, burrs, or rust spots. Lightly run a fine-grit diamond sharpening stone or 220-grit wet/dry sandpaper over damaged stainless or carbon steel blade edges at a 15-degree angle to maintain smooth feathering action.
- Box Wiper Blade Tension Adjustment: Periodically check brass or rubber wiper blades on flat boxes. Adjust side tension screws to maintain continuous, even contact against the box pressure plate, preventing compound leaks along box margins during coats.
Frequently Asked Questions
What is the difference between blue steel and stainless steel drywall knives?
Blue steel offers superior flex, shape memory, and a thinner blade profile, allowing craftspeople to feel the tension of the mud and execute seamless feather edges. However, blue steel requires immediate drying and light oiling after use to prevent flash rusting. Stainless steel is corrosion-resistant and lower maintenance, but its blade profile is slightly stiffer, requiring more manual pressure during wide finishing passes.
When should a contractor upgrade from manual hand tools to automatic taping tools (ATF)?
A contractor or taping crew should upgrade to ATF equipment when managing projects exceeding 5,000 square feet of wallboard regularly. While manual knives remain necessary for detailed repair work and tight closets, automatic tapers and flat boxes reduce tape embedding and seam coat labor times by up to 75% on open wall and ceiling expanses, allowing small crews to achieve high production volumes.
Why are depth-sensitive screw guns preferred over standard cordless drills for drywall installation?
Standard cordless drills lack automatic disengagement clutches tuned to drywall paper density. A drill easily over-drives fasteners, popping the steel head through the paper face into the brittle gypsum core and stripping its holding strength. Depth-sensitive screw guns use a nosecone clutch that disengages bit rotation precisely when the screw head forms a 1/32-inch dimple, preserving paper strength and leaving a recessed pocket for joint compound.
How do skimming blades differ from traditional wide finishing knives?
Skimming blades utilize thin (0.3 mm to 0.5 mm) flexible stainless steel sheets mounted inside extruded aluminum spine handles. Unlike traditional 12-inch or 14-inch drywall knives held by a center handle, skimming blades are held along their entire length or mounted onto extension poles. This design distributes uniform pressure across broad widths (16 to 48 inches), making it effortless to apply Level 5 skim coats across whole wall planes without blade chatter or fatigue.
What tool setup is required to achieve a Level 5 drywall finish?
Achieving a Level 5 finish requires a full Level 4 taping setup (joint knives or ATF tools for tape embedding, fill coats, finish coats, and corner finishing) plus dedicated Level 5 application tools: an airless paint sprayer or heavy-nap paint roller to apply joint compound across the entire wall surface, followed immediately by 32-inch to 48-inch skimming blades to wipe the wall flat. Surface inspection lights and fine-grit vacuum power sanders complete the process.
Final Recommendations and Next Actions
Selecting the optimal drywall tool array depends on project scale, desired finish quality, and budget.
- For DIYers and Small Residential Repairs: Focus on high-quality manual hand tools: a 48-inch aluminum T-square, a depth-sensitive screw gun attachment, 4-inch, 6-inch, and 10-inch stainless steel joint knives, a stainless mud pan, and a radial hand sander.
- For Professional Remodelers and Residential Contractors: Invest in a hybrid setup: high-flex blue steel finishing knives, a 24-inch and 32-inch skimming blade set, a mechanical mud banjo or hopper, and an electric orbital pole sander paired with an OSHA-compliant HEPA dust extractor.
- For Commercial Drywall Contractors: Equip field crews with a full suite of Automatic Taping and Finishing (ATF) tools—including automatic tapers, goosenecks, mud pumps, 7/10/12/14-inch flat boxes, angle heads, corner rollers, and nail spotters—to maximize square-footage output while maintaining strict GA-214 Level 4 and Level 5 specifications.