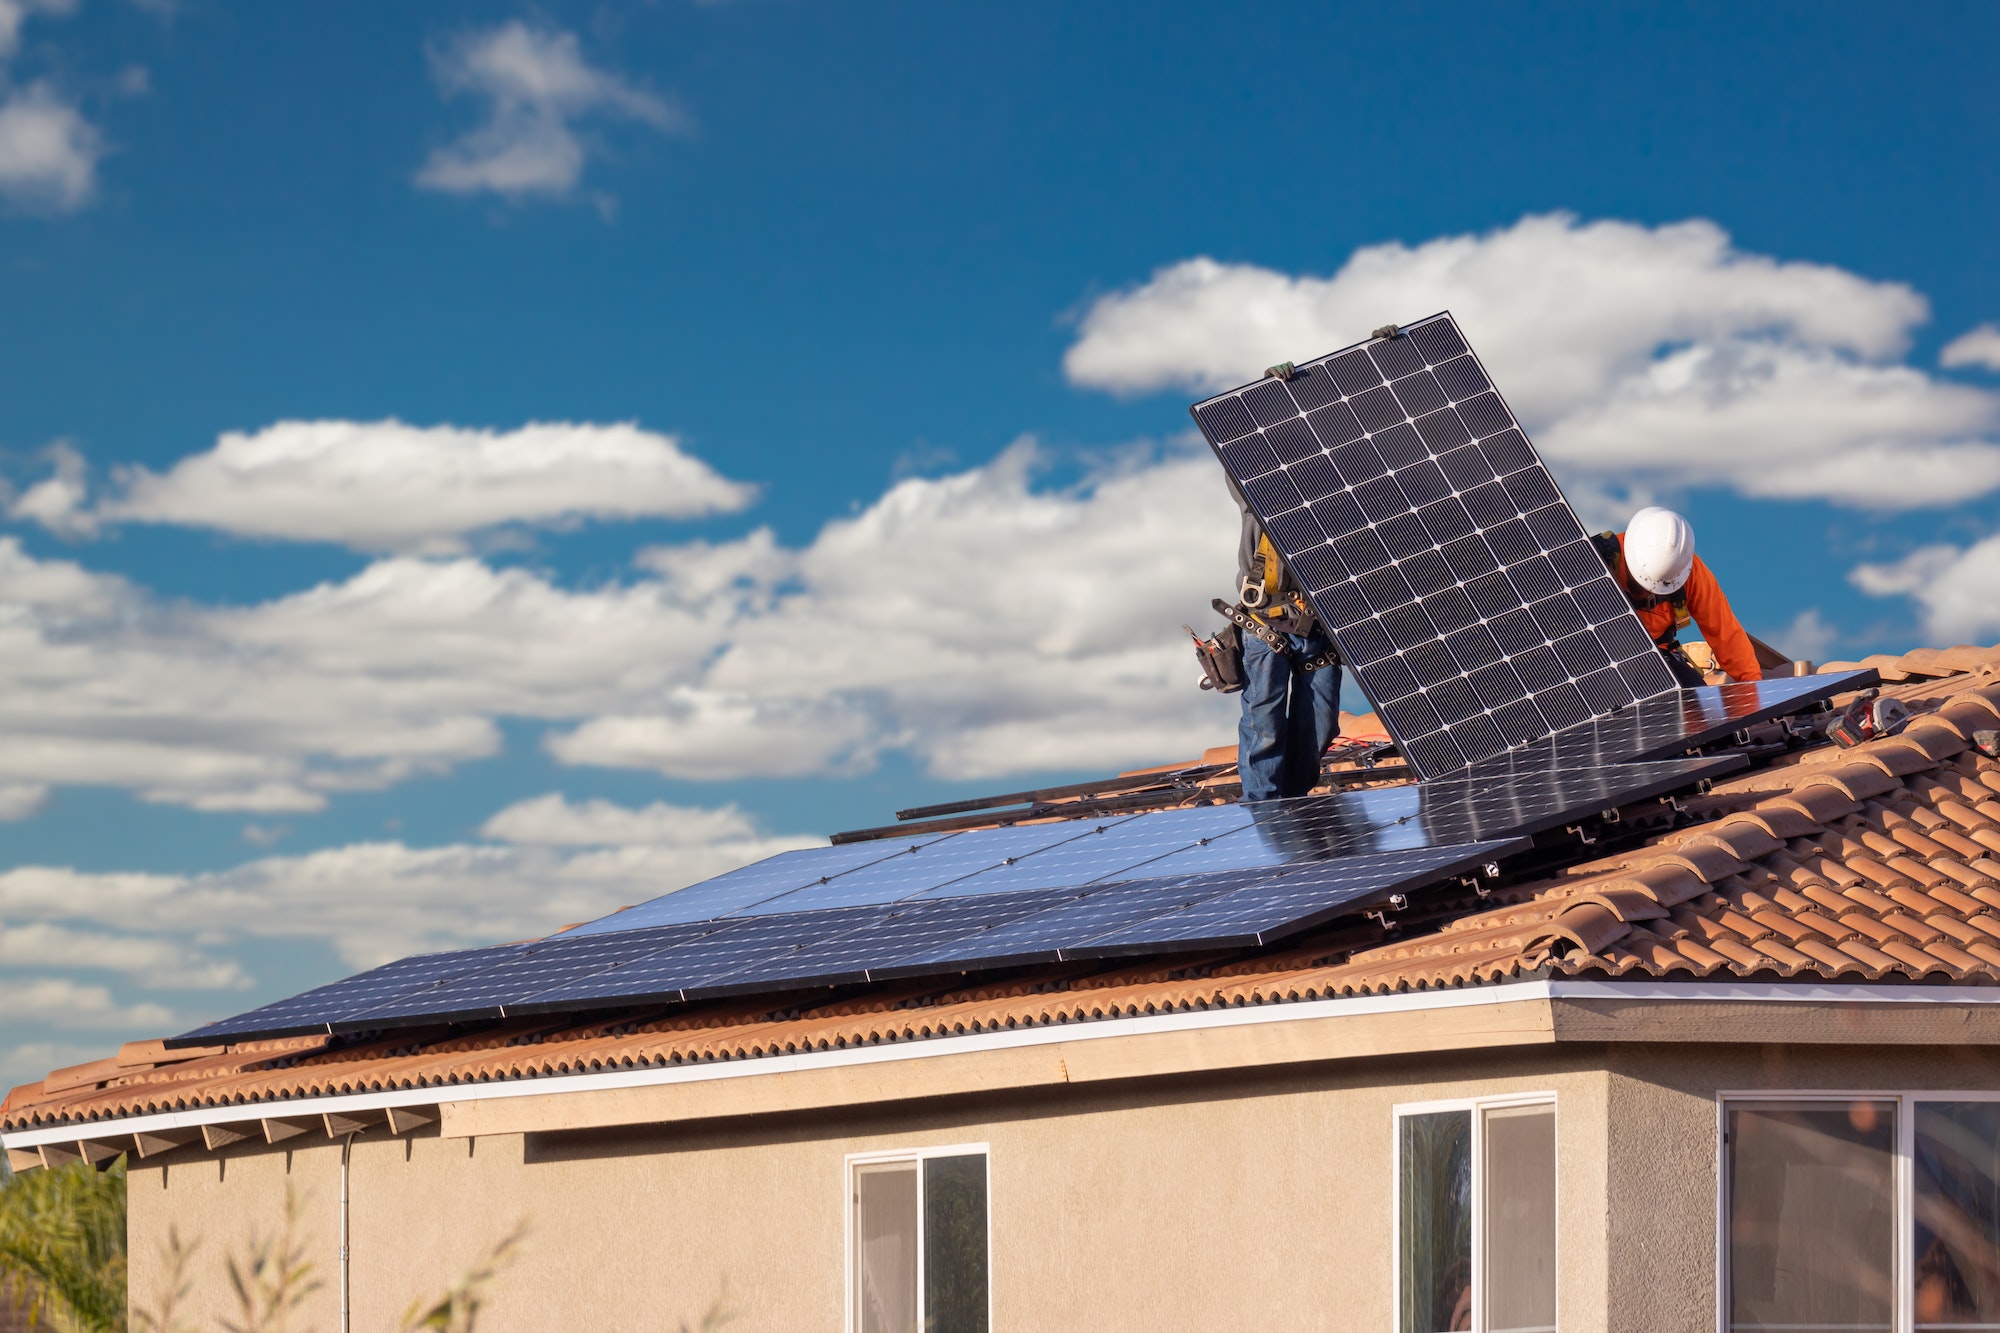
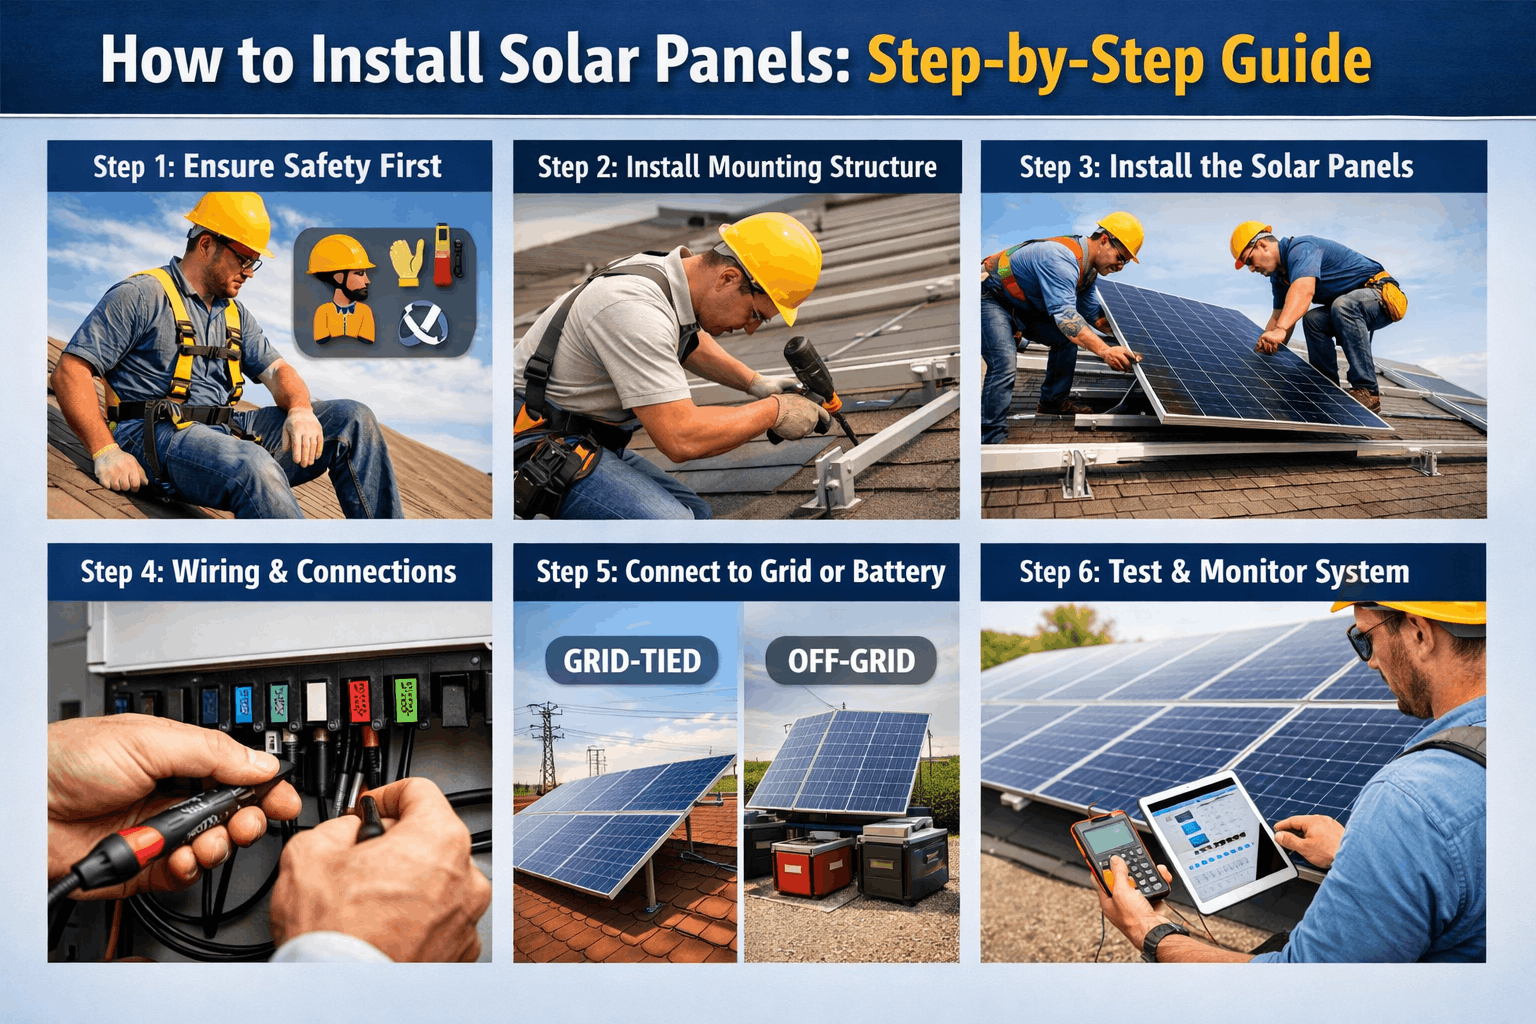
Installing residential solar panels involves a rigorous multi-stage technical process that transforms sunlight into usable household electricity. This workflow begins with an initial energy audit and site assessment, progresses through engineering design, permitting, electrical and structural installation, and concludes with utility interconnection and system commissioning.
Transitioning a residential or commercial property to renewable energy requires a structured approach that bridges structural engineering, electrical compliance, and municipal bureaucracy. While many property owners hire certified photovoltaic (PV) contractors to manage the execution, understanding the mechanical and administrative workflow ensures the system operates safely, efficiently, and in compliance with local electrical codes.
Executing a photovoltaic installation requires rigorous planning. Errors made during the preliminary structural evaluation or electrical design phases can lead to underperforming arrays, roof leaks, or failed utility inspections. The following seven key steps outline the complete lifecycle of a professional solar panel installation.
Step 1: Comprehensive Site Assessment and Energy Audit
Before a single bracket is fastened to a roof or ground mount, a rigorous evaluation of the property’s energy consumption and structural capacity must take place. This initial assessment establishes the baseline parameters for the entire engineering design.
Analyzing Energy Consumption Patterns
The first phase requires a granular review of historical utility bills, typically spanning the past 12 months. Analyzing kilowatt-hour (kWh) usage reveals seasonal spikes, base loads, and peak consumption hours. This data allows the system designer to size the array precisely to offset the building's electrical needs without investing in unnecessary generation capacity.
Evaluating Roof Integrity and Orientation
Solar panels generate maximum output when exposed to direct, unshaded sunlight for the majority of the daylight hours. During the site assessment, technicians evaluate:
- Roof Age and Condition: Asphalt shingle, tile, or metal roofs must be structurally sound and have at least 15 to 20 years of remaining life. Installing solar on an aging roof requires an expensive removal and reinstallation process later.
- Orientation and Tilt: In the Northern Hemisphere, south-facing roofs provide the highest annual yield, though east- and west-facing roofs are viable with slight capacity adjustments. The tilt angle must match or approximate the local latitude to optimize seasonal solar capture.
- Shading Analysis: Installers use specialized optical tools like a Solar Pathfinder or LiDAR software to map obstructions such as neighboring structures, mature trees, and chimneys that could cast shadows across the array.
Step 2: System Engineering, Design, and Component Selection
With the site data collected, electrical and structural engineers design the physical layout and electrical architecture of the photovoltaic system. This step determines the specific hardware components that will be deployed.
Selecting the Right Hardware
Modern photovoltaic systems rely on three primary hardware categories:
- Solar Panels (Modules): Monocrystalline panels are the industry standard for residential installations due to their high efficiency ratings and sleek aesthetic. Polycrystalline options are less common but offer a budget-friendly alternative with slightly lower efficiency.
- Inverters: The inverter converts the direct current (DC) electricity generated by the panels into alternating current (AC) electricity used by home appliances and the utility grid. Property owners choose between string inverters (cost-effective, centralized units) and microinverters or optimizers (module-level power electronics that optimize output per panel and mitigate shading losses).
- Racking and Mounting Hardware: Aluminum rails, flashing, and specialized clamps anchor the array to the roof rafters or ground mounts while maintaining a watertight seal against water infiltration.
Electrical Load Calculations
Engineers calculate voltage drop, wire gauges, conduit sizing, and rapid shutdown compliance to meet the National Electrical Code (NEC) or local equivalents. The resulting blueprints and schematics form the foundation of the permitting package.
Step 3: Permitting and Utility Interconnection Application
Installing solar panels is a heavily regulated construction process that requires official approvals before physical work can commence. Skipping this phase can result in heavy fines, mandatory system dismantling, or the denial of grid interconnection.
Navigating Local Municipal Permits
The project team submits architectural and electrical engineering plans to local building and zoning departments. These permits verify that the structural load of the panels will not compromise the roof trusses and that the electrical design complies with fire and safety codes.
Submitting the Interconnection Application
Simultaneously, an application is submitted to the local electric utility company. This application details how the solar system will tie into the grid. The utility reviews the request to ensure local grid infrastructure can handle potential back-fed power.
| Application Phase | Responsible Party | Key Deliverables | Typical Timeline |
|---|---|---|---|
| Site Audit | Solar Contractor | Energy usage report, shading analysis | 1–3 Days |
| Engineering Design | Licensed Engineer | CAD blueprints, electrical schematics | 1–2 Weeks |
| Permitting | Contractor / Permitting Agent | Building and electrical permits | 2–6 Weeks |
| Utility Interconnection | Contractor / Utility | Permission to Operate (PTO) application | 2–8 Weeks |
Step 4: Roof Preparation and Racking Installation
Once municipal permits are approved and materials are delivered, physical installation begins on-site. The structural phase focuses on secure attachment without compromising the building envelope.
Preparing the Roof Surface
Installers inspect the designated roof zone, replacing damaged shingles or reinforcing internal rafters if required. Safety harnesses, scaffolding, and fall-protection systems are deployed to comply with Occupational Safety and Health Administration (OSHA) standards.
Installing Mounts and Flashing
Rather than drilling directly into the roof decking, lag bolts are driven directly into the structural roof rafters or trusses. Waterproof flashing and specialized sealants are installed around every penetration point to prevent water leaks.
Securing the Rails
Aluminum mounting rails are bolted to the roof attachments, aligned parallel to the roofline, and leveled. These rails serve as the structural framework upon which the individual solar modules will be secured.
Step 5: Mounting Solar Panels and Electrical Wiring
With the racking securely in place, the electrical generation components are hoisted onto the roof and wired together.
Securing the Photovoltaic Modules
Technicians lift the solar panels onto the roof and fasten them to the aluminum rails using mid-clamps and end-clamps. Each panel is torqued to precise manufacturer specifications to withstand high wind loads and thermal expansion.
Wiring the Array
Depending on the system design, the DC output wires from each panel are interconnected in a series (string) or connected individually to microinverters. Weather-resistant wiring harnesses and conduit management systems route the DC current off the roof and down the exterior wall toward the inverter and electrical panel.
Step 6: Inverter and Balance-of-System Integration
The final hardware phase integrates the solar array into the home’s existing electrical infrastructure. This step requires a licensed electrician to ensure safe power conversion and distribution.
Installing the Inverter and Disconnects
The inverter is mounted indoors or outdoors near the main electrical service panel. Additionally, rapid shutdown devices and AC/DC disconnect switches are installed to allow emergency responders to cut power to the system instantly.
Tying into the Main Service Panel
The electrician connects the inverter output to a dedicated breaker in the main electrical panel or installs a supply-side tap. If the property incorporates a battery storage system for backup power, a transfer switch or smart energy gateway is integrated at this stage to manage power routing during grid outages.
Step 7: Inspection, Testing, and Commissioning
The installation process concludes with safety verifications, administrative sign-offs, and final activation of the photovoltaic system.
Municipal and Utility Inspections
An official building inspector examines the physical installation to verify compliance with approved blueprints and electrical codes. Once the municipal inspection passes, a utility representative may inspect the AC disconnect and meter installation.
System Commissioning and Permission to Operate (PTO)
The utility issues Permission to Operate (PTO), the official authorization to energize the system. The contractor powers on the inverter, performs voltage and ground-fault tests, and configures monitoring software. Property owners can then track real-time energy production and consumption via mobile applications.
Frequently Asked Questions
How long does the entire solar panel installation process take?
From the initial site audit to receiving Permission to Operate (PTO), the typical residential installation process takes between 6 to 12 weeks. The physical installation on the roof generally takes only 1 to 3 days, while the majority of the timeline is consumed by engineering, municipal permitting, and utility review queues.
Can I install solar panels on my roof myself?
While DIY solar kits exist, self-installation is generally discouraged and often prohibited by local law. Photovoltaic installations involve high-voltage DC and AC electricity, complex structural engineering calculations, and strict electrical code compliance. Unauthorized DIY installations often fail municipal inspections and void manufacturer equipment warranties.
What maintenance do solar panels require?
Solar panels have no moving parts, resulting in very low maintenance requirements. Periodic visual inspections and an annual professional cleaning in dusty or pollen-heavy environments are usually sufficient to maintain optimal energy production. Natural rainfall is generally effective at washing away routine surface debris.
Will my solar panels produce power during a blackout?
Standard grid-tied solar systems automatically shut down during a power outage for safety reasons, preventing back-feeding electricity into lines where utility workers may be performing repairs. To maintain power during a blackout, property owners must integrate a home battery storage system or an islanding inverter capable of off-grid operation.
Next Actions for Property Owners
Property owners ready to transition to solar energy should begin by conducting a preliminary review of their annual electricity bills and evaluating the age and structural condition of their roof. Scheduling consultations with multiple licensed, certified solar contractors allows comparison of equipment warranties, engineering approaches, and transparent project cost estimates before signing an installation contract.