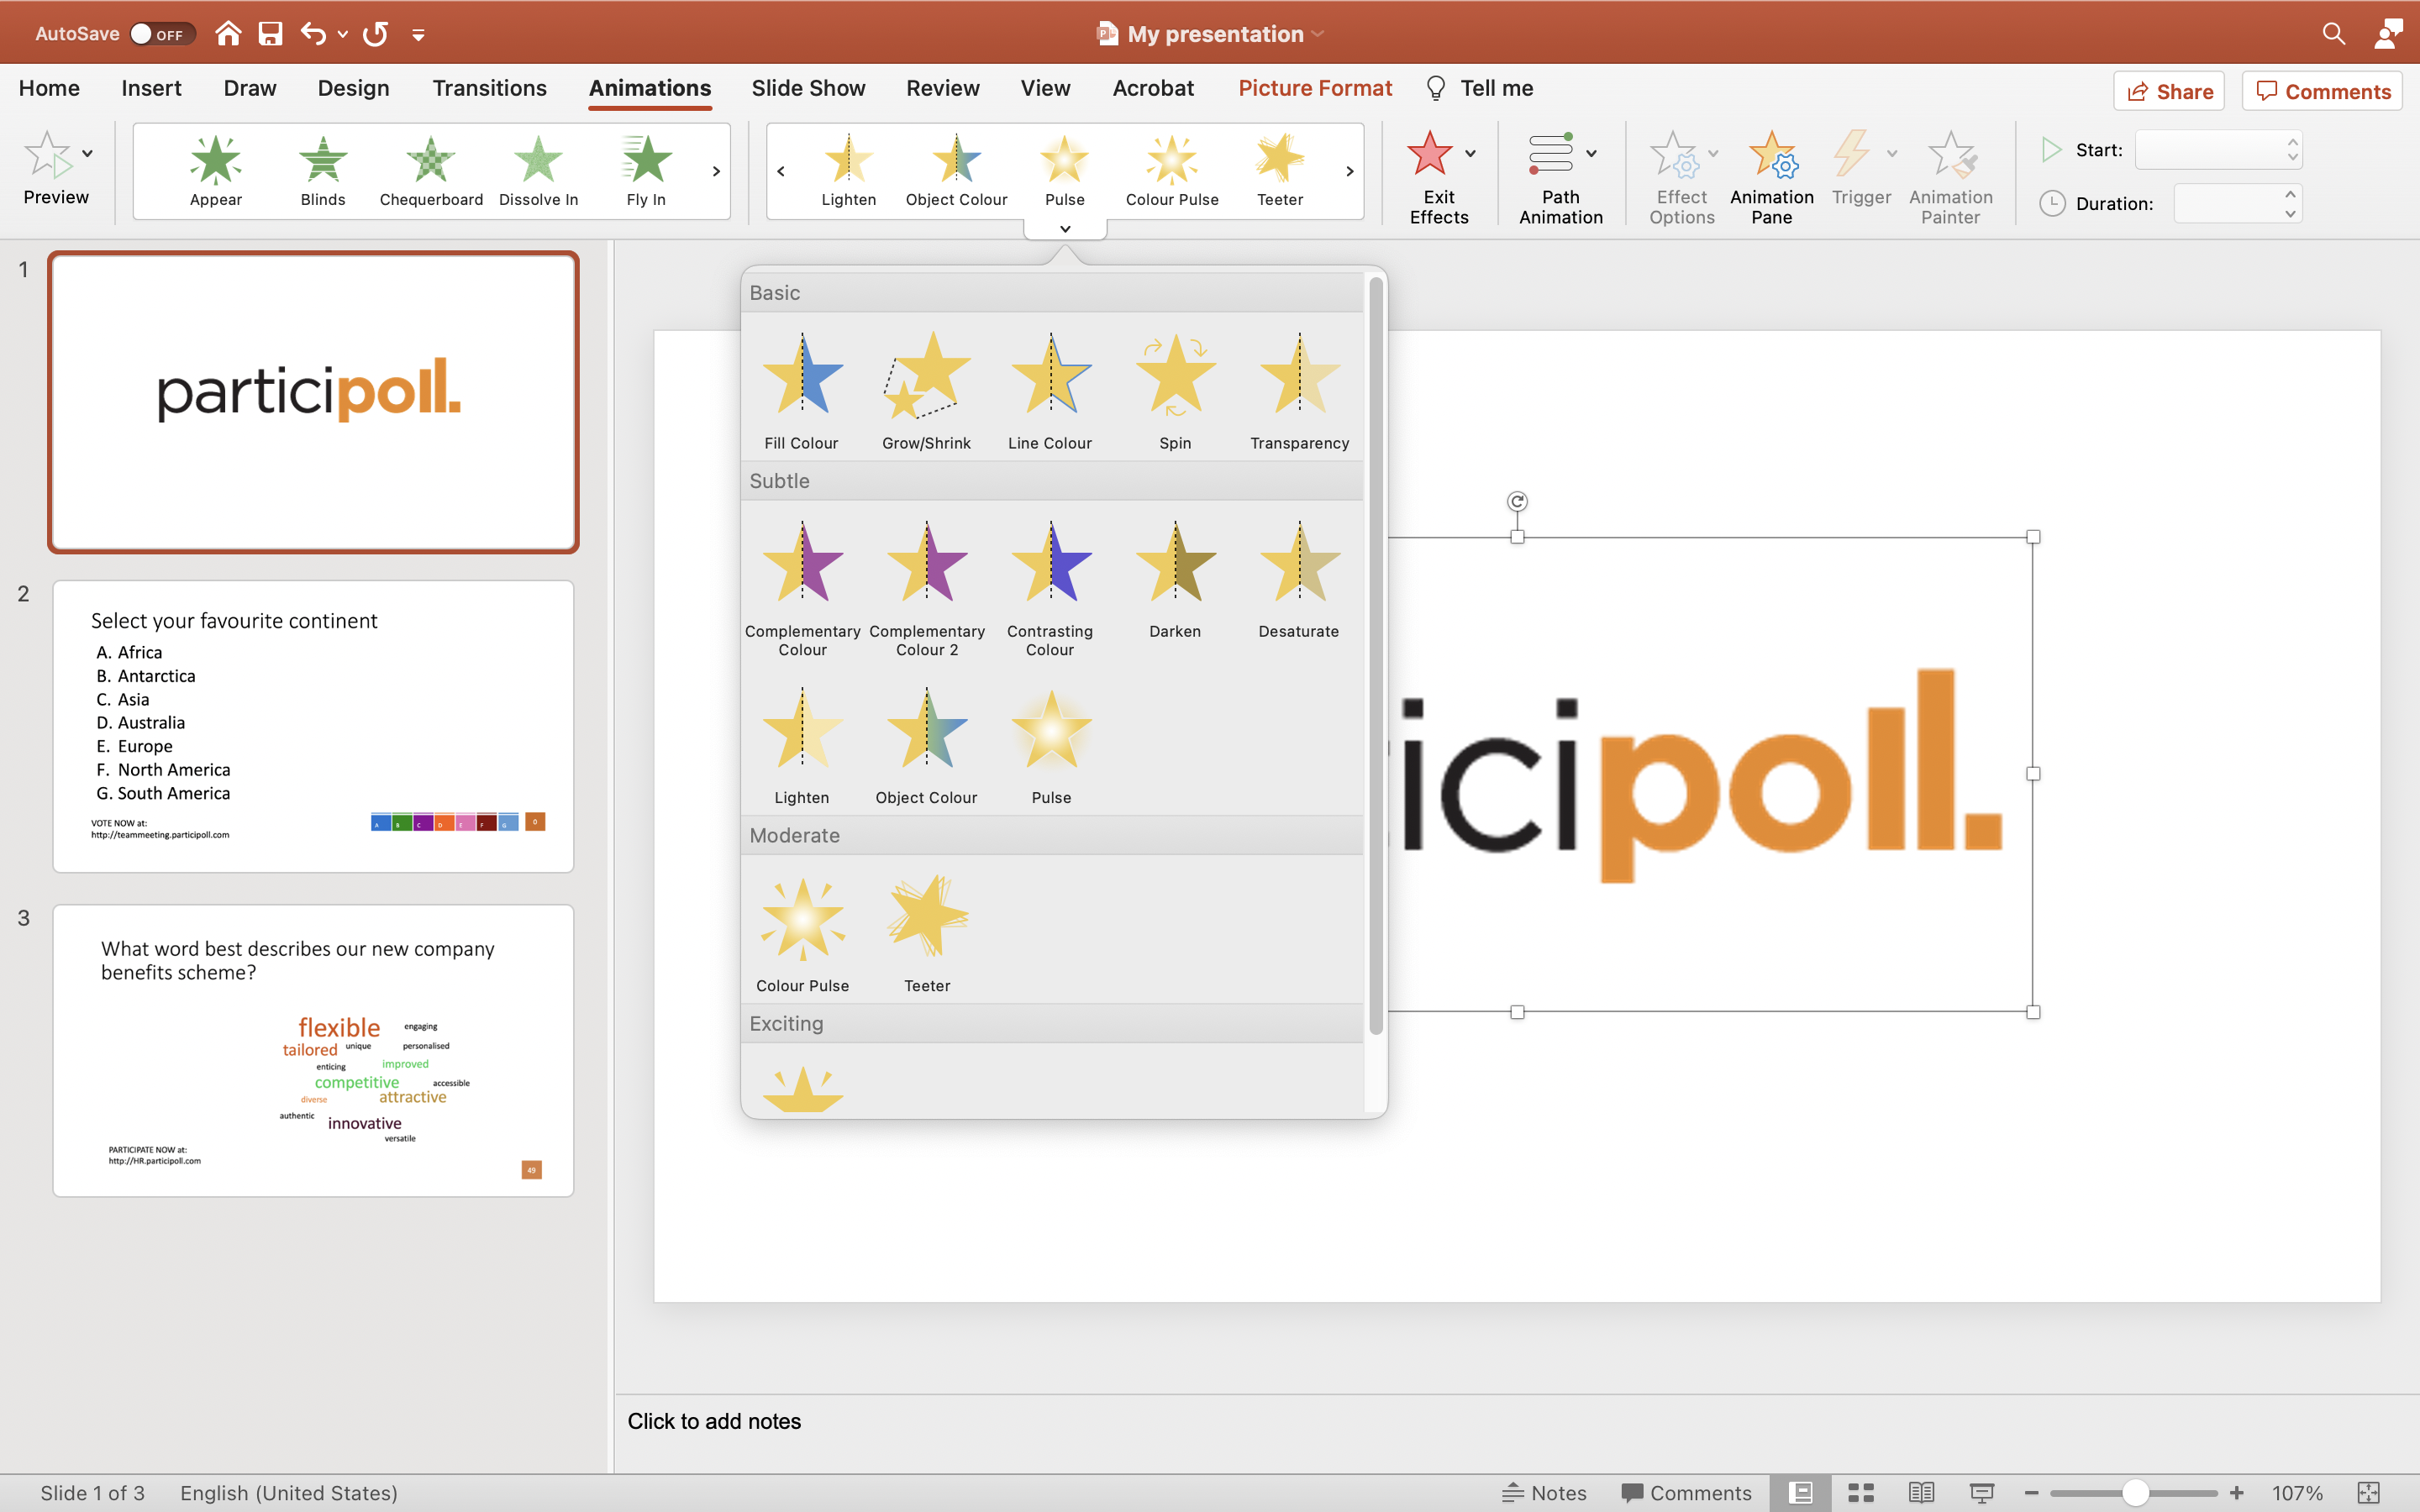
Adding motion to your presentation slides involves utilizing the Animations tab within Microsoft PowerPoint to apply entrance, emphasis, exit, or motion path effects to individual objects. By strategically timing these animations and controlling their playback sequences, you can direct your audience’s focus, clarify complex information, and improve the professional pacing of your delivery.
Understanding the Core Components of PowerPoint Animation
Before diving into the mechanics of adding motion, it is essential to distinguish between transitions and animations. A transition controls how the entire slide moves off the screen and the next one enters, whereas an animation—the focus of this guide—controls how individual elements (text, shapes, images, or charts) appear, move, or disappear while the slide is static.
Microsoft PowerPoint categorizes animations into four distinct groups, each serving a specific communicative purpose:
- Entrance Effects: These determine how an object arrives on the screen. Common examples include "Fade," "Fly In," and "Appear." Use these to introduce bullet points one by one rather than showing a full wall of text simultaneously.
- Emphasis Effects: These effects occur while the object is already visible on the slide. They are designed to highlight data or draw attention to a specific figure, such as "Pulse," "Grow/Shrink," or "Teeter."
- Exit Effects: Use these when you need an object to leave the screen. They are particularly useful for clearing visual clutter after a point has been made or when cycling through a series of images in the same frame.
- Motion Paths: These allow an object to move across the slide along a predefined or custom path. They are the most sophisticated tool for showing relationships between objects or simulating the movement of a process.
Step-by-Step Guide: Applying Motion to Your Slides
To effectively incorporate motion into your presentation, you must follow a structured workflow. Start by finalizing your slide content; adding animations to incomplete slides often leads to wasted effort if you decide to rearrange the content later.
1. Selecting the Object
Click on the object—such as a text box, an image, or a shape—that you wish to animate. If you need to animate multiple items at once, hold the Ctrl key while clicking each object.
2. Opening the Animation Pane
Navigate to the Animations tab on the Ribbon at the top of the interface. Before selecting an effect, click the Animation Pane button. This opens a sidebar on the right side of your workspace, which is the control center for your animation sequence. Relying on this pane is a best practice for managing timing, order, and triggers.
3. Choosing and Configuring the Effect
With your object selected, click the Add Animation button in the Advanced Animation group. Avoid using the basic animation gallery in the main ribbon if you plan to add multiple animations to a single object, as the gallery will replace existing effects instead of stacking them. Choose your desired effect from the dropdown list.
4. Setting the Timing and Trigger
Once the animation is added, it will appear in the Animation Pane. Right-click the item in the pane and select Timing or Effect Options. Here, you can adjust:
- Start: Choose "On Click" (the default), "With Previous" (to trigger multiple animations simultaneously), or "After Previous" (to create a chain of events without additional clicks).
- Duration: Control the speed of the motion. A duration of 0.50 seconds is generally considered snappy and professional; anything longer than 2.0 seconds can feel tedious to an audience.
- Delay: Insert a pause before the animation starts if you want to pace your presentation manually.
Strategic Uses of Motion Paths
Motion paths are the most advanced and visual form of animation in PowerPoint. Unlike simple entrance effects, motion paths require a clear starting and ending point. To apply a motion path, navigate to the "Motion Paths" section within the Animation gallery.
For custom movement, select "Custom Path." You can draw a freeform line or a scribble, and your object will follow the path exactly as drawn. This is an excellent technique for:
- Simulating Flowcharts: Moving an icon through a process cycle.
- Highlighting Comparison: Physically moving two items closer together to show their relationship.
- Guided Attention: Moving a magnifying glass or highlight shape across a table of data to direct the audience's eyes to specific rows.
Best Practices for Professional Results
The primary trap for new presenters is "animation overload." While it is tempting to use every effect available, excessive movement distracts from your message. Use the following table to help decide which effects are appropriate for your context.
| Animation Type | Recommended Usage | Avoid When |
|---|---|---|
| Entrance | Introducing key takeaways one at a time. | Presenting simple, static images. |
| Emphasis | Calling attention to a change in data. | Keeping the audience focused on narration. |
| Exit | Removing outdated content from a slide. | The content is still relevant to the discussion. |
| Motion Paths | Illustrating processes or flowcharts. | Using purely for "decorative" movement. |
The "Less is More" Philosophy
Keep animations subtle. Use "Fade" or "Appear" for most text elements. Reserve "Fly In" or "Bounce" only for when the motion itself adds meaning—for example, showing a piece of a puzzle sliding into place. If an animation does not serve the narrative, remove it. A professional presentation should feel seamless, not like a collection of special effects.
Troubleshooting Common Animation Issues
Even experienced users encounter roadblocks. Here are the most common issues and how to resolve them:
- Animations Play in the Wrong Order: Check the Animation Pane. The numbered labels on your slide correspond to the order in the pane. Click and drag items in the pane to reorder them until the sequence is correct.
- Too Many Clicks Required: If you find yourself clicking too often to advance through your slides, set your animations to "With Previous" or "After Previous" in the Animation Pane settings. This automates the flow.
- Objects Are Hidden: If you animate an object and it disappears or is covered by another layer, use the Home > Arrange > Selection Pane to verify that your object is layered correctly above other elements.
- Animation Doesn't Work: Ensure you have selected an object before attempting to apply an effect. If an animation is "grayed out" in the menu, it is likely because no object is currently selected or you are attempting to animate a group that contains incompatible elements.
FAQ: Frequently Asked Questions
How can I make an animation happen automatically without clicking? In the Animation Pane, right-click the animation and set the "Start" option to "After Previous." This triggers the animation to begin immediately after the preceding action concludes, creating a fluid sequence that does not require manual intervention during your speech.
Can I animate a group of objects together?
Yes. Select all objects you wish to move, then press Ctrl + G to group them. Once grouped, applying an animation will treat the group as a single object. This is highly recommended for complex diagrams or logos that consist of multiple distinct shapes.
How do I remove an animation?
Open the Animation Pane, click the animation effect you want to delete, and press the Delete key on your keyboard. Alternatively, right-click the item in the pane and select "Remove."
What is the best animation for bullet points? The "Fade" entrance effect is the industry standard for bulleted lists. It is clean, non-distracting, and allows the audience to focus on the text rather than the motion itself. You can set the text to appear "By Paragraph" in the Effect Options menu so each point arrives individually.
Why do my animations look choppy? Choppy animations are usually caused by excessive duration or over-complicated motion paths. Keep durations short—under one second—and avoid complex custom paths that force an object to jitter as it moves. Ensure your computer’s hardware acceleration is enabled in PowerPoint Options if the issue persists on high-resolution displays.
Final Recommendation
To elevate your next presentation, start by applying basic "Fade" animations to your text elements to control the pacing of your speech. Once comfortable, introduce motion paths to explain technical diagrams or process flows. Always test your presentation in "Slide Show" mode on the monitor you intend to use for your talk to verify that the animations feel smooth and support—rather than hinder—your message.