Appium with Python allows software quality engineers to automate mobile application testing across Android and iOS platforms using a single, unified API. By combining the Appium-Python-Client library with Pytest or unittest, teams execute automated UI tests against real devices, emulators, and simulators without modifying application source code.
Understanding Appium Architecture and Python Integration
Appium is an open-source, cross-platform test automation framework. It operates on a client-server architecture using the W3C WebDriver Protocol (formerly the JSON Wire Protocol). When running an automated test script written in Python, the script acts as the client, sending HTTP requests containing automation commands to the Appium server.
The Appium server receives these commands, interprets them, and proxies them to platform-specific automation frameworks provided by operating system vendors. On Android, Appium leverages Google's UiAutomator2 or Espresso drivers. On iOS, it relies on Apple's XCUITest driver. The platform driver executes the command on the target device or emulator and returns an HTTP response back to the Python client script.
- Python Test Script
- W3C Protocol / HTTP
- Appium Server 2.x
- Driver API
- UiAutomator2 / XCUITest
- Mobile Device
(Note: Appium modularized its architecture starting with Appium 2.0, decoupling drivers and plugins from the core server program.)
Using Python for mobile test automation offers distinct advantages. Python provides a clean syntax, rapid development speed, and access to robust testing frameworks such as Pytest. The official client library, Appium-Python-Client, extends the standard Selenium Python bindings, offering mobile-specific commands for gestures, device interactions, app lifecycle management, and context switching between native UI views and webviews.
Prerequisites and Environment Setup
Setting up a complete Appium development environment requires configuring the Node.js runtime, the Appium server, platform SDKs (Android SDK and Xcode), and the Python runtime.
1. Node.js and Appium Server Installation
Appium server is distributed as a Node.js package. Ensure Node.js (version 18 or higher) is installed on your system. Install the Appium server globally using Node Package Manager (npm):
- Run
npm install -g appiumto install the server globally. - Verify the installation by running
appium --version.
Starting in Appium 2.0, driver engines are installed separately. Install the primary drivers for Android and iOS via the Appium Command Line Interface (CLI):
- Install Android UiAutomator2 driver:
appium driver install uiautomator2 - Install iOS XCUITest driver (macOS only):
appium driver install xcuitest - Check installed drivers:
appium driver list
2. Android Development Environment Setup
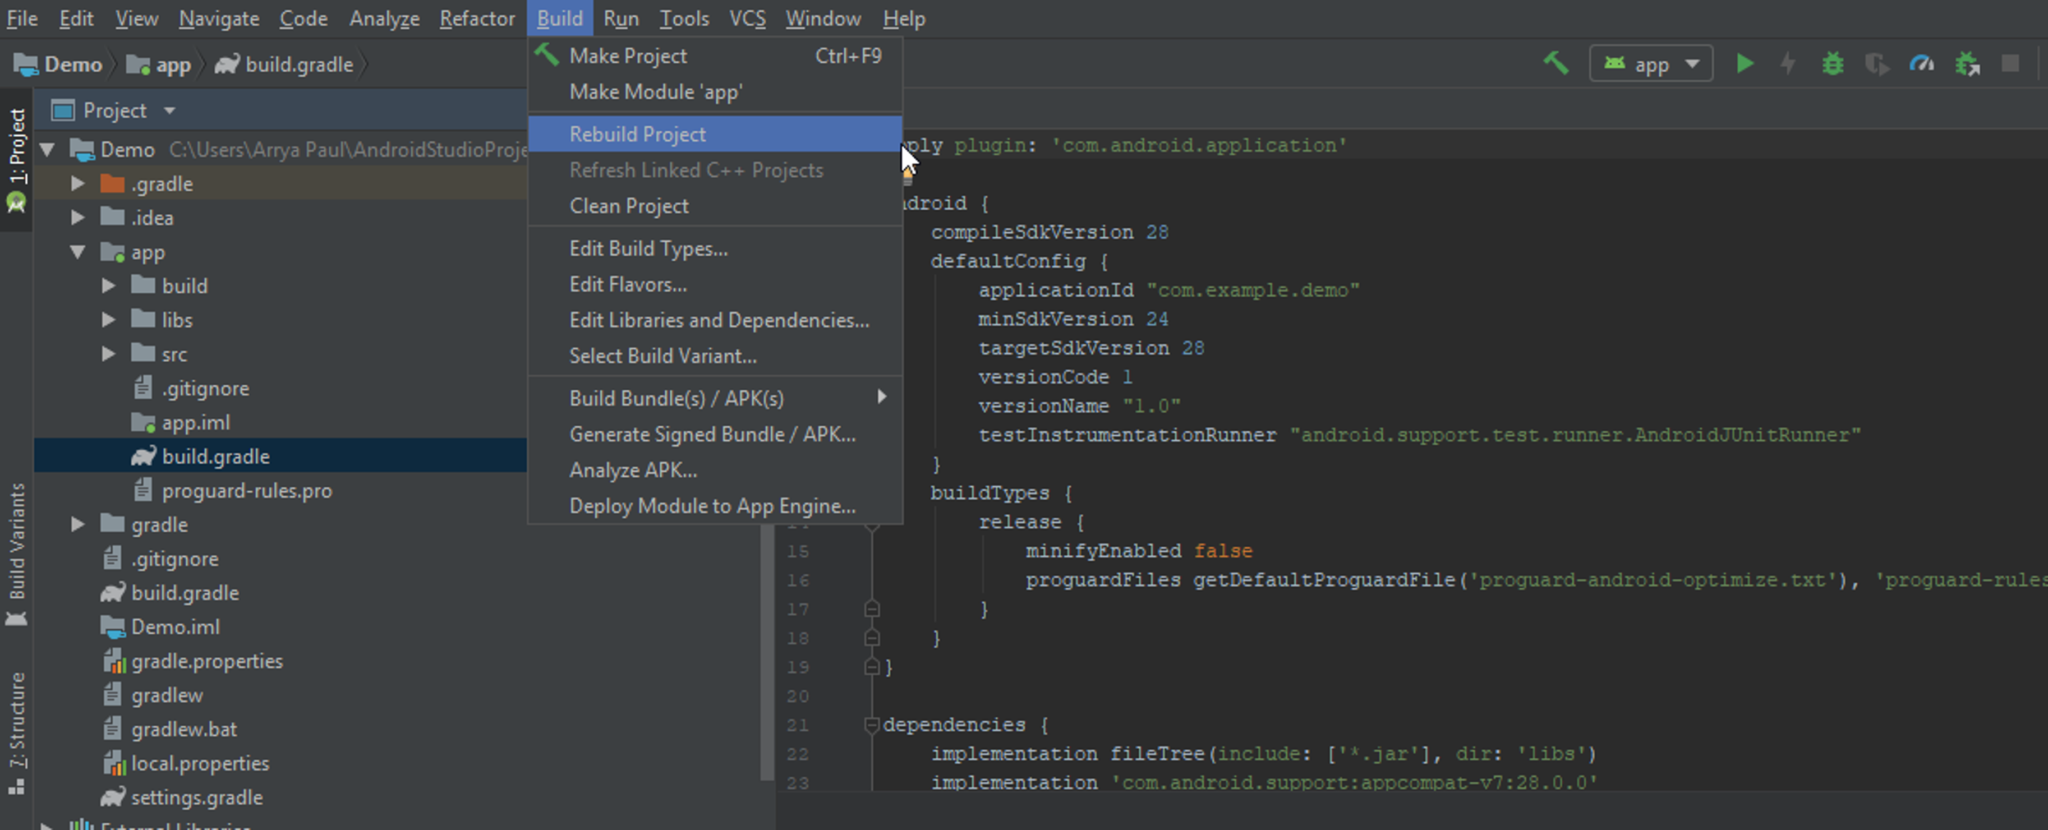
To automate Android devices, you must install Java Development Kit (JDK 11 or JDK 17) and Android Studio to acquire the Android SDK tools.
- Set the
JAVA_HOMEenvironment variable to point to your JDK installation directory. - Set the
ANDROID_HOMEenvironment variable to point to your Android SDK location (e.g.,C:\Users\\AppData\Local\Android\Sdkon Windows or/Users//Library/Android/sdkon macOS). - Add the following directories to your system
PATH:$ANDROID_HOME/platform-tools(containsadb)$ANDROID_HOME/toolsand$ANDROID_HOME/tools/bin$ANDROID_HOME/cmdline-tools/latest/bin
- Verify Android Debug Bridge (
adb) connectivity by runningadb devicesin your terminal.
3. iOS Development Environment (macOS Only)
iOS automation requires Apple's Xcode IDE, available on macOS.
- Install Xcode from the Mac App Store or Apple Developer Portal.
- Install Xcode Command Line Tools:
xcode-select --install. - Install
CarthageorAppium Doctorto verify configuration if necessary. Appium Doctor can be executed usingnpx appium-doctor --android --iosto diagnose system configuration gaps automatically.
4. Python Environment and Client Installation
It is recommended to manage your Python dependencies inside a virtual environment to prevent package conflicts.
- Create a virtual environment:
python3 -m venv venv - Activate the virtual environment:
- macOS/Linux:
source venv/bin/activate - Windows:
venv\Scripts\activate
- macOS/Linux:
- Install the official Python Appium client library via PyPI:
pip install Appium-Python-Client - Install Pytest for test management and assertions:
pip install pytest
Refer to the official package repository on the Python Package Index (PyPI) to check for the latest release notes and compatibility specifications.
Capabilities and Options Configuration
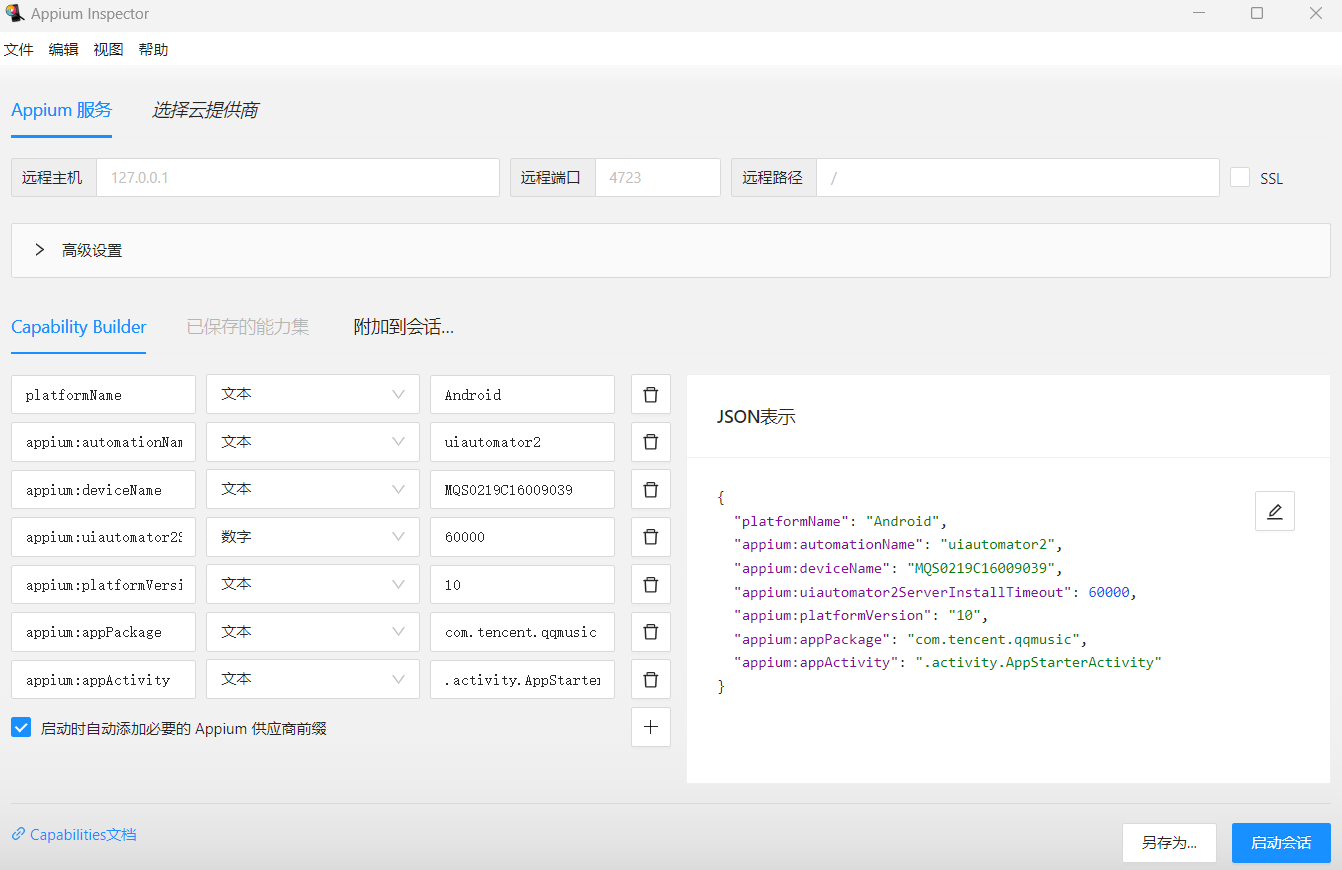
In early Appium versions, test sessions were configured using plain Python dictionaries called "Desired Capabilities." Modern Appium automation uses dedicated Options classes available in appium.options. These classes provide type safety and explicit configuration methods.
UiAutomator2Options (Android) vs. XCUITestOptions (iOS)
For Android tests, import UiAutomator2Options from appium.options.android. For iOS tests, import XCUITestOptions from appium.options.ios.
| Configuration Property | Android (UiAutomator2Options) |
iOS (XCUITestOptions) |
Purpose / Description |
|---|---|---|---|
| Automation Name | uiautomator2 |
XCUITest |
Specifies the underlying driver engine. |
| Platform Name | Android |
iOS |
Target operating system. |
| Device Name | Android Emulator or Device ID |
iPhone 15 Pro or Device UDID |
Identifier for emulator/simulator or physical unit. |
| App Path / Package | app or app_package / app_activity |
app or bundle_id |
Path to .apk/.aab file or installed package details for Android; .app/.ipa or Bundle ID for iOS. |
| Reset Strategies | no_reset=True / full_reset=True |
no_reset=True / full_reset=True |
Controls app state between sessions (e.g., clearing cache vs. preserving data). |
| Timeout Settings | new_command_timeout=300 |
new_command_timeout=300 |
Server wait time (in seconds) for client commands before closing session. |
Writing Your First Appium Python Test Script
A standard Appium test follows four operational phases: initializing driver capabilities, launching the app session, executing locator strategies and interactions, and terminating the driver session cleanly.
Step 1: Start the Appium Server
Open a terminal window and run:
appium
The server will start, listening by default on http://127.0.0.1:4723/ (or http://localhost:4723/).
Step 2: Creating the Python Script
Below is a complete, structural walkthrough of a Python script designed to test an Android application using Pytest patterns.
Importing Modules
import unittest from appium import webdriver from appium.options.android import UiAutomator2Options from appium.webdriver.common.appiumby import AppiumBy from selenium.webdriver.support.ui import WebDriverWait from selenium.webdriver.support import expected_conditions as EC
Configuring Options and Initializing Driver
options = UiAutomator2Options() options.platform_name = "Android" options.automation_name = "uiautomator2" options.device_name = "Android Emulator" options.app = "/path/to/your/sample_app.apk" # Or target an already installed app: # options.app_package = "com.example.android.store" # options.app_activity = "com.example.android.store.MainActivity" # Connect to the local Appium server instance driver = webdriver.Remote("http://127.0.0.1:4723", options=options)
Finding Elements and Performing Actions
Always prefer Explicit Waits (WebDriverWait) over static pauses (time.sleep) to prevent flakiness in mobile test suites.
# Initialize explicit wait helper wait = WebDriverWait(driver, 10) # Locate an element by Accessibility ID (Best Practice) login_button = wait.until( EC.element_to_be_clickable((AppiumBy.ACCESSIBILITY_ID, "LoginButton")) ) login_button.click() # Locate an input field by ID, enter text username_field = wait.until( EC.presence_of_element_located((AppiumBy.ID, "com.example.android.store:id/username")) ) username_field.send_keys("standard_user") # Submit form submit_btn = driver.find_element(AppiumBy.XPATH, "//android.widget.Button[@text='Submit']") submit_btn.click()
Assertions and Session Cleanup
# Assert result text success_message = wait.until( EC.presence_of_element_located((AppiumBy.ID, "com.example.android.store:id/status")) ) assert success_message.text == "Welcome back!" # End the test session cleanly driver.quit()
Mobile Locators and Gesture Automation
Finding elements on mobile screens differs significantly from traditional web browser automation. Mobile layouts rely on native UI component hierarchies rather than standard HTML DOM structures.
Standard Appium Locator Strategies
The AppiumBy class provides strategies specifically designed for mobile applications:
AppiumBy.ACCESSIBILITY_ID: The premier selection strategy for both platforms. It targetscontent-descon Android andaccessibilityIdentifieron iOS. It offers high execution speed and resilience against visual layout updates.AppiumBy.ID: Targets the resource identifier of a view (resource-idon Android).AppiumBy.XPATH: Evaluates element locations using XML paths. Use XPath cautiously; complex dynamic XPaths slow down execution speeds on iOS devices significantly due to native query translation overhead.AppiumBy.ANDROID_UIAUTOMATOR: A native Android locator enabling native Java-based UI queries directly (e.g.,AppiumBy.ANDROID_UIAUTOMATOR, 'new UiSelector().text("Settings")').AppiumBy.IOS_CLASS_CHAINandAppiumBy.IOS_PREDICATE_STRING: High-performance, iOS-specific locators that serve as faster, direct alternatives to traditional iOS XPaths.
Mobile Gestures with the W3C Actions API
Legacy methods such as driver.swipe() or the TouchAction class have been deprecated in recent client updates in favor of the standardized W3C Actions API.
To perform gestures like scrolling or swiping, construct action chains using Sequence, PointerInput, and move actions.
Implementing a Vertical Swipe Down (Scroll Action)
from selenium.webdriver.common.action_chains import ActionChains from selenium.webdriver.common.actions import interaction from selenium.webdriver.common.actions.action_builder import ActionBuilder from selenium.webdriver.common.actions.pointer_input import PointerInput def swipe_screen(driver, start_x, start_y, end_x, end_y, duration_ms=600): actions = ActionChains(driver) touch_input = PointerInput(interaction.POINTER_TOUCH, "touch") # Create action sequence: pointer move -> button down -> pause -> pointer move -> button up actions.w3c_actions = ActionBuilder(driver, mouse=touch_input) actions.w3c_actions.pointer_action.move_to_location(start_x, start_y) actions.w3c_actions.pointer_action.pointer_down() actions.w3c_actions.pointer_action.pause(duration_ms / 1000) actions.w3c_actions.pointer_action.move_to_location(end_x, end_y) actions.w3c_actions.pointer_action.release() actions.perform()
Alternatively, platform extensions can be invoked via driver.execute_script() for native gesture commands like mobile: scrollGesture or mobile: swipeGesture on Android and iOS.
Implementation of Page Object Model (POM) in Appium Python
The Page Object Model (POM) enhances code maintainability, minimizes duplication, and separates element identification logic from test verification assertions.
1. Designing the Base Page Class
The Base Page encapsulates universal driver interactions, explicit wait strategies, and gesture helpers.
# pages/base_page.py from selenium.webdriver.support.ui import WebDriverWait from selenium.webdriver.support import expected_conditions as EC class BasePage: def __init__(self, driver): self.driver = driver self.wait = WebDriverWait(driver, 15) def find(self, locator): return self.wait.until(EC.presence_of_element_located(locator)) def click(self, locator): element = self.wait.until(EC.element_to_be_clickable(locator)) element.click() def send_keys(self, locator, text): element = self.find(locator) element.clear() element.send_keys(text) def get_text(self, locator): return self.find(locator).text
2. Designing Page Components
Inherit from BasePage to define screen-specific locators and UI flow methods.
# pages/login_page.py from appium.webdriver.common.appiumby import AppiumBy from pages.base_page import BasePage class LoginPage(BasePage): # Locators tuple definition USERNAME_FIELD = (AppiumBy.ACCESSIBILITY_ID, "input-username") PASSWORD_FIELD = (AppiumBy.ACCESSIBILITY_ID, "input-password") LOGIN_BUTTON = (AppiumBy.ACCESSIBILITY_ID, "button-login") ERROR_MESSAGE = (AppiumBy.ID, "com.example.android.store:id/error_txt") def __init__(self, driver): super().__init__(driver) def login(self, username, password): self.send_keys(self.USERNAME_FIELD, username) self.send_keys(self.PASSWORD_FIELD, password) self.click(self.LOGIN_BUTTON) def get_error_message_text(self): return self.get_text(self.ERROR_MESSAGE)
3. Writing Pytest Test Scripts
Utilize Pytest fixtures to handle session startup, driver setup, and teardown cleanly.
# tests/test_login.py import pytest from appium import webdriver from appium.options.android import UiAutomator2Options from pages.login_page import LoginPage @pytest.fixture(scope="function") def driver(): options = UiAutomator2Options() options.platform_name = "Android" options.automation_name = "uiautomator2" options.device_name = "Android Emulator" options.app_package = "com.example.android.store" options.app_activity = "com.example.android.store.MainActivity" driver_instance = webdriver.Remote("http://127.0.0.1:4723", options=options) yield driver_instance driver_instance.quit() def test_invalid_login_shows_error(driver): login_page = LoginPage(driver) login_page.login("invalid_user", "wrong_password") error_text = login_page.get_error_message_text() assert error_text == "Invalid credentials supplied."
Troubleshooting Common Errors and Best Practices
Mobile test execution involves hardware emulation, USB connections, system permissions, and network sockets. Below are solutions for common setup issues:
1. SessionNotCreatedException
- Cause: Mismatch between requested device configuration and real system state, missing drivers, or unstarted Appium server.
- Solution: Verify the Appium server is running. Run
appium driver listto confirmuiautomator2orxcuitestdrivers are installed properly. Ensure the device name and OS version match the output ofadb devicesorxcrun simctl list.
2. ElementNotFoundException / TimeoutException
- Cause: The element has not rendered on screen, is off-screen, or exists inside a hybrid webview context.
- Solution: Replace implicit waits with explicit waits (
WebDriverWait). If the element is off-screen, execute a scroll or swipe gesture before attempting interaction. For hybrid apps, switch contexts usingdriver.switch_to.context('WEBVIEW_').
3. Android SDK or ANDROID_HOME Environment Errors
- Cause: Appium cannot locate
adbbinaries or Java runtime. - Solution: Double-check environment variables in your terminal profile (
~/.bashrc,~/.zshrc, or Windows System Properties). Ensure paths do not contain trailing slashes or syntax mistakes.
Frequently Asked Questions (FAQs)
What is the difference between Appium 1.x and Appium 2.x?
Appium 2.x decoupled driver drivers (UiAutomator2, XCUITest) and plugins (images, gestures, relaxed security) from the main server package. Drivers must now be installed individually using appium driver install . Additionally, standard W3C protocol compliance is enforced, replacing legacy options dictionaries with platform-specific Options classes in client bindings.
Can I run Appium Python tests on real physical mobile devices?
Yes. Automation can be executed on real devices as well as emulators/simulators. Real Android devices require enabling USB Debugging inside Developer Options. Real iOS devices require a valid Apple Developer Account, provisioning profiles, code-signing certificates, and enabling Developer Mode on iOS 16+.
How do I locate mobile UI elements accurately?
Use the official Appium Inspector Desktop application. Appium Inspector connects to your active Appium server session, captures an interactive screenshot of the target app alongside the native layout tree hierarchy, and automatically generates recommended locator queries (such as Accessibility IDs and XPaths).
How do I automate hybrid mobile applications containing WebViews in Python?
Hybrid apps combine native shell containers with embedded browser webviews. To interact with elements inside a WebView, query available contexts using driver.contexts. Transition control from native mode to web mode using driver.switch_to.context(driver.contexts[1]). Once switched, standard Selenium web locators (such as CSS selectors or HTML IDs) can be used.
Is Pytest better than unittest for Appium Python frameworks?
Pytest is widely preferred over standard unittest due to its concise syntax, powerful fixture framework (which simplifies setup and teardown management across environments), advanced parametrization capabilities, parallel test execution plugins (pytest-xdist), and rich reporting integration capabilities (such as Allure Reports).
Summary and Next Steps
Automating mobile applications with Appium and Python provides a scalable solution for end-to-end testing across Android and iOS platforms. By setting up Appium 2.x, using platform-specific Options classes, implementing robust locators via Accessibility IDs, and structuring tests with the Page Object Model, automation teams build reliable test suites that catch bugs early in the software lifecycle.
To advance your mobile automation architecture:
- Download and configure Appium Inspector to speed up element locator discovery.
- Integrate parallel execution with
pytest-xdistand Selenium Grid or cloud grid vendors (such as Sauce Labs or BrowserStack). - Configure your test scripts inside Continuous Integration (CI) pipelines using GitHub Actions, GitLab CI, or Jenkins.
For complete API references and official documentation, visit the Official Appium Documentation and the Selenium Python Documentation.