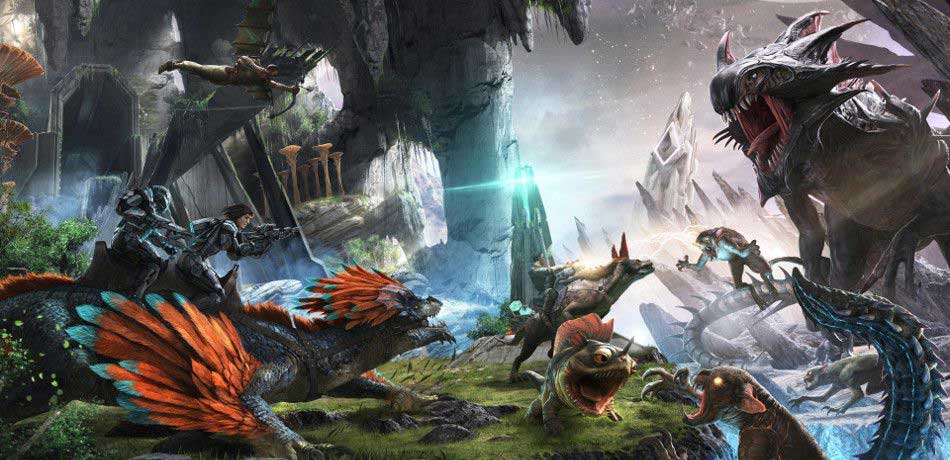
The aberration ark survival evolved expansion is a major subterranean-themed expansion pack for ARK: Survival Evolved that places players on a damaged, malfunctioning ARK station. Featuring a ruined surface exposed to lethal radiation, gameplay forces survivors underground into interconnected bioluminescent biomes filled with unique vertical hazards, charge light mechanics, mutated creatures, and specialized traversal tools.
What Is the ARK: Survival Evolved Aberration Expansion?
Released by Studio Wildcard in December 2017, the Aberration expansion drastically altered the standard ARK: Survival Evolved formula. Unlike traditional island settings dominated by open skies and airborne dinosaurs, Aberration takes place within the cavernous depths of an unstable, derelict space ark. The internal atmosphere of this artificial world has collapsed, stripping away the atmosphere on the surface and bombarding the exterior landscape with scorching solar radiation during the day.
To survive, players must descent deep beneath the crust into an intricate underground ecosystem. This subterranean environment introduces a steep difficulty curve compared to the base game. Standard flying creatures—such as Pteranodons, Argentavis, and Quetzals—are disabled by default on Aberration servers, forcing players to adapt to vertical ground movement, grappling mechanics, ziplines, and gliders.
The narrative of Aberration delves into the mystery of the ARKs' original builders, the corruption caused by liquid Element, and the fate of previous survivors like Helena Walker and Sir Edmund Rockwell. The map is designed as a deep vertical descent, transitioning from relatively peaceful lush overgrown caverns down into terrifying radioactive trenches where the game's ultimate boss resides.
Environmental Zones and Subterranean Biomes
Aberration is structured into three primary subterranean depth zones, plus a highly dangerous surface area. Each region features distinct ambient lighting, environmental hazards, wild creatures, and resource yields.
- THE SURFACE (Lethal Sunlight / Extreme Heat / Drops & Element Ore)
- FERTILE ZONE (GREEN ZONE) (Mushroom Forests / Water / Baseline Resources / Low Risk)
- BIOLUMINESCENT ZONE (BLUE ZONE) (Glowing Flora / Nameless Spawns / Rock Drakes / Mid Risk)
- ELEMENT ZONE (RED ZONE) (Radioactive Gas / Liquid Element / Reaper Queens / High Risk)
The Fertile Zone (Green Zone)
Located near the top of the cavern system, the Fertile Zone acts as the primary spawn and starter region for players entering Aberration. Characterized by massive subterranean trees, giant mushrooms, and flowing rivers, this zone provides access to basic building materials, wood, stone, and water.
While safer than lower depths, the Green Zone still presents notable hazards:
- Fungal Spores: Walking through patches of specific wild mushrooms can trigger status effects. Freezing Spores induce hypothermia and rapid health loss, while Fertile Spores cause hallucination, disorientation, and oxygen depletion. Eating Aggeravic Mushrooms grants temporary immunity to Freezing Spores.
- Earthquakes: Frequent seismic activity shakes the ground, knocking players off balance, dislodging resources from the ceiling, and dropping stone, crystal, wood, and metal pieces to the cavern floor.
- Aggressive Wildlife: Predators like Ravagers, Raptors, and Carnos stalk the forest floors, while Basilisk snakes lie in wait buried under the soil.
The Bioluminescent Zone (Blue Zone)
Descending deeper leads into the Bioluminescent Zone, a mesmerizing landscape illuminated by glowing blue flora, giant crystal formations, and towering fungal trees. This zone represents the mid-game area of Aberration, providing abundant access to Silica Pearls, Blue Gems, Metal, and Polymer.
However, the Blue Zone introduces the Nameless threat. When players venture into the dark areas of the Blue Zone without a source of Charge Light, ground-dwelling creatures called Nameless emerge continuously from the soil. If left unchecked, a swarm of Nameless will summon a terrifying Subterranean Reaper King.
The Element Zone (Red Zone)
The deepest accessible layer of the cavern system is the Element Zone, recognizable by its ominous red hue, glowing Red Gems, and rivers of raw, liquid Element. The air itself in the Element Zone is intensely radioactive, making the region completely fatal to any player not wearing a fully intact Hazard Suit.
The Red Zone is home to the map's most dangerous native apex predators, including wild Reaper Queens and wild Rock Drakes. Liquid Element pools will rapidly drain player and creature health upon contact, requiring precise navigation across high-hanging bridges, cliff faces, and stone arches.
The Surface
The Surface of Aberration can be accessed through three distinct cave tunnels located around the perimeter of the map. However, the surface is governed by a extreme day-night cycle:
- Daytime: Temperatures reach lethal levels exceeding 100°C+, burning players, tames, and equipment to ash within seconds.
- Nighttime: The solar radiation recedes, allowing survivors to search the surface for high-tier orbital supply drops, Element Ore, and dense clusters of rare minerals.
The length of daytime and nighttime varies according to the map's seasonal cycle, which rotates between 90% Night / 10% Day, 50% Night / 50% Day, and 10% Night / 90% Day. Checking the in-game clock is vital before attempting a surface run.
Core Gameplay Mechanics: Traversal and Charge Light
Aberration fundamentally redefines how players travel, build, and survive by removing traditional airborne tames and introducing two interconnected core systems: Vertical Traversal and Charge Light.
Vertical Traversal Mechanics
Without flyers, navigating hundreds of vertical meters of sheer cliff faces requires tactical equipment and specialized tames:
- Glider Suit Attachment: Crafted and attached to chest armor, the Glider Suit allows players to launch off cliffs and glide rapidly across cavern chasms.
- Climbing Picks: Dual hand axes that allow players to physically ascend vertical stone walls, giant trees, and ceiling structures. Picks degrade in durability with each stroke.
- Ziplines and Anchor Cables: Players can shoot Zipline Anchors using a Crossbow to create permanent travel cables between high ledges. Ravagers and players equipped with Zipline Motor Attachments can quickly ascend and descend these cables.
- Pliers and Grappling Hooks: Essential tools for repairing gear in the field and making emergency descents.
The Charge Light System
Charge Light is the single most critical survival mechanic on Aberration. It acts as both a protective shield against aggressive creatures and a power source for advanced technology.
CHARGE LIGHT MECHANIC
- EMITTERS: Charge Pets (Bulbdog, Shinehorn) / Charge Lanterns / Nodes
- DEFENSIVE EFFECT:
- Suppresses Nameless spawns
- Debuffs Reaper armor
- Prevents Reaper Kings
- UTILITY EFFECT:
- Powers Charge Batteries
- Enables Tek Replicator use
- Fuels structures & devices
Nameless Suppression: Nameless will not spawn from the ground if a survivor or tame is within the radius of an active Charge Light source. If Nameless are already present, exposure to Charge Light weakens their damage resistance.
Reaper Armor Debuff: Wild and tamed Reapers possess extremely thick natural natural armor that reduces incoming damage by roughly 80%. Activating Charge Light strips away this armor bonus, allowing players to deal full damage to them.
Charge Pets: Aberration introduces four small shoulder tames that generate organic Charge Light:
- Bulbdog: High charge capacity, found in the Fertile Zone.
- Shinehorn: Balanced charge recovery and capacity, found in lush caves.
- Featherlight: Flying bird creature with wide light radius, found in deep caverns.
- Glowtail: High recharge rate, found in cave ruins.
Charge Nodes: Fixed glowing structures scattered across the map that store electrical charge. Players can insert empty Charge Batteries into Charge Nodes to recharge them, or use the node's internal inventory to craft Tek items.
Unique Creatures of Aberration
The expansion introduces a diverse array of adapted and mutated creatures designed to complement the underground environment.
Rock Drake
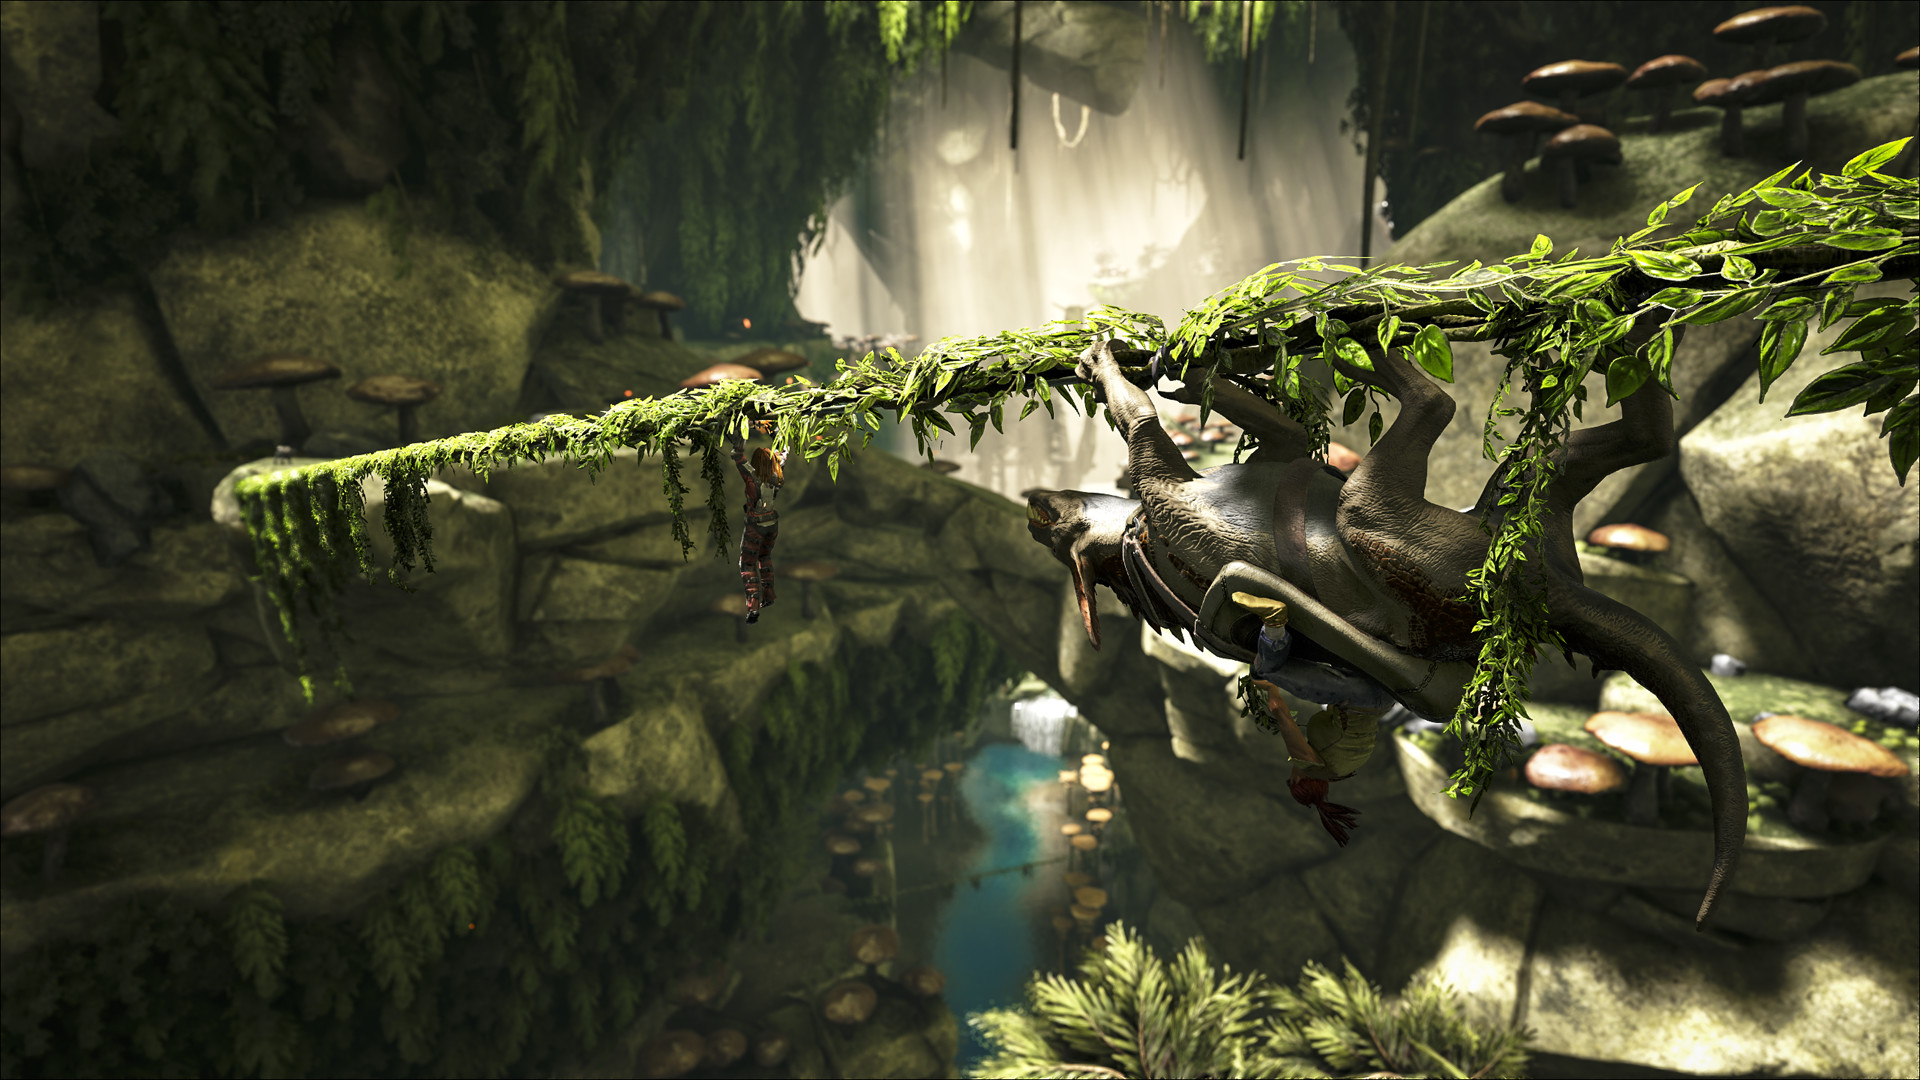
The Rock Drake is the definitive mobility tame of Aberration. It cannot fly in the traditional sense, but it can glide across vast distances, cling to any vertical or inverted surface, and leap long distances from walls.
- Special Abilities: Camouflage cloak mode (renders rider and drake almost invisible), wall climbing, and active tracking (feathers flare when wild Reaper or Nameless threats are nearby).
- Taming Method: Cannot be tamed through standard knock-out methods. Players must descend into the hazardous nests of the Element Zone, steal a wild Rock Drake Egg, escape, and hatch the egg at extremely cold temperatures using air conditioners or Dimetrodons.
Reaper (Reaper King & Queen)
Reapers are massive, xenomorph-like terror apex predators of the subterranean depths.
- Reaper Queen: Found exclusively in the radioactive Element Zone. They cannot be tamed directly.
- Taming a Reaper King: To obtain a tamed Reaper King, a player must locate a wild Reaper Queen, lower her health below 10%, turn off all Charge Light sources, and allow the Queen to impregnate the player character with a tail strike attack. The player must then carry the pregnant parasite inside their body until the gestation timer completes, avoiding radiation damage which kills the embryo. Once born, the infant Reaper King must be raised using Pheromone Glands collected from defeated Reaper Queens.
Karkinos
The Karkinos is a giant, multi-limbed amphibious crab found near subterranean rivers and lakes.
- Utility: Capable of dual-wielding creatures or players, picking up two targets simultaneously and hurling them long distances. It possesses high health, jump height, and immunity to radiation.
- Taming Method: Knock-out tame using catapults or cannon fire aimed directly at its central shell.
Ravager
The Ravager is a pack-hunting canine predator found early in the game.
- Utility: Excellent early-to-mid game mount. Ravagers can walk along player-placed ziplines, jump high, deal bleed damage in packs, and reduce the weight of heavy raw resources (such as Metal, Stone, Wood, and Crystal) in their inventory by 50%.
- Taming Method: Standard knock-out tame using Bolas and Tranquilizer darts.
Basilisk
A massive subterranean serpent that burrows beneath the earth and shoots lethal poison projectiles.
- Taming Method: Unique passive tame. Players must drop fertilized Rock Drake eggs (or Magmasaur/Voidwyrm eggs) on the ground while the wild Basilisk is unburrowed and aggressive, allowing it to consume the eggs.
Key Resources, Crafting, and Mechanics Comparison
Progression on Aberration requires mastering localized resources not found in the original base game.
| Zone | Primary Hazards | Essential Resources | Key Creatures Found | Traversal Tools Required |
|---|---|---|---|---|
| Fertile Zone (Green) | Spore patches, Earthquakes, Ravager packs, Basilisks | Green Gems, Wood, Stone, Mushroom Wood, Water | Ravager, Bulbdog, Roll Rat, Raptor, Carno | Climbing Picks, Crossbow Ziplines |
| Bioluminescent Zone (Blue) | Nameless swarms, Subterranean Reapers, Abyssal drops | Blue Gems, Silica Pearls, Metal, Polymer, Chitin | Karkinos, Rock Drake (high ledges), Shinehorn, Megalosaurus | Glider Suit, Charge Pets, Ravagers |
| Element Zone (Red) | Extreme Radiation, Liquid Element rivers, Fire | Red Gems, Element Ore, Element Shards, Organic Polymer | Rock Drake (nests), Reaper Queen, Purlovia, Featherlight | Hazard Suit Set, Rock Drake, Charge Pets |
| The Surface | Extreme Solar Radiation (Daytime), Reaper Kings, Seekers | Element Ore, Heavy Metal, High-tier Orbital Drops | Surface Reaper King, Seeker | Glider Suit, High-speed mount (Rock Drake), Hazard Suit |
Essential Aberration Equipment
- Hazard Suit Assembly: Crafted at a Fabricator using Blue Gems, Polymer, Congealed Gas Balls, and Fiber. The full 5-piece set (Helmet, Chestpiece, Pants, Boots, Gloves) grants 100% protection against radiation, spore hazards, and poison gas. Armor durability degrades slowly while in radiation zones; carrying spare sets or repair materials is necessary.
- Gas Collector: Placed on top of pink Gas Veins located across the map. Over time, it extracts Congealed Gas Balls, a required ingredient for Hazard Suits and high-tier gear.
- Charge Battery: Portable electrical storage cells filled at Charge Nodes. Used to power Charge Lanterns, Heavy Turrets, and remote base structures without needing traditional electrical generators.
Boss Progression: Defeating Sir Edmund Rockwell
The ultimate goal of the Aberration expansion is navigating to the lowest point of the cavern system—the Graves of the Lost—and entering the boss arena to confront Rockwell, a mutated former human survivor who integrated himself into the ARK's central core system.
Boss Requirements & Tiers
To launch the Rockwell boss fight, players must access a Charge Node or Surface Obelisk and submit specific tribute items gathered from around the map:
- Gamma Rockwell: Requires Artifact of the Depths, Artifact of the Shadows, Artifact of the Stalker.
- Beta Rockwell: Requires base artifacts plus Reaper Queen Pheromone Glands, Basilisk Scales, Rock Drake Feathers, and Alpha Karkinos Claws.
- Alpha Rockwell: Requires all Beta attributes plus high-tier tribute components from Alpha Apex predators (Alpha Reaper King Barb).
- PHASE 1: Destroy glowing tentacles surrounding the arena perimeter.
- PHASE 2: Main body exposes chest core; deal maximum DPS to Rockwell.
- PHASE 3: Nameless & Reapers spawn; manage adds with Charge Light.
- REPEAT: Repeat cycle until Rockwell's global health bar hits zero.
Combat Strategy
- Tentacle Phase: Rockwell is invincible while his tentacles are active. Players equipped with high-shotgun damage, Pump-Action Shotguns, or mounted on high-health Rock Drakes/Shotgun-wielding Megalosaurs must clear all tentacles surrounding the arena platform.
- Vulnerability Phase: Once tentacles are submerged, Rockwell drops his head onto the main platform, exposing his glowing heart chest cavity. Players must concentrate all firearm damage directly into the chest.
- Add Management: Throughout the encounter, energy orbs, Nameless, and elemental Reapers spawn across the arena floor. Bringing Charge Lanterns, shoulder Charge Pets, and high-quality Hazard Suits is mandatory to avoid radiation exposure and keep add damage minimal.
Defeating Rockwell rewards survivors with the Tek Replicator, Tek Armor engrams, Tek Rifle, and unlocks the Ascension cutscene, transferring the survivor to the next storyline expansion (Extinction).
Practical Recommendations for New Aberration Players
To establish a successful playthrough on the Aberration map, follow these tactical steps:
- Base Location: Set up your primary early-game base near a natural water source in the Fertile Zone (Green Zone), close to an exit leading toward the Bioluminescent border. Avoid building directly on spawn points or near deep ravines.
- Secure a Charge Shoulder Pet Immediately: Prioritize taming a low-level Bulbdog using Aquatic Mushrooms early on. Keep its light active whenever venturing near dark caves or blue moss regions.
- Tame a Ravager Pack: Knock out two or three Ravagers using Bolas. A mate-boosted pack of Ravagers with high weight stats enables effortless metal and wood gathering via zipline networks.
- Prepare Multiple Hazard Suits: Do not enter the Red Zone or Surface without at least two spare Hazard Suit sets in your inventory. If your current suit breaks due to durabilty damage, radiation will kill your character within seconds.
- Steal Rock Drake Eggs Prepared: Use a combination of a high-stat Karkinos or Megalosaurus, paired with Glider Suits and Climbing Picks, to descend into the Drake Nests, snatch an egg, and escape rapidly before wild Drakes swarm your position.
Frequently Asked Questions
Can you use flying creatures on the Aberration map?
By default, traditional airborne flyers (such as Pteranodons, Argentavis, and Wyverns) cannot be ridden or transferred onto Aberration servers. Traversal relies on ground tames, climbing mechanics, ziplines, Glider Suits, and Rock Drakes. However, server administrators can override this setting using specific server configuration commands (AllowFlyerCarryForAberration=True).
How do you survive radiation in the Red Zone?
To survive radiation in the Red Zone and Element Trench, you must equip a full 5-piece Hazard Suit set (Helmet, Chest, Pants, Gloves, Boots). If even one piece breaks or is removed, your character will immediately suffer severe radiation sickness, which rapidly drains health and causes death. Specialized tames like Rock Drakes, Karkinos, and Reapers are immune to radiation.
What do Nameless feed on, and how do you stop them from spawning?
Nameless emerge from the ground when players navigate the Blue or Red zones in total darkness. They cannot be tamed permanently. To prevent Nameless from spawning, you must keep an active source of Charge Light nearby, such as a shoulder Charge Pet (Bulbdog, Shinehorn, Featherlight, Glowtail) or a Charge Lantern.
How do you hatch a Rock Drake Egg?
Rock Drake eggs require extremely low temperatures to hatch, ranging between -85°C and -90°C. To achieve this temperature, build a closed hatching room equipped with 20 to 30 Air Conditioners placed closely together, or line up multiple tamed Dimetrodons with high Melee Damage stats to provide thermal insulation.
How do you get a tamed Reaper King in Aberration?
You cannot knock out or tame a wild Reaper directly. You must locate a wild Reaper Queen in the Element Zone, reduce her health below 10%, turn off all Charge Light sources, and let her perform an impregnation attack on your player character. After gestating the embryo inside your character's body without taking radiation damage, you will give birth to a infant Reaper King, which must be hand-fed using Reaper Queen Pheromone Glands.