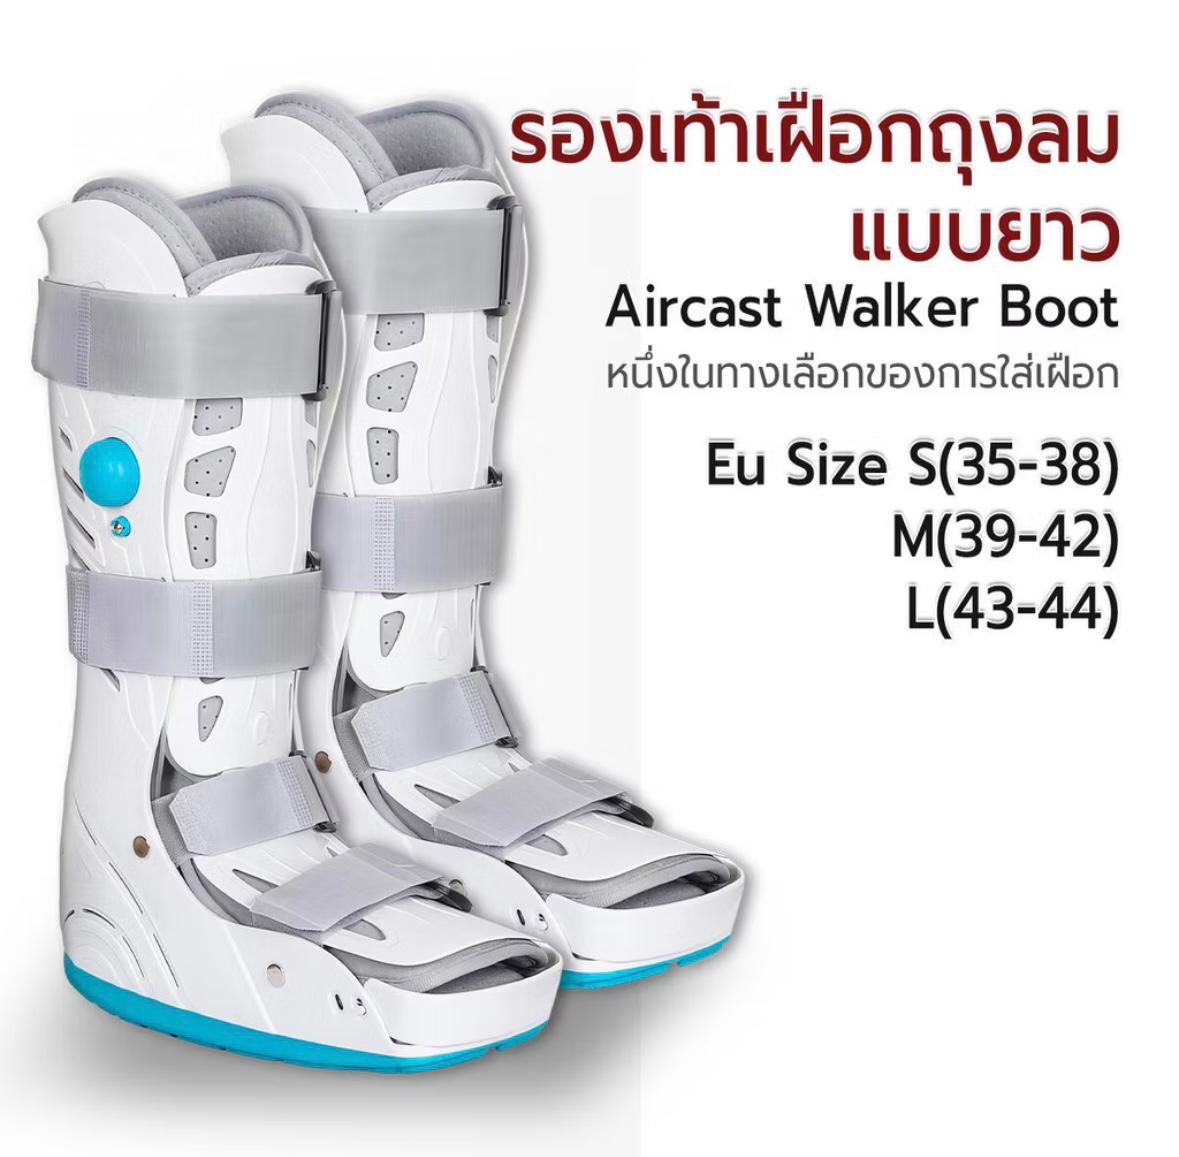
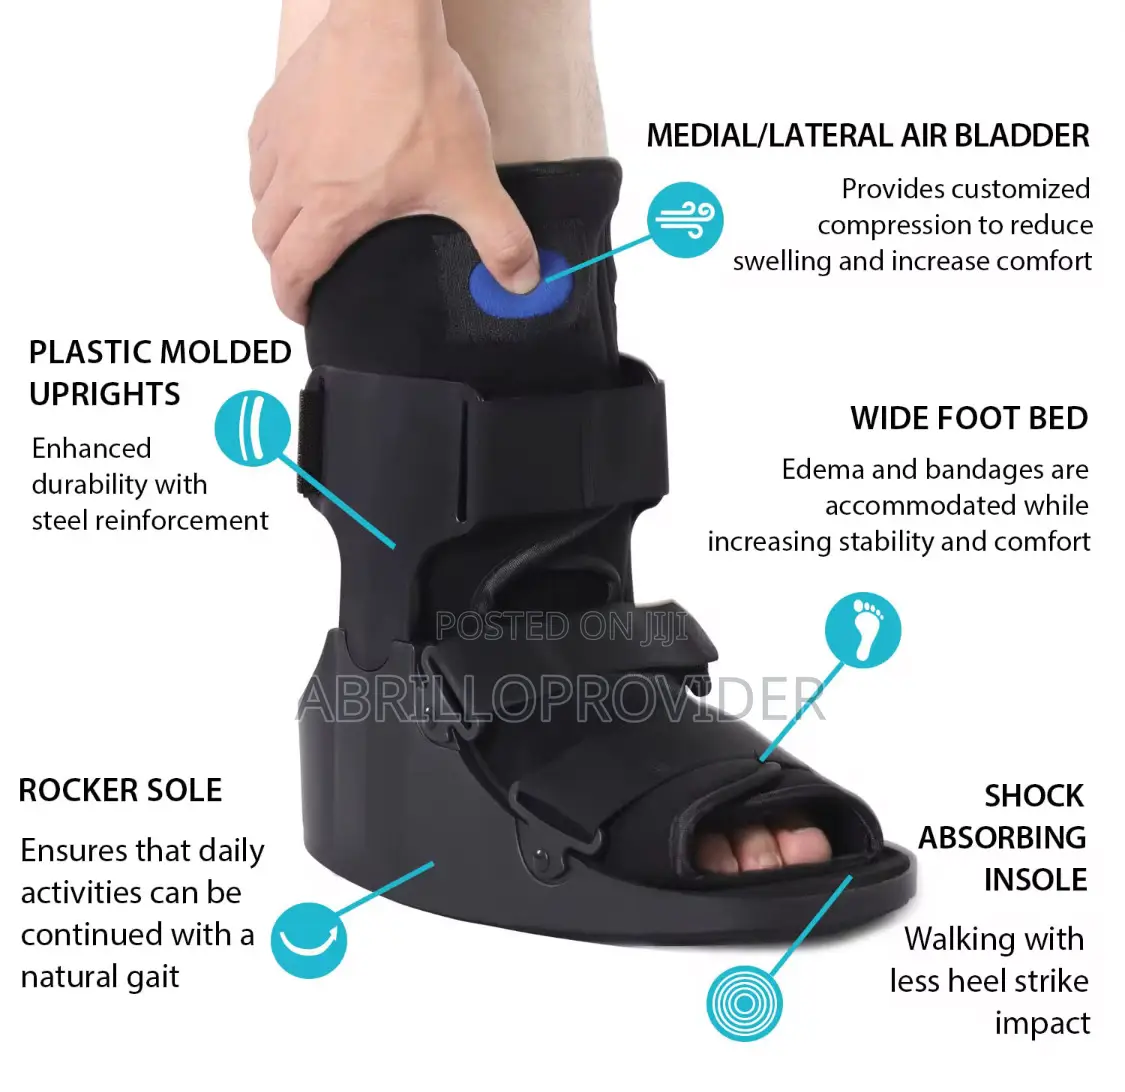
To properly use an Aircast walking boot, begin by placing your heel firmly against the back of the boot liner. Secure the foam wraps and then fasten the straps from the bottom up. Finally, use the integrated pump to inflate the air cells until the fit is snug but comfortable, ensuring stability for your injury.
Introduction to the Aircast Walking Boot
The Aircast walking boot, specifically the AirSelect series, represents a standard in orthopedic recovery for 2026. Designed to provide localized compression and stabilization, these boots are used for stable fractures of the foot and ankle, severe stress fractures, and post-operative recovery. Unlike traditional plaster casts, the Aircast utilizes a semi-rigid shell and pneumatic (air) technology to manage swelling (edema) while allowing for protected weight-bearing.
Correct application is not merely a matter of comfort; it is a clinical requirement. An improperly fitted boot can lead to skin breakdown, secondary joint pain in the hips or knees, or even a failure of the bone to knit correctly. These instructions cover the fundamental procedures for the AirSelect Elite, Standard, and Short models, providing the technical depth necessary to manage your recovery safely at home.
Pre-Fitting Preparation and Requirements
Before you attempt to put on your Aircast, you must ensure your environment and your limb are prepared. Fitting a medical orthosis requires patience and attention to detail.
Selecting the Right Hosiery
Never wear an Aircast boot against bare skin. A long, moisture-wicking absorbent sock is essential. The sock should extend higher than the top of the boot to prevent the plastic shell or foam liner from rubbing against your calf. Avoid socks with thick seams, as the pneumatic compression can press these seams into your skin, causing "pressure sores" or ulcerations over time.
Preparing the Boot
- Undo all straps: Loosen every Velcro strap and pull them back so they do not obstruct the opening.
- Open the liner: Peel back the foam liner flaps.
- Check the air cells: Ensure the air cells are fully deflated before your first fitting. On most 2026 models, this is done by turning the selector dial to the "deflate" position or pressing the manual release valve.
Physical Positioning
Sit in a sturdy chair with your knee bent at a 90-degree angle. Your foot should be flat on the floor or a footstool if your doctor has cleared you for light weight-bearing. If you are non-weight-bearing, have someone assist you to ensure the foot remains in a neutral position (90 degrees to the shin) during the fitting process.
Step-by-Step Fitting Instructions (Donning the Boot)
Achieving a "neutral" ankle position is the most critical part of the donning process. If the foot is tilted down (plantarflexion) or up (dorsiflexion) when the boot is tightened, it can strain the Achilles tendon or the fracture site.
Step 1: Positioning the Foot
Slide your foot into the foam liner. It is vital that your heel is flush against the back of the liner and the hard plastic shell. If there is a gap between your heel and the rear of the boot, the "rocker sole" will not function correctly, and your gait will be significantly impaired.
Step 2: Securing the Foam Liner
Wrap the foam flaps over your foot and around your lower leg. The wrap should be snug but should not pinch the skin. Many Aircast models include a small toe wrap or cover; ensure this is flat and not folded over the toes, which could cause numbness.
Step 3: Fastening the Straps
Always fasten the straps starting from the bottom (toes) and moving upward (calf).
- The Toe Strap: This stabilizes the forefoot.
- The Ankle Strap: This is the most important strap for preventing "heel migration" (the foot sliding forward). It should be firm.
- The Calf Straps: These provide the secondary stability for the lower leg.
Do not over-tighten the straps to the point of cutting off circulation. You should be able to slide one finger between the strap and the boot shell.
Adjusting the Pneumatic Compression
The "Air" in Aircast refers to the internal air cells that provide graduated compression. This technology helps move fluid away from the injury site and provides a custom-contoured fit.
Using the Selector Dial
Most Aircast AirSelect models feature a dial with numbers (1, 2, and sometimes 3) and a "lock" or "deflate" icon.
- Number 1: Usually controls the lateral (outer) air cell.
- Number 2: Controls the medial (inner) air cell.
- Number 3: (On Elite models) Controls the posterior (back) air cell.
Inflation Process
- Turn the dial to the number corresponding to the cell you wish to inflate.
- Press the large integrated black pump (usually located near the top of the boot) repeatedly.
- Stop when you feel a firm but comfortable pressure. The air cell should feel like a supportive cushion, not a hard brick.
- Switch the dial to the next number and repeat the process.
- Once all cells are inflated, turn the dial to the "locked" position to prevent accidental deflation.
Deflation Process
If you feel throbbing, tingling, or numbness, you must deflate the cells immediately. Turn the dial to the specific cell number and press the small manual release button located next to the pump. To remove the boot entirely, it is best to deflate all cells to make it easier to slide the foot out without aggravating the injury.
Walking and Weight-Bearing Guidelines
The Aircast is designed with a rocker sole, which is a curved bottom that mimics the natural roll of the foot during a stride. This reduces the force transmitted to the ankle and foot bones.
Gait Mechanics
When walking in the boot:
- Heel Strike: Land gently on the heel of the boot.
- Mid-Stance: Allow the rocker sole to roll your weight forward toward the ball of the foot.
- Toe-Off: Push off gently. Avoid "twisting" or "pivoting" on the boot, as this can apply shear forces to a healing fracture.
Leveling Your Hips
Because the sole of an Aircast is significantly thicker than a standard shoe, you will likely experience a "limb length discrepancy." Walking with one leg significantly higher than the other can cause secondary pain in the lower back and opposite hip. It is highly recommended to wear a shoe leveler or a thick-soled athletic shoe on your non-injured foot to balance your pelvis.
Maintenance and Hygiene
Maintaining the cleanliness of your Aircast is vital for skin health, especially during long recovery periods (6-12 weeks).
Cleaning the Liner
The foam liner can be hand-washed.
- Remove the liner from the plastic shell.
- Use warm water and a mild detergent (avoid bleach or harsh chemicals).
- Air dry only. Never put the liner in a clothes dryer, as the high heat will break down the foam structure and ruin the Velcro attachments. Ensure the liner is 100% dry before putting it back on to prevent fungal infections.
Cleaning the Shell
The hard plastic shell can be wiped down with a damp cloth and disinfectant. Ensure the "tread" on the bottom of the rocker sole is kept free of mud or debris to maintain traction and prevent slips.
Technical Specifications and Model Comparison
| Feature | AirSelect Elite | AirSelect Standard | AirSelect Short |
|---|---|---|---|
| Primary Use | Severe fractures, post-op | Stable fractures, sprains | Forefoot injuries, bunionectomy |
| Number of Air Cells | 3 (Medial, Lateral, Posterior) | 2 (Medial, Lateral) | 2 (Medial, Lateral) |
| Shell Height | Full Calf | Full Calf | Mid-Ankle |
| Compression Level | High / Graduated | Moderate | Moderate |
| Weight-Bearing | Full or Partial | Full or Partial | Full or Partial |
Troubleshooting Common Issues
Pressure Points
If you feel a sharp pain over a bony prominence (like the ankle bone), you may have the air cells inflated too tightly, or the boot may be misaligned. Deflate the boot, reposition your heel, and re-inflate slowly. If the pain persists, you may need to add a small piece of "moleskin" or extra padding, but consult your doctor first to ensure this doesn't create a new pressure point.
The Boot is Making a Squeaking Noise
Squeaking is often caused by the friction between the foam liner and the plastic shell. You can sometimes resolve this by removing the liner and applying a very small amount of unscented talcum powder to the inside of the plastic shell before re-inserting the liner.
Swelling Increases at Night
It is normal for swelling to fluctuate. Many patients find that their boot feels tighter in the evening. This is why the adjustable pneumatic system is beneficial; you can let a small amount of air out in the evening and pump it back up in the morning when swelling has subsided.
When to Contact Your Healthcare Provider
While the Aircast is a safe and effective tool, certain symptoms require immediate medical attention. Refer to the Mayo Clinic guidelines on fracture recovery or your local orthopedic surgeon if you experience the following:
- Numbness or Tingling: If "pins and needles" do not go away after loosening the straps and deflating the air cells.
- Discoloration: If your toes appear blue, purple, or extremely pale.
- Calf Pain: Severe pain, redness, or warmth in the calf muscle (not the injury site) can be a sign of a Deep Vein Thrombosis (DVT), a serious blood clot.
- Skin Ulcers: Any open sores or raw areas developing under the boot.
- Increased Instability: If the boot feels broken or the air cells fail to hold pressure.
Frequently Asked Questions
Can I sleep in my Aircast walking boot?
Most orthopedic protocols require you to sleep in the boot during the initial phases of healing to prevent accidental movement or "foot drop." However, you should usually loosen the straps slightly and deflate the air cells for comfort and circulation while sleeping. Always follow the specific instructions provided by your surgeon.
Can I drive while wearing an Aircast?
If the boot is on your right foot, it is generally considered unsafe and often illegal to drive, as the boot's bulk prevents quick movement between the gas and brake pedals. If the boot is on your left foot and you drive an automatic vehicle, you may be able to drive, but you should check with your insurance provider and doctor first.
How tight should the air cells be?
The air cells should provide "snug support." You should feel the boot making contact with your entire lower leg, but it should never feel like it is "throbbing." The goal is to eliminate any "wobble" inside the boot shell.
Do I need to wear the boot 24/7?
In the first few weeks following a fracture or surgery, constant use is typical. As healing progresses, your doctor may allow "active range of motion" exercises where you remove the boot for 10-15 minutes a day while seated. Never walk without the boot unless explicitly cleared by your healthcare provider.
How long do I need to wear the Aircast?
The duration depends on the severity of the injury. Most stable fractures require 6 to 8 weeks in a boot. Ligamentous injuries or severe sprains may require 3 to 4 weeks. Your progress will be monitored via X-rays to determine when bone "callus" has formed sufficiently to transition back to a standard shoe.
Practical Recommendation
To ensure the best outcome for your recovery in 2026, treat your Aircast as a precision medical instrument. Verify your weight-bearing status at every follow-up appointment. If you are permitted to transition out of the boot, do so gradually—wearing it for part of the day and a supportive sneaker for the other part—to allow your muscles and tendons to readapt to the lack of rigid support.