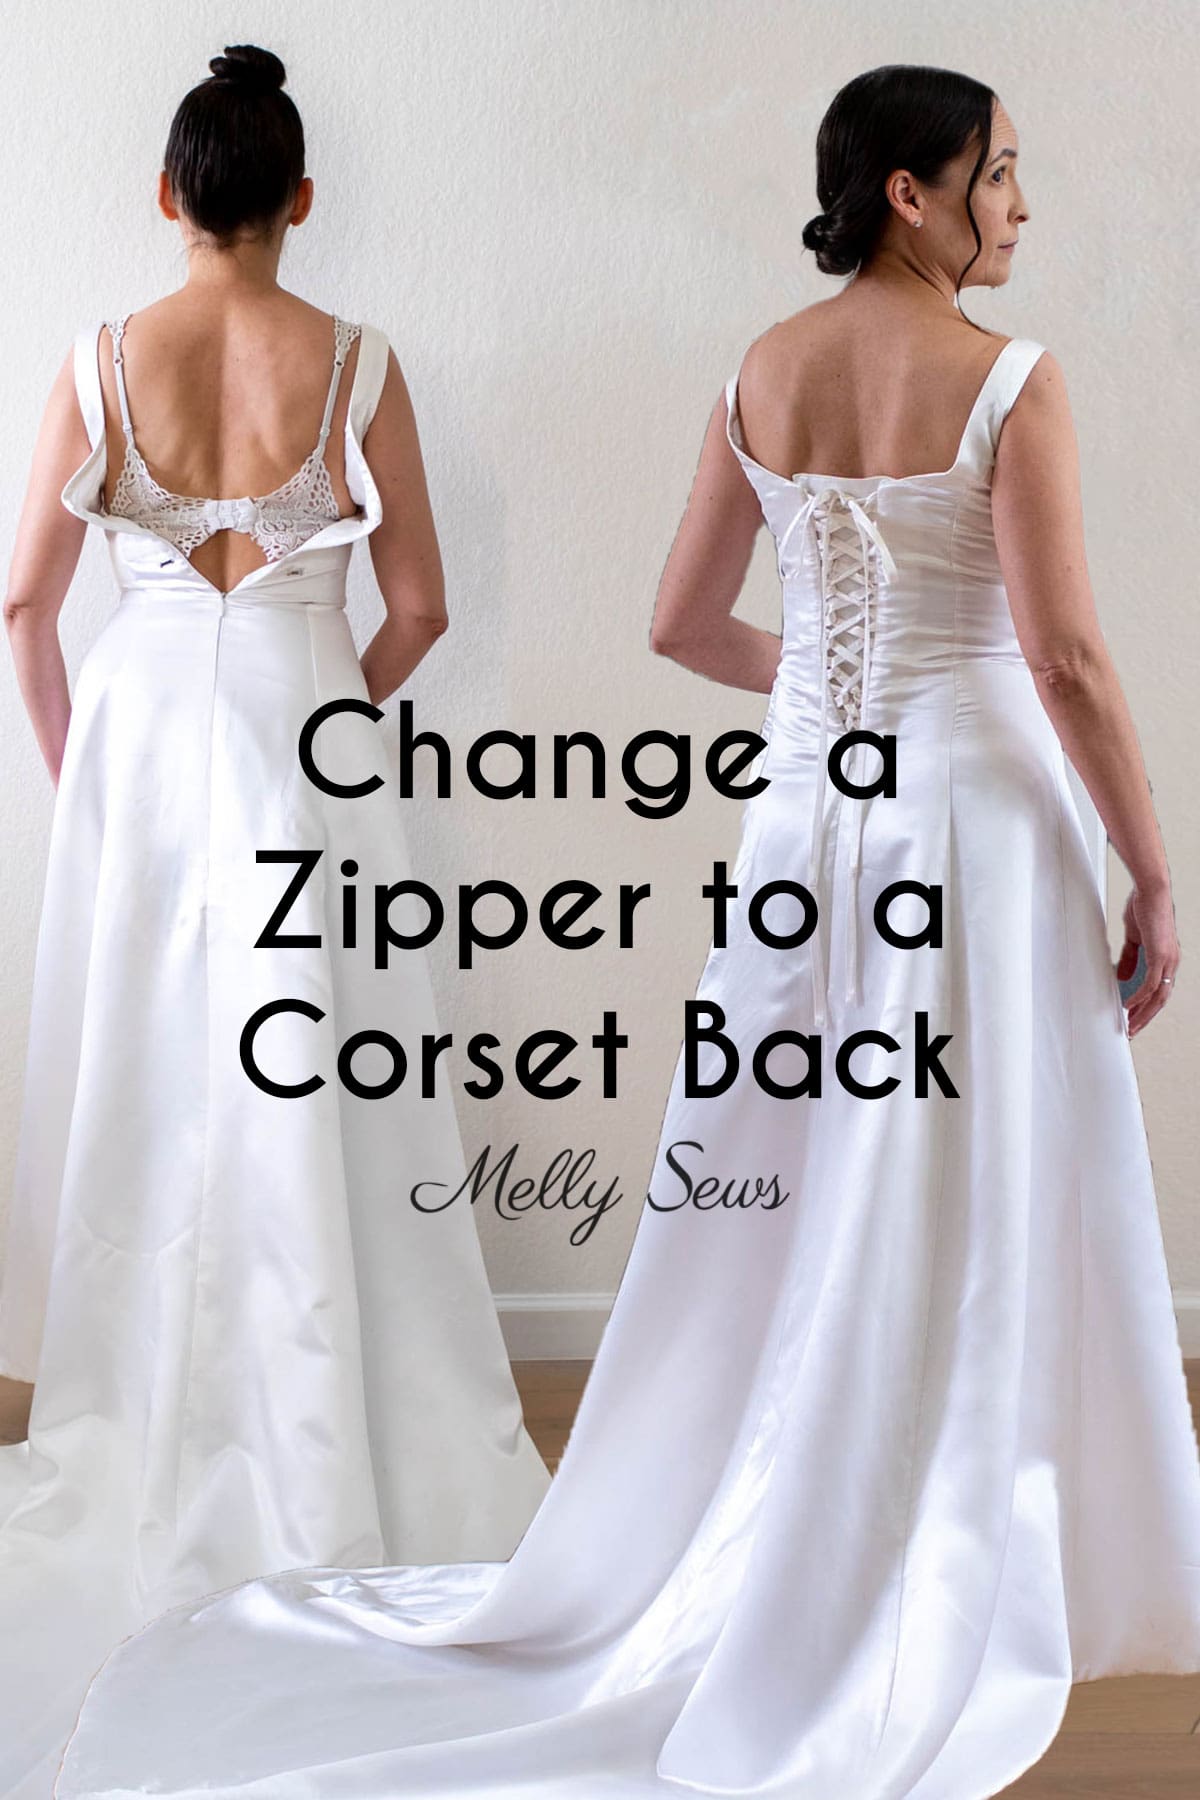
Altered wedding dresses before and after photos represent more than just a change in size; they showcase the technical evolution of a garment into a custom-fit masterpiece. Through structural resizing, hem adjustments, and aesthetic redesigns, professional tailoring ensures a gown complements the bride’s unique proportions while maintaining the integrity of the original design.
Understanding the "Before" State: Why Standard Sizing Requires Alteration
When a bride first receives her wedding dress, the "before" state is often characterized by a lack of definition. Most bridal manufacturers produce gowns based on standardized size charts that prioritize the largest measurement of the bust, waist, or hips. Consequently, a dress that fits the hips perfectly may be several inches too large in the bodice. This discrepancy is the primary reason why nearly 95% of wedding dresses require some level of professional tailoring.
In 2026, bridal fashion continues to embrace complex internal structures, such as built-in corsetry and illusion netting. These elements, while beautiful, make the "before" fit feel stiff or "boxy" if not molded to the wearer’s specific ribcage and torso length. The initial fitting serves as the diagnostic phase where a seamstress identifies where the fabric bunches, where the support is lacking, and how the gown’s grainline interacts with the bride’s stance.
Common Structural Transformations: The "After" Effect
The transformation seen in "after" photos is the result of meticulous technical work that often happens from the inside out. Tailors do not simply "take in" a dress; they deconstruct and rebuild it to suit a specific anatomy.
Bodice and Side Seam Adjustments
The most dramatic "before and after" changes occur in the bodice. A well-altered bodice provides enough support that the bride should feel secure without constantly tugging at the neckline. To achieve this, tailors often remove the zipper or buttons, take in the side seams or the center back, and reattach the fasteners. If the dress has intricate lace or beadwork, these elements must be painstakingly removed by hand and reapplied after the seam is closed to ensure the pattern remains continuous and "invisible."
Hemming and Length Management
A standard "before" dress is typically designed for a woman who is 5’9” or taller wearing heels. For the majority of brides, the "after" version requires a significant hem. Hemming a wedding dress is rarely a straight cut. Depending on the fabric—whether it is horsehair braid, scalloped lace, or multi-layered tulle—the tailor may need to shorten the dress from the waist or remove the lace trim from the bottom, cut the base fabric, and then re-stitch the trim at the new height.
Bustle Integration
The bustle is perhaps the most functional "after" feature of a wedding gown. Because most dresses come with a train intended for the ceremony, a bustle is necessary to lift the fabric off the floor for the reception. The "before" state has a long, trailing train; the "after" state features a series of buttons, hooks, or ties that transform the gown into a floor-length dress, allowing for ease of movement and dancing.
Aesthetic Redesigns and Customizations
Modern brides in 2026 are increasingly seeking customizations that move beyond mere fitting. These alterations change the very DNA of the dress, creating a "before and after" that looks like two different garments.
- Neckline Modifications: Converting a high-neck gown into a plunging V-neck or changing a strapless sweetheart into a square neckline.
- Sleeve Additions: Incorporating detachable off-the-shoulder "swags," full-length bishop sleeves, or delicate cap sleeves to an originally sleeveless design.
- Back Lowering: Deepening the back of a gown to create a dramatic "low-back" look, which often requires adding internal "boning" (stiffening rods) to the sides to maintain the dress's structural integrity.
- Embellishment Migration: Moving lace appliqués from the skirt to the bodice to create a more cohesive flow or to hide specific seams created during the resizing process.
The Technical Reality: Fabric and Complexity
The success of a wedding dress alteration depends heavily on the textile. Different fabrics react differently to the needle and the steam iron, influencing the final "after" appearance.
| Fabric Type | Alteration Difficulty | Key Technical Considerations |
|---|---|---|
| Crepe | Moderate | Shows every stitch; requires extremely fine needles and precise tension to avoid puckering. |
| Tulle/Netting | High | Usually raw-edged; shortening requires cutting multiple layers perfectly even to prevent a "choppy" look. |
| Satin/Mikado | Low-Moderate | Holds its shape well but can show permanent "needle holes" if a seam is ripped out and moved. |
| Lace Appliqué | Very High | Requires hand-stitching; lace must be "fussy cut" and layered to hide the structural seams underneath. |
| Sequins/Beading | Very High | Beads must be removed from the seam allowance before sewing to prevent needle breakage, then replaced by hand. |
The Timeline for 2026 Bridal Alterations
Achieving the perfect "after" result is a marathon, not a sprint. In the 2026 bridal market, most reputable seamstresses require a minimum of three to four months for a standard alteration package. This timeline allows for multiple fittings, which are essential for verifying the fit as the dress changes.
- The First Fitting (8-12 Weeks Out): The "pinning" session. The tailor identifies the necessary changes and pins the hem, the bustle, and the bodice. The bride should bring her actual wedding shoes and undergarments to this appointment, as they fundamentally change her posture and height.
- The Second Fitting (4-6 Weeks Out): The "structural check." The major seams have been sewn, but the hem might still be basted (temporarily stitched). This is the time to ensure the bride can breathe, sit, and move comfortably.
- The Final Fitting (2-3 Weeks Out): The "polishing." The bustle is tested, the lace is finalized, and the dress is steamed. This is the last chance for minor adjustments before the wedding day.
Budgeting for Alterations in 2026
The cost of transforming a dress is often a surprise to many brides. Because bridal tailoring is highly specialized handwork, costs in 2026 typically range from $500 to $1,200 for standard fit adjustments (hem, side seams, and bustle). However, if the "after" vision involves major reconstructions—such as changing a silhouette from a ballgown to a mermaid or adding extensive beadwork—costs can exceed $2,000.
It is vital to view these costs as an investment in the garment’s performance. A $3,000 dress that fits poorly will look less impressive than a $1,000 dress that has been perfectly tailored to the wearer's body.
Working with Vintage and Second-Hand Gowns
One of the most rewarding "altered wedding dresses before and after" scenarios involves the restoration of heirloom or pre-owned gowns. These projects often require a two-step process: professional cleaning/restoration followed by modernization.
When working with vintage fabrics (such as 1980s silk or 1950s lace), a tailor must assess the "tensile strength" of the fibers. Old fabric can become brittle, meaning it may not withstand the stress of tight tailoring. In these cases, the "after" result often includes the addition of modern linings or "interfacings" to reinforce the vintage material while updating the silhouette to a 2026 aesthetic.
Common Pitfalls to Avoid
To ensure your "after" photo is a success, avoid these common mistakes during the alteration process:
- Buying a Dress Too Small: It is significantly easier (and cheaper) to take a dress in than it is to let one out. Most dresses only have about an inch of "seam allowance" that can be used to make a dress larger. If a dress is two sizes too small, the tailor may need to add "gussets" (extra fabric panels), which can disrupt the original design.
- Fluctuating Weight: While many brides plan to lose weight before the wedding, it is best to tailor the dress to the body you have during the fittings. Extreme weight changes after the second fitting can lead to rushed, expensive, and less-than-perfect last-minute adjustments.
- Bringing Too Many Opinions: Fittings are technical appointments. Bringing a large group of people can lead to conflicting advice that distracts the tailor and the bride from the primary goal: a perfect fit. Limit your "entourage" to one or two trusted individuals.
Frequently Asked Questions
Can you change the silhouette of a wedding dress?
Yes, but it is one of the most complex alterations. Changing a "A-line" skirt into a "fitted" or "trumpet" style involves tapering the side seams through the hips and thighs and potentially altering the internal crinoline. It requires a deep understanding of garment balance to ensure the dress doesn't pull or twist when the bride walks.
How many sizes can a wedding dress be taken in?
Generally, a dress can be taken in up to two sizes without losing its proportions. Beyond two sizes, the placement of the cups, the side seams, and the apex of the bust may shift so far toward the center that the dress needs to be completely deconstructed and recut, which is significantly more expensive.
Should I get my dress cleaned before or after alterations?
If the dress is brand new, cleaning is not necessary until after the final fitting. However, if the "before" state is a sample sale gown or a vintage piece, it must be professionally cleaned before alterations begin. Dirt and oils can become permanently set if they are pressed with a tailor's iron during the fitting process.
Is it possible to add a corset back to a zipper dress?
Yes. This is a common solution for dresses that are slightly too small or for brides who want more adjustability in their fit. The tailor removes the zipper and replaces it with a series of loops and a modesty panel, allowing the bodice to be laced to the perfect tension.
Why is hemming a lace dress so expensive?
Lace hems often involve "scalloped" edges. A tailor cannot simply cut the bottom; they must carefully unpick the lace border from the entire circumference of the skirt, shorten the underlying fabric, and then hand-sew the lace border back onto the new hemline. This process can take several hours of meticulous handwork.
Moving Forward with Your Alterations
The journey from the "before" dress to the "after" masterpiece is a collaborative process between the bride and a skilled artisan. To achieve the best results, start your search for a specialist early—ideally as soon as you purchase your gown. Look for a tailor who specializes specifically in bridal wear, as the construction techniques for gowns differ significantly from standard tailoring.
Always communicate your concerns clearly during fittings. If a seam feels itchy or a strap feels loose, speak up immediately. The goal of the "after" state is not just a beautiful photo, but a gown that allows you to move with confidence and comfort throughout your wedding day in 2026.