Adding an Apple ID to a MacBook links your personal account to macOS, enabling synchronization for iCloud services, access to the App Store, iMessage, FaceTime, and continuity features across your Apple devices. You can add an Apple ID during the initial setup assistant on a new or freshly erased Mac, or at any time afterward through the System Settings menu.
Understanding the Role of an Apple ID on macOS
An Apple ID serves as the primary master key for the Apple ecosystem. On a MacBook, signing in with an Apple ID bridges local hardware operations with Apple’s cloud architecture. It handles authentication, identity verification, authorization for purchasing applications and media, and security protocols such as two-factor authentication.
When you add an Apple ID to your MacBook, you do not just log into a single application. Instead, you establish a centralized account that interacts with several core subsystems of the macOS operating system. Understanding these subsystems helps clarify why linking your account requires specific system permissions and security verifications.
The ecosystem integration relies on a unified token system. Once authenticated, macOS securely stores your credentials in the system Keychain, allowing background services to fetch data without constantly prompting you for your password. This architecture powers seamless interactions between your MacBook, iPhone, iPad, and Apple Watch.
Prerequisites Before You Begin
Before you attempt to add an Apple ID to your MacBook, ensure you have the necessary information and environment ready. Proper preparation prevents interruptions during the authentication workflow.
- An Active Apple ID: You must have a valid Apple ID username (typically an email address) and password. If you do not have one, you can create a new account during the setup process or via the official Apple ID account page.
- Active Internet Connection: Your MacBook must be connected to a reliable Wi-Fi or Ethernet network to communicate with Apple's authentication and iCloud servers.
- Two-Factor Authentication Device: Because Apple enforces strict security measures, you will likely need access to a trusted phone number or another trusted Apple device to receive a six-digit verification code.
- macOS Up-to-Date: Ensure your system is running a supported version of macOS. While Apple IDs function across legacy and modern versions, user interface pathways differ between older versions (using System Preferences) and modern versions (using System Settings).
Step-by-Step Guide: Adding an Apple ID via System Settings
For users who skipped the initial setup assistant or need to add a secondary account for specific services, macOS provides a direct pathway through System Settings. Follow these detailed steps to add your Apple ID to a modern MacBook running current versions of macOS.
- Open System Settings: Click the Apple menu icon ($\apple$) in the top-left corner of your screen and select System Settings from the dropdown menu.
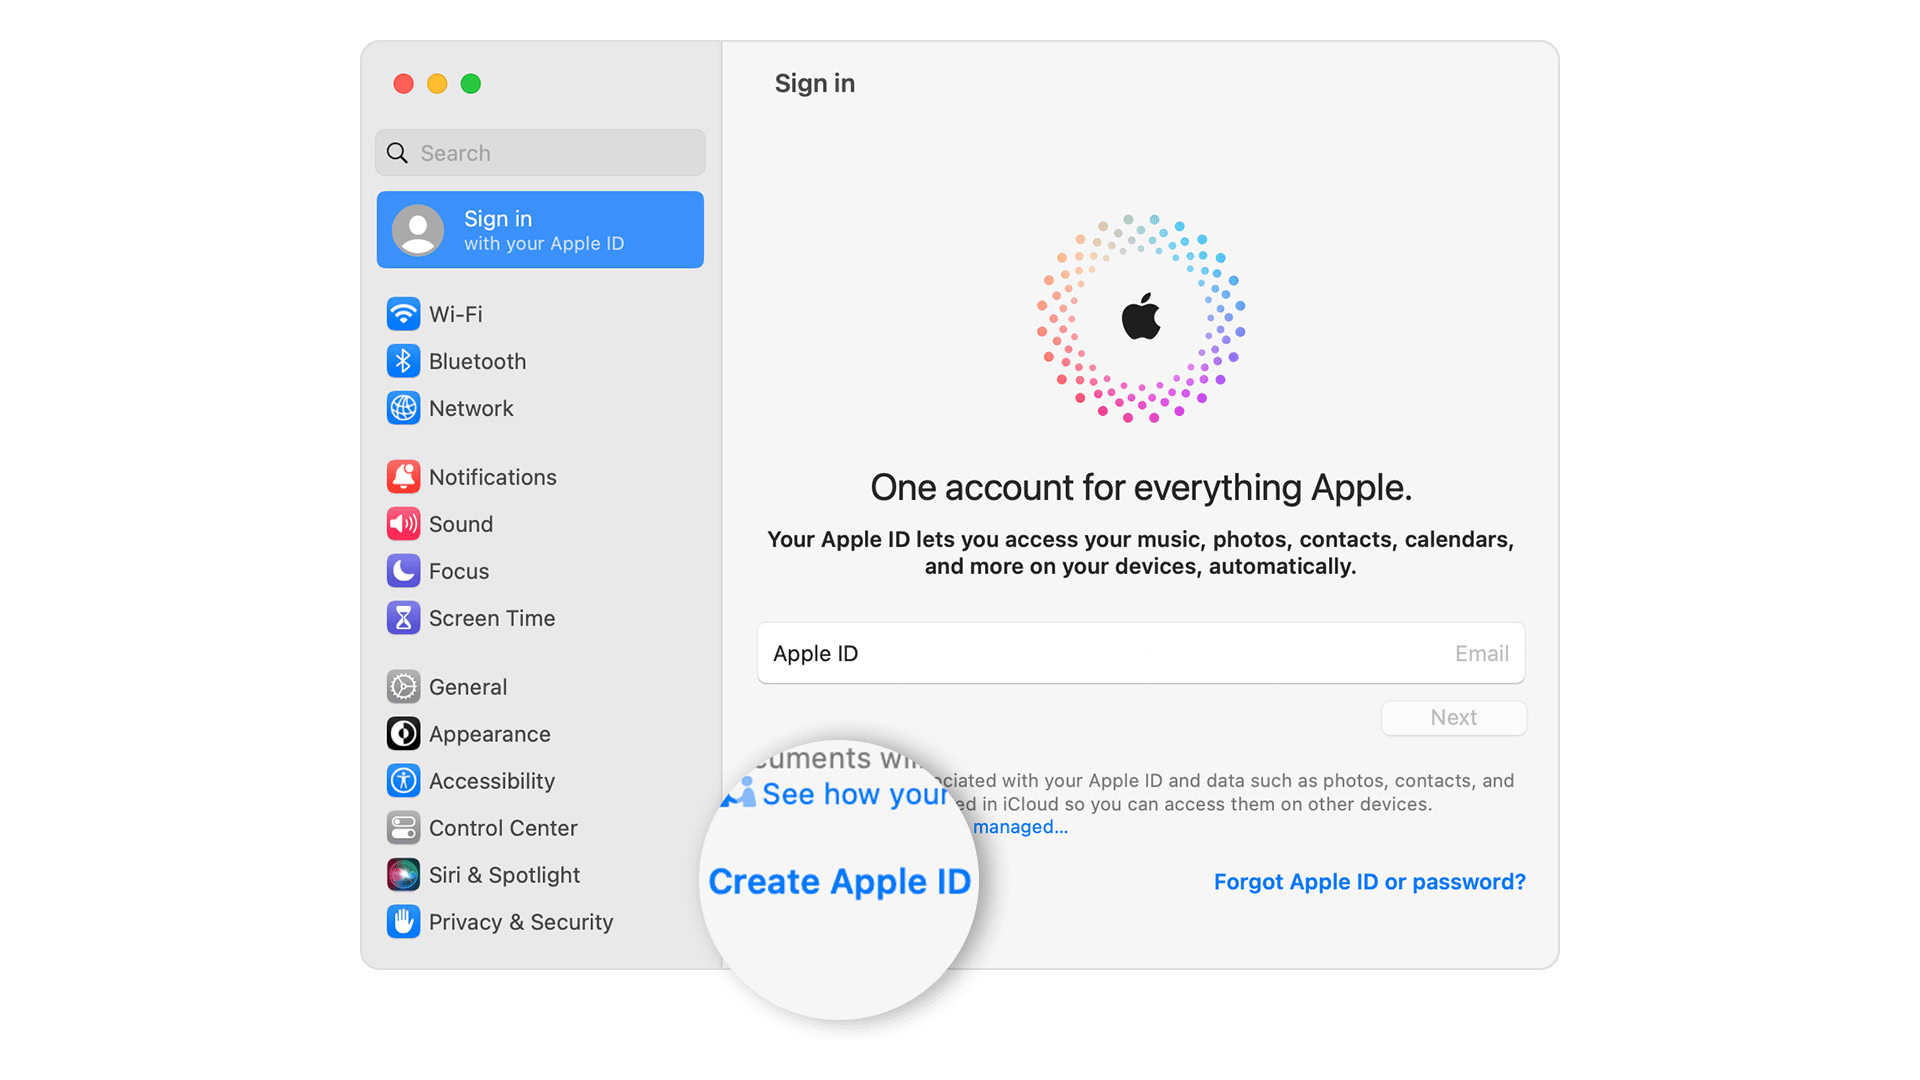
- Locate the Sign-In Prompt: At the very top of the sidebar on the left side of the window, click the option that says Sign in with your Apple ID. (In older versions of macOS, this is labeled Apple ID within System Preferences).
- Enter Your Credentials: A dialog box will appear prompting you for your Apple ID email address or phone number. Type your credentials and click Continue, then enter your account password when prompted.
- Complete Two-Factor Authentication: If prompted, enter the six-digit verification code sent to your trusted Apple device or phone number.
- Merge Data (Optional): macOS will ask if you want to merge or keep local data on your Mac separate from iCloud (such as Safari bookmarks, contacts, and calendars). Choose your preferred option to proceed.
- Authorize Find My Mac: The system will prompt you to allow Find My Mac to use your location. Enabling this feature is strongly recommended for security and device recovery purposes.
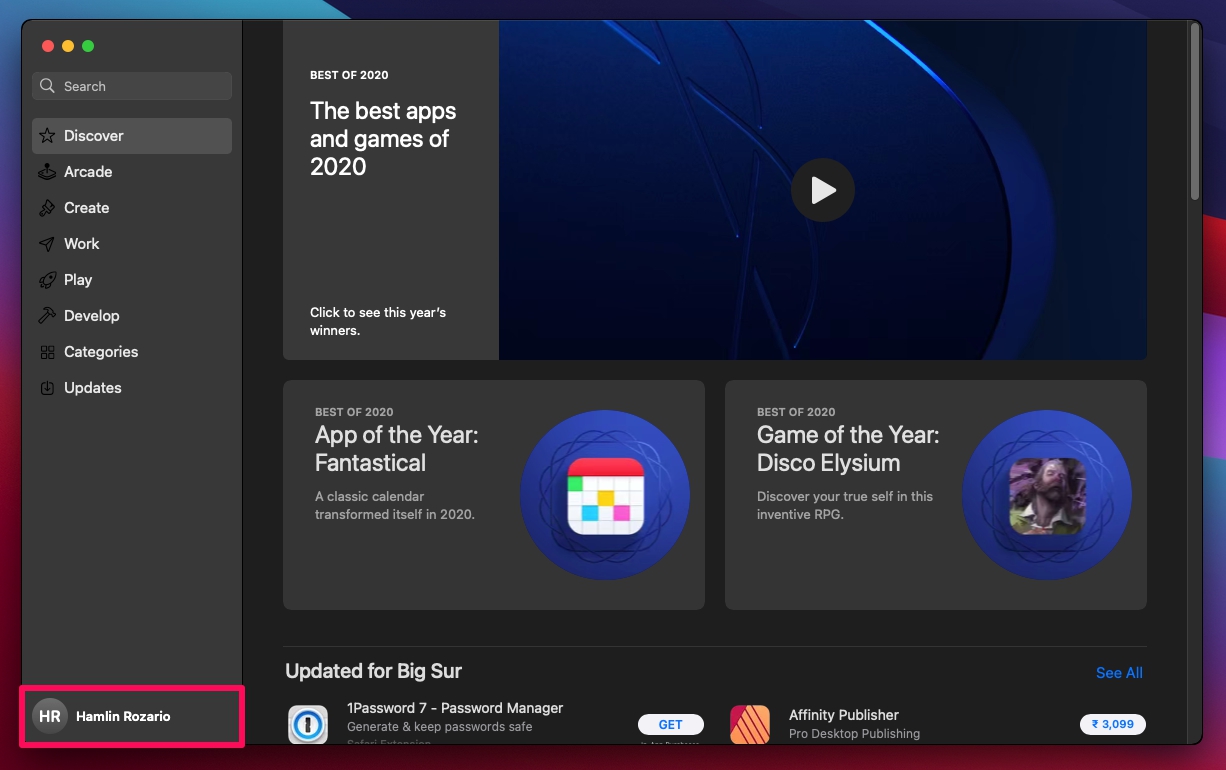
Once these steps are complete, your name and profile picture will appear at the top of the System Settings sidebar, confirming that your Apple ID is successfully linked to the MacBook.
Configuring iCloud Features and Data Synchronization
After adding your Apple ID, you must choose which services and data types you wish to synchronize across your devices. Unchecked services remain stored exclusively on your local drive or stay unlinked from iCloud.
To manage these settings, navigate back to System Settings, click on your Apple ID name in the sidebar, and select iCloud. Here, you will see two main categories: Apps Using iCloud and iCloud+.
- Apps Using iCloud: Toggle individual switches for apps like Notes, Reminders, Photos, Passwords, and Safari to determine what syncs with cloud storage.
- iCloud Drive: Enables file storage synchronization across your desktop and documents folder, allowing you to access local MacBook files from an iPhone or iPad.
- Photos: Enables iCloud Photos to back up your camera library and optimize storage on your local MacBook hard drive.
| Service | Primary Function | Storage Impact |
|---|---|---|
| iCloud Drive | Syncs Desktop and Documents folders across devices. | Counts against total iCloud storage quota. |
| iCloud Photos | Stores full-resolution photos and videos in the cloud. | High impact; may require paid storage upgrade. |
| Keychain | Secures and syncs passwords, passkeys, and credit cards. | Minimal impact; highly encrypted. |
| Find My | Tracks device location and enables remote lock/wipe. | Minimal impact; essential for security. |
Alternative Method: Adding an Apple ID During Initial Setup
When unboxing a new MacBook or after performing a clean installation of macOS, the Setup Assistant automatically prompts you to sign in with an Apple ID. This is the most efficient way to provision a new machine.
During the Sign in with your Apple ID screen of the setup assistant:
- Enter your Apple ID and password.
- Complete the multi-factor authentication prompt.
- Review and accept the terms and conditions for iCloud and macOS services.
- Enable or disable FileVault disk encryption when prompted (strongly recommended for security).
- Enable Location Services and Find My Mac.
Completing these steps during initial setup automatically configures your primary user account with full iCloud synchronization, App Store access, and continuity features without requiring manual post-setup adjustments.
Managing App Store, Media, and Purchases
Your primary Apple ID in System Settings also governs your downloads and purchases in the App Store, Apple Music, and Apple TV applications. However, macOS allows you to separate your iCloud account from your Media & Purchases account if your workflow requires multiple identities.
To manage your Media & Purchases account:
- Open System Settings.
- Click your Apple ID name in the sidebar.
- Scroll down and look for Media & Purchases.
- Click Manage to sign out or switch the specific account used strictly for buying apps, subscriptions, and digital media.
Keeping a unified account minimizes administrative complexity, but separating media accounts is useful for households sharing a single computer or users managing regional App Store storefront restrictions.
Common Mistakes and Troubleshooting
When adding an Apple ID to a MacBook, users occasionally encounter friction due to network blocks, incorrect credentials, or software mismatches. Review these common issues to resolve roadblocks quickly.
- Incorrect Verification Codes: Ensure your trusted device has a stable internet connection to receive push notifications for two-factor codes. If push notifications fail, request a verification code via SMS or phone call through the prompt interface.
- Apple ID Locked for Security: If you enter an incorrect password too many times, Apple temporarily locks the account to prevent unauthorized access. Unlock or reset your password using the official Apple Account recovery portal.
- Network or Firewall Restrictions: Corporate or public Wi-Fi networks occasionally block ports required for Apple’s authentication servers. Switching to a personal mobile hotspot or home network often resolves connection timeouts.
- Software Version Discrepancies: Trying to restore a backup from a newer version of macOS onto an older MacBook can cause Apple ID sync errors. Ensure your operating system is fully updated via System Settings > General > Software Update.
Next Actions and Security Best Practices
Once your Apple ID is successfully added to your MacBook, take proactive steps to secure your account and hardware.
- Enable Two-Factor Authentication: If you have not already done so, secure your Apple ID with robust multi-factor authentication via an trusted device or hardware security key.
- Review Trusted Devices: Periodically check your account settings on an Apple device to remove old, sold, or lost hardware that no longer belongs to you.
- Set Up Recovery Contacts: Add a trusted family member or close friend as an account recovery contact to ensure you can regain access if you ever lose your password.