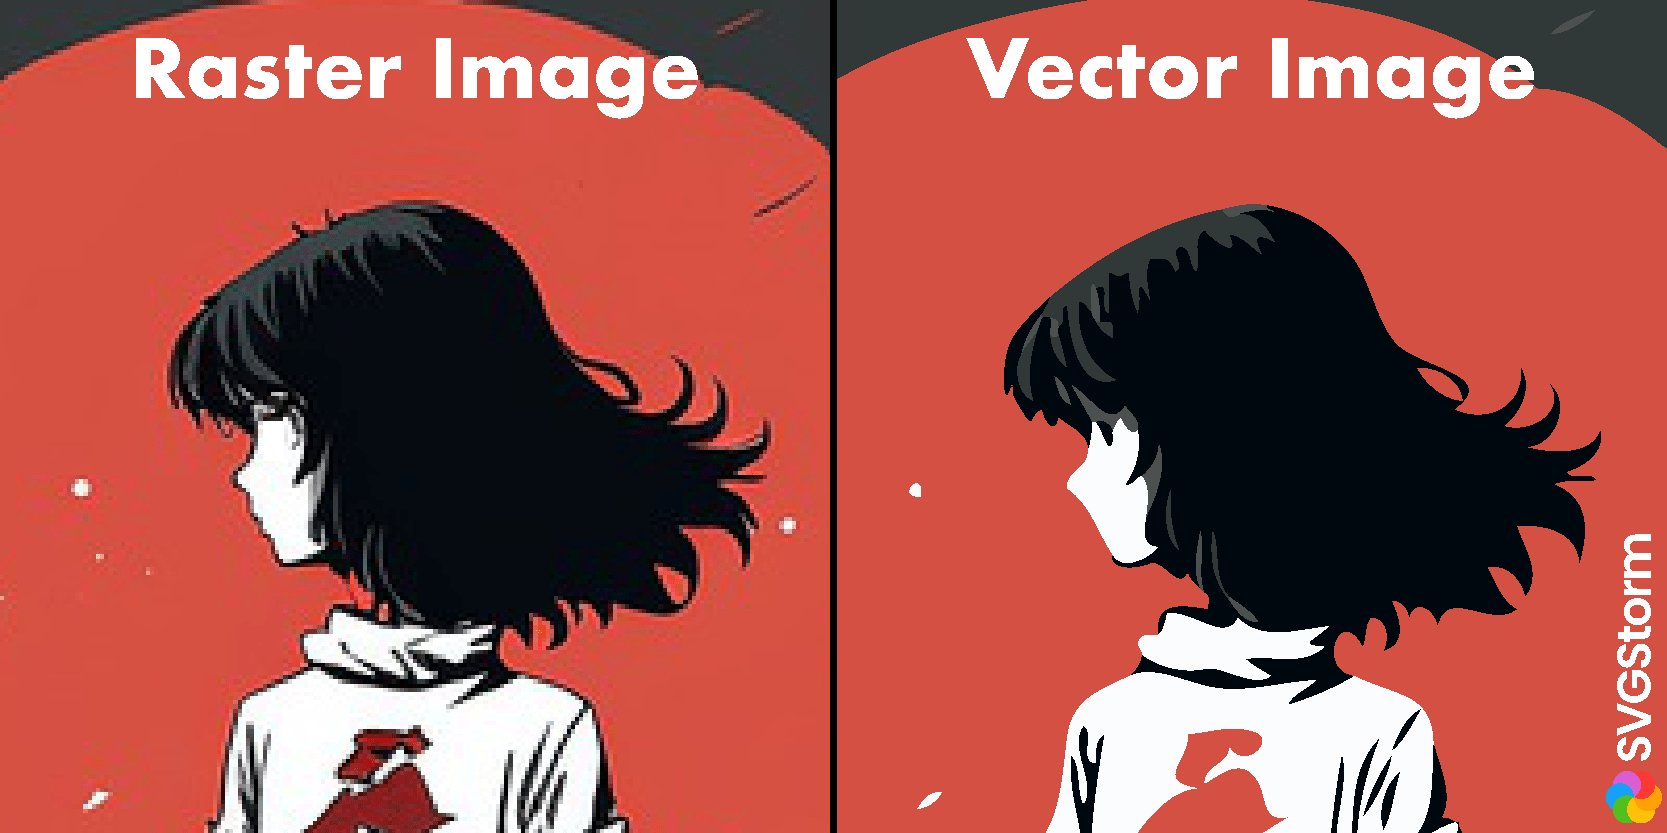
To convert a raster image to a vector in Adobe Illustrator, select your image and open the Image Trace panel (Window > Image Trace). Choose a preset or adjust settings like Threshold and Paths, then click Expand in the Properties panel or Object menu to finalize the paths into editable anchor points.
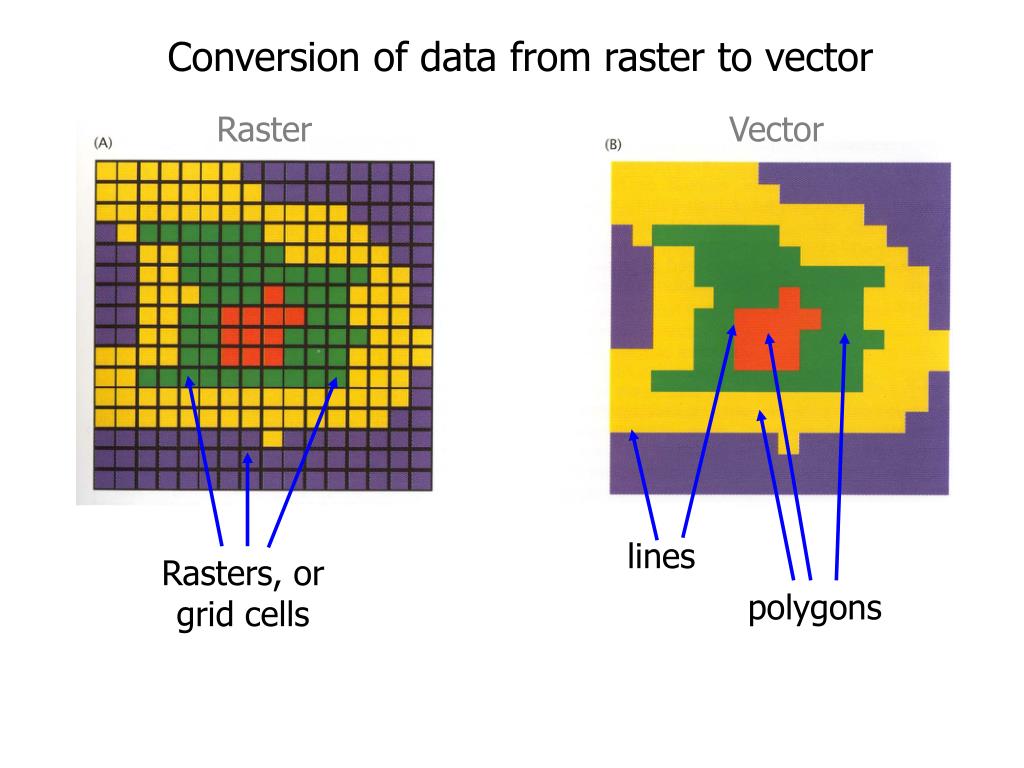
Adobe Illustrator remains the industry standard for creating scalable graphics. While raster images (like JPGs or PNGs) rely on a fixed grid of pixels that lose quality when enlarged, vector graphics use mathematical paths to define shapes, allowing for infinite scaling without loss of resolution. In 2026, Illustrator’s Image Trace engine remains the primary tool for this conversion, utilizing refined algorithms to interpret pixel data into clean, manageable paths.
Understanding the Difference Between Raster and Vector
Before initiating a conversion, it is essential to understand the technical architecture of the files involved. Raster images, such as photographs, are composed of a specific number of pixels. If you zoom in or enlarge these files, the pixels become visible, resulting in "pixelation" or a blurry appearance. This makes raster files unsuitable for large-scale printing or branding that requires versatility.
In contrast, vector graphics are defined by anchor points and paths. These paths are calculated mathematically based on their coordinates and curvature. Because the computer recalculates these lines every time the image is resized, a vector logo can be scaled from the size of a postage stamp to a highway billboard with no loss in clarity. Converting a raster image to a vector—often called "vectorization"—is the process of translating those pixel clusters into these mathematical instructions.
Prerequisites for Successful Conversion
The quality of your output depends heavily on the source material. While Adobe Illustrator 2026 features advanced AI-assisted tracing, the following factors will determine the success of your conversion:
- Resolution: While vectors are resolution-independent, the source raster should ideally be at least 150-300 DPI. If the image is too small (e.g., a 100px thumbnail), Illustrator will struggle to distinguish between a sharp corner and a curve, leading to "muddy" results.
- Contrast: Images with high contrast between the subject and the background trace more effectively. If a logo has a soft drop shadow or a complex gradient, the Image Trace tool may create thousands of tiny, unnecessary shapes.
- Color Depth: Simple logos with limited palettes (1–5 colors) are much easier to vectorize than complex photographs. If you are tracing a photo, be prepared for a significantly higher anchor point count, which can slow down software performance.
- Licensing: Ensure you have the legal right to vectorize the image. Converting a copyrighted raster into a vector does not grant ownership of the underlying design.
The Step-by-Step Guide to Using Image Trace
The Image Trace feature is a non-destructive live preview. This means you can adjust settings and see the results before committing to the final vector paths. Follow these steps to perform a standard conversion.
Step 1: Import and Place Your Image
Open a new or existing document in Adobe Illustrator. Go to File > Place, select your raster file (JPG, PNG, TIFF, or PSD), and click on the artboard to drop the image. Ensure the image is selected; you will see a blue "X" across the bounding box if it is not yet embedded, or a simple bounding box if it is.
Step 2: Open the Image Trace Panel
While you can access basic tracing options in the Properties panel or the Control Bar at the top of the screen, the dedicated Image Trace Panel offers the most granular control. Navigate to Window > Image Trace to open it.
Step 3: Select a Preset
Illustrator provides several presets to jump-start the process. Select the one that best matches your source:
- High Fidelity Photo: Best for complex images where you want to maintain photorealism.
- Low Fidelity Photo: Creates a more stylized, painterly look with fewer paths.
- 3, 6, or 16 Colors: Limits the palette, which is ideal for posters or simple illustrations.
- Shades of Gray: Converts the image into a monochromatic grayscale vector.
- Black and White Logo: The most common choice for vectorizing icons and text.
- Sketched Art/Silhouettes: Best for hand-drawn ink sketches or solid black shapes.
Step 4: Refine the Advanced Settings
Expand the Advanced section in the Image Trace panel to fine-tune how the engine interprets your image.
- Paths: Controls how closely the vector follows the original pixels. A higher percentage creates a more accurate but "noisier" trace. A lower percentage smooths out the lines.
- Corners: Determines how "snappy" the corners are. If you are tracing a geometric logo, increase this. For organic shapes, decrease it.
- Noise: This is a crucial filter. It tells Illustrator to ignore clusters of pixels smaller than a certain size. Increasing the noise value helps eliminate "speckles" or artifacts in the trace.
- Method: You can choose between Abutting (creates cutout shapes that fit together like a puzzle) and Overlapping (stacks shapes on top of each other). Abutting is usually preferred for professional printing to avoid "gaps" between colors.
- Ignore White: If your logo is on a white background, checking this box will prevent Illustrator from creating a white vector shape for the background, leaving you with only the subject.
Step 5: Expand and Ungroup
Until you perform this step, your image is still technically a raster being "viewed" as a vector. To edit individual points, you must "commit" the trace. With the image selected, go to Object > Image Trace > Expand or click the Expand button in the Properties panel.
Once expanded, the image becomes a group of paths. To move individual parts, right-click and select Ungroup, or use the Direct Selection Tool (A) to click on specific anchor points.
Automated Tracing vs. Manual Tracing
While Image Trace is powerful, it is not always the best tool for high-precision work. Professional designers often distinguish between automated results and manual recreations.
| Feature | Image Trace (Automated) | Pen Tool (Manual) |
|---|---|---|
| Speed | Extremely fast (seconds) | Slow (minutes to hours) |
| Precision | Approximate; may miss fine details | 100% accurate to user intent |
| Anchor Points | Often creates excessive points | Minimal, optimized points |
| Complexity | Best for photos and complex art | Best for logos and typography |
| Scalability | Good, but edges may look "wobbly" | Perfect, crisp edges at any size |
| Cleanliness | Can be messy with artifacts | Clean, professional structure |
When to Use the Pen Tool Instead
For professional logo design, manual tracing using the Pen Tool (P) or Curvature Tool (Shift + ~) is often required. Image Trace tends to create "wobbly" lines on straight edges because it is trying to follow the slight irregularities of pixels.
If you are working on a brand identity, use Image Trace only as a starting point. After expanding, use the Simplify tool (Object > Path > Simplify) to reduce the number of anchor points. This makes the file size smaller and the curves smoother. If the result is still not perfect, lock the raster image on one layer, lower its opacity, and draw over it manually on a new layer for the highest quality result.
Troubleshooting Common Conversion Issues
The Trace Looks Blurry or "Muddy"
This usually happens when the Threshold or Paths settings are too low. In the Image Trace panel, increase the Threshold to force more pixels into the "filled" areas. If the source image is extremely low-res, try using an AI upscaler before importing it into Illustrator.
There Are Too Many Tiny Shapes
If your vector looks like a mosaic of thousands of tiny paths, your Noise setting is likely too low. Increase the Noise value to tell Illustrator to ignore small pixel variations. Also, check if you have selected a "Photo" preset when a "Logo" preset would be more appropriate.
Colors Are Inaccurate
If the colors don't match the original, ensure your Mode is set to Color in the Image Trace panel and that the Palette is set to Full Tone or a high number of colors. Be aware that converting a CMYK raster to an RGB vector (or vice versa) can cause color shifts.
The Software is Lagging
Vectorizing a high-resolution photograph can create hundreds of thousands of anchor points. This consumes significant RAM. If Illustrator becomes unresponsive, try reducing the complexity of the trace by lowering the Paths percentage or decreasing the color count before clicking Expand.
Post-Conversion Cleanup
Once you have expanded your trace, the work isn't quite finished. To ensure the file is production-ready for web or print:
- Check for Stray Points: Use Select > Object > Stray Points to find and delete any single, unconnected anchor points that may have been created during the trace.
- Merge Overlapping Colors: Sometimes Image Trace creates multiple shapes of the same color. Select these and use the Pathfinder > Unite tool to merge them into a single compound path.
- Correct Gradients: Image Trace struggles with smooth gradients, often turning them into "steps" of solid color. It is usually better to delete these stepped colors and apply a fresh Gradient Fill in Illustrator.
- Simplify Paths: Run the Simplify command to remove unnecessary anchor points that don't contribute to the shape's visual integrity.
Frequently Asked Questions
Can I convert a vector back into a raster in Illustrator?
Yes. To do this, select your vector object and go to Object > Rasterize. You will be asked to choose a color mode and resolution. This is often done to apply specific pixel-based filters or to ensure compatibility with older software that doesn't support complex vector paths.
Why is "Ignore White" grayed out in my Image Trace panel?
The "Ignore White" option is only available when the Mode is set to Black and White. If you are tracing in Color or Grayscale mode, Illustrator treats white as a specific color value that it must account for. In these modes, you will have to manually delete the white background shapes after clicking Expand.
Does Image Trace work on text?
It does, but it is rarely the best option. Image Trace often rounds off the sharp corners of serifs or distorts the counters (the holes in letters like 'o' and 'p'). If you know the name of the font, it is always better to re-type the text. If you don't know the font, use a font-identification service before resorting to tracing.
Is there a limit to how large an image I can trace?
Technically, no, but practically, yes. Extremely large raster files (e.g., 10,000 pixels wide) can cause Illustrator to crash during the tracing calculation. If you have a very large file, consider downsampling it in Photoshop first; since you are converting it to a vector anyway, you only need enough detail for the trace engine to follow the edges.
Can I vectorize a photograph and keep it looking like a photo?
You can use the High Fidelity Photo preset, which creates a very dense web of vector shapes. While it looks like a photo from a distance, it is technically a vector. However, these files are often much larger in disk size than the original JPG and can be very difficult to edit. This is usually done for artistic effect rather than functional scalability.
Summary of Best Practices
To achieve the best results when converting raster to vector in Adobe Illustrator 2026, always start with the highest quality image possible. Utilize the Image Trace panel for initial automation, but do not rely on it for final, high-stakes branding work without manual refinement. By adjusting the Noise and Path settings, you can eliminate artifacts and create cleaner lines. Always remember to Expand your trace to turn it into editable geometry, and use the Simplify tool to keep your anchor point count efficient.