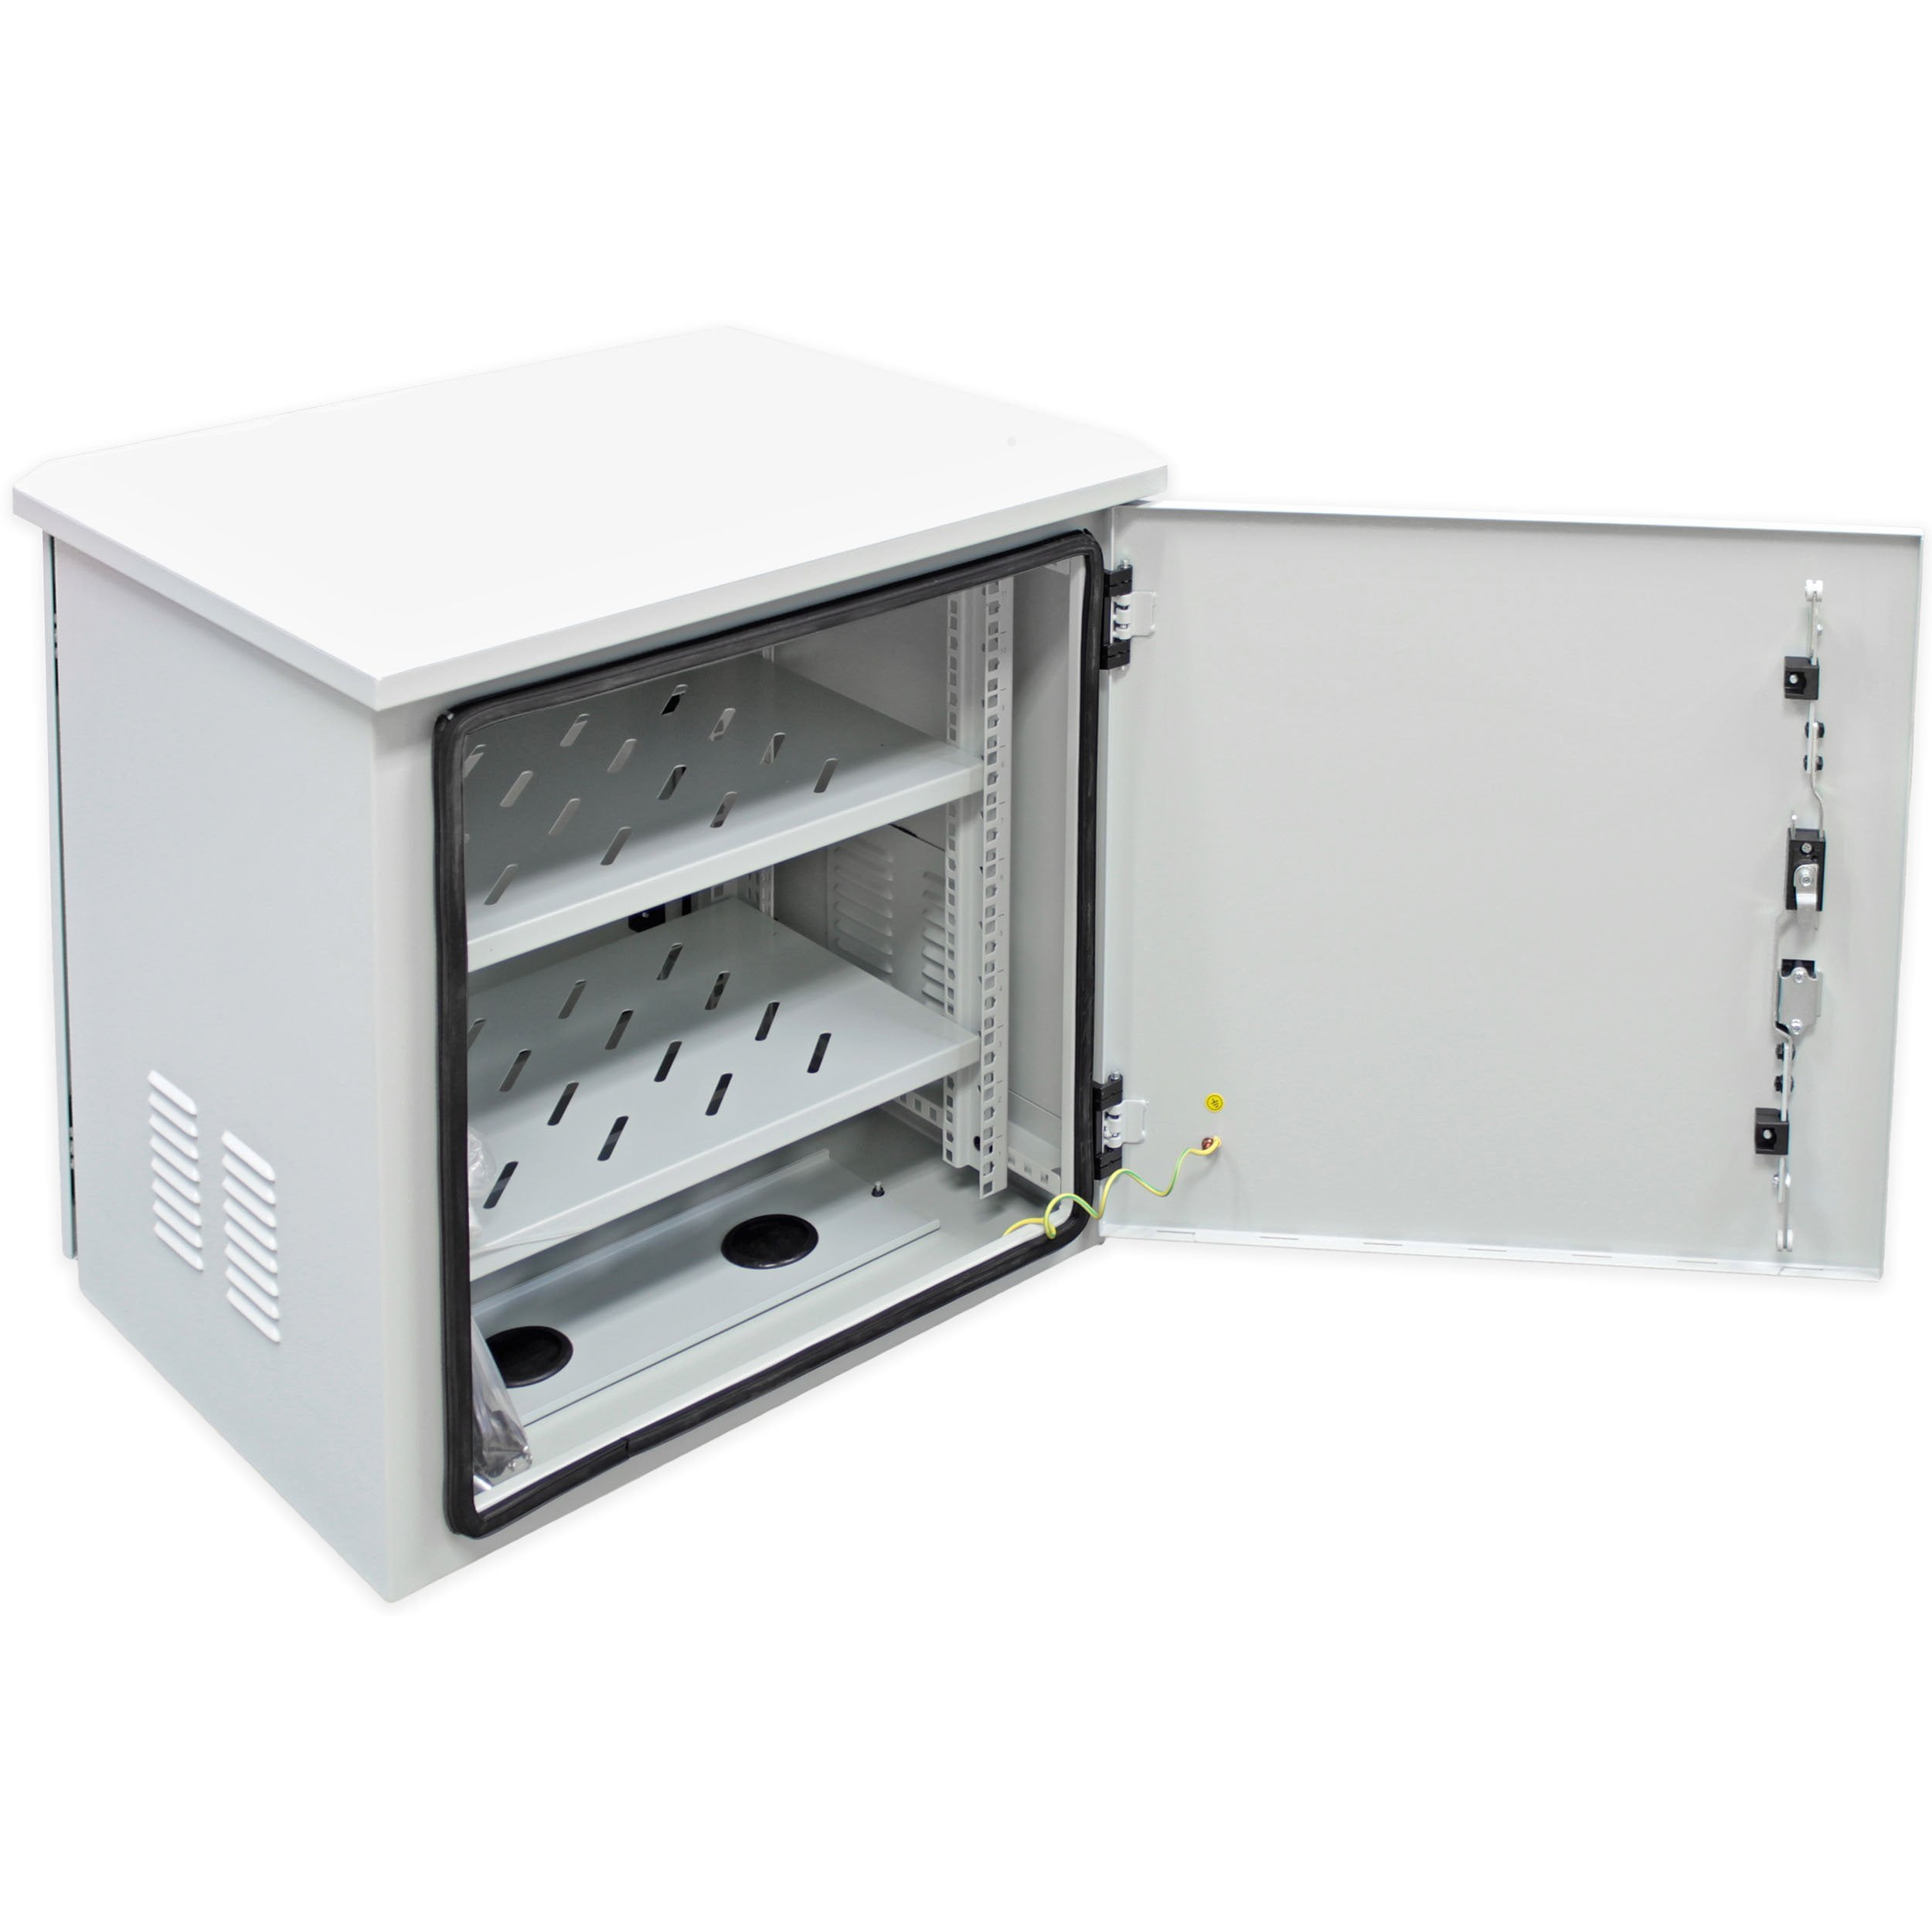
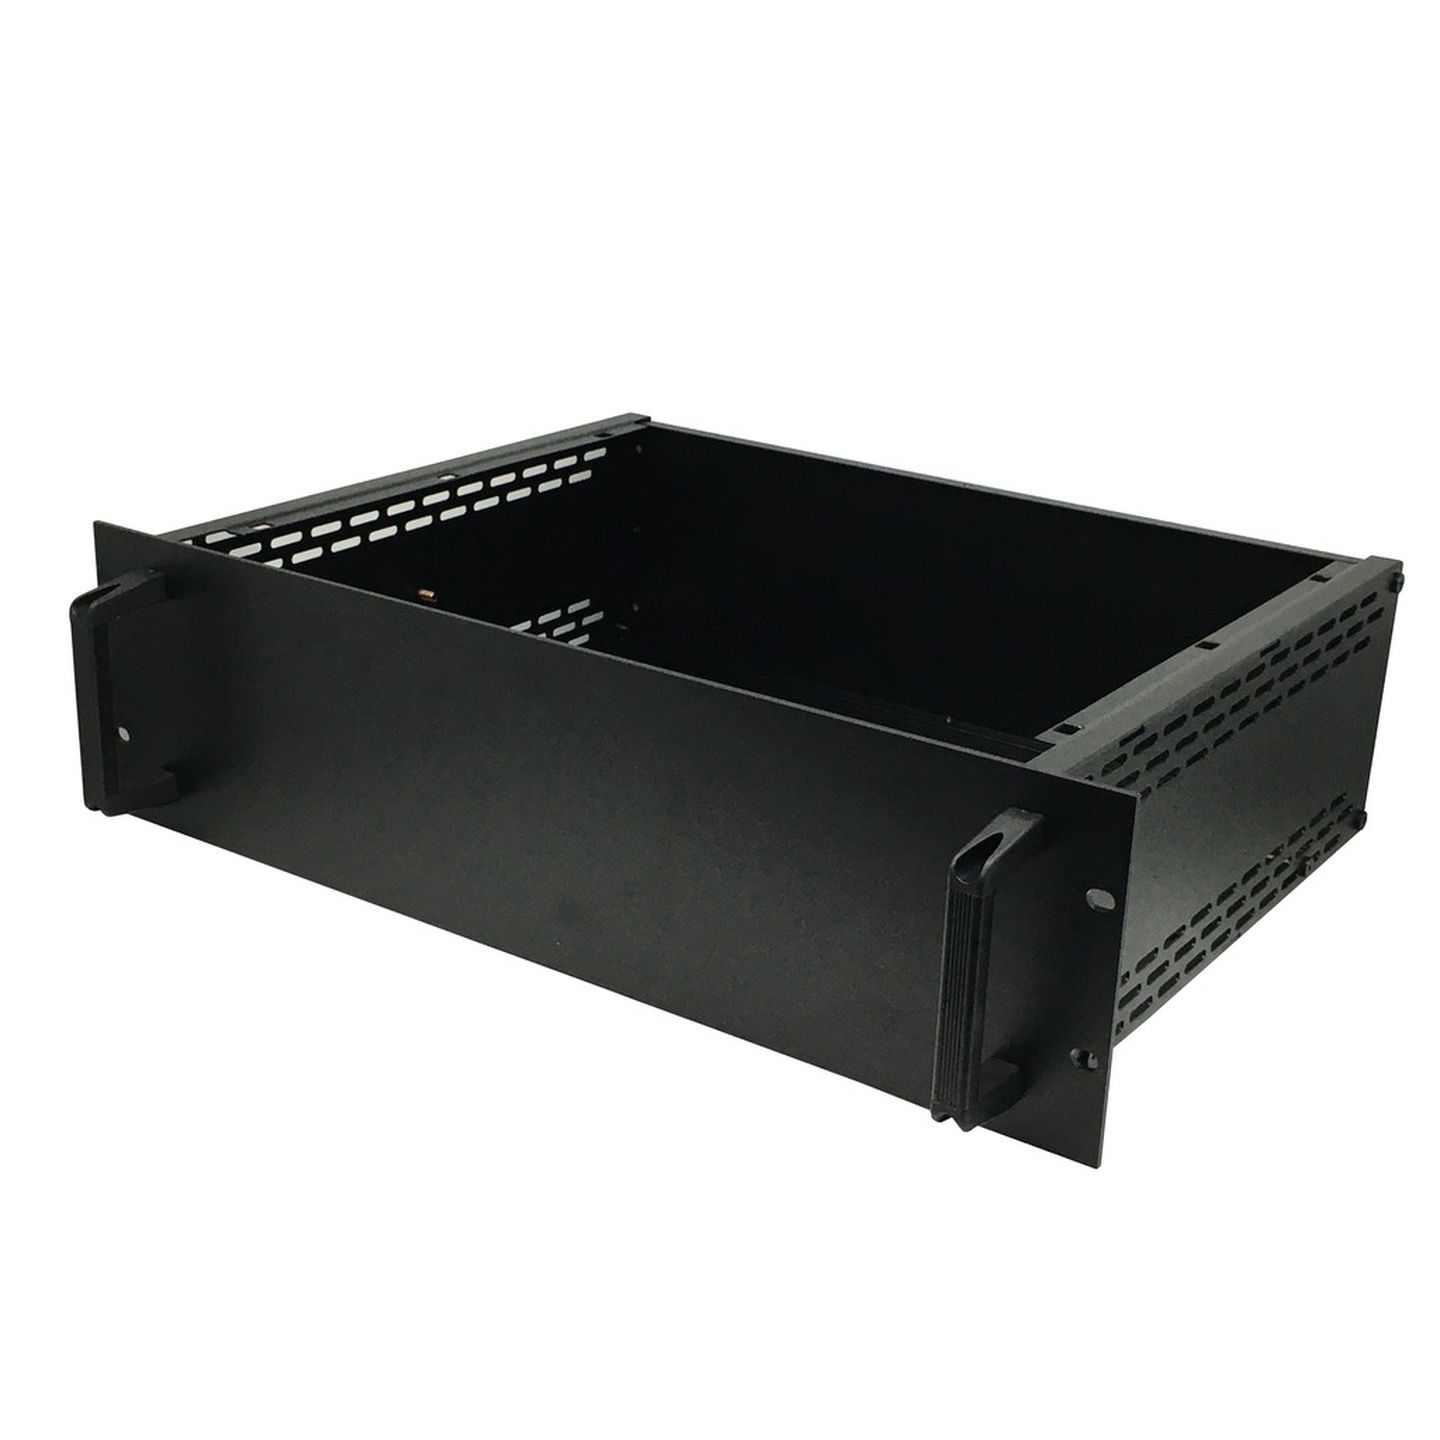
A 19-inch enclosure is a standardized standardized frame or housing designed to mount various electronic, networking, and telecommunications equipment. It utilizes the ubiquitous 19-inch rack width standard, ensuring broad compatibility with servers, patch panels, audio mixers, and industrial control hardware across diverse deployment environments.
Understanding the 19-Inch Enclosure Standard
The 19-inch enclosure standard forms the backbone of modern IT infrastructure, broadcasting systems, and industrial automation. At its core, the standard defines a specific horizontal mounting width of 19 inches (482.6 mm) between two vertical mounting rails. This standardization allows engineers, system administrators, and integrators to house hardware from multiple manufacturers securely within a single unified cabinet.
Historically rooted in early telecommunications relay racks, the 19-inch format evolved to accommodate modular electronics through the definition of Rack Units, commonly abbreviated as U or RU. One rack unit equals 1.75 inches (44.45 mm) in vertical height. Understanding this measurement is vital for capacity planning, as equipment height is universally specified in rack units. A standard full-height floor-standing cabinet typically provides 42U of vertical mounting space, though variants ranging from compact 6U wall-mounted boxes to massive 48U high-density server cabinets are widely available.
Beyond width and height, depth is a critical parameter that varies significantly based on application requirements. Network switches and patch panels generally require shallow depths ranging from 400mm to 600mm. Conversely, enterprise blade servers, uninterrupted power supplies (UPS), and high-performance computing nodes often demand deep enclosures ranging from 800mm to 1200mm to accommodate cable management arms and maintain proper airflow clearance at the rear.
Key Types of 19-Inch Enclosures
Selecting the correct enclosure type depends entirely on the operational environment, physical space constraints, security needs, and thermal management requirements of the installed hardware.
Floor-Standing Server and Network Cabinets
Floor-standing cabinets are heavy-duty enclosures designed to house high-density IT infrastructure, enterprise networking gear, and telecommunications equipment. These units usually feature locking front and rear doors, removable side panels for easy internal access, and heavy-duty leveling feet or casters. Floor-standing cabinets are further divided into server cabinets—which typically feature high-perforation doors (often exceeding 60-80% open area) to maximize airflow for heat dissipation—and network cabinets, which prioritize vertical cable management channels and side-mounted cable troughs over raw thermal venting.
Wall-Mounted Enclosures
When floor space is limited or network drops originate near ceilings in small offices, retail locations, or educational facilities, wall-mounted enclosures provide an ideal solution. Available in fixed or swing-out configurations, wall-mount cabinets typically range from 6U to 24U in height. Swing-out models feature a hinged body that allows technicians to swing the entire loaded enclosure away from the wall, granting unobstructed access to the rear cabling and connection ports during maintenance.
Open-Frame Racks
Open-frame racks consist of vertical mounting rails without side panels, top covers, or doors. They are exceptionally popular in dedicated wiring closets, data center staging areas, and laboratory environments where maximum physical access and unimpeded natural airflow are paramount. Because they lack physical boundaries, open-frame racks are easy to cable, but they offer zero physical security against tampering and provide no dust or particulate protection.
Industrial and NEMA-Rated Enclosures
For harsh environments exposed to moisture, dust, extreme temperatures, or corrosive agents—such as factory floors, oil rigs, or outdoor cellular sites—standard IT racks are inadequate. Industrial 19-inch enclosures feature specialized gasketing, IP (Ingress Protection) or NEMA ratings, climate control units (such as filtered fan trays, air conditioners, or heat exchangers), and reinforced locking mechanisms to protect sensitive industrial PCs and programmable logic controllers (PLCs).
Comparing Enclosure Configurations
| Enclosure Type | Typical Height Range | Primary Use Case | Physical Security | Airflow / Cooling |
|---|---|---|---|---|
| Server Cabinet | 24U – 48U | Data centers, server rooms | High (Locked doors/panels) | Excellent (Perforated doors) |
| Network Cabinet | 12U – 42U | Telecom, patch routing, switches | High (Locked doors/panels) | Moderate to High |
| Wall-Mount Box | 6U – 24U | Edge computing, retail, branch offices | Moderate to High | Limited (Fan kits optional) |
| Open-Frame Rack | 12U – 45U | Wiring closets, labs, AV studios | None | Unrestricted |
| Industrial / NEMA | 9U – 42U | Factories, outdoor, harsh locations | Very High (Gasketed seals) | Dependent on integrated AC/fans |
Thermal Management and Airflow Dynamics
As modern enterprise hardware packs higher processing power into tighter footprints, thermal management inside 19-inch enclosures becomes a primary engineering concern. Trapped heat significantly degrades semiconductor lifespans and can trigger thermal throttling or catastrophic system shutdowns.
Effective thermal design begins with selecting an enclosure with appropriate ventilation. Perforated metal doors allow ambient room air to pass freely through the rack. To optimize this flow, installations should adhere to a front-to-back cooling methodology, mirroring the intake and exhaust patterns of modern rack-mount servers. Cold air is drawn into the front of the enclosure, passes across internal components to absorb heat, and is exhausted out the rear.
Hot aisle/cold aisle data center layouts reinforce this principle at room scale, but inside the individual enclosure, blanking panels are an indispensable tool. Any unused rack unit space must be covered with a solid filler panel (blanking panel) to prevent hot exhaust air from recirculating back to the cool intake side of the equipment. Neglecting blanking panels can reduce cooling efficiency by up to 30%, driving up energy consumption and creating localized hot spots.
For high-density configurations exceeding standard thermal thresholds, active cooling solutions become necessary. Roof-mounted fan trays pull air upward through the cabinet, while intelligent fan units equipped with temperature sensors automatically ramp up speeds based on real-time internal thermal readings. In sealed industrial enclosures, closed-loop air conditioners or thermoelectric coolers remove heat without exchanging internal air with the contaminated outside environment.
Cable Management Best Practices
Proper cable management inside a 19-inch enclosure is not merely an aesthetic choice; it directly impacts airflow, maintenance efficiency, and system reliability. Disorganized cabling obstructs exhaust paths, traps heat, and makes tracing faulty connections difficult during emergency troubleshooting.
- Vertical Cable Managers: Install high-capacity vertical cable troughs or channels on both sides of the mounting rails. These channels organize patch cords and power cables away from the path of equipment airflow.
- Horizontal D-Rings and Lacing Bars: Utilize horizontal cable managers and rear lacing bars to support heavy cable bundles, relieving strain off the interface connectors on switches and patch panels.
- Separation of Power and Data: Route high-voltage AC power cords down one side of the enclosure and low-voltage data cables (Cat6, fiber optics) down the opposite side. Crossing power and data cables at right angles minimizes electromagnetic interference (EMI) and signal degradation.
- Velcro Over Zip Ties: Secure cable bundles using hook-and-loop fasteners (Velcro) rather than nylon zip ties. Over-tightened zip ties can crush internal data conductors or twist fiber optic strands, whereas Velcro allows for effortless future expansions and adjustments.
Weight Distribution and Structural Safety
Installing heavy enterprise equipment—such as multi-node servers, backup battery units (UPS), and massive matrix switchers—introduces significant structural and safety considerations. A fully loaded 42U server cabinet can easily weigh over 1,000 pounds (450 kg), posing tipping hazards if not deployed correctly.
When populating an enclosure, always load the heaviest components at the bottom of the rack. Placing a heavy uninterruptible power supply in the upper units shifts the center of gravity upward, dramatically increasing the risk of the cabinet tipping forward when technicians extend sliding rails for maintenance.
Furthermore, verify that the floor loading capacity of the building can support concentrated point loads. Raised computer room flooring (access flooring) often requires structural reinforcement beneath heavy cabinet rows. Always deploy anti-tip feet or floor-anchoring brackets provided with the enclosure, particularly in seismic zones or facilities frequented by personnel.
Cost Considerations and Investment Planning
Procuring 19-inch enclosures involves balancing upfront capital expenditures against long-term operational flexibility. Basic open-frame racks represent the lowest initial cost, making them suitable for budget-conscious wiring closets where security is managed at the room level.
Moving to floor-standing server cabinets increases the initial investment due to the inclusion of heavy-gauge steel framing, locking side panels, tempered glass or perforated steel doors, and integrated power distribution units (PDUs). However, investing in a high-quality, modular cabinet yields long-term dividends. A robust frame accommodates future hardware upgrades, offers superior cable management features that reduce maintenance labor hours, and protects expensive enterprise assets from physical damage and unauthorized access.
Hidden costs often include accessories such as vertical PDU mounting brackets, specialized grounding kits, custom depth extension frames, and precision caster wheels. When budgeting for an enclosure deployment, verify that these necessary hardware accessories are either included or accounted for in the initial procurement order.
Common Mistakes to Avoid
- Ignoring Depth Clearance: Failing to measure both the depth of the deepest hardware chassis and the space required for rear cable bend radius before purchasing an enclosure. Always leave at least 4 to 6 inches of clearance behind the deepest device.
- Neglecting Weight Limits: Overloading wall-mounted cabinets beyond their certified structural weight capacity, leading to wall anchor failure and catastrophic equipment drops.
- Skipping Grounding and Bonding: Failing to properly bond painted or powder-coated rack components to the facility's central telecommunications grounding bus bar, risking equipment damage from electrostatic discharge or power surges.
- Blocking Airflow: Failing to install blanking panels in unused spaces, which undermines the entire thermal design of the cabinet.
Frequently Asked Questions
What does "U" or "RU" mean in 19-inch enclosures?
"U" stands for Rack Unit, a standard unit of measurement defined as 1.75 inches (44.45 mm) in vertical height. Equipment height and enclosure capacity are universally measured in U to ensure standardized sizing and modular compatibility across different manufacturers.
Can I install standard tower servers into a 19-inch rack?
Standard desktop tower servers cannot be mounted directly into a 19-inch enclosure without modification. To rack-mount a tower server, you must either transfer its internal components into a compatible 19-inch rack-mount chassis or place the tower horizontally onto a heavy-duty sliding or fixed rack shelf designed to fit within the enclosure rails.
What is the difference between a server cabinet and a network cabinet?
Server cabinets are designed primarily for deep enterprise servers and feature heavily perforated doors (often 80% open area) to maximize airflow and heat dissipation. Network cabinets are typically shallower and are engineered with a focus on extensive vertical and horizontal cable management channels to route high volumes of patch cables and network switches.
How do I determine the correct depth for my enclosure?
Measure the physical depth of your deepest piece of equipment from front mounting ear to rear chassis edge. Then, add a minimum of 4 to 6 inches to account for power plugs, rear cable connections, and the minimum bend radius of fiber optic or heavy copper network cables.
Are all 19-inch enclosures threaded for the same screw size?
No. Vertical mounting rails use three primary hole patterns: threaded (commonly 10-32 or M6), unthreaded clearance holes, and square holes designed to accept cage nuts. Square-hole rails are the most versatile, as they allow technicians to snap in cage nuts matching the specific thread pitch required by their equipment slide rails.
Conclusion
Selecting and deploying the right 19-inch enclosure requires careful evaluation of physical dimensions, weight distribution, thermal dynamics, and cable management needs. By matching the cabinet style to the operational environment—whether a high-density data center, a branch office wall, or an industrial floor—administrators protect critical hardware investments, optimize cooling efficiency, and ensure seamless maintenance access for years to come.