Adding your Zoho email account to your iPhone allows you to manage professional or personal correspondence directly through the native iOS Mail app. By configuring Zoho Mail using IMAP (Internet Message Access Protocol), your emails remain synchronized across your mobile device, desktop client, and web browser, ensuring that read statuses, folders, and sent items reflect accurately regardless of where you access your inbox.
Understanding Email Protocols and Prerequisites
Before you begin the configuration process, it is essential to understand the underlying architecture of your email connection. Zoho Mail supports several protocols, but for an iPhone integration, IMAP is the industry standard. Unlike POP (Post Office Protocol), which downloads messages to a single device and often deletes them from the server, IMAP acts as a live window into your mailbox on the Zoho servers.
To ensure a seamless setup, you must have the following information and settings ready:
- Active Zoho Mail Account: Ensure you have your full email address and password. If you have enabled Two-Factor Authentication (2FA) for your Zoho account—which is highly recommended—you will need to generate an App-Specific Password. You cannot use your standard account password if 2FA is active.
- Stable Internet Connection: A reliable Wi-Fi or cellular data connection is required to authenticate your credentials with the Zoho server during the initial handshake.
- iOS Version Compatibility: This guide assumes you are using a modern version of iOS. While menu layouts may shift slightly between updates, the core logic of the Settings menu remains consistent.
Enabling IMAP Access in Zoho Mail
Before iOS can fetch your messages, the IMAP feature must be explicitly enabled within your Zoho account settings. If this is disabled, the iPhone will repeatedly report an authentication error.
- Log in to your Zoho Mail account via a web browser.
- Click the Settings (gear icon) in the top-right corner.
- Navigate to the Mail Accounts section.
- Locate the IMAP heading.
- Ensure the "IMAP Access" toggle is set to ON. This allows external mail clients to communicate with your Zoho inbox.
Step-by-Step Configuration on iOS
The integration process relies on the Mail settings pane within the iOS Settings app. Follow these steps precisely to register your account.
1. Initiating the Account Setup
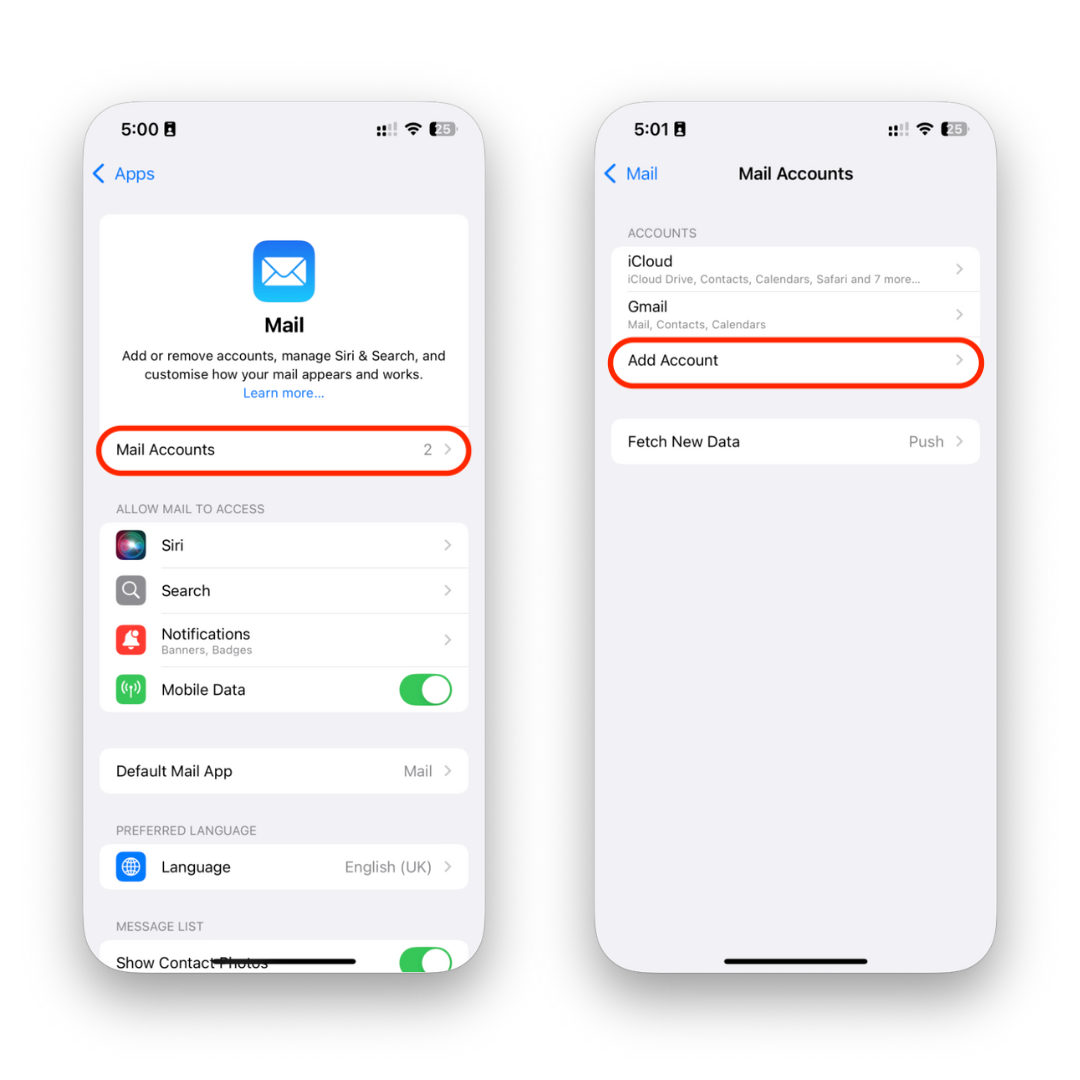
Open the Settings app on your iPhone and scroll down to the Mail section. Tap Accounts, then select Add Account. You will be presented with a list of major providers like iCloud, Google, and Outlook. Choose Other from the bottom of the list.
2. Entering Account Details
Select Add Mail Account and enter the following credentials:
- Name: The display name that recipients will see.
- Email: Your full Zoho email address.
- Password: Use your account password if 2FA is disabled, or your generated App-Specific Password if 2FA is enabled.
- Description: A label for your own reference (e.g., "Zoho Work").
3. Configuring Incoming and Outgoing Server Settings
After tapping Next, the system will prompt you for server configurations. Select the IMAP tab at the top.
Incoming Mail Server:
- Host Name:
imap.zoho.com - User Name: Your full email address.
- Password: Your password (or App-Specific Password).
Outgoing Mail Server (SMTP):
- Host Name:
smtp.zoho.com - User Name: Your full email address.
- Password: Your password (or App-Specific Password).
Tap Next to verify the settings. Your iPhone will perform an autodiscover check. If the details are correct, the checkmark will appear, and you can proceed to select whether you wish to sync Mail, Notes, or both.
Comparison of Zoho Mail Integration Methods
| Feature | Zoho Mail App (iOS) | iOS Native Mail App (IMAP) |
|---|---|---|
| Setup Complexity | Very Low (Sign-in only) | Moderate (Manual server input) |
| Calendar Sync | Native/Integrated | Requires CalDAV setup |
| Notification Reliability | Push Notifications | Push or Fetch |
| Resource Usage | Separate application | System-integrated |
| Best For | Power users of Zoho features | Unified inbox users |
Managing App-Specific Passwords for Security
If you have enabled 2FA on your Zoho account, you must not use your main login password in the iPhone settings. Zoho, like many modern secure platforms, requires an App-Specific Password to ensure that your primary credentials are not stored on third-party devices.
To generate this:
- Go to accounts.zoho.com.
- Navigate to Security and select App Passwords.
- Select Generate New Password.
- Enter a label like "iPhone Mail" and copy the generated password.
- Use this exact string in the Password field during the iPhone setup steps outlined above.
Troubleshooting Common Connection Errors
Even with precise input, users occasionally encounter synchronization issues. Here is how to diagnose the most frequent problems:
- "Cannot Verify Server Identity": This often occurs if the SSL certificate check fails during setup. Ensure your internet connection is not being intercepted by a restrictive firewall or a VPN. Try toggling your VPN off during the initial setup.
- "Authentication Failed": This is almost always caused by using your regular account password when 2FA is active, or by a typo in the email address. Double-check your App-Specific Password. Note that spaces are often accidentally included when copying these codes.
- Messages Not Sending: If your incoming mail works but outgoing mail fails, verify the SMTP settings. Specifically, ensure the Outgoing Mail Server User Name is set to your full email address and that the password matches the incoming settings.
- Slow Synchronization: If your folders are not updating, navigate to Settings > Mail > Accounts > Fetch New Data. Ensure that the Push toggle is active for your account, or select Fetch and set the schedule to "Automatically" or "Every 15 Minutes."
Next Actions and Expert Tips
Once your account is added, take a moment to customize your iPhone experience. In the account settings, you can adjust the "Mail Days to Sync" to control how much storage the mailbox consumes on your device. For high-volume users, selecting "1 Month" or "2 Weeks" is often sufficient and prevents your device storage from becoming cluttered with years of archived correspondence.
If you frequently send emails from different aliases associated with your Zoho account, you can add these in the Advanced settings of the mail account menu. Adding aliases ensures that when you reply to a message sent to a specific project-based email, the "From" address automatically adjusts to match the original recipient address.