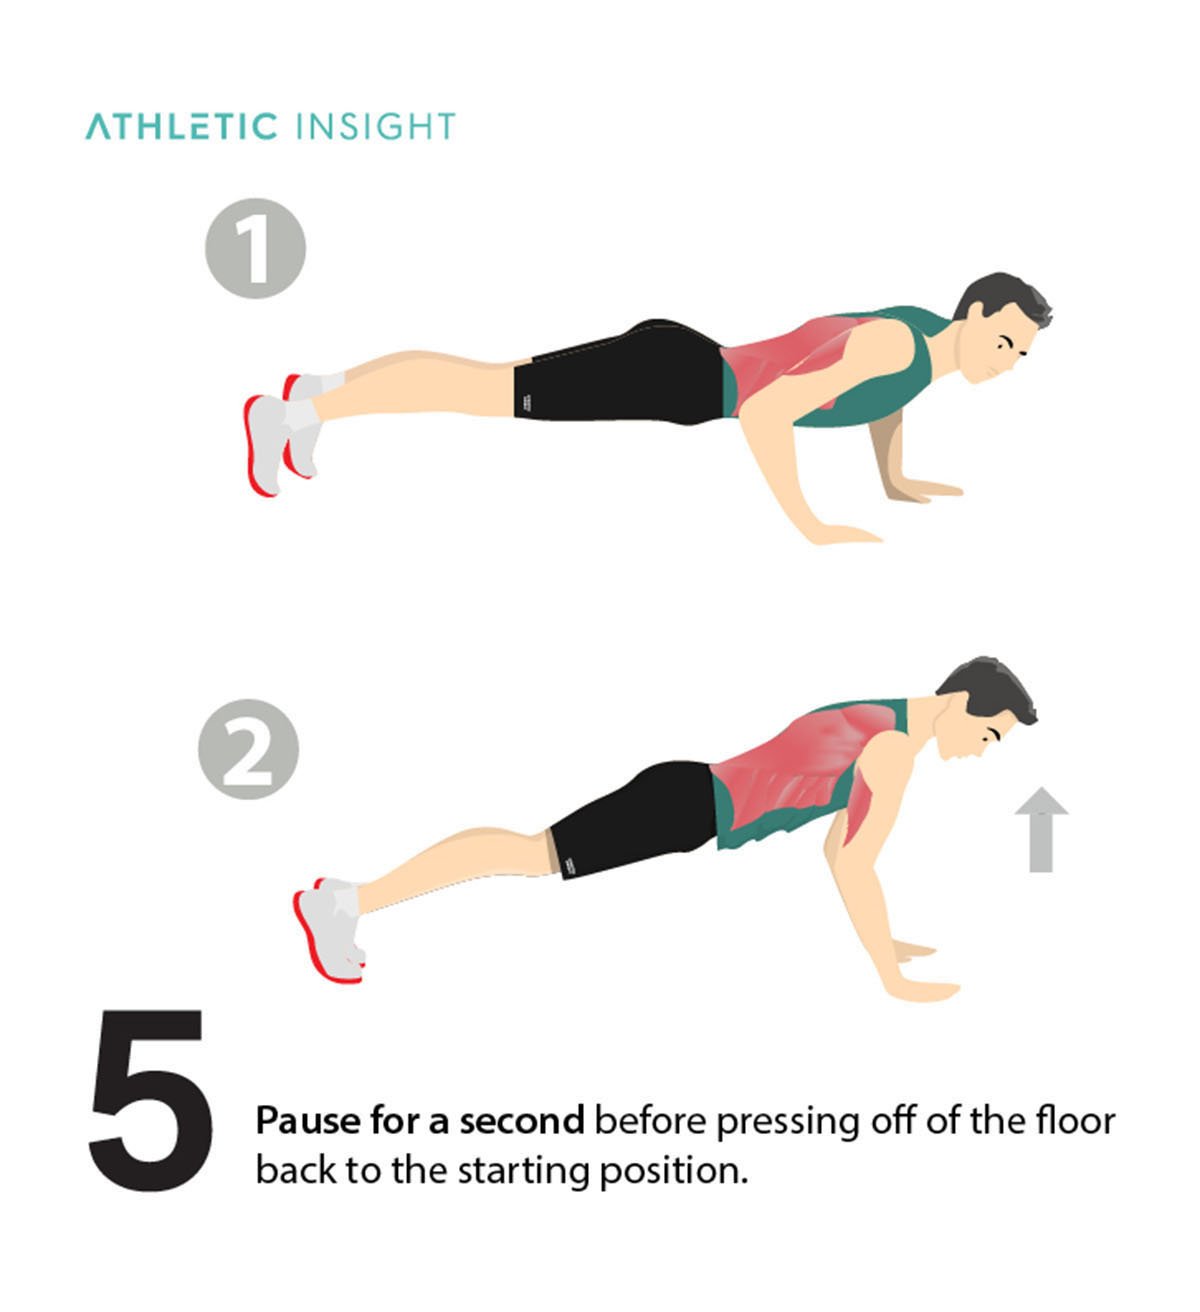
To achieve proper push-up form, you must maintain a rigid straight line from head to heels, engage your core and glutes, and position your hands slightly wider than shoulder-width. Ensure your elbows remain at a 45-degree angle to your torso while lowering your chest fully toward the floor and locking out at the top.
The push-up remains one of the most effective, versatile, and accessible exercises in the fitness world. As of 2026, it continues to be the benchmark for upper-body pressing strength and core stability in both military readiness tests and civilian fitness programs. However, despite its ubiquity, the push-up is frequently performed with suboptimal technique, leading to diminished results and a heightened risk of shoulder or wrist injury.
Proper form is not merely about "doing the move"; it is about optimizing the biomechanical levers of the body to recruit the maximum number of muscle fibers while protecting the joints. Whether you are a beginner looking to perform your first repetition or an advanced athlete aiming for high-volume sets, these five essential tips will refine your technique and transform your training.
1. Establish the "Corkscrew" Hand Position and Shoulder Torque
The foundation of a successful push-up begins at the point of contact with the ground: your hands. Many lifters simply place their palms flat and begin pressing, but this ignores the critical role of shoulder stability.
Creating External Rotation
To protect the glenohumeral joint (the shoulder), you must create external rotation. Imagine you are trying to tear a piece of paper on the floor between your hands or "screwing" your palms into the ground. Your right hand should feel like it is trying to rotate clockwise, while your left hand rotates counter-clockwise.
While your hands do not actually move, this mental cue engages the latissimus dorsi and the rotator cuff muscles. This tension creates "torque," which pulls the head of the humerus securely into the shoulder socket. When the shoulder is stable, the primary movers—the pectoralis major and triceps—can generate force more efficiently.
Finger Spacing and Weight Distribution
Spread your fingers wide to increase your base of support. Do not let the weight of your body collapse solely onto the heels of your palms, as this can lead to wrist strain. Instead, distribute the pressure across the entire hand, including the finger pads and the knuckles. If you experience persistent wrist pain, consider using parallettes or hex-shaped dumbbells to maintain a neutral wrist position, which reduces the extension demand on the joint.
2. Treat the Push-Up as a Moving Plank
One of the most common errors in bodyweight training is viewing the push-up as strictly an upper-body exercise. In reality, a push-up is a dynamic plank. If your midsection is soft, your hips will sag or your "butt" will pike into the air, both of which break the kinetic chain and reduce the effectiveness of the movement.
Core and Glute Engagement
To maintain a rigid torso, you must actively engage your rectus abdominis (the "six-pack" muscles) and your gluteus maximus. Before you even lower yourself toward the ground, squeeze your glutes as hard as possible. This action helps tilt the pelvis into a posterior position, which flattens the lower back and prevents "swayback" or lumbar hyperextension.
The Head-to-Heel Alignment
Your body should form a straight line. A helpful tip is to imagine a rod running through your ears, shoulders, hips, knees, and ankles. If any part of that line breaks, the efficiency of the push-up drops. Avoid "chicken-necking," a common mistake where the trainee pokes their head forward to make it feel like they are closer to the floor. Keep your chin tucked slightly and your gaze about 6 to 10 inches in front of your fingertips to maintain a neutral cervical spine.
3. Optimize Elbow Path and Torso Angle
The angle of your arms relative to your body is the most significant factor in long-term shoulder health. Many beginners default to a "T-shape," where the elbows flare out at a 90-degree angle from the torso. This position places immense stress on the subacromial space of the shoulder, often leading to impingement or rotator cuff tendonitis.
The 45-Degree Rule
For the safest and strongest push-up, your elbows should be tucked at roughly a 45-degree angle relative to your sides. From an aerial view, your body should look like an arrow rather than a "T." This positioning allows the humerus to move through a natural range of motion while maximizing the involvement of the chest and triceps.
Varying the Angle for Specific Goals
While 45 degrees is the gold standard for general strength, you can adjust this slightly based on your goals:
- Narrow Grip (Diamond Style): Keeping the elbows closer to the ribs (0 to 15 degrees) increases the demand on the triceps brachii.
- Wide Grip: Slightly widening the hands can emphasize the outer fibers of the pectoralis major, though you must be careful not to exceed the 60-degree flare threshold to avoid joint strain.
4. Prioritize Active Scapular Movement
Your shoulder blades (scapulae) are designed to move. A common mistake is "pinning" the shoulder blades together throughout the entire movement or, conversely, letting them wing out uncontrollably.
Protraction and Retraction
A proper push-up involves a full range of scapular motion:
- At the bottom (The Descent): As you lower yourself, your shoulder blades should naturally retract (squeeze together). Imagine you are trying to pinch a pencil between your blades as your chest nears the floor.
- At the top (The Ascent): As you press back up, you should actively protract your shoulder blades. This means "pushing the floor away" so hard that your upper back rounds slightly at the very top of the rep.
This protraction engages the serratus anterior, a muscle located on the side of the ribs that is vital for shoulder health and stability. Neglecting this "plus" phase at the top of the push-up can lead to muscular imbalances and scapular winging.
5. Control Your Tempo and Range of Motion
Quantity is often the enemy of quality. Doing 50 "half-reps" with a bouncing tempo provides significantly less stimulus for muscle growth and strength than 15 controlled, full-range-of-motion repetitions.
The Importance of the Eccentric Phase
The eccentric (lowering) phase of the push-up is where a significant amount of muscle damage and subsequent growth occurs. Instead of letting gravity pull you down, fight the resistance. Aim for a 2-second descent. This control ensures that you are using muscle tension rather than momentum to move your body weight.
Chest-to-Floor Standard
Unless you have a pre-existing injury that limits your range of motion, every repetition should end with your chest nearly touching the floor (or about an inch above it). This ensures the pectoral muscles are fully stretched under load. At the top of the movement, fully lock out your elbows—without snapping them—to ensure the triceps are fully contracted.
| Push-Up Variation | Primary Target Area | Difficulty Level (1-5) | Best For |
|---|---|---|---|
| Standard Push-Up | Chest, Triceps, Front Delts | 2 | General strength and hypertrophy |
| Incline Push-Up | Lower Chest, Core | 1 | Beginners or high-volume finishers |
| Decline Push-Up | Upper Chest, Shoulders | 4 | Advanced strength and upper-chest focus |
| Diamond Push-Up | Triceps | 3 | Isolating the arms and inner chest |
| Archer Push-Up | Unilateral Chest/Shoulder | 5 | Building toward one-arm push-ups |
Common Push-Up Mistakes to Avoid
Even with the five tips above, certain habits can creep into your routine that sabotage your progress. Recognizing these "form killers" is essential for long-term success.
Sagging Hips and Lumbar Stress
When the core fails, the hips drop. This not only makes the exercise easier by shortening the lever but also places an unsafe load on the intervertebral discs of the lower back. If you cannot keep your hips up, it is time to regress the exercise to an incline (hands on a bench) rather than continuing with poor form.
"Half-Repping" and Ego Lifting
Many people stop several inches short of the floor because the bottom portion of the push-up is the hardest. This is known as the "sticking point." By avoiding this range, you miss out on the most beneficial part of the exercise for muscle development. If you cannot reach the floor, reduce the total repetitions and focus on depth.
Improper Breathing Patterns
Holding your breath (the Valsalva maneuver) can increase intra-abdominal pressure, which is helpful for heavy squats, but for high-repetition bodyweight moves, it can lead to unnecessary spikes in blood pressure and premature fatigue. Inhale as you lower yourself toward the floor and exhale forcefully as you drive back up.
Progressions and Modifications for 2026
If a standard push-up is too difficult, or if you have mastered it and need a new challenge, use these modifications to keep your training effective.
Regressions for Beginners
- Incline Push-Ups: Place your hands on a sturdy table, bench, or Smith machine bar. The higher the incline, the easier the movement. This is superior to "knee push-ups" because it allows you to maintain the full-body plank tension and develop the necessary core strength.
- Wall Push-Ups: Stand a few feet from a wall and press against it. This is the ideal starting point for those recovering from surgery or with very limited upper-body strength.
Progressions for Advanced Athletes
- Weighted Push-Ups: Wear a weighted vest or have a partner safely place a weight plate on your upper back (not the lower back). This allows for progressive overload similar to a bench press.
- Deficit Push-Ups: Place your hands on yoga blocks or handles to allow your chest to travel deeper than the level of your hands. This increased stretch leads to greater hypertrophy.
- Pause Reps: Hold the bottom position for 3 seconds before exploding upward. This removes all elastic recoil and forces the muscles to work harder from a dead stop.
Frequently Asked Questions
Why do my wrists hurt during push-ups?
Wrist pain is usually caused by a lack of mobility in the wrist joint or improper weight distribution. When you perform a push-up, your wrist is in extreme extension. To alleviate this, ensure you are gripping the floor with your fingers to take pressure off the carpals. Alternatively, use push-up handles or dumbbells to keep your wrists in a neutral, straight position. Consistency in wrist stretching and strengthening can also help over time.
Is it better to do push-ups every day or every other day?
While push-ups are a bodyweight exercise, the muscles still require recovery. For most people, performing push-ups 3 to 4 times a week is ideal. If you are doing high-intensity variations or weighted push-ups, you may need 48 hours of rest between sessions to allow the muscle fibers to repair. However, if you are doing low-volume sets for "greasing the groove" (a technique where you do many sub-maximal sets throughout the day), daily practice can be effective for neurological adaptation.
Should I do push-ups on my knees?
Knee push-ups are a common modification, but they are often less effective than incline push-ups. When you drop to your knees, you lose the ability to fully engage your glutes and hamstrings, which changes the mechanics of the "moving plank." If possible, perform incline push-ups with your hands on an elevated surface to keep your legs straight and your core fully engaged.
How many push-ups should I be able to do?
There is no universal number, as "fitness" is relative to your age, weight, and goals. According to general fitness standards used in 2026, a healthy adult male should aim for 20 to 30 consecutive reps with perfect form, while a healthy adult female should aim for 10 to 20. However, the quality of the movement is always more important than the quantity. Ten perfect reps are far superior to thirty sloppy ones.
Can push-ups replace the bench press?
Push-ups are an excellent horizontal pressing movement, but they have limitations regarding absolute load. While you can build a significant amount of muscle and strength with push-ups—especially using variations like the dip or weighted push-up—the bench press allows for easier micro-loading with plates. For a well-rounded physique, many athletes include both: the bench press for heavy loading and push-up variations for high-volume metabolic stress and core stability.
Final Recommendation
To master the push-up, you must treat it with the same respect as a heavy barbell lift. Focus on the "total body" aspect of the movement by locking in your core and glutes before your first rep. Record yourself from a side profile to ensure your hips aren't sagging and your elbows aren't flaring. Once you can perform 15 perfect repetitions with a controlled tempo, begin experimenting with harder variations like decline or weighted push-ups to continue your strength journey.