The 3D cursor in Blender is a versatile pivot and positioning tool used to determine exact locations for spawning new objects, aligning geometry, and establishing custom pivot points for rotations and scaling. By mastering its coordinate placement, snapping features, and reset shortcuts, 3D artists can significantly accelerate their modeling workflows.
Understanding the Role of the 3D Cursor
In 3D computer graphics, maintaining absolute spatial awareness is essential for creating clean topologies and accurate assemblies. Blender utilizes a unique utility known as the 3D cursor—represented visually as a red-and-white striped crosshair with a red-and-white circle—to navigate and manipulate three-dimensional space. Unlike standard selection tools that interact directly with mesh geometry, curves, or lights, the 3D cursor acts as a universal reference point in the global Cartesian coordinate system ($X$, $Y$, $Z$). It serves as the primary spawning point for any new object added to a scene, whether you are introducing a basic mesh primitive like a cube, adding a camera, or creating a new armature bone.
Beyond acting as a spawn location, the 3D cursor functions as a dynamic pivot point. By default, Blender rotates and scales objects around their individual or collective origins. However, changing the pivot point setting to the "3D Cursor" allows artists to orchestrate complex orbital movements, array arrangements, and symmetrical modeling tasks relative to a custom coordinate. This versatility makes the cursor indispensable for hard-surface modeling, architectural visualization, and character rigging, where precision placement dictates the success of subsequent modeling operations.
Core Methods for Placing and Moving the 3D Cursor
Placing the 3D cursor accurately requires an understanding of Blender's various input mechanisms, ranging from quick viewport clicks to exact coordinate typing. The most direct method for general navigation is the standard viewport click. By simply holding down the Shift key and clicking the right mouse button (assuming standard Blender keymap configurations), the 3D cursor instantly teleports to the surface of any visible mesh directly beneath the cursor. This raycasted placement detects geometry normals, allowing artists to position the cursor flush against a specific face or vertex with minimal effort.
For situations requiring absolute mathematical precision, manual coordinate input is necessary. This can be accomplished through the View panel located on the right side of the 3D viewport (toggled open with the N key). Within the Item tab, users can expand the 3D Cursor section to reveal explicit numerical input fields for $X$, $Y$, and $Z$ locations, as well as rotation values if the cursor's orientation needs adjustment. Entering exact measurements here ensures that objects spawned or aligned to the cursor adhere strictly to architectural blueprints or technical dimensions.
Snapping the Cursor to Geometry
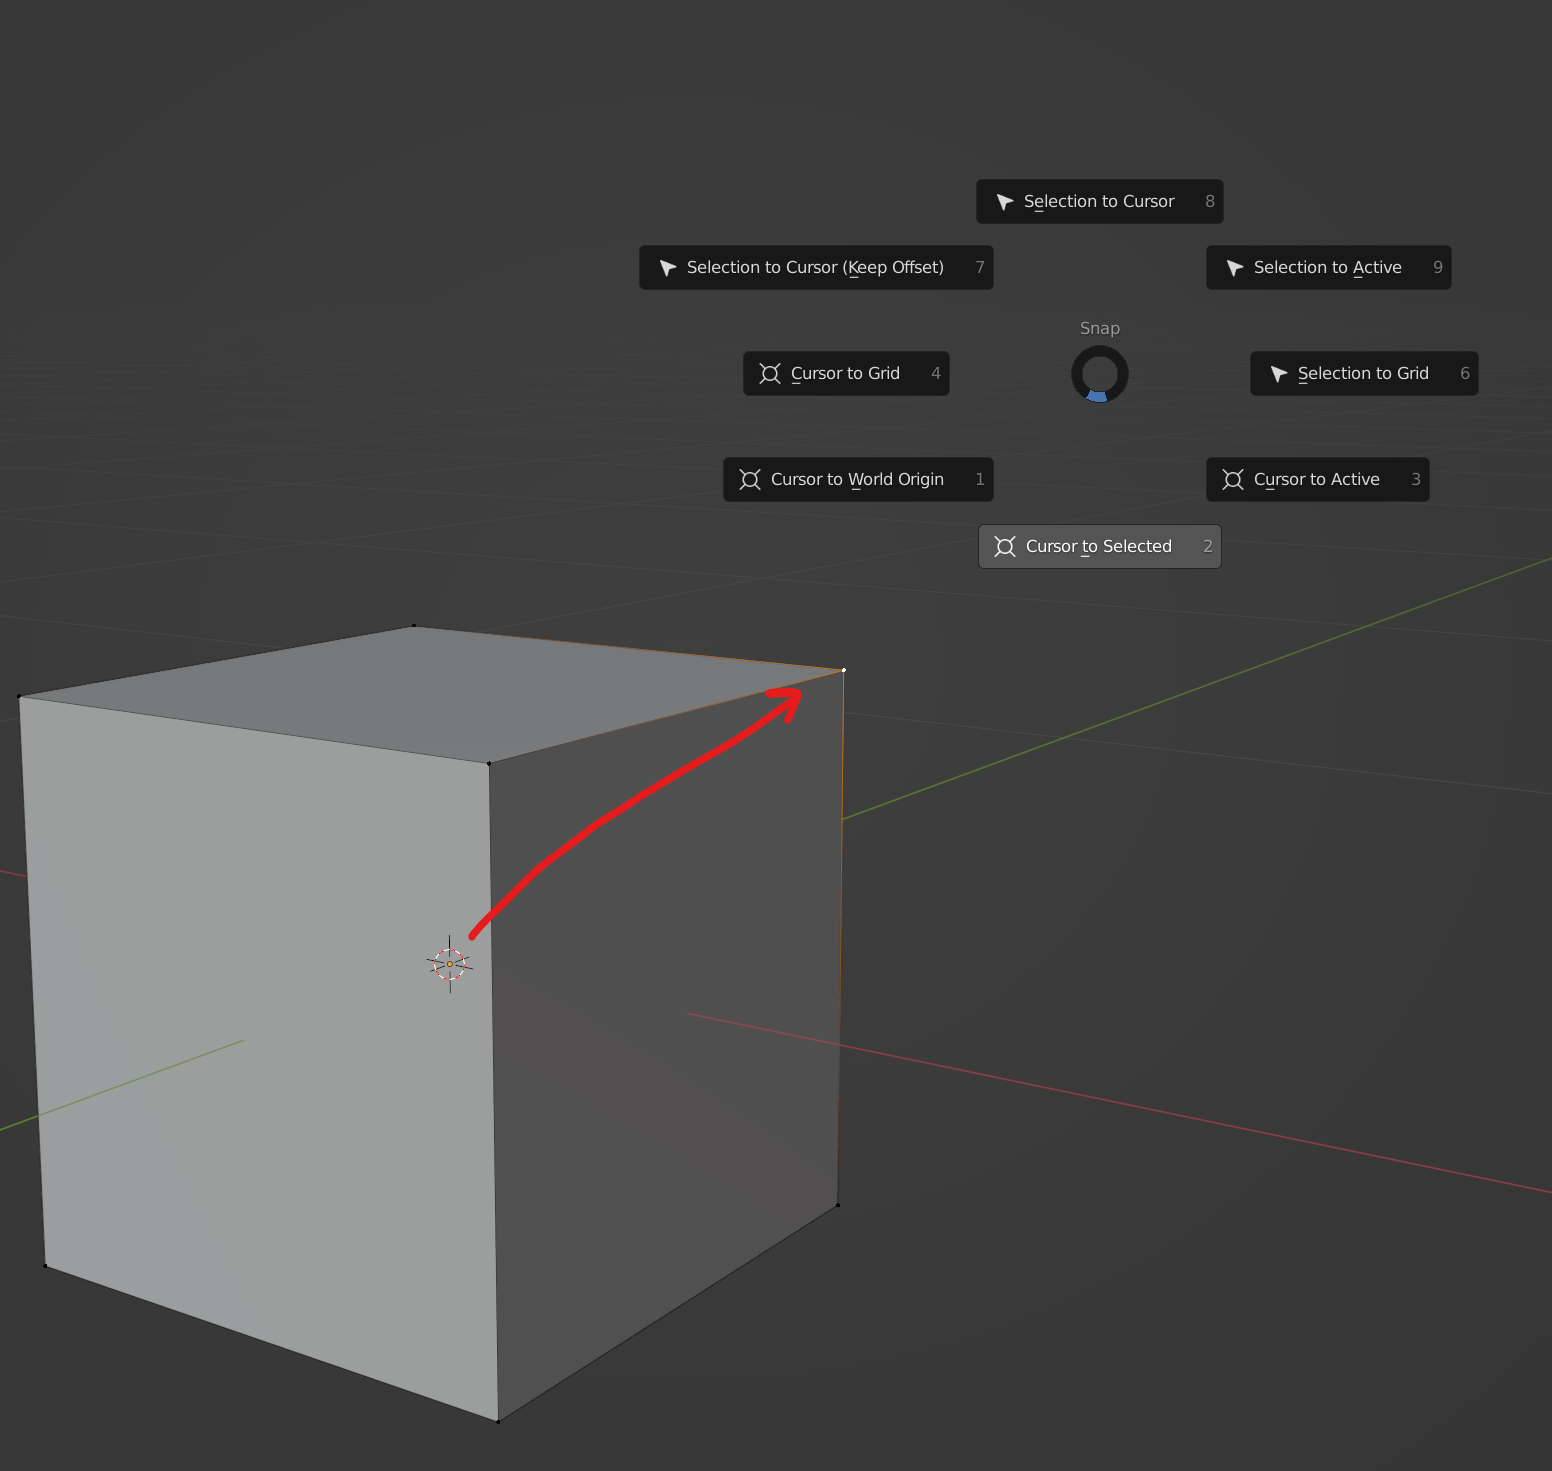
Blender’s powerful snapping system provides intermediate placement options that combine the speed of viewport interaction with the accuracy of geometric alignment. By pressing Shift + S, users summon the Cursor/Selection Snapping pie menu. This menu offers a variety of context-aware placement commands:
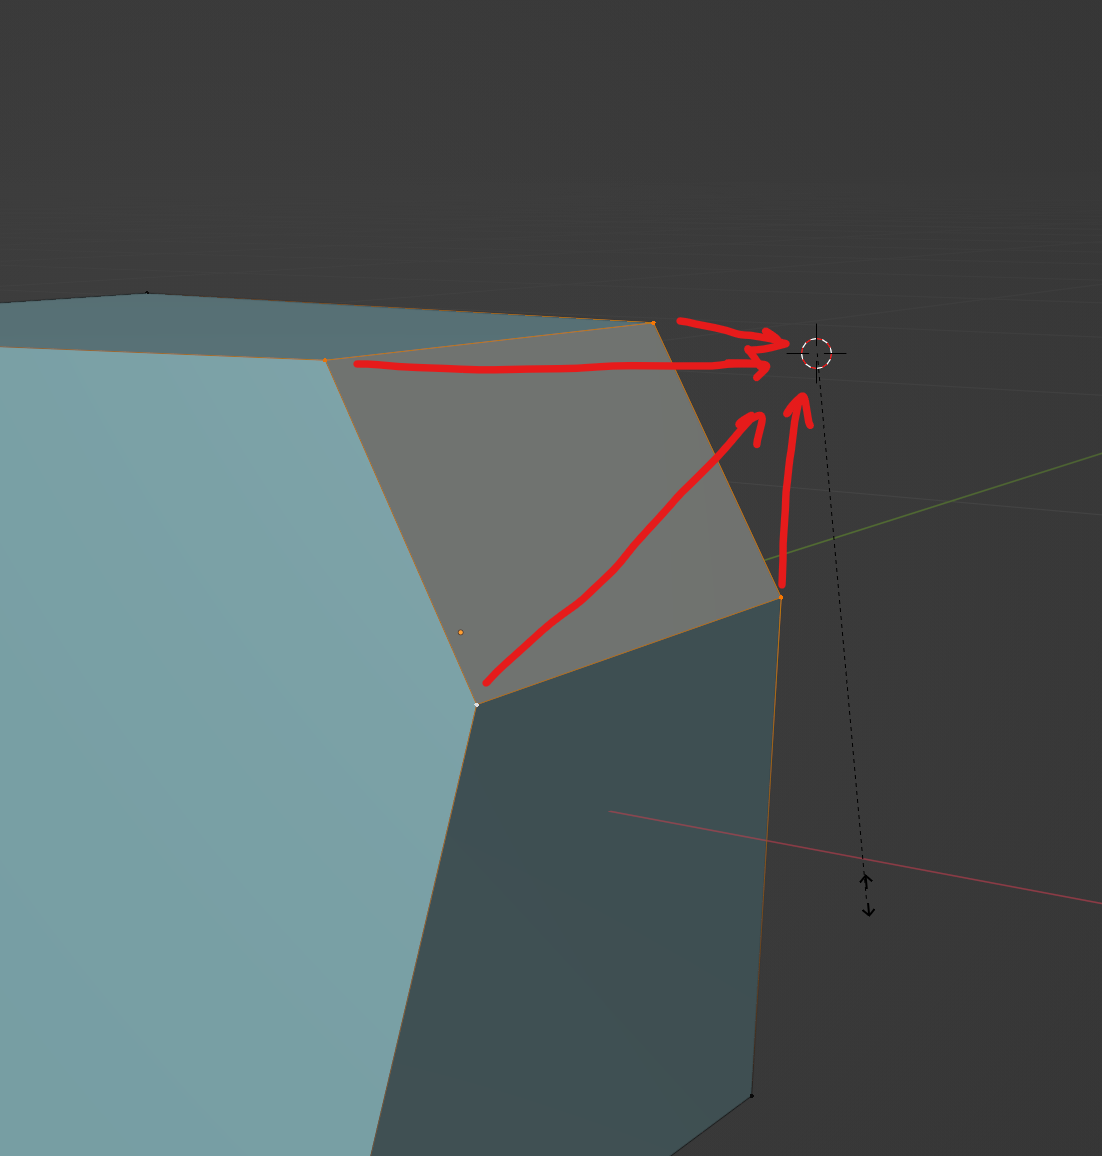
- Cursor to Selected: Instantly moves the 3D cursor to the exact center point of currently selected vertices, edges, faces, or object origins.
- Cursor to World Origin: Resets the 3D cursor back to the absolute center of the scene ($X: 0, Y: 0, Z: 0$), which is useful for starting fresh or aligning root assets.
- Cursor to Active: Snaps the cursor directly to the active element within a selection (the last selected item or active bone).
- Cursor to Grid: Snaps the cursor to the nearest grid intersection based on the current viewport zoom level and unit scale.
Utilizing the 3D Cursor as a Pivot Point
Transforming objects using the 3D cursor as a pivot point unlocks advanced modeling techniques that would otherwise require tedious manual calculations. By default, the transformation pivot point is set to Median Point or Bounding Box Center. To switch this behavior to the 3D cursor, users can access the pivot point dropdown menu located in the header of the 3D viewport (or press the Period key to open the pivot pie menu) and select 3D Cursor.
Once active, any scaling (S), rotation (R), or mirroring operation executed on selected geometry will use the exact location of the 3D cursor as its anchor. For example, if you want to rotate a set of windows around a central architectural pillar, you can snap the 3D cursor to the center of the pillar, set the pivot point to the 3D cursor, and rotate your duplicated window objects seamlessly around that central axis. This method is heavily relied upon in mechanical design, furniture modeling, and organic array creation.
The 3D Cursor Context Menu and Advanced Options
Managing the 3D cursor extends beyond simple location adjustments; its orientation can also be modified to match specific geometry. In older workflows, aligning objects to sloped surfaces required manual trigonometric calculations. Modern versions of Blender allow the 3D cursor to adopt the custom orientation of selected faces. By selecting a face, opening the Cursor/Selection menu (Shift + S), or using the dedicated 3D Cursor Tool from the left-hand toolbar, users can align the cursor's transform axes directly to the normal vector of the target surface.
When the 3D cursor tool is active in the toolbar, clicking on any surface not only repositions the cursor but also rotates its coordinate system to match the local normal. This means that subsequent objects added to the scene will automatically spawn aligned to that slope or angle, drastically reducing the time required to populate complex, non-planar environments with props or structural elements.
Comparison of Pivot Point Options in Blender
To understand why and when to use the 3D cursor, it helps to compare it against Blender's other primary pivot point modes. Each setting serves a distinct phase of the 3D pipeline.
| Pivot Point Mode | Primary Behavior | Best Used For |
|---|---|---|
| Bounding Box Center | Calculates the geometric center of the collective selection's outer boundaries. | General scaling and uniform expansion of grouped objects. |
| Median Point | Averages the exact center of all selected element origins or geometry centers. | Standard rotational adjustments and symmetrical modeling of centered groups. |
| Individual Origins | Treats each selected object or component's individual origin as its own pivot. | Scaling multiple objects or faces independently from their own centers. |
| 3D Cursor | Utilizes the custom global coordinates of the red-and-white crosshair. | Precise orbital positioning, custom asset placement, and architectural layouts. |
| Active Element | Anchors transformations to the most recently selected vertex, edge, object, or bone. | Precision modeling where one specific part dictates the movement of others. |
Common Mistakes and Troubleshooting
Even experienced artists occasionally encounter frustrating behaviors related to the 3D cursor, usually stemming from accidental hotkey presses or forgotten settings.
1. Objects Spawning Far Away from View
If newly created objects consistently appear miles away from your current workspace, the 3D cursor has likely been misplaced via an accidental mouse click (Shift + Right Click).
- Solution: Press
Shift + Sand select Cursor to World Origin, or select an object near you, pressShift + S, and choose Cursor to Selected followed by recreating your asset.
2. Unexpected Rotation Axis Behavior
When attempting to rotate an object, it spins wildly off-screen or around a distant point. This usually indicates that the pivot point dropdown in the viewport header is still set to the 3D cursor from a previous task.
- Solution: Open the pivot point menu (press
Period) and switch the mode back to Median Point or Bounding Box Center.
3. Loss of Cursor Orientation
If the 3D cursor has been rotated to match a custom face normal and subsequent global operations feel skewed or difficult to control, the cursor's transform orientation needs to be reset.
- Solution: Open the View > 3D Cursor panel in the sidebar (
Nkey) and manually reset the rotation values back to $0^\circ$ on the $X$, $Y$, and $Z$ axes, or use the transform orientation dropdown to switch back to Global.
Frequently Asked Questions
How do I reset the 3D cursor back to the center of the world?
You can instantly reset the 3D cursor to the world origin ($0, 0, 0$) by pressing Shift + S in the 3D viewport and selecting Cursor to World Origin from the pie menu. Alternatively, you can open the sidebar panel with the N key, navigate to the Item tab, and manually zero out the $X$, $Y$, and $Z$ location values under the 3D Cursor header.
Can I save a specific 3D cursor location for later use in a project?
Blender does not feature a dedicated multi-cursor bookmarking system out of the box for saving dozens of distinct cursor locations. However, you can use empty objects (Plain Axes or Single Arrows) as persistent spatial bookmarks. Snap an empty object to your desired cursor location, name it accordingly in the outliner, and you can instantly recall that position later by selecting the empty, pressing Shift + S, and choosing Cursor to Selected.
Why does the 3D cursor move when I am trying to select objects?
If clicking in your viewport continuously repositions the 3D cursor instead of selecting your geometry, your primary mouse button configuration or tool settings may be interacting incorrectly. In standard Blender keymaps, the cursor is moved using Shift + Right Click. If you are using industry-compatible keymaps or have the dedicated 3D Cursor tool selected in the active toolbar on the left side of the screen, a simple left-click will move the cursor. Switch back to the standard Select Box or Tweak tool in the toolbar to restore normal object selection behavior.
How do I make objects spawn directly on top of another surface?
While you can spawn an object and then move it, you can streamline this by placing the 3D cursor directly onto the target surface first. Hold Shift and right-click on the destination face to snap the cursor there, ensuring its orientation matches if you are using surface snapping. When you add a new mesh (Shift + A), it will spawn centered at that exact surface point.
Next Actions for Precise Modeling
To build greater fluency with Blender's spatial tools, practice incorporating Shift + S shortcuts into your daily modeling routines rather than relying entirely on manual grab (G) adjustments. Experiment with snapping the cursor to vertices on complex meshes to establish custom rotation centers for mechanical parts like gears, hinges, and radial arrays. Combining these cursor techniques with custom transform orientations will yield a faster, more predictable 3D workflow.