Mastering black and white photography requires shifting your focus from color harmony to the interplay of light, shadow, and form. By utilizing techniques like high-contrast lighting, the Zone System, and long exposure, photographers can create timeless images that emphasize emotion and structural composition over literal representation and distracting hues.
Black and white photography is far more than the simple absence of color. In 2026, despite the ubiquity of high-resolution color sensors, monochrome imagery remains a dominant medium for fine art, documentary, and portrait photography. Removing color forces the viewer to engage with the "bones" of an image: the geometry, the textures, and the varying shades of gray that define depth. To move beyond basic filters and achieve professional-grade results, one must understand the technical nuances of tonality and the physics of light.
1. Pre-visualization: Seeing in Monochrome
The most critical skill in black and white photography is the ability to "see" without color before you even press the shutter. In a world saturated with color, our brains naturally prioritize hue to distinguish objects. To master monochrome, you must train your eyes to identify luminance values—the brightness or darkness of a surface regardless of its color.
When scouting a scene, look for high-contrast boundaries. A bright red rose against a dark green leaf may look striking in color, but in black and white, those two colors often share a similar luminance value, resulting in a muddy, grey-on-grey image. Pre-visualization involves recognizing these "tonal traps" and seeking out subjects where the light creates clear separation. Many modern mirrorless cameras in 2026 offer a "Monochrome" or "Grayscale" picture style for the electronic viewfinder (EVF). Using this tool allows you to see the tonal distribution in real-time, helping you compose based on shape and shadow rather than color.
2. Mastering High-Contrast Lighting (Chiaroscuro)
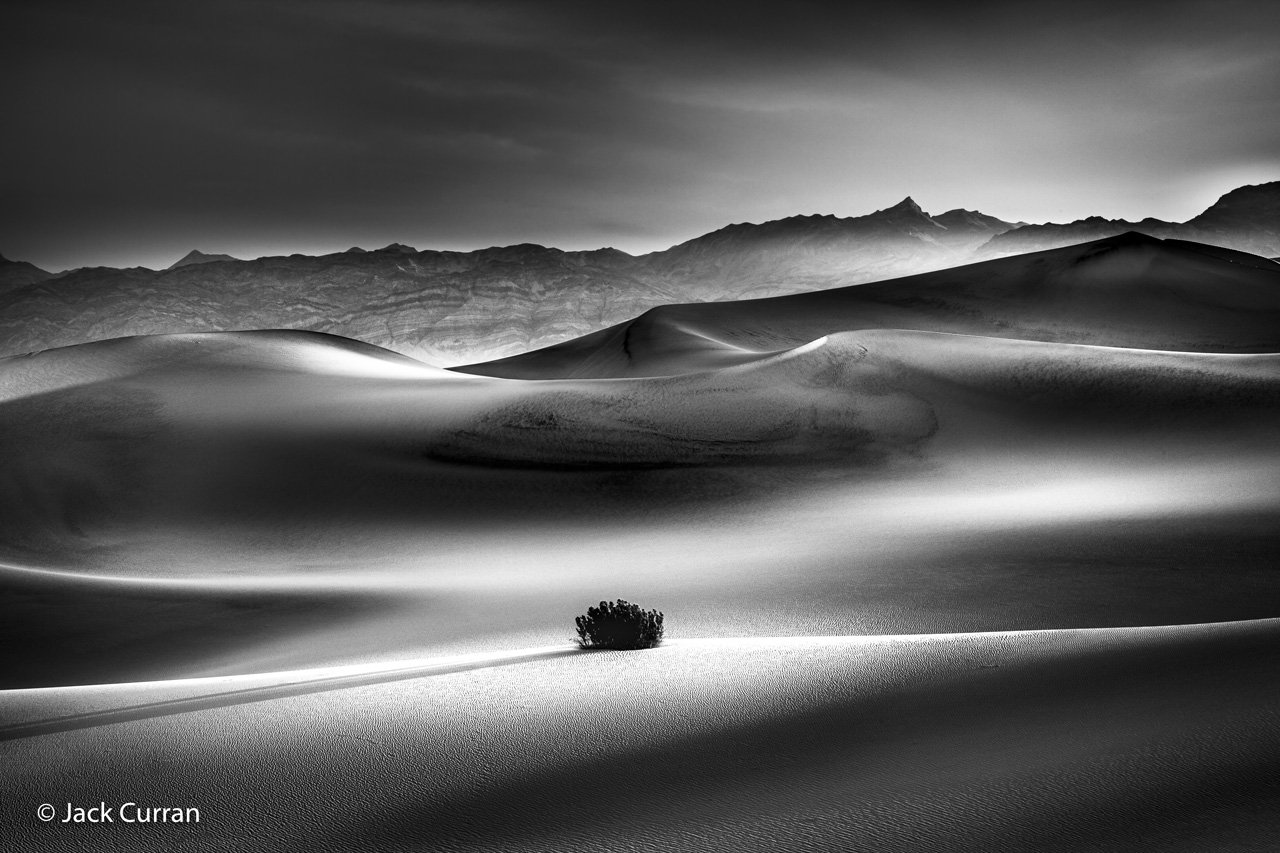
High-contrast photography utilizes the extreme ends of the histogram, featuring deep blacks and brilliant whites with fewer mid-tones. This technique is often referred to as Chiaroscuro, a term borrowed from Renaissance painting that describes the treatment of light and shade.
To execute this, seek out "hard" light sources, such as the midday sun or a focused studio spotlight. The goal is to create sharp transitions between light and dark. In street photography, this might mean capturing a subject walking through a narrow shaft of light between tall buildings. The harsh shadows hide unnecessary details, simplifying the frame and directing the viewer’s eye toward the illuminated subject. Technical precision is required here; you must expose for the highlights to ensure they don't "blow out," while allowing the shadows to fall into true black.
3. The Zone System for Digital Sensors
Originally developed by Ansel Adams and Fred Archer in the late 1930s, the Zone System remains a cornerstone of professional black and white work. While it was designed for film, the principles apply perfectly to digital sensors in 2026. The system divides a scene into 11 zones, from Zone 0 (solid black) to Zone X (pure white).
Digital sensors have a finite dynamic range. By using the Zone System, you can evaluate the brightest and darkest parts of your scene and decide where they should land on the scale. For instance, if you want detail in a dark rock (Zone III) but want to keep the clouds bright but textured (Zone VII), you must calculate your exposure to fit these zones within the sensor's capabilities. Using a spot meter is the most accurate way to implement this technique, allowing you to measure specific areas of the frame and adjust your aperture and shutter speed accordingly.
4. Long Exposure for Ethereal Textures
Black and white imagery excels at conveying mood, and long exposure is a powerful tool for enhancing this. By using Neutral Density (ND) filters to extend shutter speeds to 30 seconds or more, moving elements like water or clouds transform into a silky, ethereal mist.
In color, long-exposure water can sometimes look unnatural due to color shifts or reflections. In monochrome, the technique emphasizes the structural contrast between the sharp, static elements (like a pier or a jagged rock) and the soft, blurred motion of the environment. This contrast in texture creates a sense of serenity and timelessness. To succeed, a heavy tripod is mandatory, and photographers should use a remote shutter release to prevent camera shake during the extended exposure.
5. Utilizing Physical Color Filters
A common misconception is that color filters are obsolete in the digital age. However, using physical glass filters—specifically Red, Orange, Yellow, and Green—on your lens fundamentally changes how your sensor records light before the RAW file is even processed.
- Red Filters: These are the most dramatic, darkening blue skies to the point of appearing black and making white clouds pop with intense contrast.
- Orange Filters: Often used in portraiture to smooth skin tones and reduce the appearance of blemishes while still providing good contrast.
- Yellow Filters: The most versatile, providing a natural-looking lift in contrast that mimics how the human eye perceives brightness.
- Green Filters: Essential for landscape photography, as they lighten foliage and help differentiate between various shades of green that might otherwise look identical in B&W.
6. High-Key Photography for Minimalism
High-key photography is characterized by a predominance of light tones and a lack of deep shadows. This technique creates an atmosphere of optimism, purity, and airiness. It is frequently used in fashion and minimalist landscape photography.
To achieve a high-key look, you need a bright, even light source. On an overcast day, the clouds act as a massive softbox, eliminating harsh shadows. In a studio, you might use multiple large modifiers to "wash" the subject in light. The technical challenge is to push the exposure as far to the right of the histogram as possible without losing essential detail in the highlights. High-key images rely heavily on shape and outline rather than depth and volume.
7. Low-Key Photography for Mystery and Drama
Conversely, low-key photography focuses on the dark end of the spectrum. These images are mostly dark, with only small areas of light defining the subject. This technique is synonymous with "Film Noir" and is excellent for creating a sense of mystery or tension.
Low-key images require precise control over light spill. Use "flags" or "snoots" in a studio to prevent light from hitting the background. In natural settings, look for "rim lighting"—where the light source is behind or to the side of the subject, illuminating only the edges. This creates a powerful silhouette effect that emphasizes the subject's form against a dark void.
8. Emphasizing Texture and Pattern
Without color to distinguish objects, texture becomes a primary narrative element. Every crack in a weathered face, every grain of sand, and every fiber in a piece of fabric is amplified in black and white.
To maximize texture, use side-lighting. When light hits a surface from a low angle, it creates tiny shadows in the recesses of the texture, giving the image a tactile, three-dimensional quality. This is particularly effective in architectural photography, where the repeating patterns of windows or the rough surface of concrete can become the main subject of the photograph.
9. Silhouette and Negative Space
Black and white photography is the perfect medium for exploring negative space—the empty areas around the subject. By underexposing a subject against a bright background (like the sky at dusk), you create a silhouette.
A successful silhouette removes the identity of the subject and focuses entirely on the graphic shape. This technique works best when the subject has a recognizable and clean outline. If the subject is cluttered or overlapping with other dark elements, the silhouette will become a confusing blob. Use negative space to provide "breathing room" in the composition, which helps to isolate the subject and create a sense of scale.
10. Advanced Channel Mixing in Post-Processing
In 2026, the conversion from color RAW to black and white is rarely done via a simple "desaturate" command. Instead, professional photographers use Channel Mixing. Every digital color image is composed of Red, Green, and Blue channels.
By adjusting the contribution of each channel, you can control the "brightness" of specific colors in your B&W conversion. For example, if you want a person's blue eyes to look piercing and light, you increase the Blue channel's influence. If you want to darken a red brick wall to add grit, you decrease the Red channel. This level of control allows for a "digital darkroom" experience that far exceeds the capabilities of traditional film.
11. Street Photography and Decisive Timing
Black and white has been the "language" of street photography for decades. Its ability to strip away the distractions of colorful advertisements and neon signs allows the human element to take center stage.
In this context, the technique is less about camera settings and more about the "Decisive Moment"—a term coined by Henri Cartier-Bresson. Because monochrome simplifies the scene, the timing of a gesture or the alignment of a person within an architectural frame becomes much more obvious. Use a fast shutter speed (at least 1/500s) to freeze motion, and consider "zone focusing" to ensure your subject is sharp even if they are moving quickly.
12. Infrared Black and White Photography
Infrared (IR) photography captures light wavelengths that are invisible to the human eye. In 2026, many photographers use converted digital cameras that have the IR-cut filter removed.
When processed in black and white, IR images produce a surreal effect known as the "Wood Effect." Deciduous trees and grass reflect IR light intensely, causing them to appear glowing white, while skies and water appear jet black. This technique turns a mundane landscape into a dreamlike, otherworldly scene. It requires specialized filters (like the R72) and a deep understanding of how different materials reflect non-visible light.
13. Mastering Grain and Noise as Aesthetic Tools
While color photographers usually try to eliminate noise, black and white photographers often embrace it as "grain." Grain adds a sense of organic texture and "honesty" to a digital image, reminiscent of high-ISO film stocks like Tri-X or T-Max.
In 2026, sophisticated AI-driven software can simulate the specific grain structures of historical film types. Rather than applying a uniform filter, these tools analyze the luminance of the image and apply more grain in the shadows and mid-tones, just as silver halide crystals would react in film. Adding a subtle amount of grain can help "knit" the tones together, especially in images with large areas of smooth gradients, preventing digital banding.
Comparison of Key Black and White Styles
| Technique | Primary Goal | Recommended Lighting | Common Subjects |
|---|---|---|---|
| High-Contrast | Graphic Impact | Hard, Direct Light | Architecture, Street |
| High-Key | Ethereal/Clean | Soft, Overcast, Backlit | Portraits, Fine Art |
| Low-Key | Drama/Mystery | Single Point Source | Noir Portraiture, Still Life |
| Long Exposure | Smooth Motion | Low Light / ND Filters | Seascapes, Waterfalls |
| Infrared | Surrealism | Bright Sunlight | Landscapes, Nature |
| Silhouette | Shape/Form | Strong Backlighting | People, Trees, Skylines |
Technical Considerations for 2026
The hardware available in 2026 has significantly impacted monochrome workflows. Sensors now offer upwards of 15 stops of dynamic range, which is vital for the Zone System. Furthermore, dedicated monochrome sensors (which lack a Bayer color filter array) are increasingly popular among professionals. Because these sensors don't have to "interpolate" color, they capture significantly more fine detail and have a higher signal-to-noise ratio, resulting in cleaner, sharper black and white files that have a unique, luminous quality.
Common Mistakes to Avoid
- Over-processing: It is easy to push the contrast slider too far, leading to "clipping" where you lose all detail in the blacks and whites. Always monitor your histogram.
- Ignoring the Mid-tones: While high contrast is popular, a great black and white image often relies on the subtle gradations of gray in the mid-tones to provide depth and volume.
- Flat Lighting: Avoid flat, front-on lighting unless you are specifically going for a minimalist look. Without color, flat lighting makes subjects appear two-dimensional and dull.
Frequently Asked Questions
Why is my black and white photo looking grey and flat?
A "flat" photo usually lacks a full tonal range. If your histogram is clustered in the middle, you have no true blacks or true whites. To fix this, increase the contrast or adjust the black and white points in post-processing to ensure the image spans from the far left to the far right of the histogram.
Can I just use a B&W filter on my phone?
While phone filters provide a quick preview, they often "throw away" data. To achieve professional results, it is better to shoot in a RAW format. This preserves all the original color data, allowing you to use channel mixing to precisely control the luminance of different hues during the conversion process.
Is a dedicated monochrome camera worth it in 2026?
For most, a standard high-resolution camera is sufficient. However, for fine-art photographers, a monochrome-only sensor (like those from Leica or Phase One) offers superior tonal transitions and increased sharpness because it removes the need for a de-mosaicing algorithm.
What is the best lens for black and white photography?
Lenses with high micro-contrast are generally preferred for monochrome. While sharpness is important, how a lens renders the transitions between light and shadow (its "drawing" style) is more critical. Many photographers prefer prime lenses with fewer glass elements to reduce internal reflections and maintain pure contrast.
How do I print black and white photos without a color cast?
Printing B&W is notoriously difficult because many printers use color inks to create grey, which can lead to a green or purple tint. In 2026, use a printer with dedicated "Carbon" or "Advanced Black and White" (ABW) modes that use multiple shades of black and grey ink to ensure a neutral tone.
Recommendation for Next Actions
To truly improve, choose one of the thirteen techniques—such as the Zone System or Long Exposure—and spend an entire week shooting exclusively with that method. Limit yourself to a single focal length to force your brain to focus on composition and tonality rather than zooming. By isolating these techniques, you will build the "muscle memory" needed to identify monochromatic opportunities in any environment. Finally, always shoot in RAW to ensure you have the maximum dynamic range available for post-processing adjustments.